cybercom
Member
- First Name
- David
- Joined
- Oct 10, 2024
- Threads
- 2
- Messages
- 10
- Reaction score
- 15
- Location
- Frisco, TX
- Vehicles
- 2019 Model 3 Performance, 2023 Model Y
- Thread starter
- #1
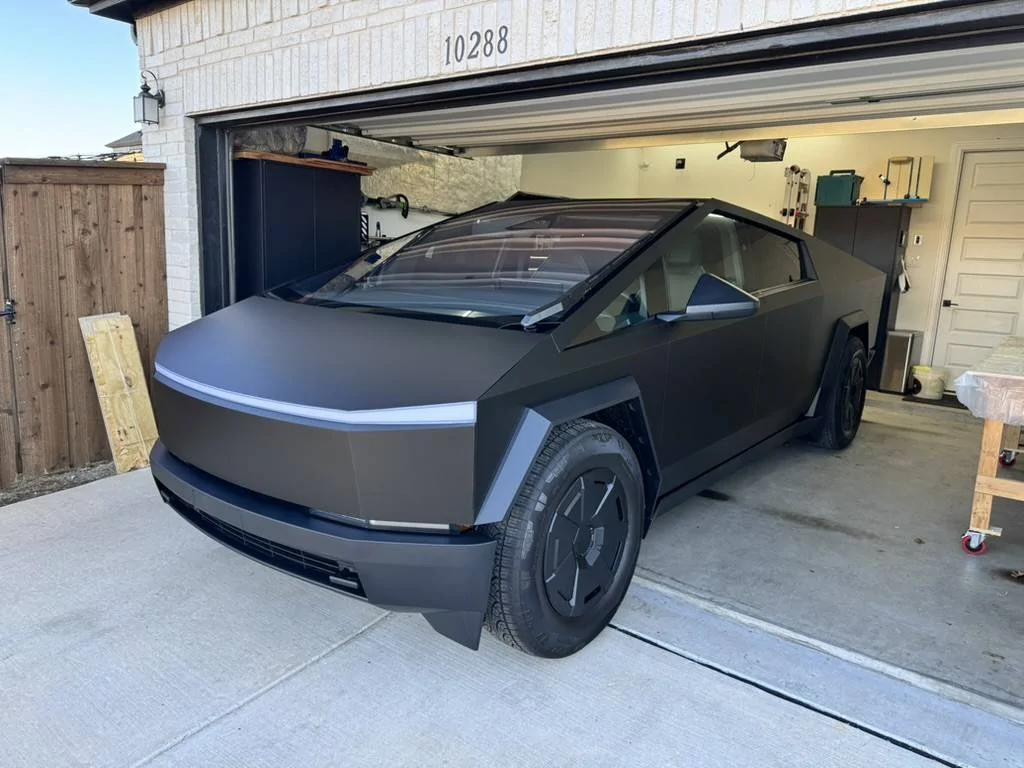
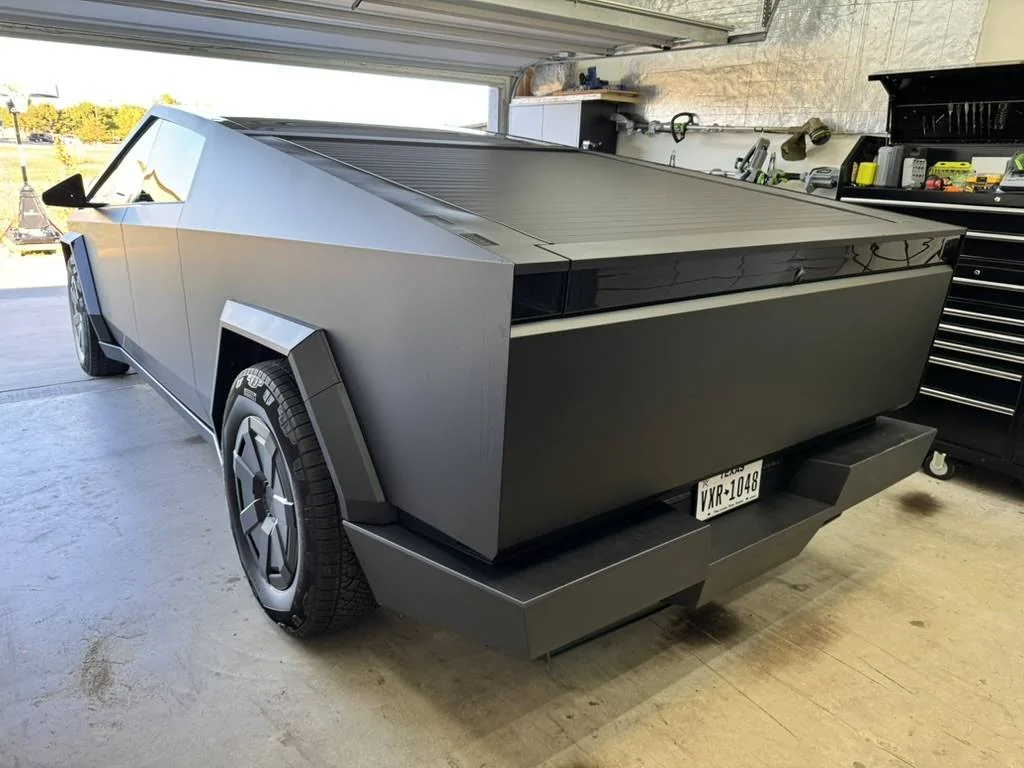
Hello everyone. Just wanted to create a post to share that my wife and I wrapped our CT with PPF from @TWRAPS.
Decision to DIY
I live in the Dallas, TX area. I have a Model Y that I previously had wrapped in PPF by a local shop. It was a couple years ago, so I can't remember the exact cost, but it was somewhere around $7,000-$7,500. They did good work, but it was a pretty high price tag! When I got our CT, I was hoping the cost to wrap it in PPF would be a good amount lower. Unfortunately, that was not the case. I got several quotes and they all hovered around $6,500. I'm 52 years old, so no spring chicken, but I like to diy (wood projects and 3D printing), so I started looking into DIY options for the CT. I found a number of companies out there offering full kits. I ended going with TWRAPS, mostly because the owner was refreshingly responsive. That was important to me, knowing that I could get feedback and advice on a diy project I had never done before. And the price is really hard to beat. I saved $1000s on the diy option.
The install
Just like with about any type of diy project, after finishing the wrap, I know I could do it quicker if I ever had to do it again. But the learning curve wasn't too steep. After the first couple panels I really started to get the hang of it. Having my wife on hand was helpful, especially when transferring the pieces from the table to the panel.
I appreciated that there wasn't really any stress from having to hurry. If the wrap started to feel too tacky, I just peeled it back, sprayed some more soap solution, and carried on.
I also learned that the PPF had a stretch to it. There are certain panels where, as you get started squeegeeing, it looked like the piece would come up short. But, as promised in the install video, by the time I made it to the edge, the wrap had stretched to exactly the right length.
My CT won't fit in my garage, so I had to install with the garage door open. I would have prefered to be in a closed space to avoid breeze and dust in the air. But in the end it worked out fine. There were a couple times where, after inspecting the panel, we found a piece of dust. It was easy enough to peel back, remove the dust particle and reapply.
It took us about 2 days to get the job done. The folding over the edges was the most challenging part.
Post-Install
Would I do it again? Absolutely! The Satin Black looks amazing IMHO and the install process was straightforward. And, again, the amount of money I saved was well worth the weekend spent putting it on.
Also, no longer having to battle fingerprints was the icing on the cake!
A special thanks to TWRAPS. I highly recommend them, not only for having a great product, but also for their responsiveness. Much appreciated! They don't use a generic cut model and they put a lot of R&D in getting it just right for the CT. It's a made in the USA product by a family business.
Sponsored
