Leifmb
Well-known member
- First Name
- Leif
- Joined
- May 12, 2024
- Threads
- 27
- Messages
- 491
- Reaction score
- 781
- Location
- California
- Vehicles
- 2025 Cyberbeast
- Thread starter
- #1
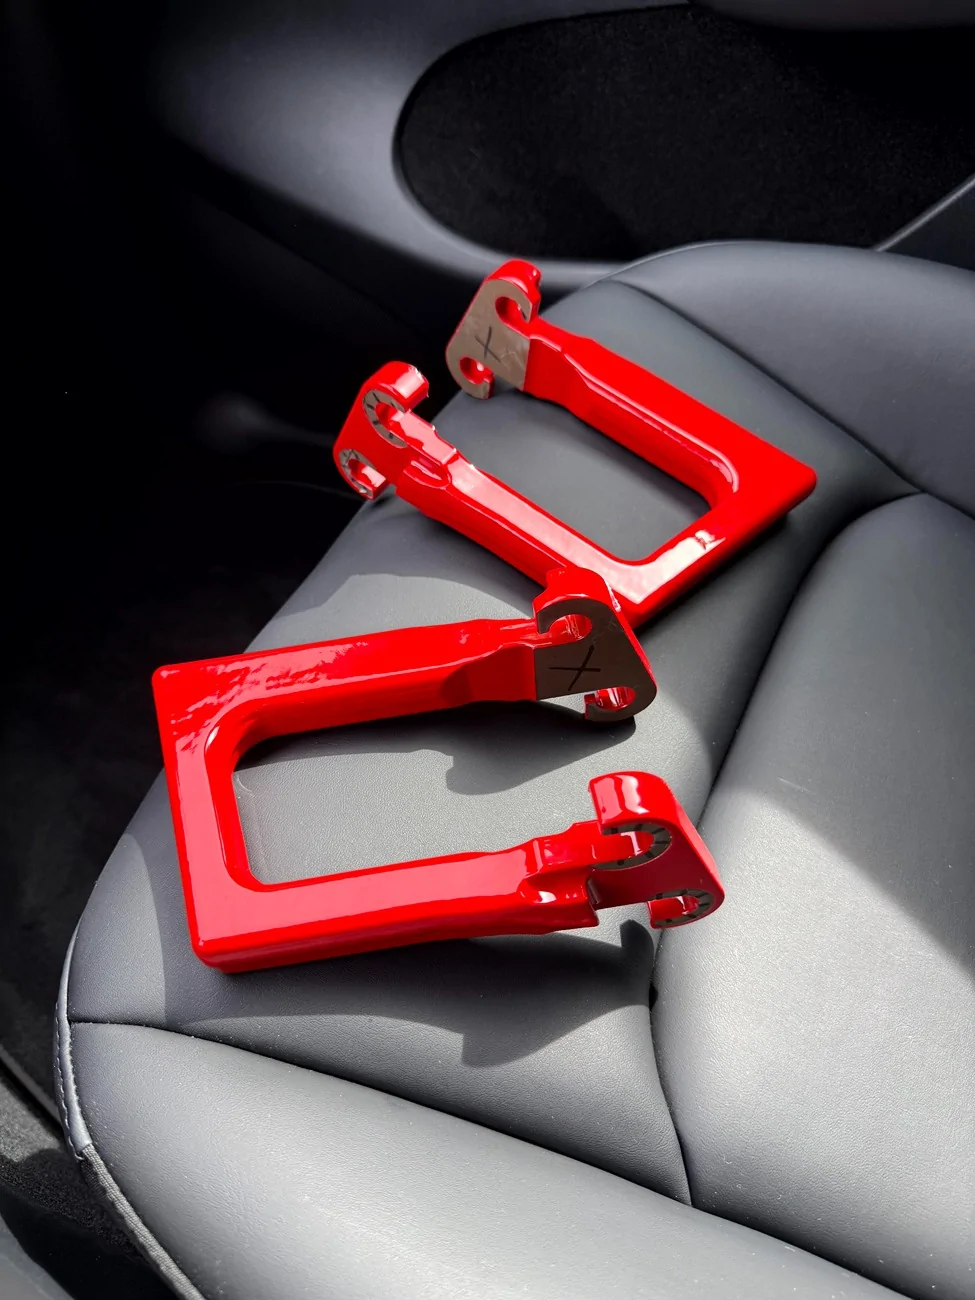
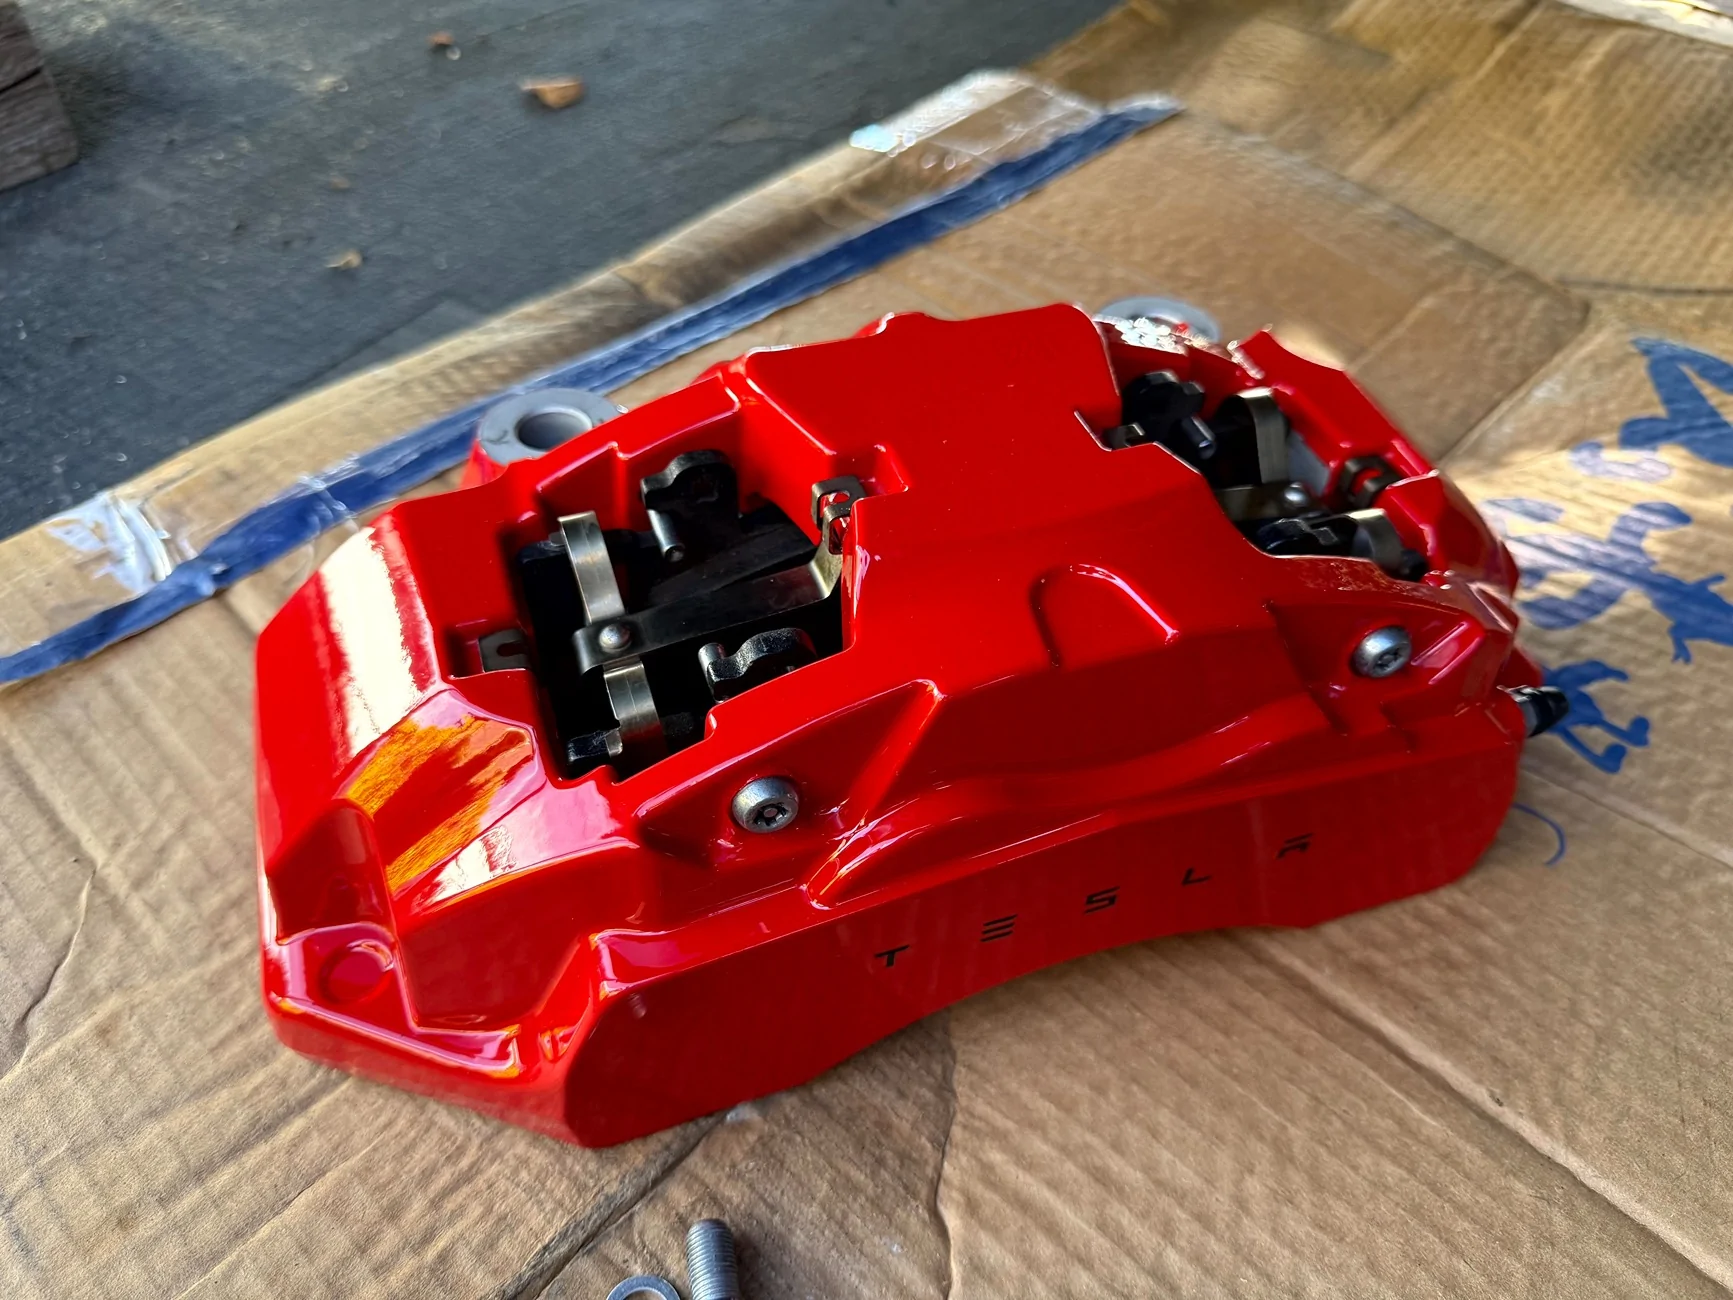
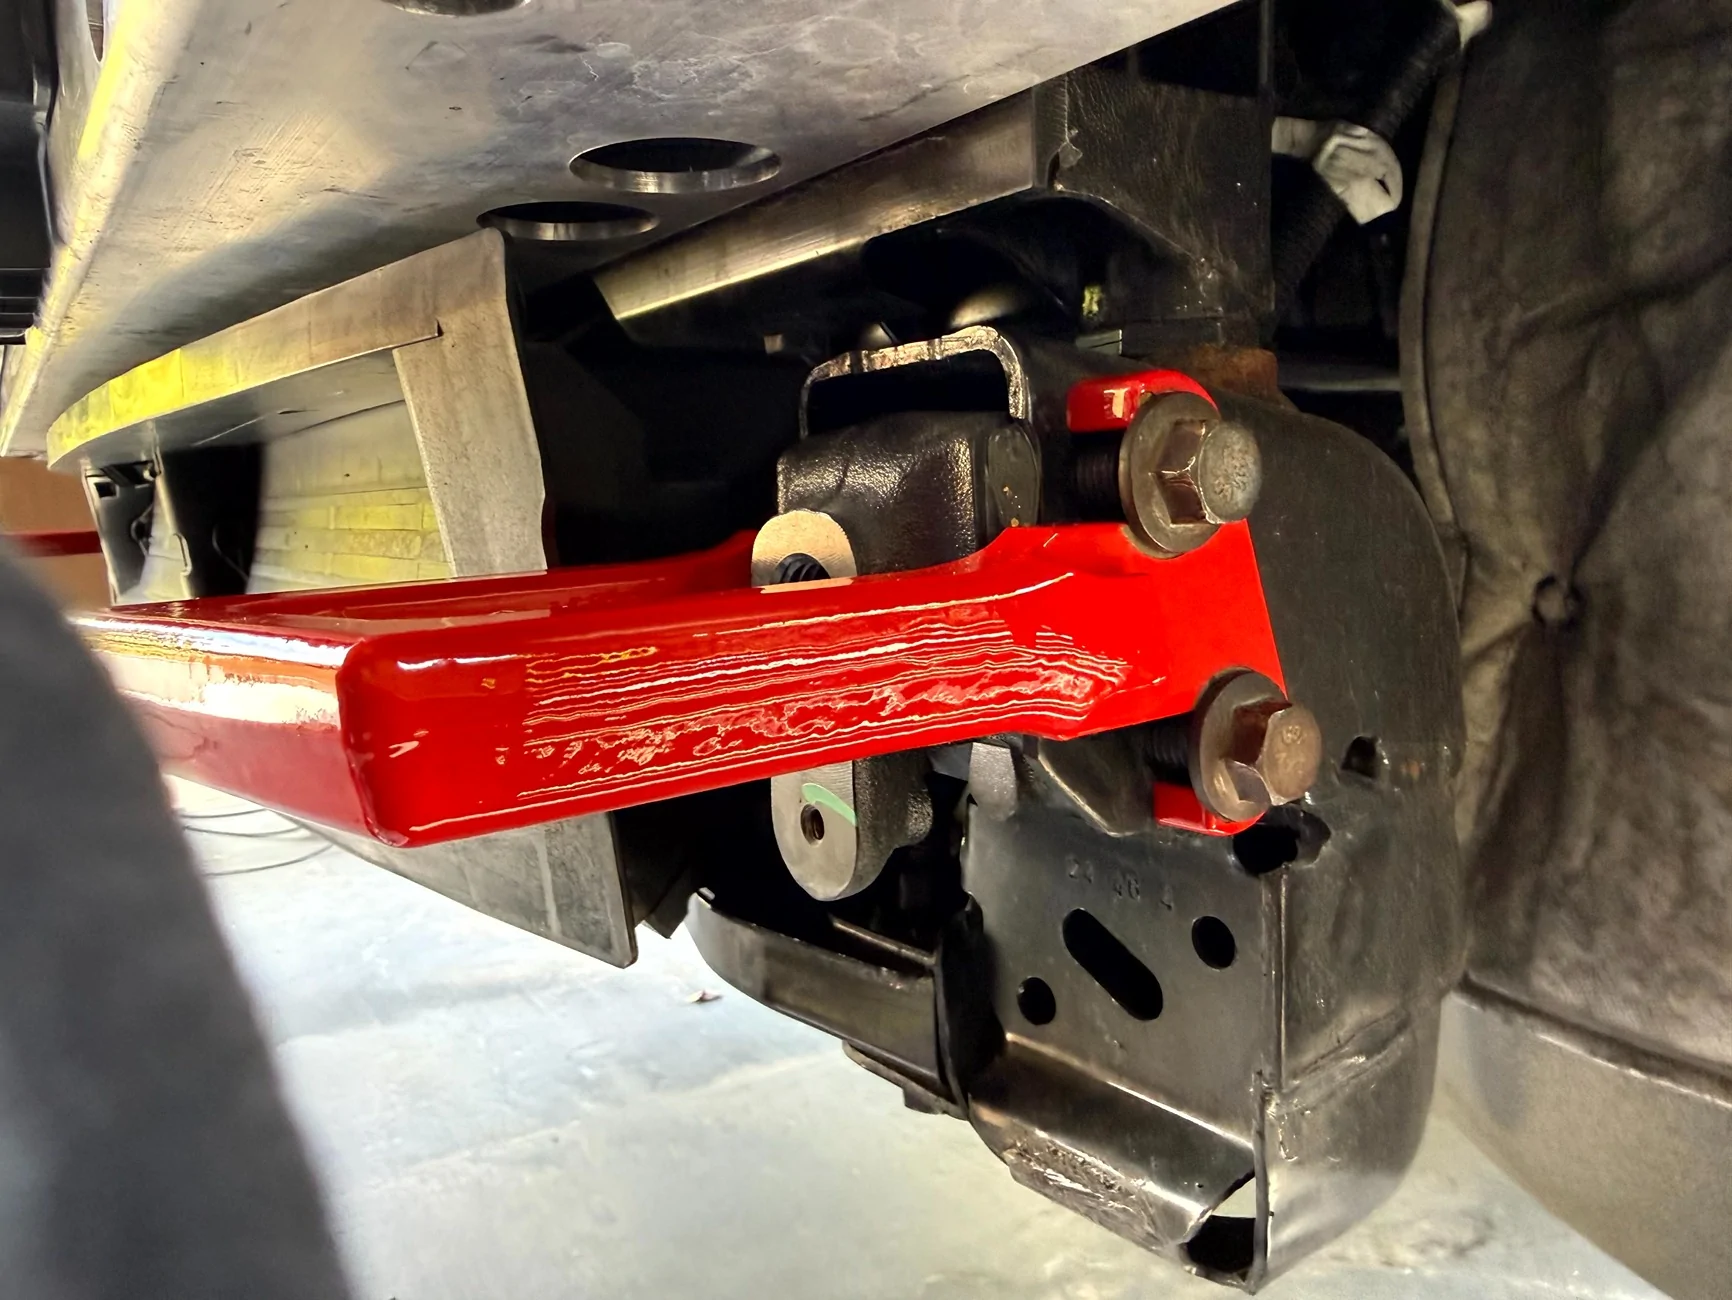
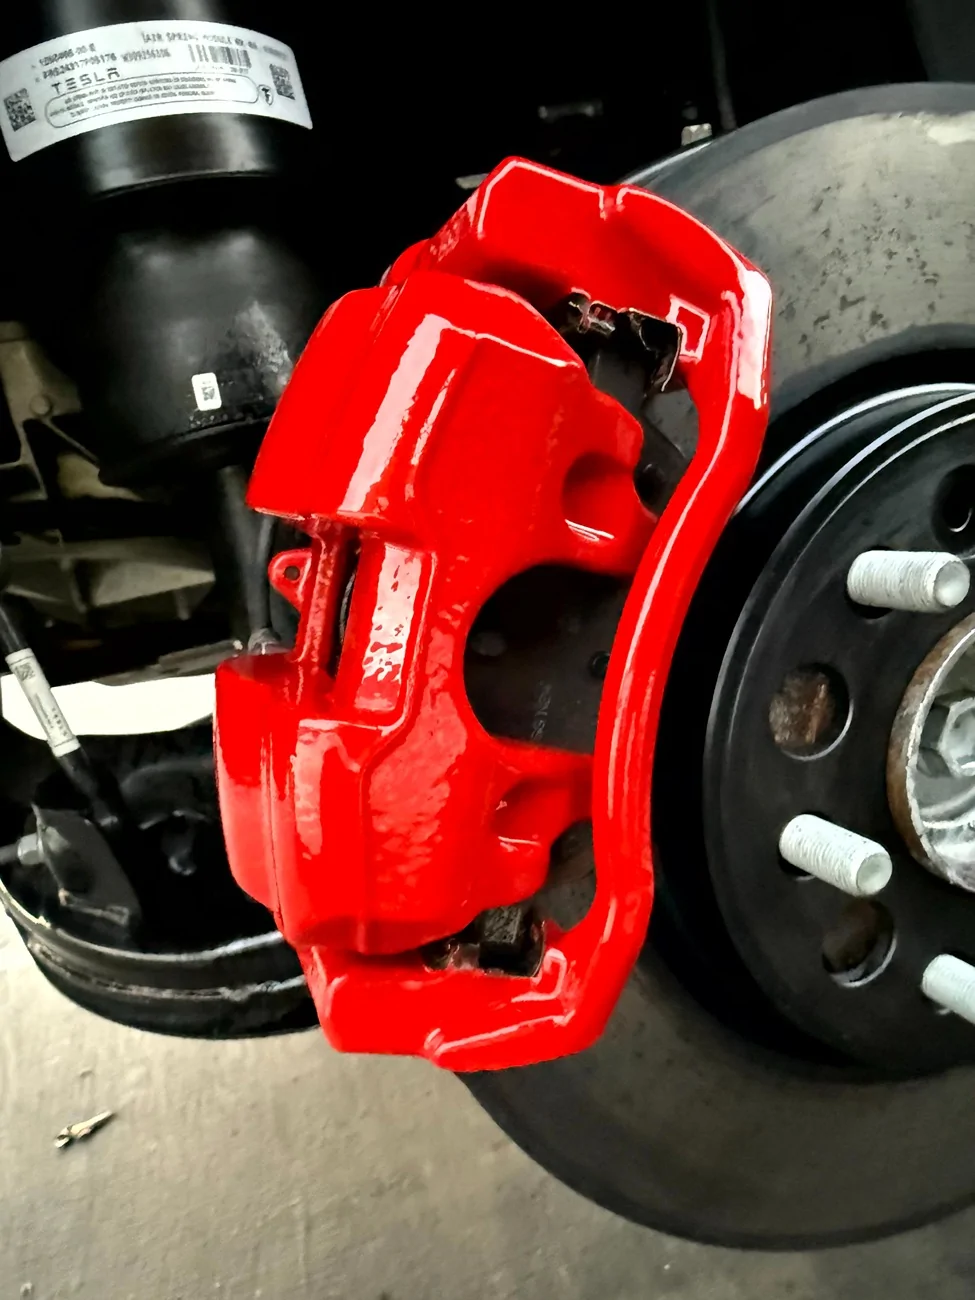
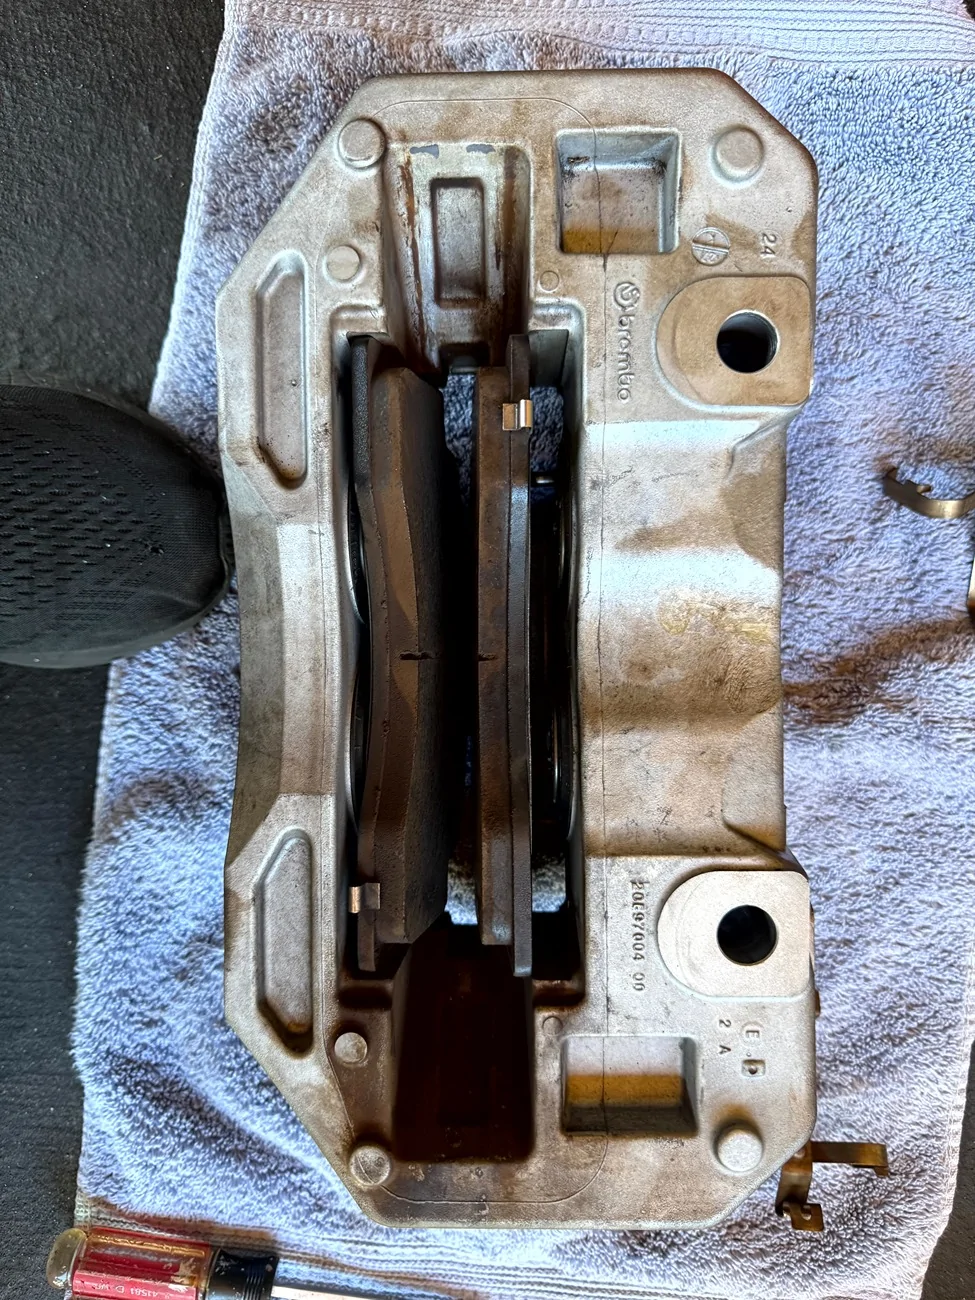
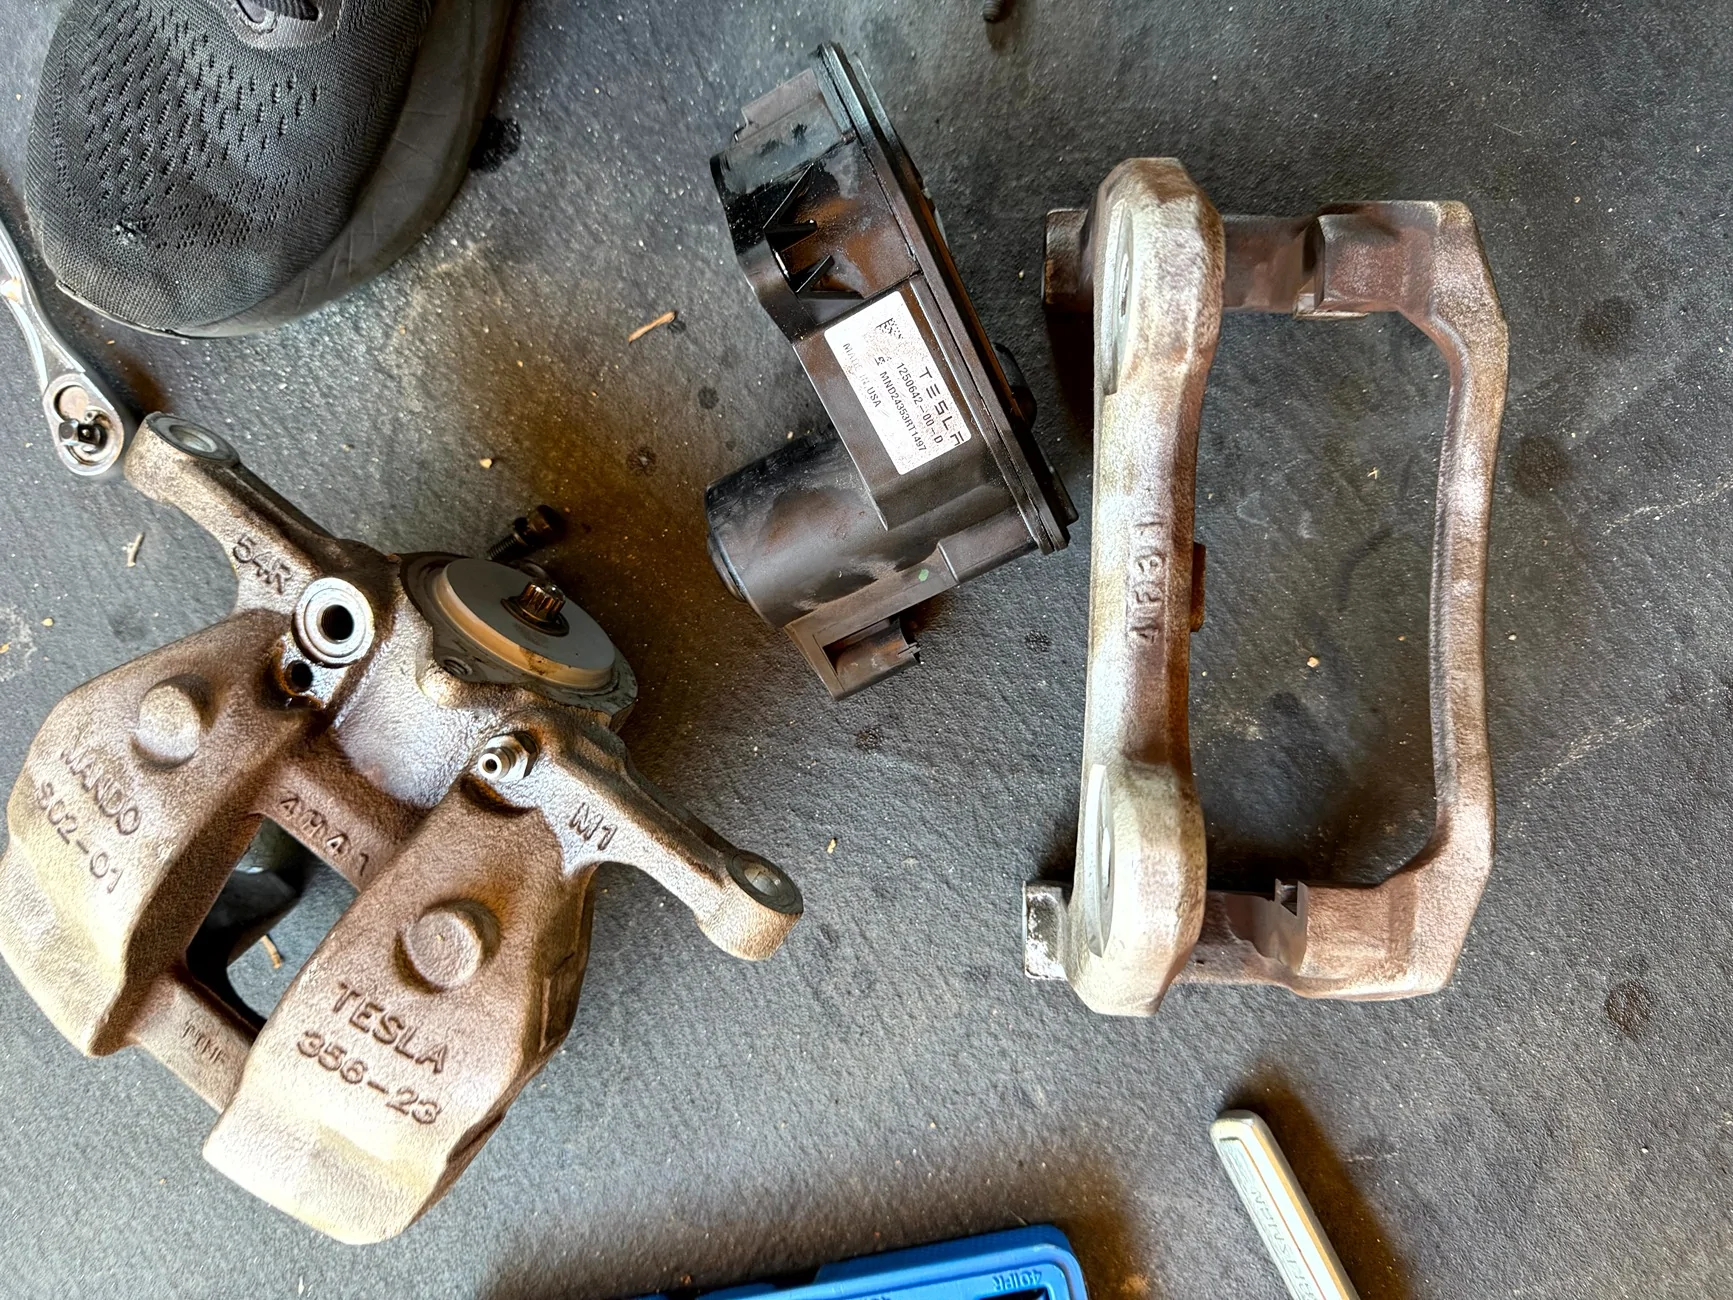
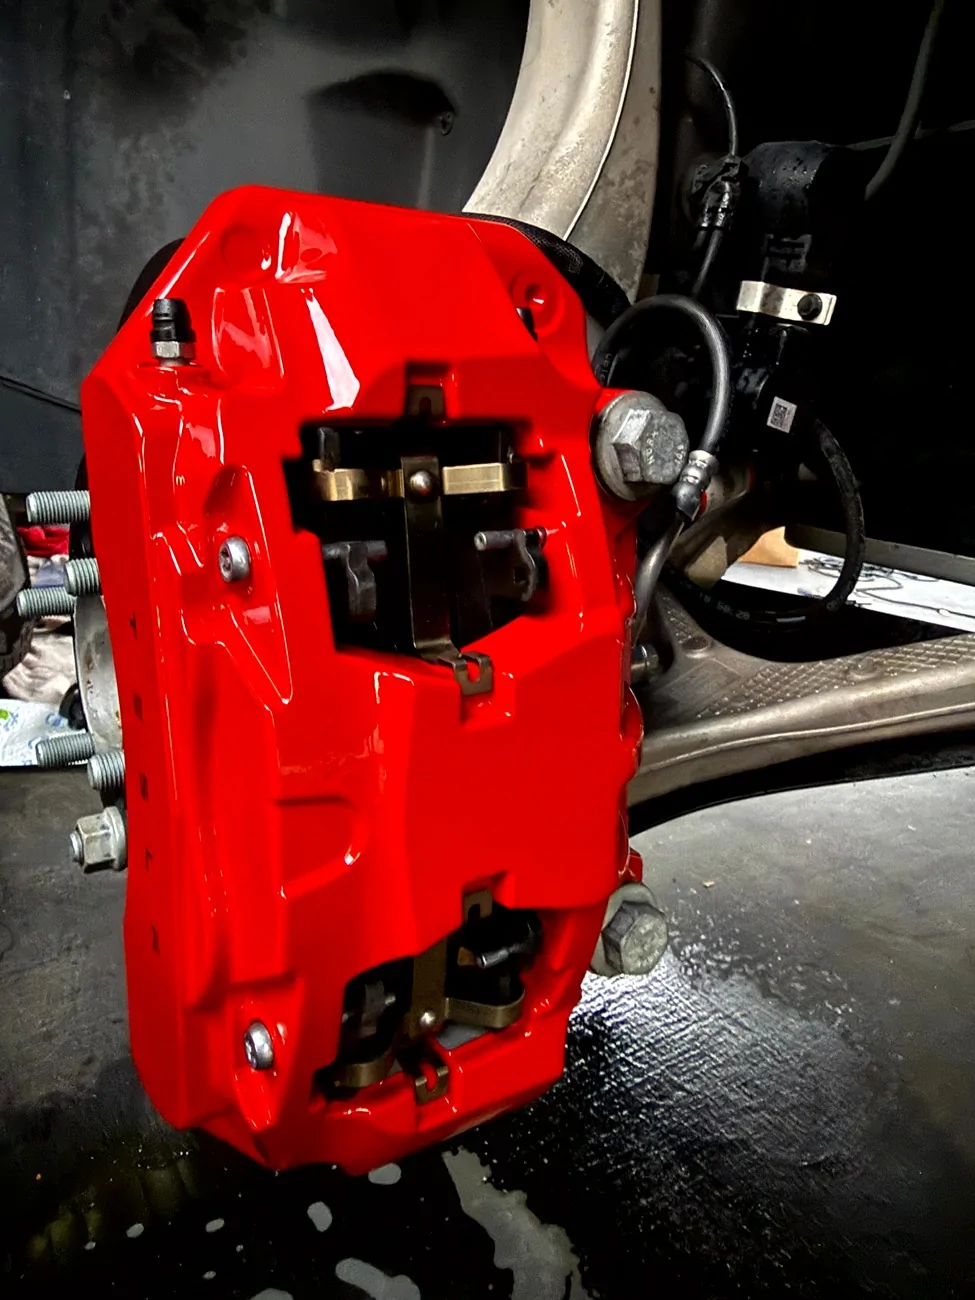
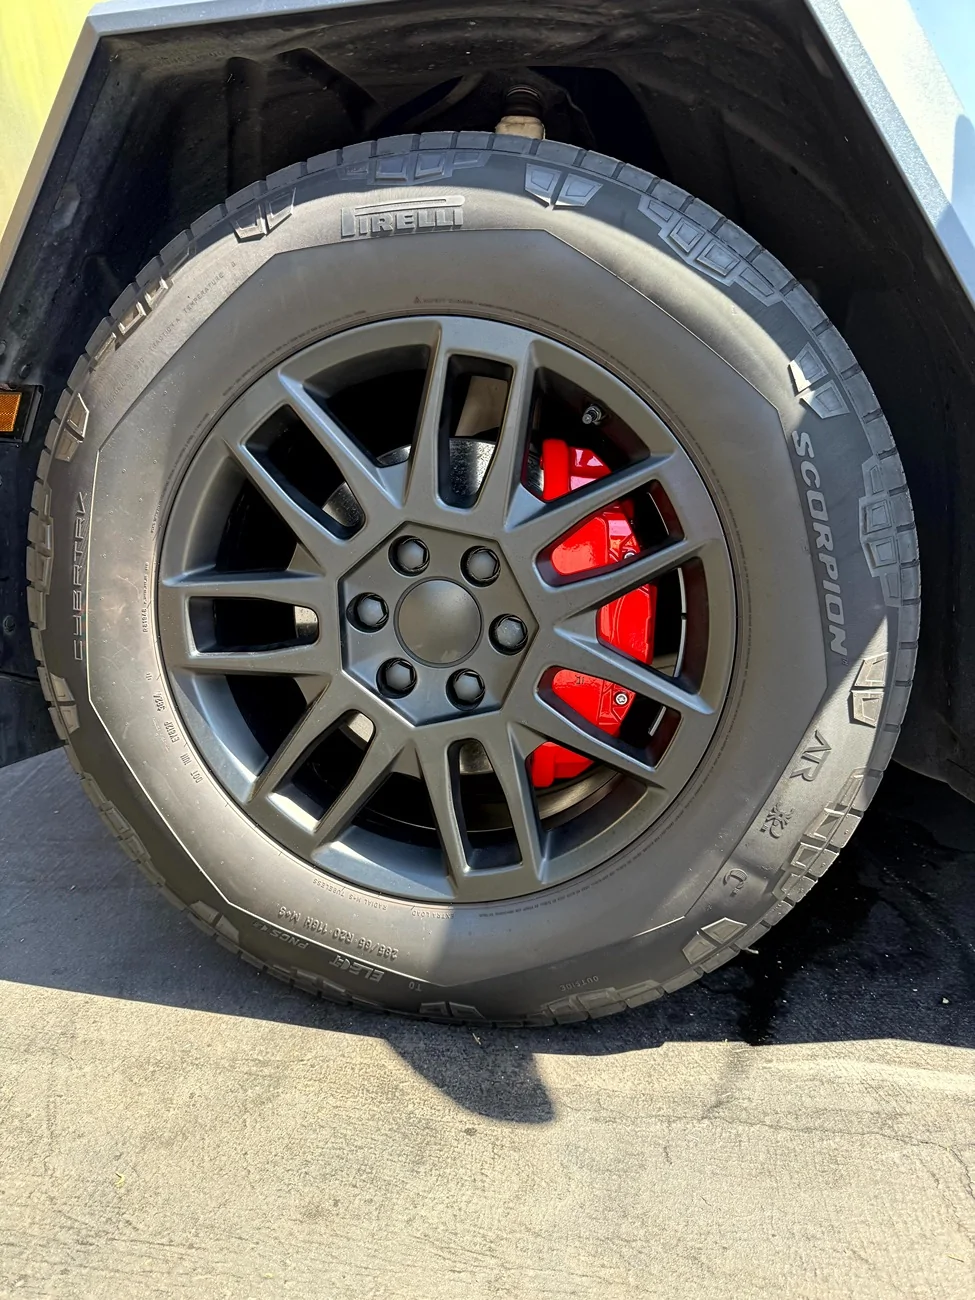
I decided to powder coat my brake calipers "the hard way". This involved removing all 4 calipers, disassembling them (except pistons- the shop did that), marking areas NOT to be coated and then waiting to reassemble/reinstall. I also had to bleed the brake system as I mistakenly let the fluid drain out of one of the lines due to an improper silicone plug placement. The result looks MUCH better to me as it adds a little color to the truck. I also did the front tow/recovery hooks. Powder coating is stronger and more durable than paint and better resists brake fluid (and other fluids) and heat. I followed the service manual procedures including:
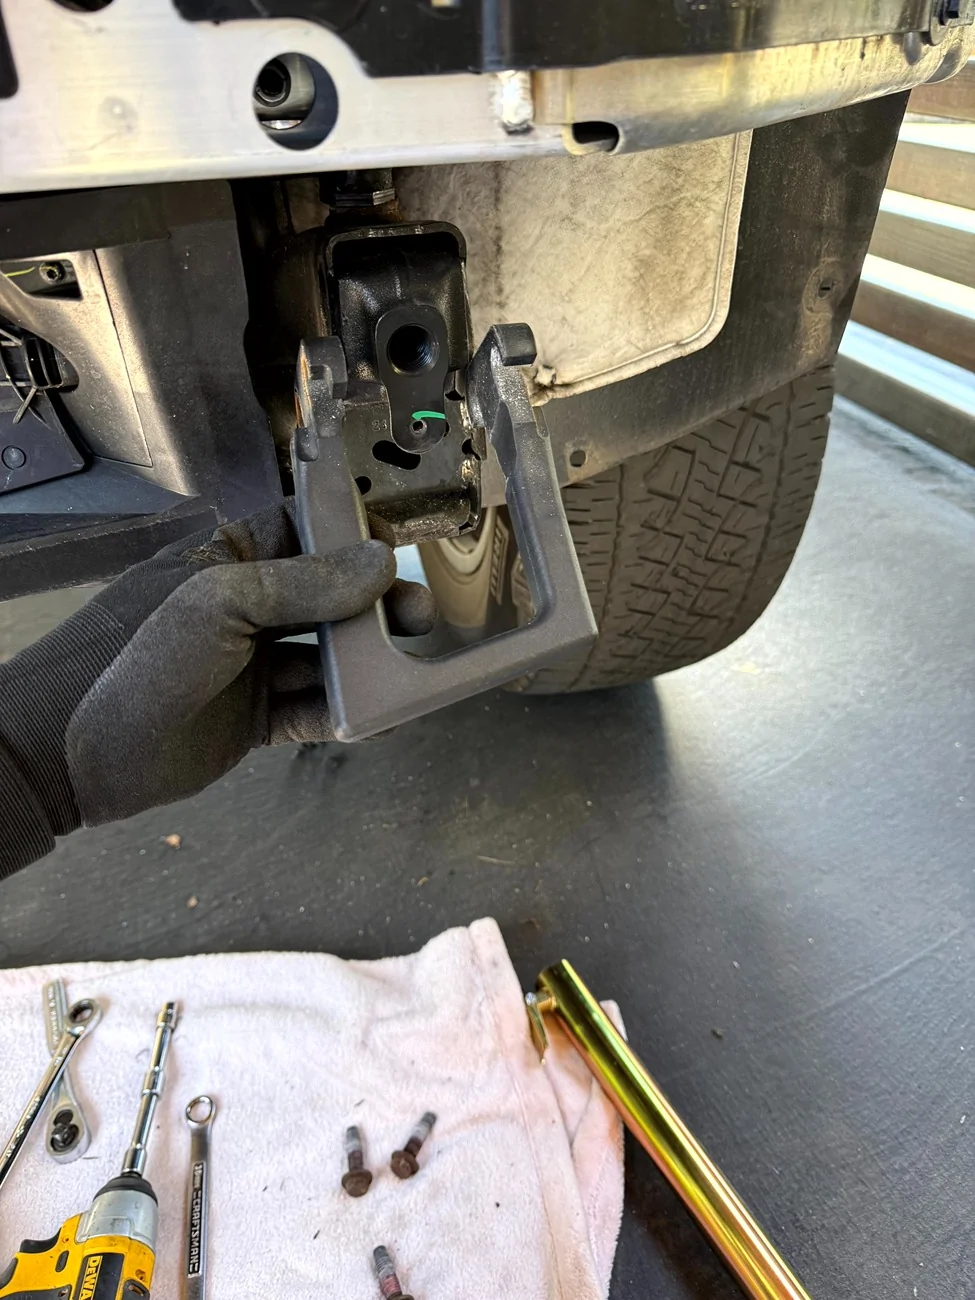
1. Removing front trunk lining
2. Removing Front Facia
3. Removing Under hood Apron - Rear
4. Removing Wheel Cover - Front
5. EPB (Electronic Parking Brake) Service Mode (Keep FRUNK open before engaging and don't close as it will not open if so)
6. Removing Front Calipers
7. Removing Rear Calipers
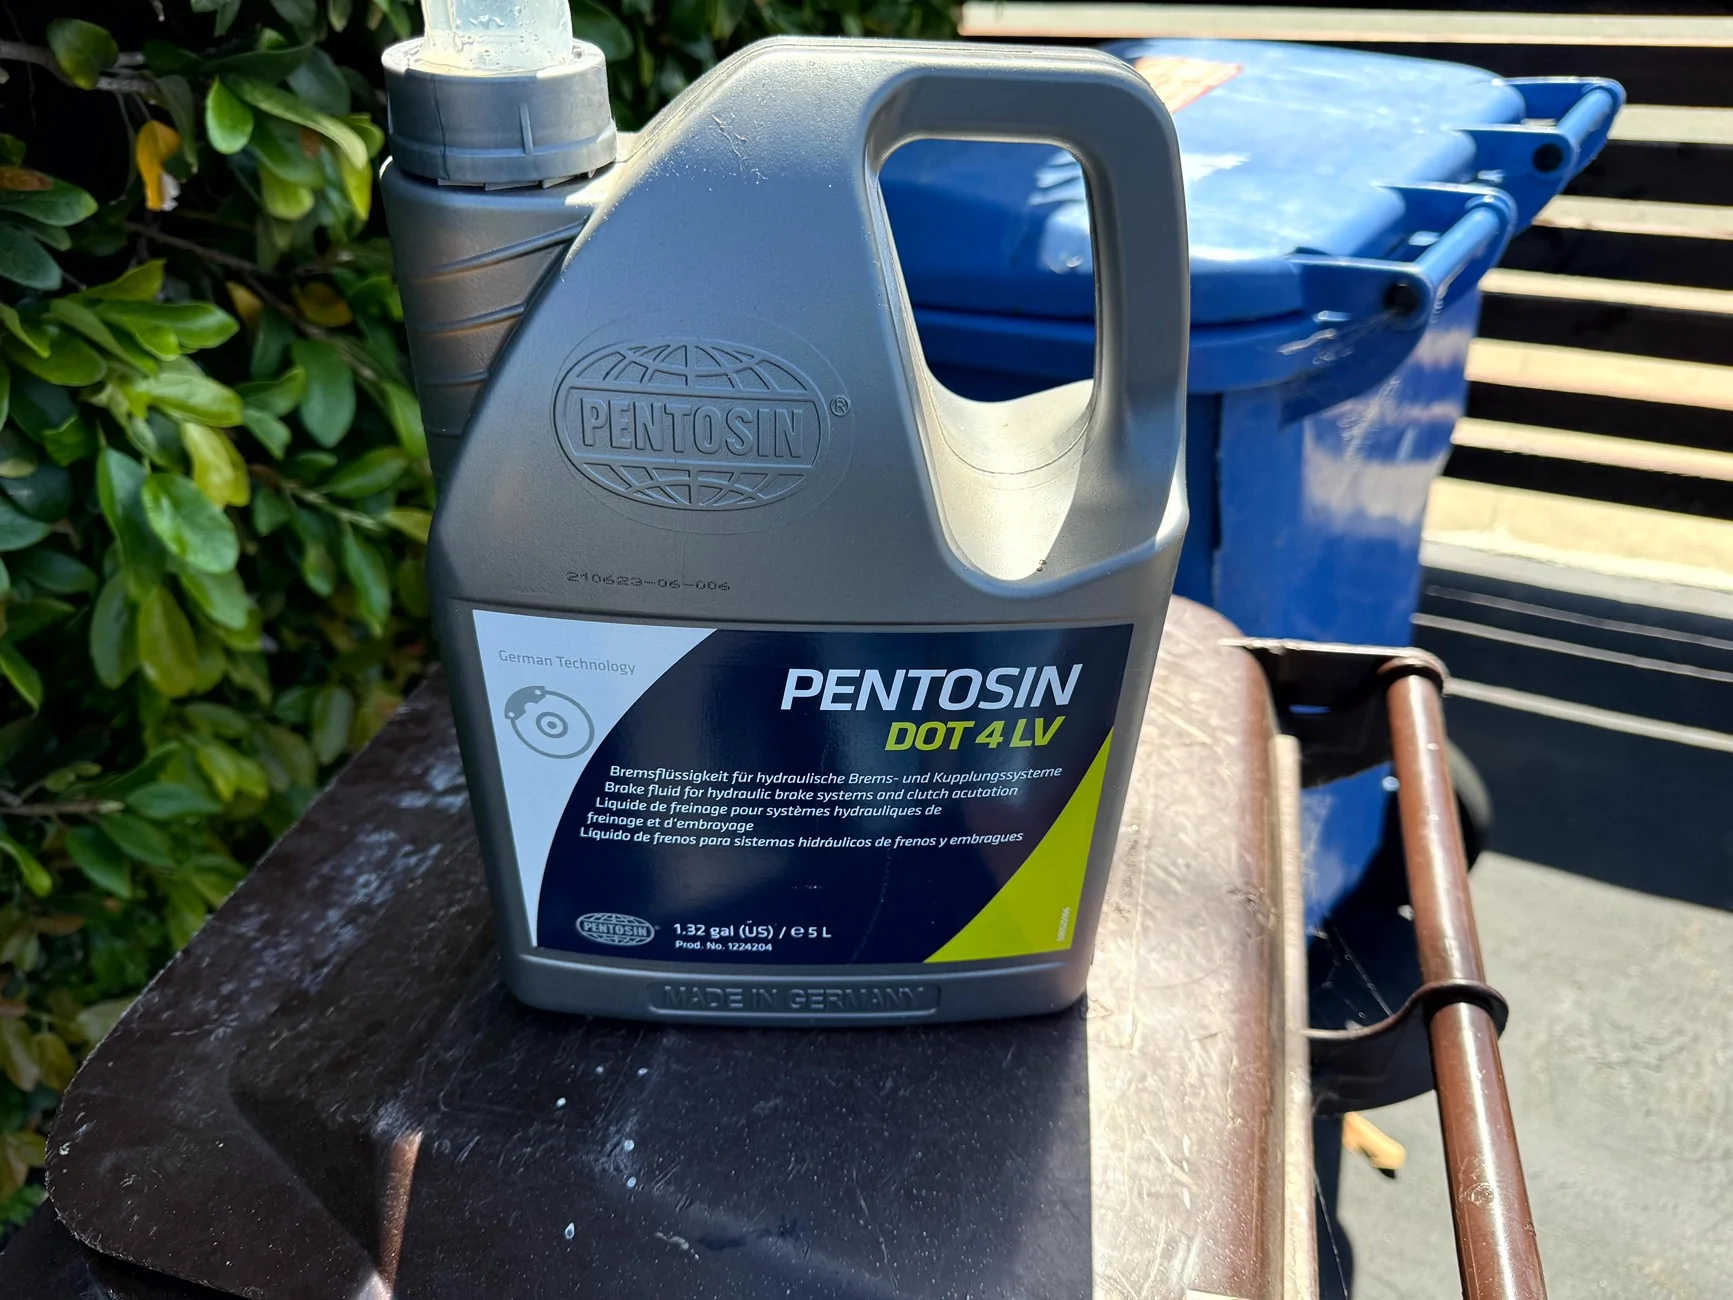
8. Brake Bleeding and Brake Stiffness Tests completed multiple times. (use a pressure bleeder @30psi and the correct Pentosin Dot4 LV fluid or factory)
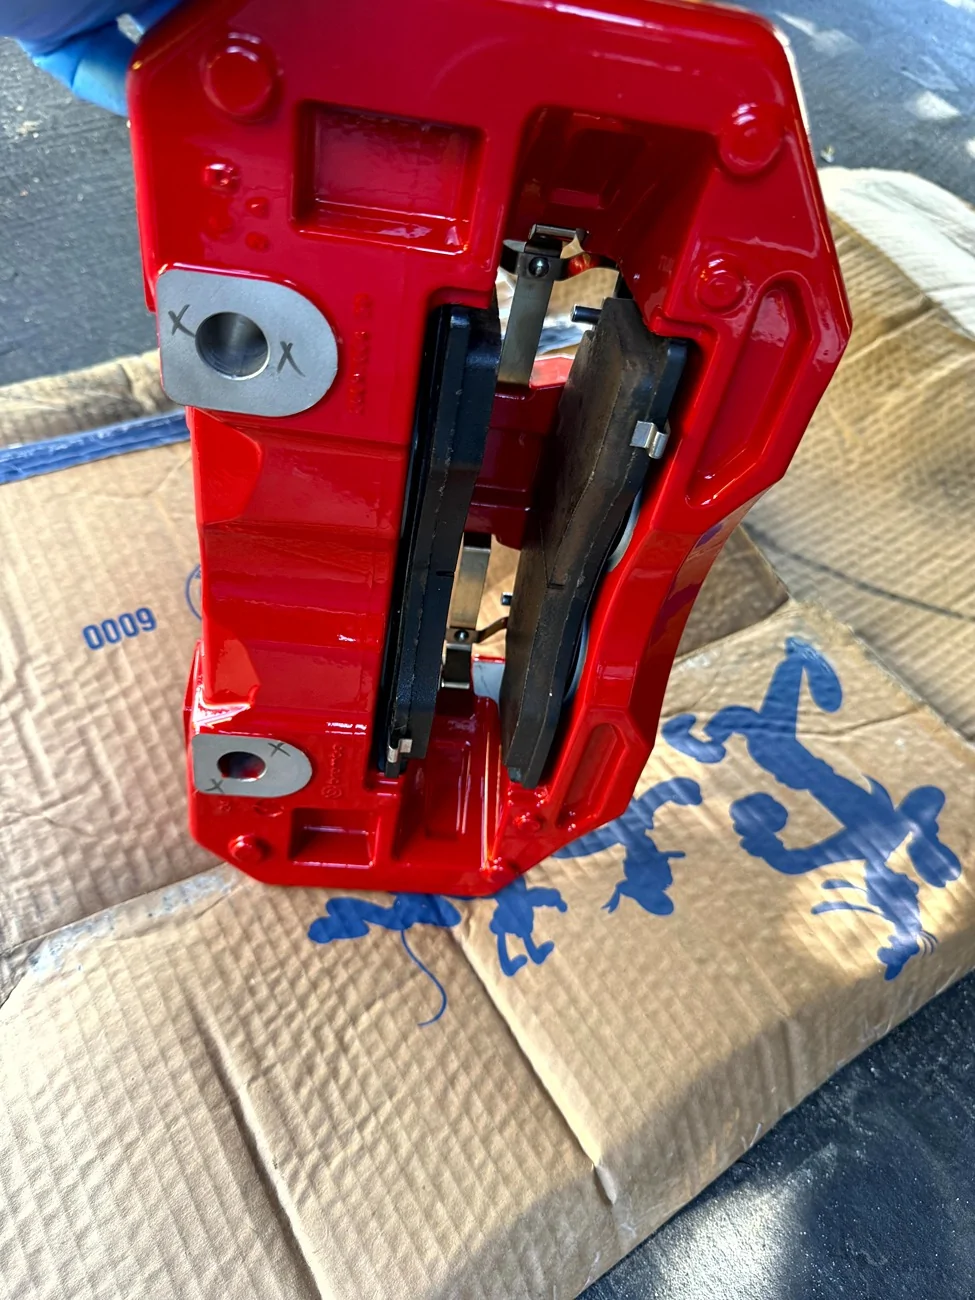
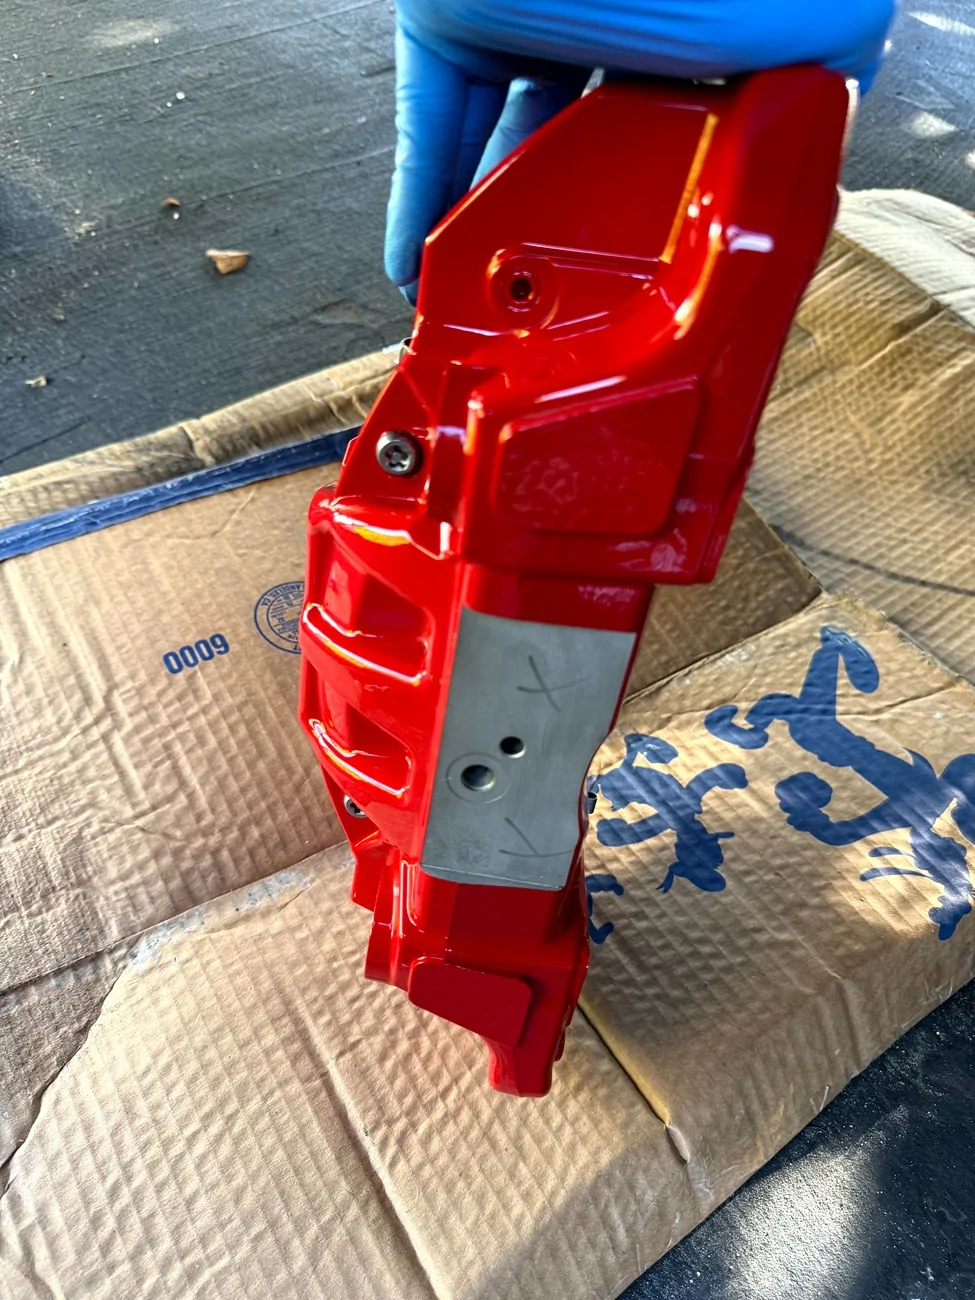
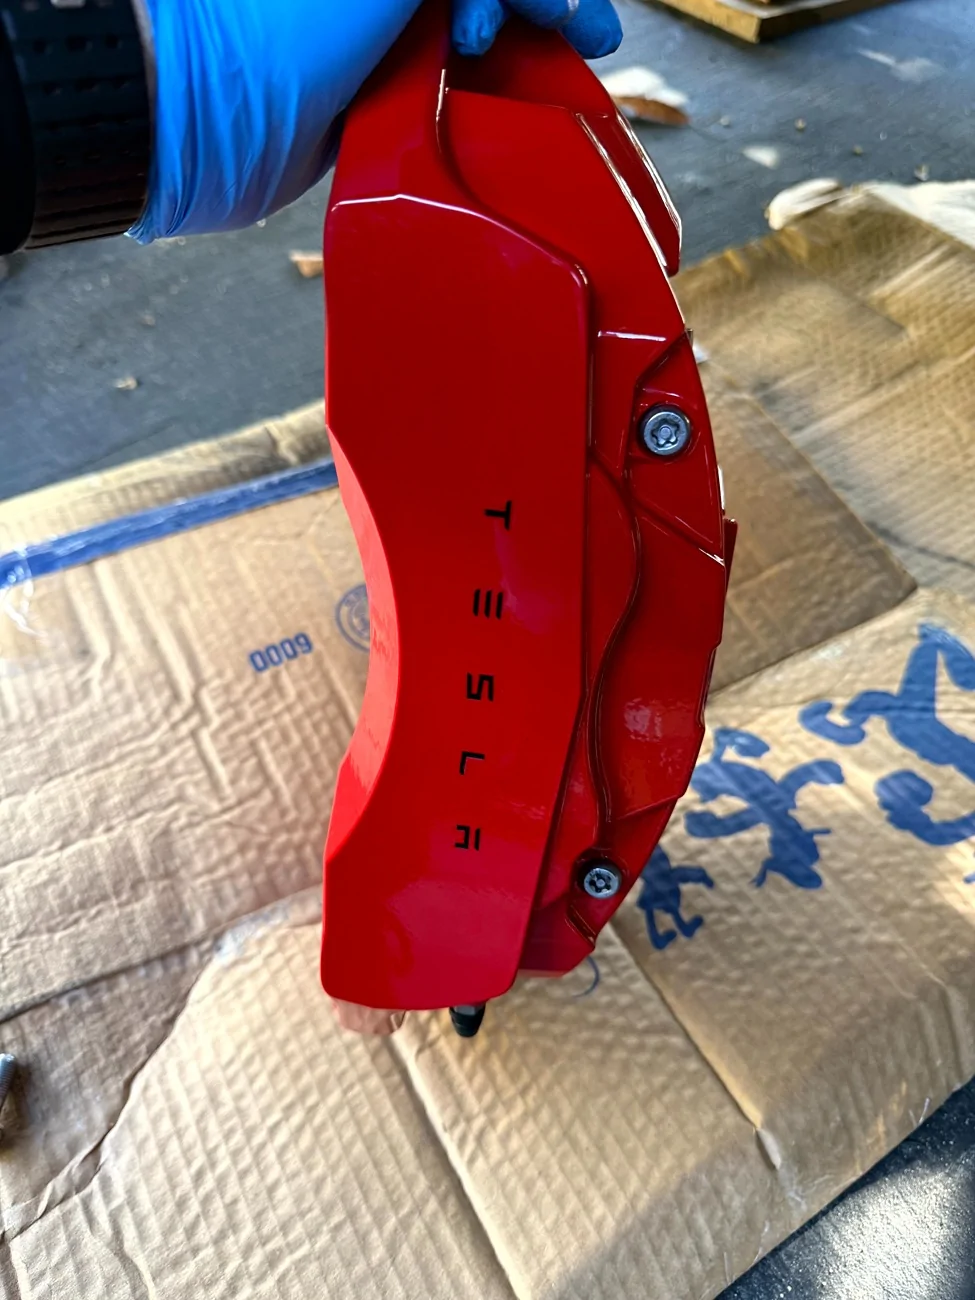
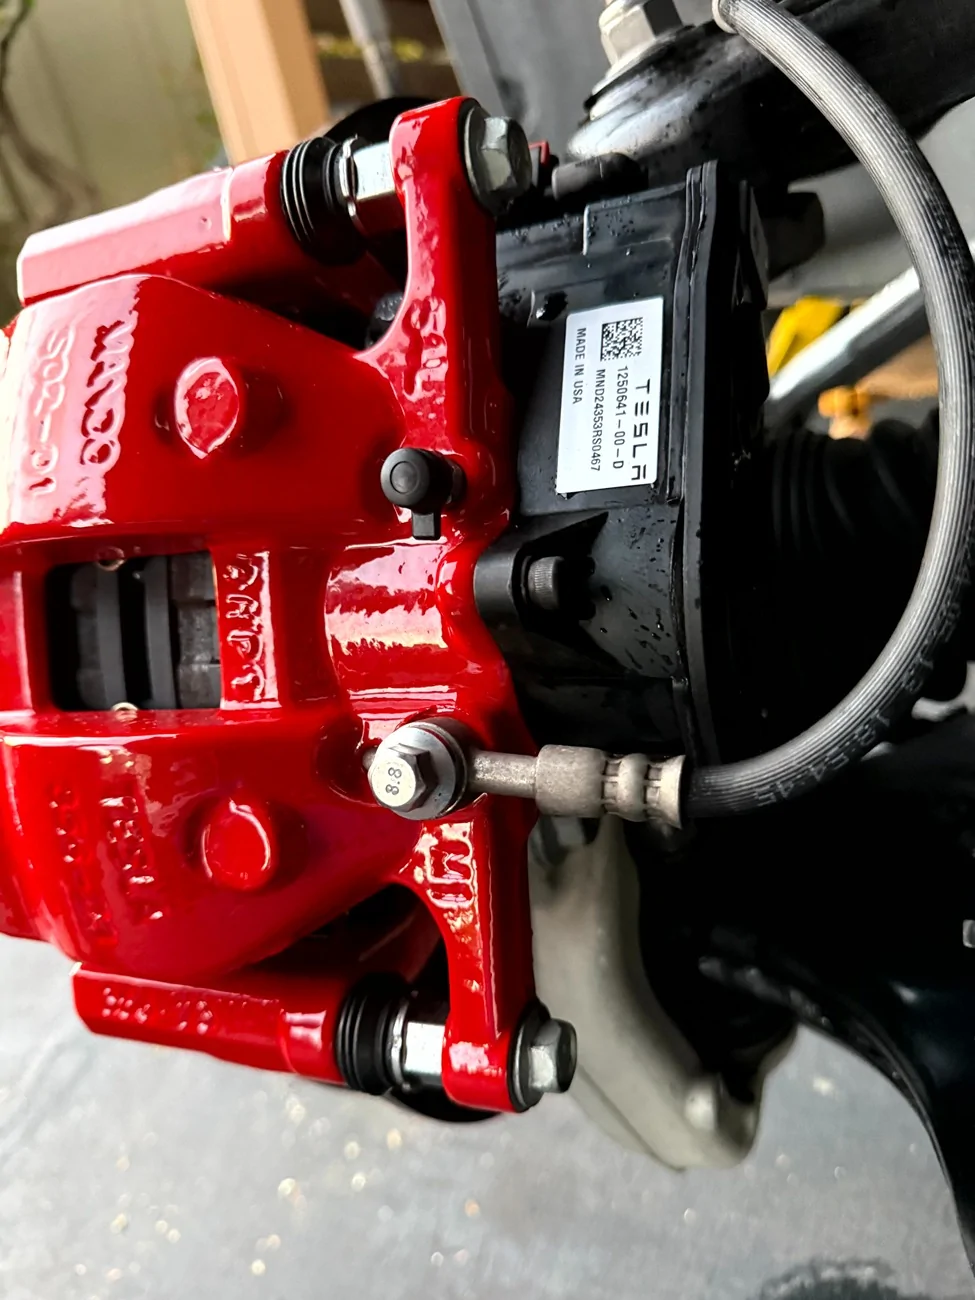
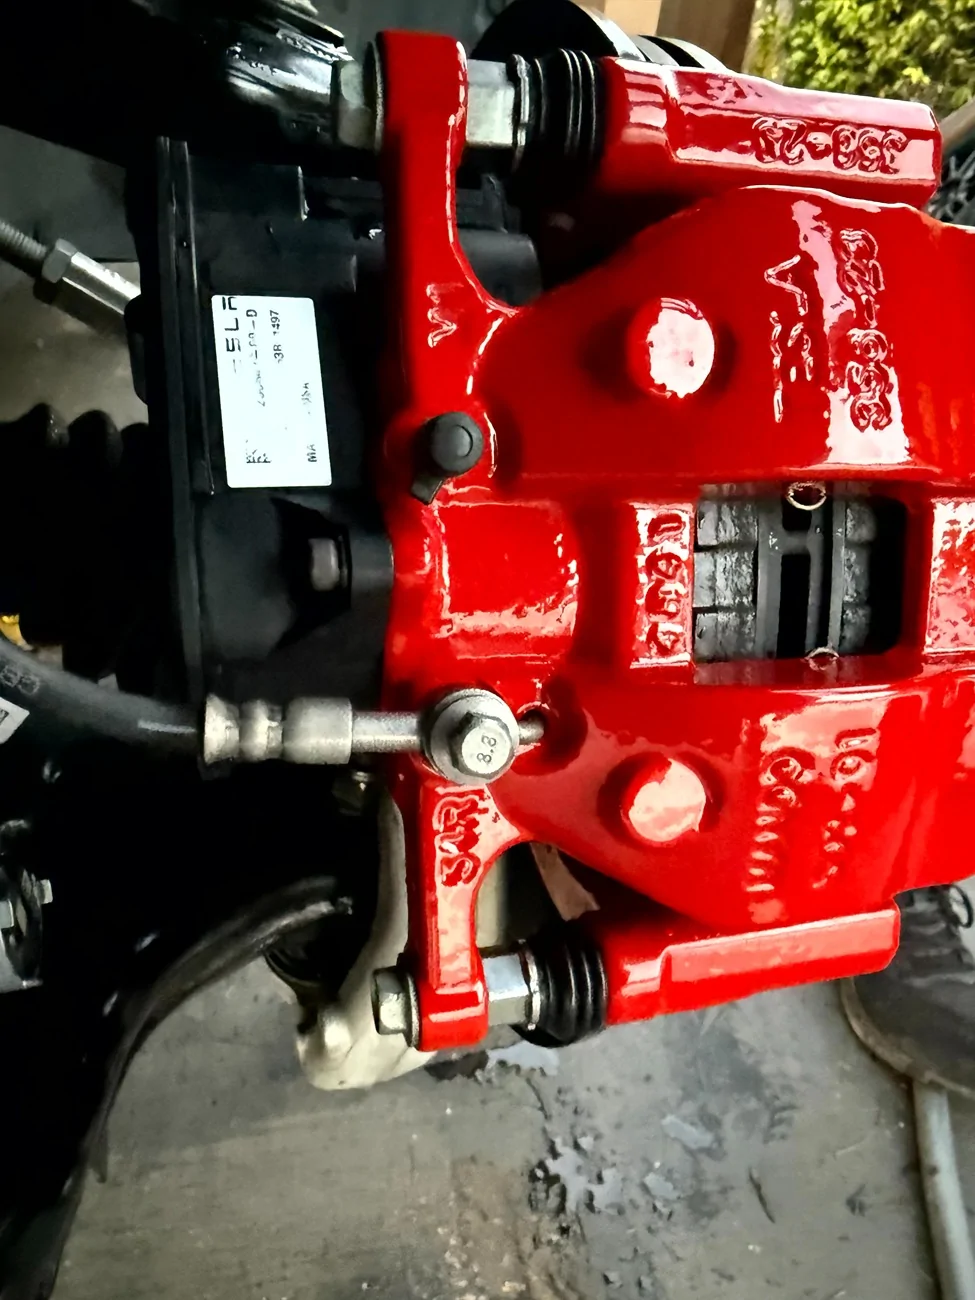
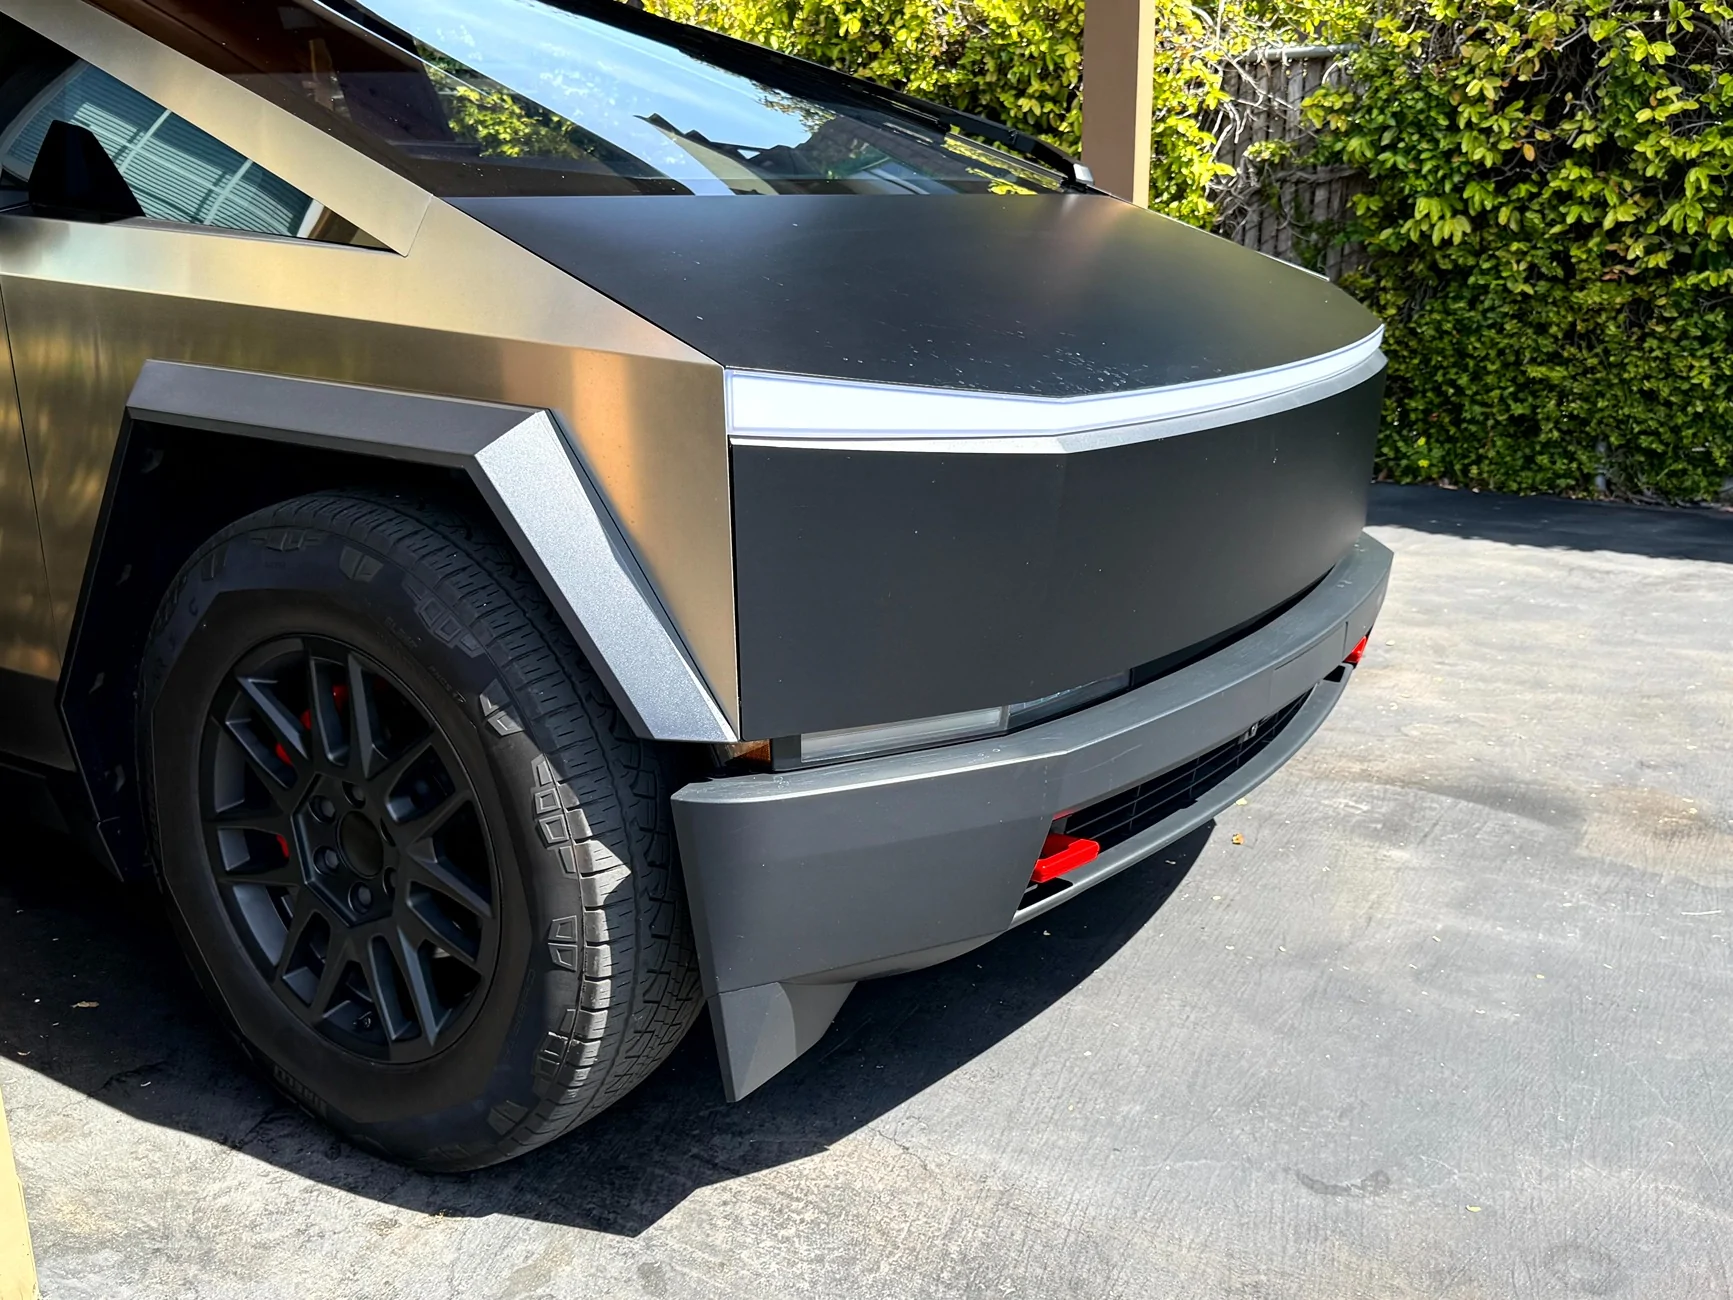
I dropped off the Calipers and hooks on a Monday and picked them up that Friday. On the TESLA logo- I decided to use "TESLA" instead of the various Cybertruck/Cyberbeast styled variants mostly because "TESLA" is what the factory puts on their High Perf brakes AND the stylized writing is already hard to read so I wanted something factory looking and easy to read! The logos are put on after the RED Powder coat and THEN a clear power coating is baked on top to seal everything up. I also cleaned up the rotors and painted the insides an out with high temp black paint as I felt it was them RUSTING that was creating what only appeared to be brake dust on the inner diameter of the wheels. Oh, also, before reassembly, all the calipers (and wheels) were ceramic coated. The cost for the Powder Coating was $600 incl the hooks, $550 without. The brake fluid was about $90. Any other questions, lmk!


1. Removing front trunk lining
2. Removing Front Facia
3. Removing Under hood Apron - Rear
4. Removing Wheel Cover - Front
5. EPB (Electronic Parking Brake) Service Mode (Keep FRUNK open before engaging and don't close as it will not open if so)
6. Removing Front Calipers
7. Removing Rear Calipers
8. Brake Bleeding and Brake Stiffness Tests completed multiple times. (use a pressure bleeder @30psi and the correct Pentosin Dot4 LV fluid or factory)
I dropped off the Calipers and hooks on a Monday and picked them up that Friday. On the TESLA logo- I decided to use "TESLA" instead of the various Cybertruck/Cyberbeast styled variants mostly because "TESLA" is what the factory puts on their High Perf brakes AND the stylized writing is already hard to read so I wanted something factory looking and easy to read! The logos are put on after the RED Powder coat and THEN a clear power coating is baked on top to seal everything up. I also cleaned up the rotors and painted the insides an out with high temp black paint as I felt it was them RUSTING that was creating what only appeared to be brake dust on the inner diameter of the wheels. Oh, also, before reassembly, all the calipers (and wheels) were ceramic coated. The cost for the Powder Coating was $600 incl the hooks, $550 without. The brake fluid was about $90. Any other questions, lmk!
Sponsored

 (rookie maneuver) I had to bleed the system like 4 times before it would pass the Stiffness Test (service menu). A proper torque wrench is also required. All the instructions are right there in the online service manual! It even tells you what tools you’ll need!
 . One note on brake fluid-it’s corrosive BUT dissolves in water so have a sprayer ready to wash off any drips spills etc!
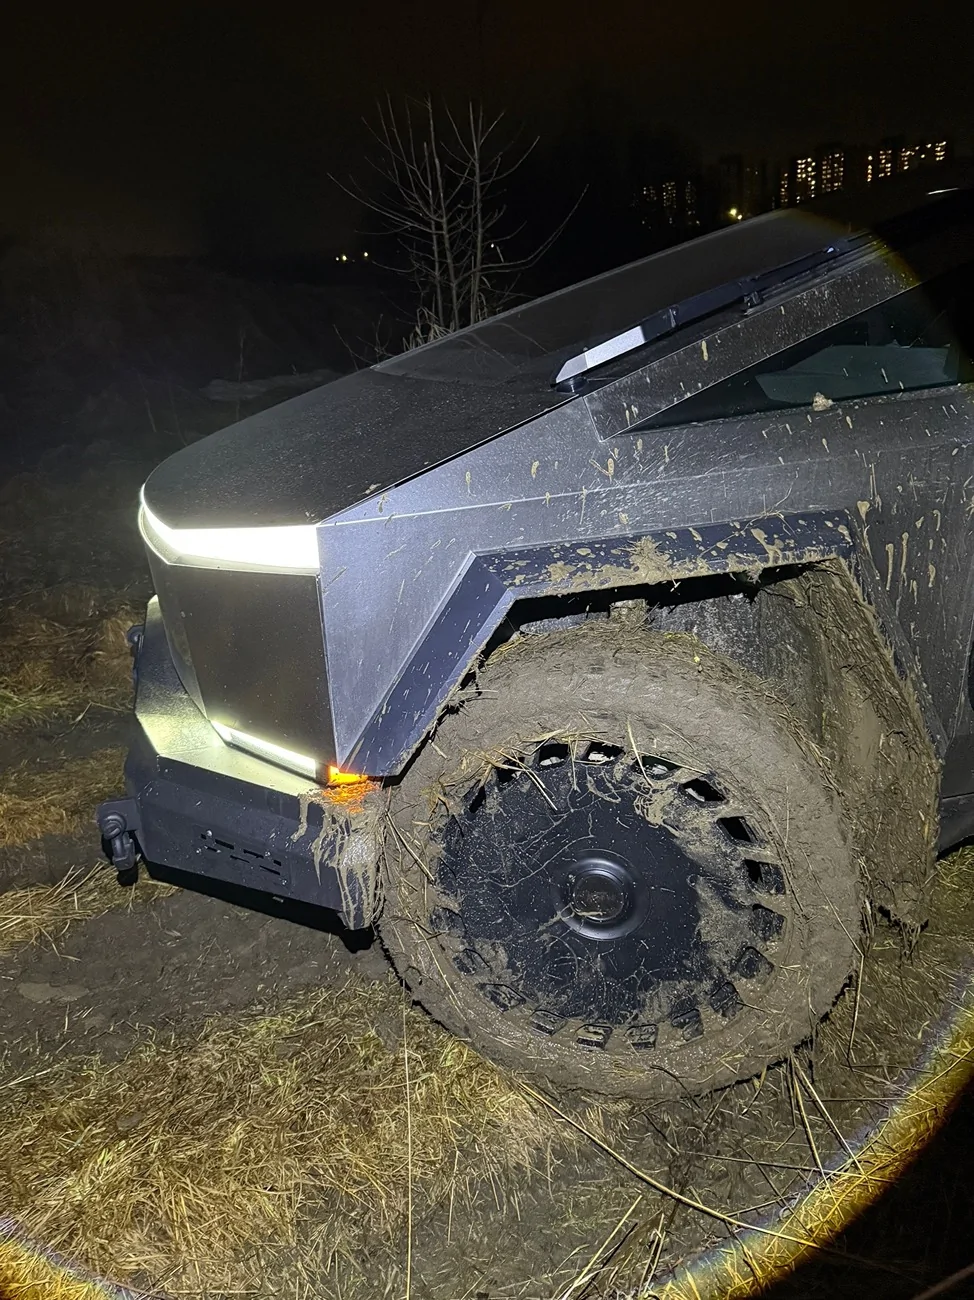
") Could you provide a photo from the side of the entire truck and a video of it in motion to show what it looks like on the road?
Could you provide a photo from the side of the entire truck and a video of it in motion to show what it looks like on the road?