jahansolu
Well-known member
- First Name
- Jahan
- Joined
- Oct 17, 2024
- Threads
- 43
- Messages
- 365
- Reaction score
- 913
- Location
- Vancouver
- Vehicles
- M3, Cybertruck
- Thread starter
- #1
Hello Folks,
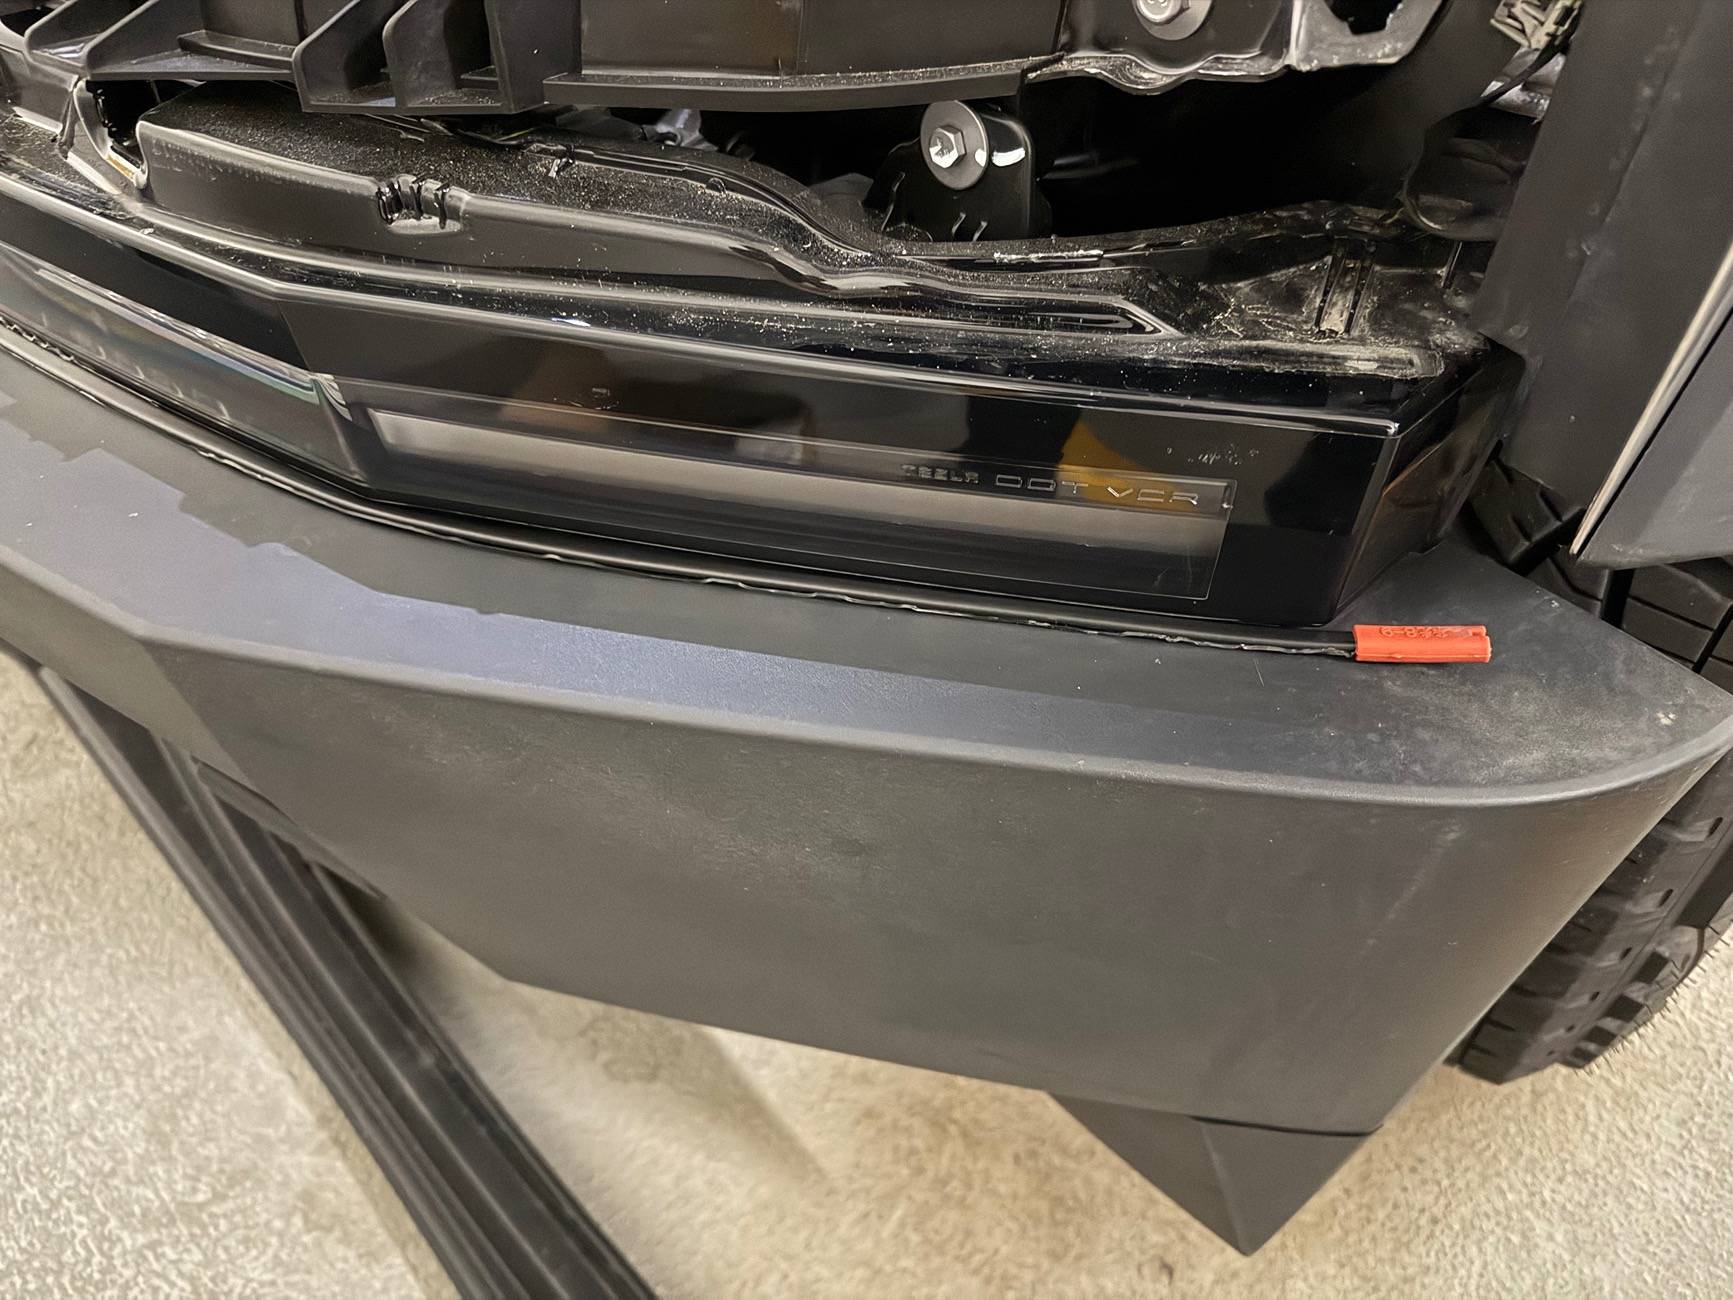
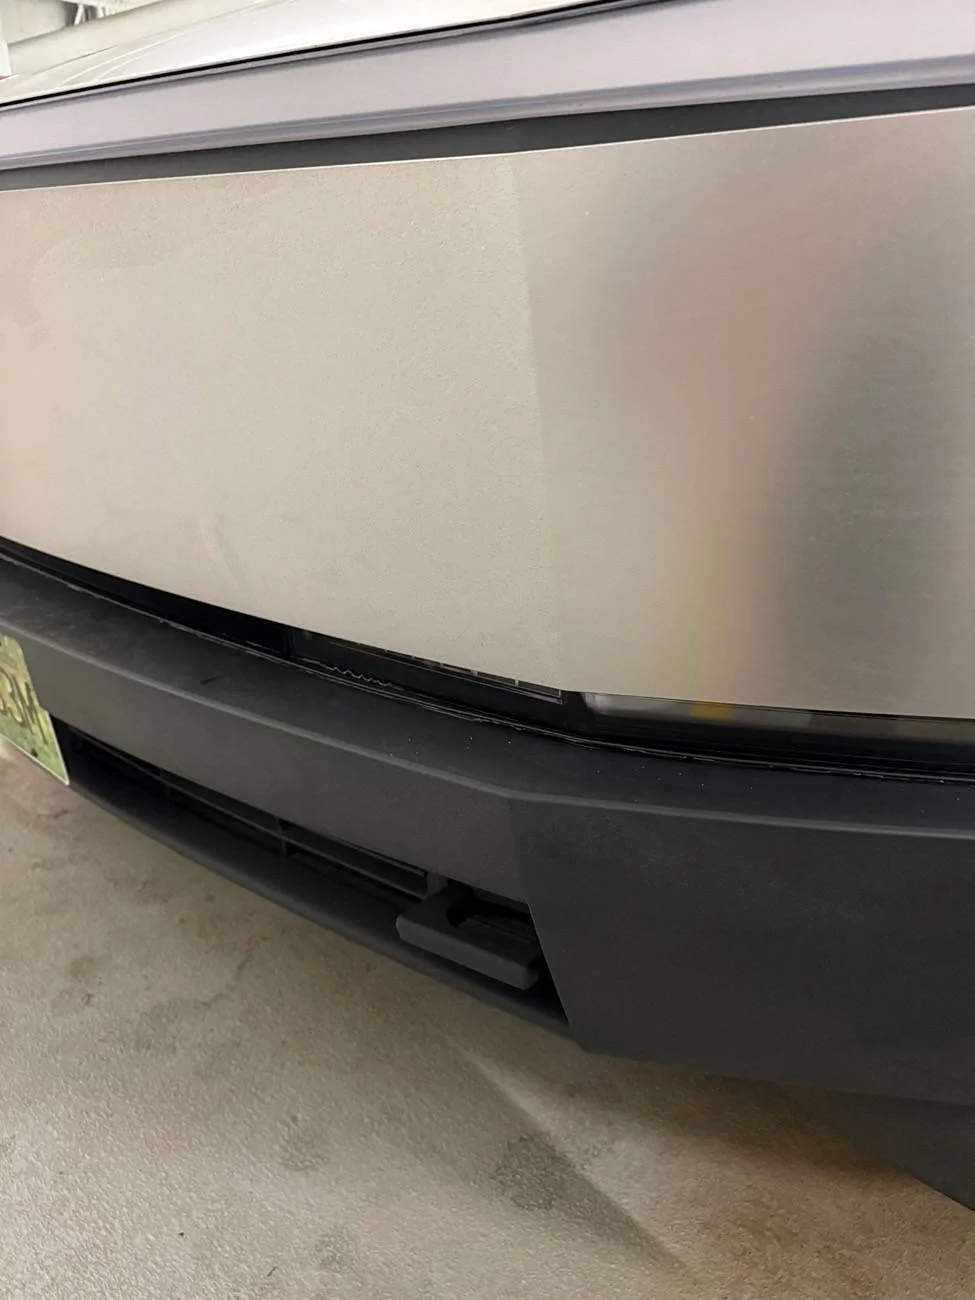
The time has come for me to post my build of installing a successful, yet prototype, "contraption" of melting snow on bumper. This will prevent the snow from building up and blocking the headlights.
Please keep in mind that this is just a prototype. In terms of functionality: it works. I live in Canada, so I apologize for my Canadian links, however I'm sure equivalents can be found.
Before listing the materials, everything is 48V compatible and can be controlled from the "Front Outlet" toggle inside the vehicle. Gone are those days of having to get out to clear the snow, I tested on Cyprus Mountain in West Vancouver, BC.
*** NOTE: I am not nor will be responsible or liable for any issues. Do NOT keep "Front Outlet" on for longer than 5 Minutes. Only use when visibility of headlights has degraded. ***
Parts:
- 18 Gauge Wire 2 Conductor Electrical Wire, 18 AWG Wire Stranded PVC Cord, 12V Low Voltage/Tinned Copper/Flexible/18/2 Wire for Automotive Wire LED Strips Lamp Lighting Marine (30FT-9.1M)
- Heat Resistant Acrylic Double Sided Tape Removable(Residue Free)/Heavy Duty/Weather-resistant/Clear Sticker for Car/Cell Phone Touch Screen Repair/Household(10 m×10 mm×1 mm)
- Motoforti Universal DC 12V- 48V 15Amp Car Circuit Breaker, with Manual Reset Inline Fuse Holder Protector, Durable, Metal, Black, 2pcs, Circuit Breaker - Amazon Canada
- 1~20 Meters 12V 24V 36V 48V DC Self-regulating Heating Cable Low Voltage Heat Trace Cable for Freeze Protection <<<<---- MAKE SURE TO ORDER 2 Metres (6.5 or more feet) and 48V!
Installation:
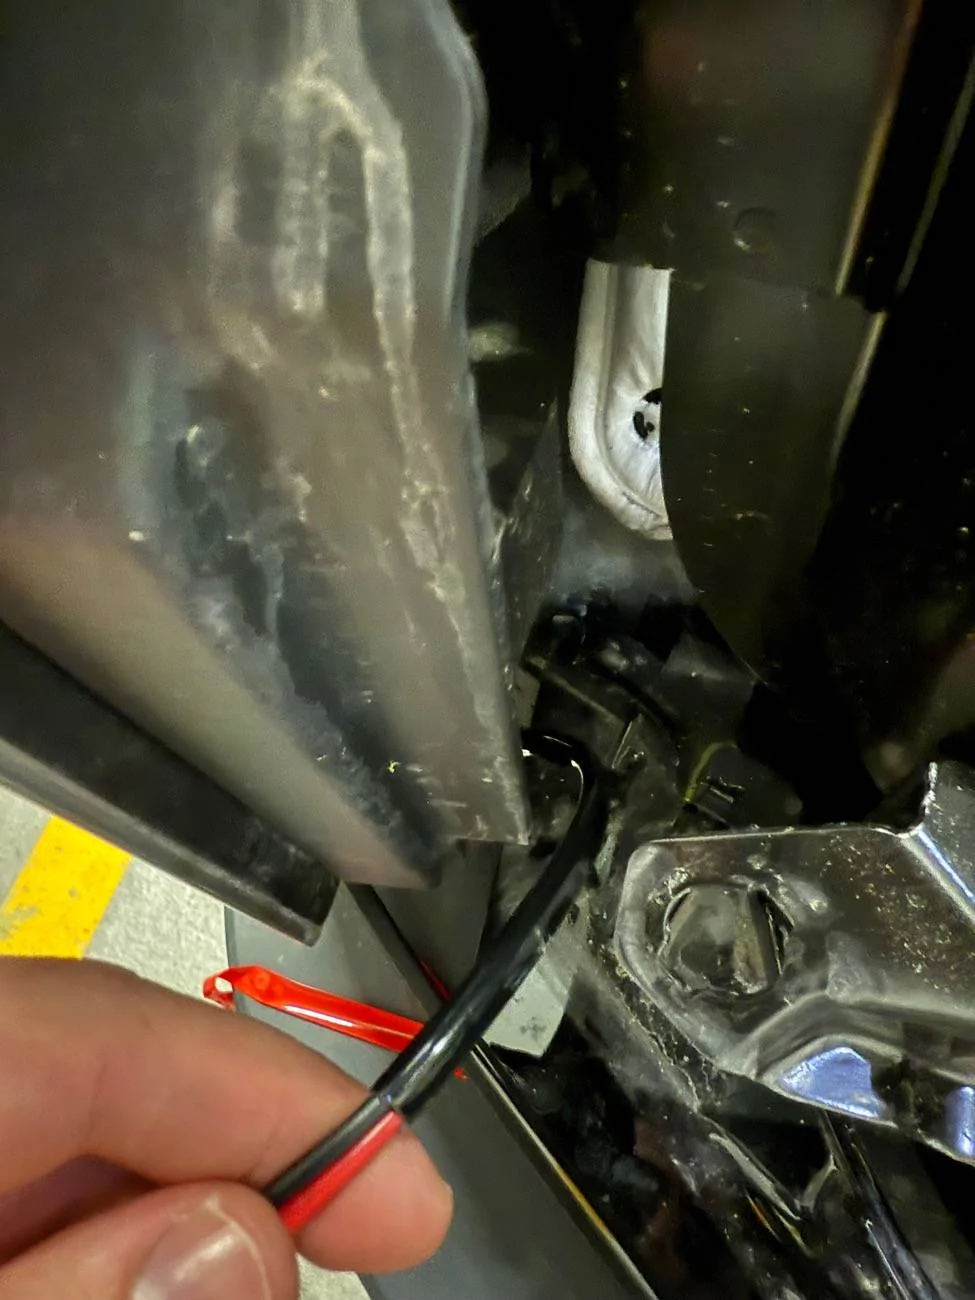
Red+Blue = Positive (+) Connection
Brown+Blue = Negative (-) Connection
(The polarity doesn't matter when connecting to the Heating Cable)
*Note: If you want to play it cautious, you're more than welcome to install fuse / circuit breaker though it's not necessary as the vehicle has its own*
Front Trunk at 48V with 500W max draw = 10.41 amps <-- hence the 15 amp (optional breaker)
It won't be using 10.41 amps as that's the max - so don't fret.
There's no need to disconnect the 48V or HV battery while working. Only make sure the Frunk Outlet slider/toggle is off - that's all.
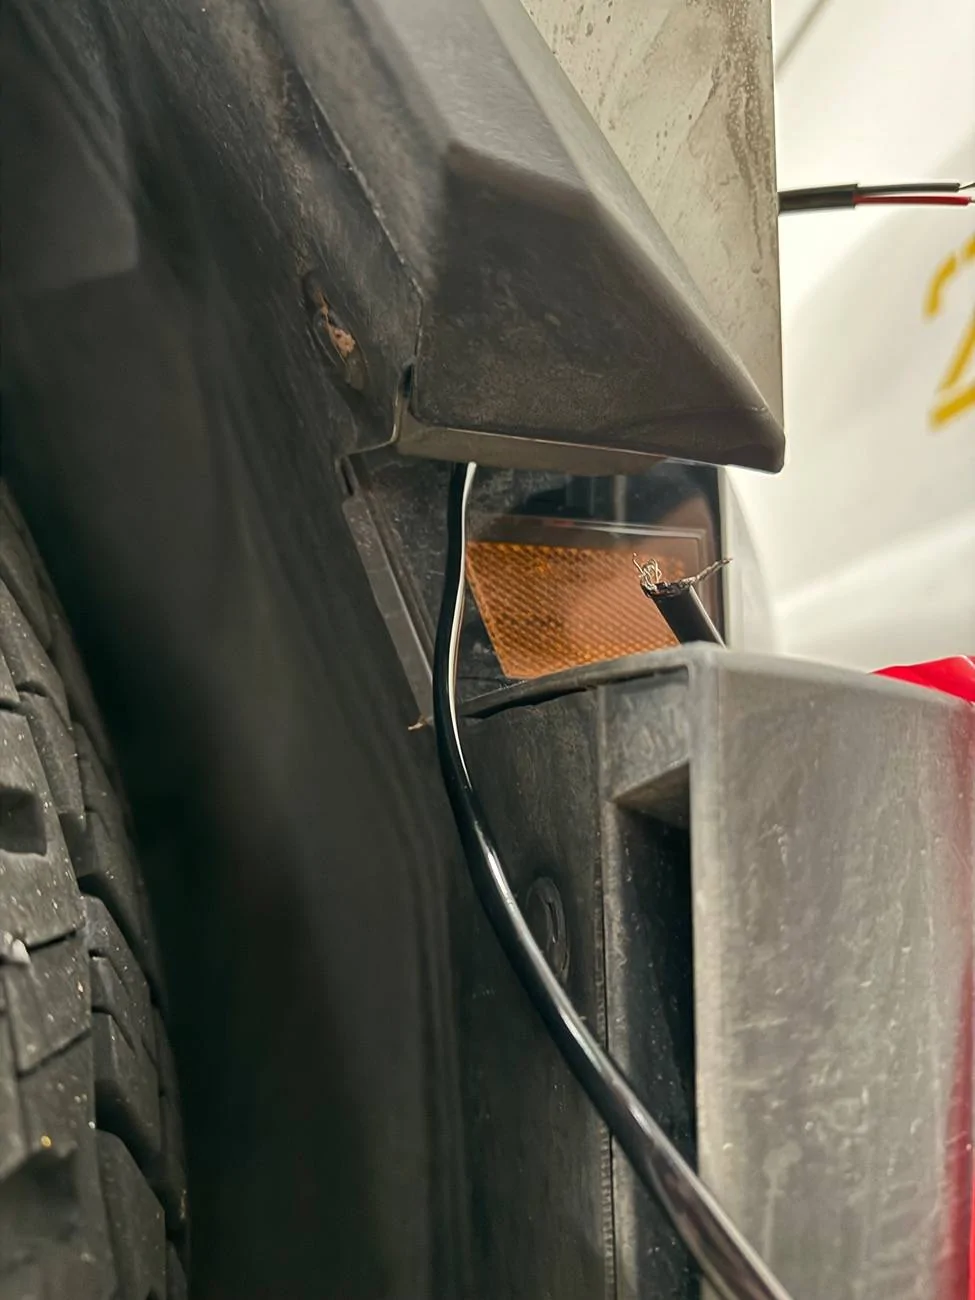
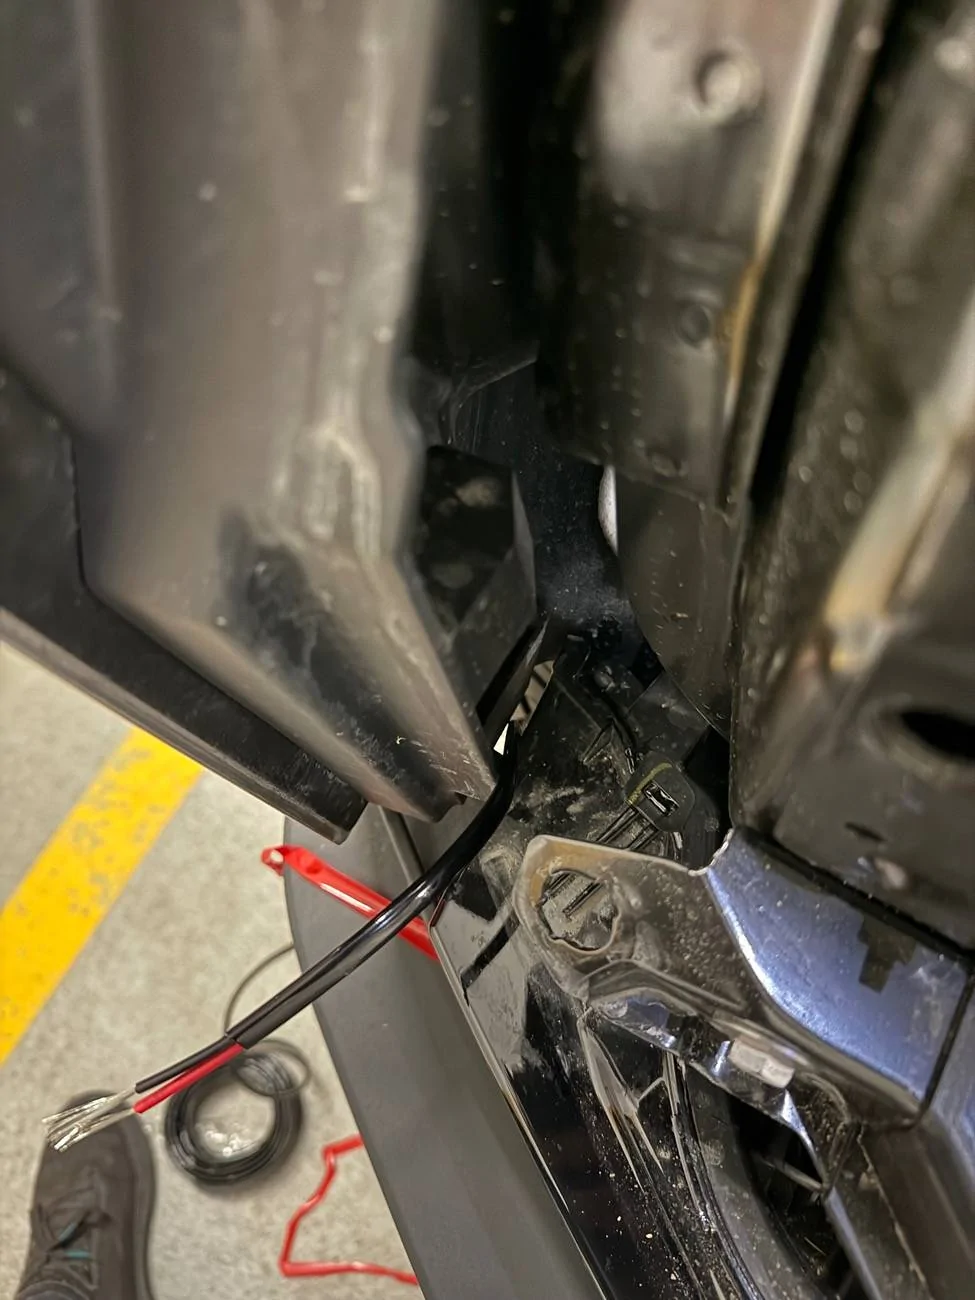
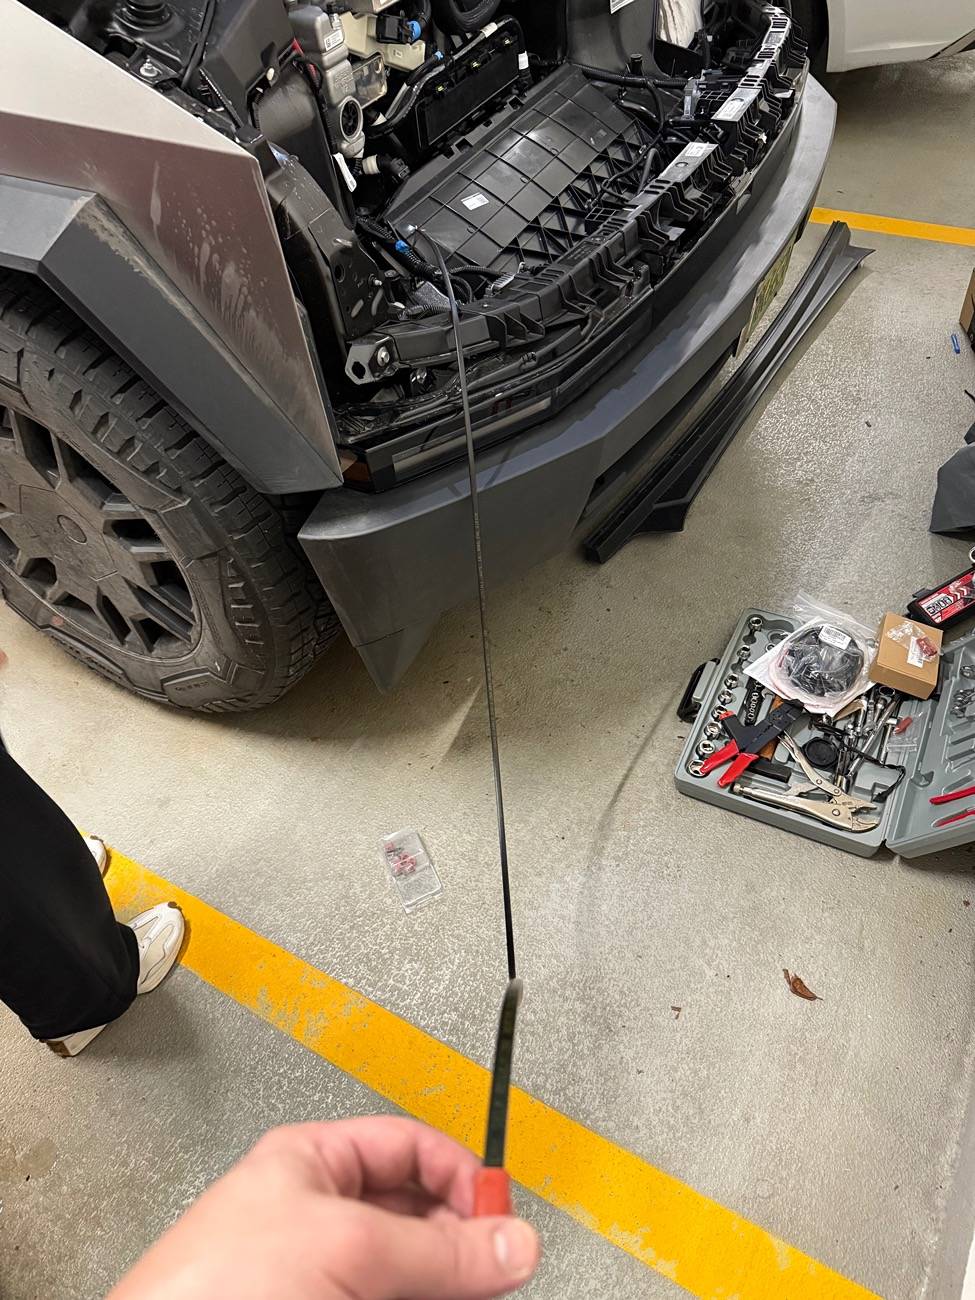
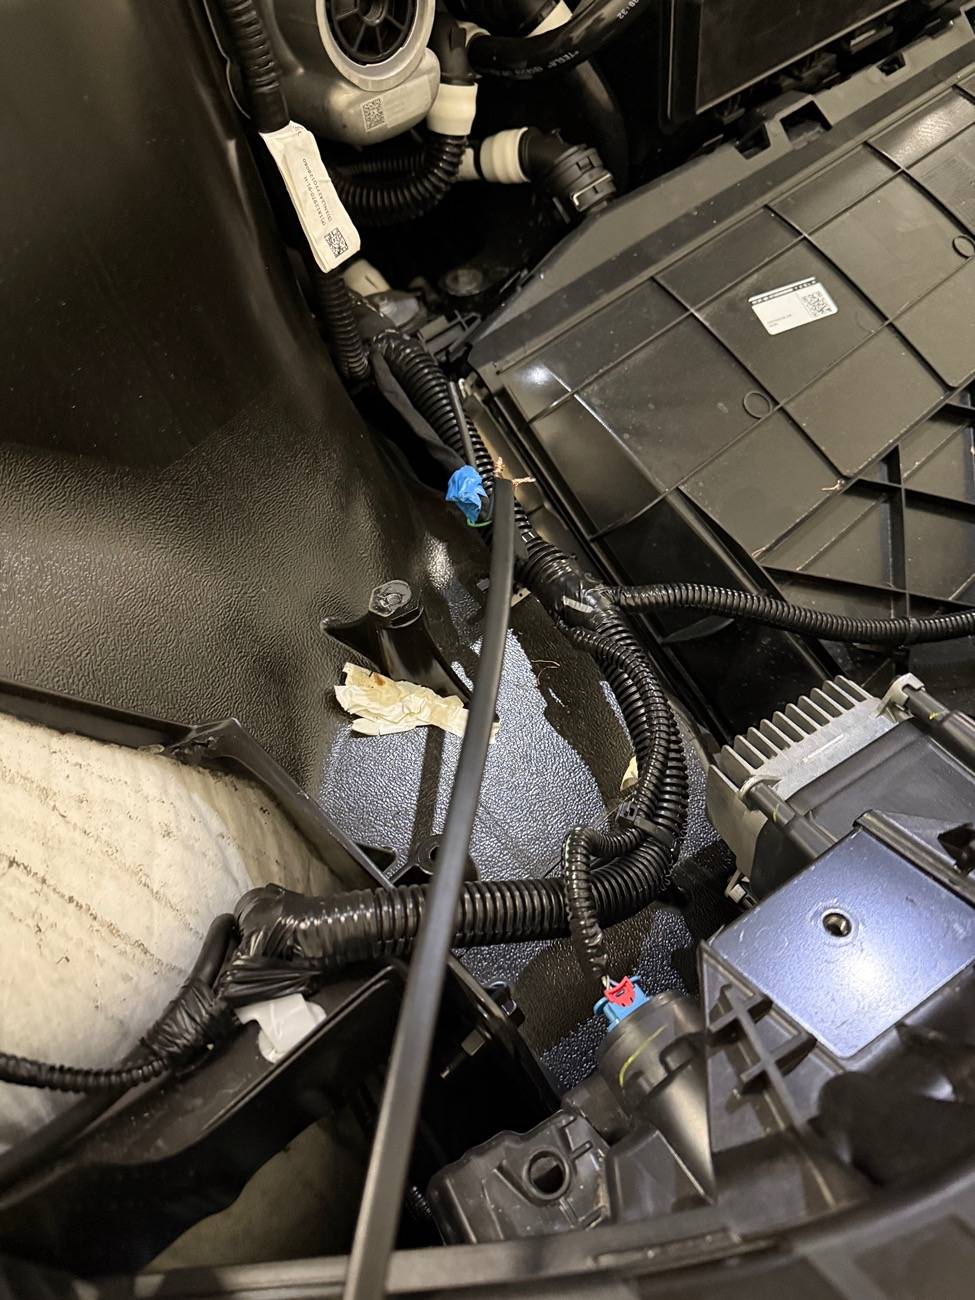
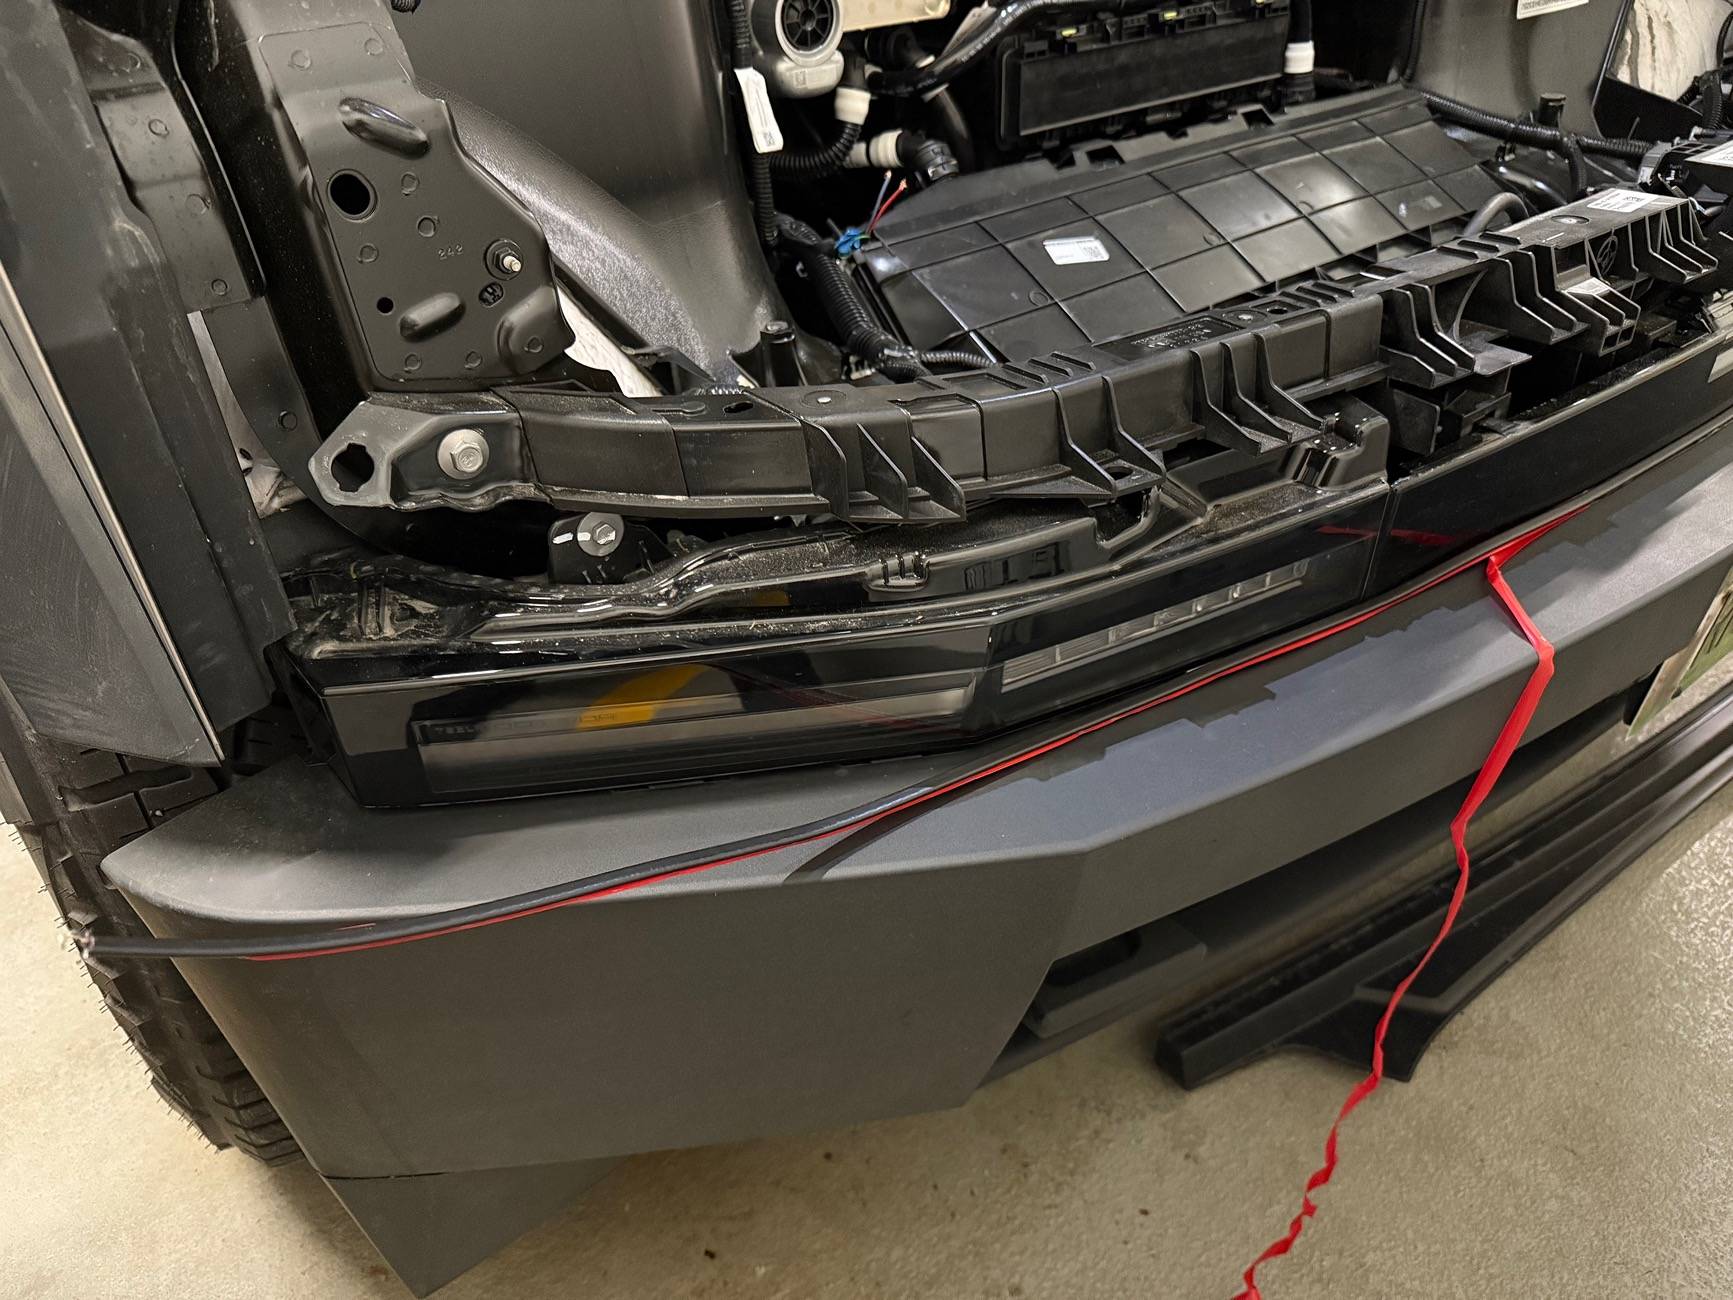
*** WARNING: Do NOT wire the Heating Cable inside the Frunk. Use the 18 AWG extension cable to wire from 48V connectors, then feed through the side, as shown in the picture, then connect to the Heating cable which will run the span from driver side headlight to passenger. Do not forget to connect the (orange) cap to prevent any electrical short or arching. ***
Here's how you take the frunk liner out:
Remove Funk Liner To Access 48V
In the same video at the 7:24 mark of the video they also talk about the 48V wiring.
I will post my pictures of what mine looks like - Sorry the pics are not in order. If I find there are more questions than answers, then I will try my best to follow up with either a video or detailed post on this. However, I truly think it's pretty self-explanatory. It's a shame plans fell through with TesStudio as my hope was to create an easy to bundle package with everything a person needs in one box.
Merry (Early) Christmas Guys and Gals!


The time has come for me to post my build of installing a successful, yet prototype, "contraption" of melting snow on bumper. This will prevent the snow from building up and blocking the headlights.
Please keep in mind that this is just a prototype. In terms of functionality: it works. I live in Canada, so I apologize for my Canadian links, however I'm sure equivalents can be found.
Before listing the materials, everything is 48V compatible and can be controlled from the "Front Outlet" toggle inside the vehicle. Gone are those days of having to get out to clear the snow, I tested on Cyprus Mountain in West Vancouver, BC.
*** NOTE: I am not nor will be responsible or liable for any issues. Do NOT keep "Front Outlet" on for longer than 5 Minutes. Only use when visibility of headlights has degraded. ***
Parts:
- 18 Gauge Wire 2 Conductor Electrical Wire, 18 AWG Wire Stranded PVC Cord, 12V Low Voltage/Tinned Copper/Flexible/18/2 Wire for Automotive Wire LED Strips Lamp Lighting Marine (30FT-9.1M)
- Heat Resistant Acrylic Double Sided Tape Removable(Residue Free)/Heavy Duty/Weather-resistant/Clear Sticker for Car/Cell Phone Touch Screen Repair/Household(10 m×10 mm×1 mm)
- Motoforti Universal DC 12V- 48V 15Amp Car Circuit Breaker, with Manual Reset Inline Fuse Holder Protector, Durable, Metal, Black, 2pcs, Circuit Breaker - Amazon Canada
- 1~20 Meters 12V 24V 36V 48V DC Self-regulating Heating Cable Low Voltage Heat Trace Cable for Freeze Protection <<<<---- MAKE SURE TO ORDER 2 Metres (6.5 or more feet) and 48V!
Installation:
Red+Blue = Positive (+) Connection
Brown+Blue = Negative (-) Connection
(The polarity doesn't matter when connecting to the Heating Cable)
*Note: If you want to play it cautious, you're more than welcome to install fuse / circuit breaker though it's not necessary as the vehicle has its own*
Front Trunk at 48V with 500W max draw = 10.41 amps <-- hence the 15 amp (optional breaker)
It won't be using 10.41 amps as that's the max - so don't fret.
There's no need to disconnect the 48V or HV battery while working. Only make sure the Frunk Outlet slider/toggle is off - that's all.
*** WARNING: Do NOT wire the Heating Cable inside the Frunk. Use the 18 AWG extension cable to wire from 48V connectors, then feed through the side, as shown in the picture, then connect to the Heating cable which will run the span from driver side headlight to passenger. Do not forget to connect the (orange) cap to prevent any electrical short or arching. ***
Here's how you take the frunk liner out:
Remove Funk Liner To Access 48V
In the same video at the 7:24 mark of the video they also talk about the 48V wiring.
I will post my pictures of what mine looks like - Sorry the pics are not in order. If I find there are more questions than answers, then I will try my best to follow up with either a video or detailed post on this. However, I truly think it's pretty self-explanatory. It's a shame plans fell through with TesStudio as my hope was to create an easy to bundle package with everything a person needs in one box.
Merry (Early) Christmas Guys and Gals!

Sponsored
Last edited:

