AbblePC
Well-known member
- First Name
- Jeffrey
- Joined
- Mar 12, 2024
- Threads
- 0
- Messages
- 220
- Reaction score
- 197
- Location
- State College PA
- Vehicles
- 16MS90D - 23MYP - 22MYP - 21MYLR - 23MXPlaid - 24CB AT Tires/White Int
- Occupation
- IT Managed Service Provider
I had mine installed in Mechanicsburg PA / Carlisle service center.
The service guys there are top notch and polite as ever.
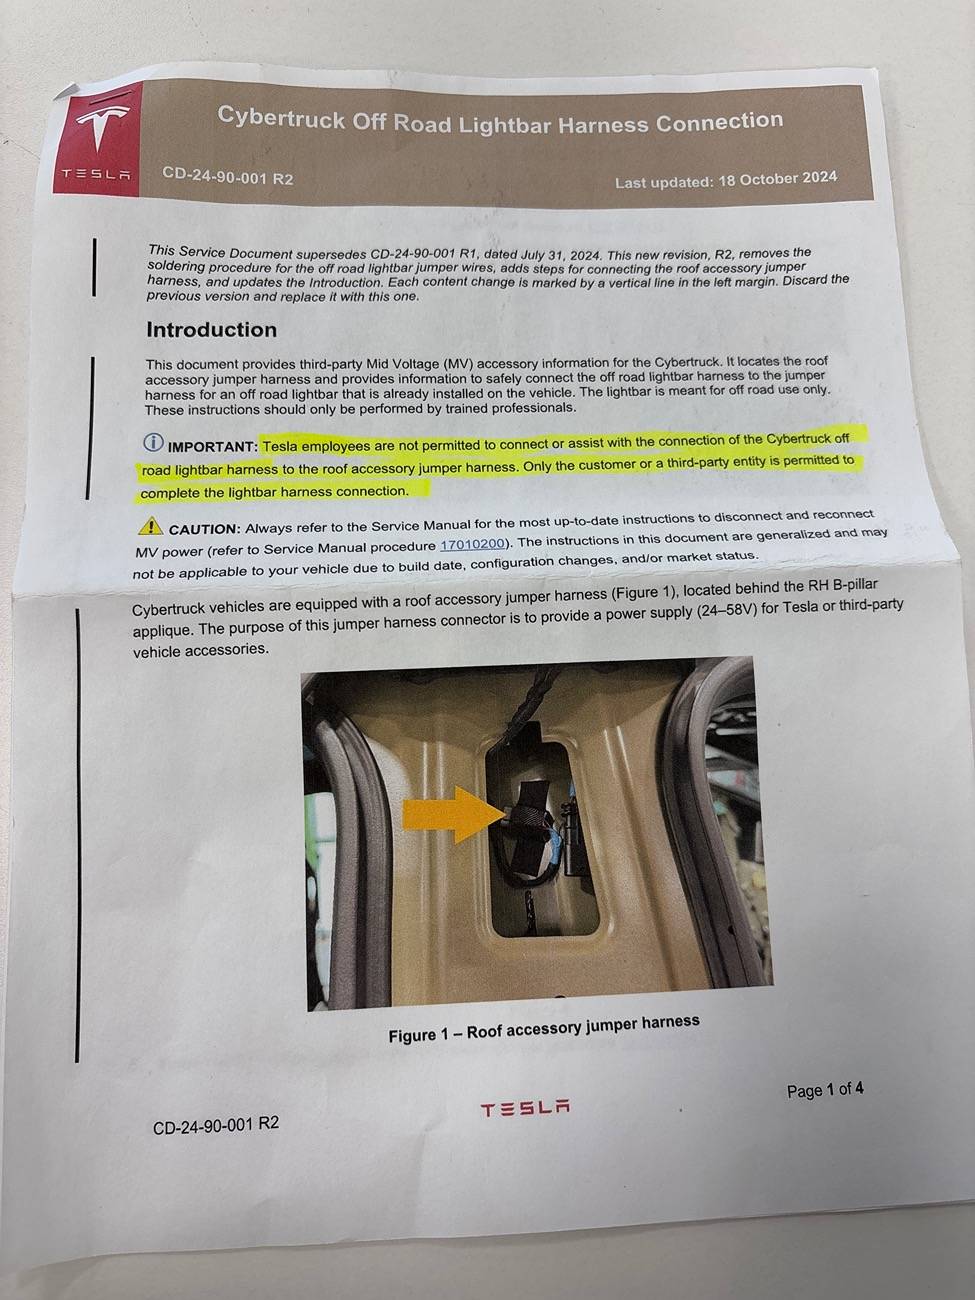
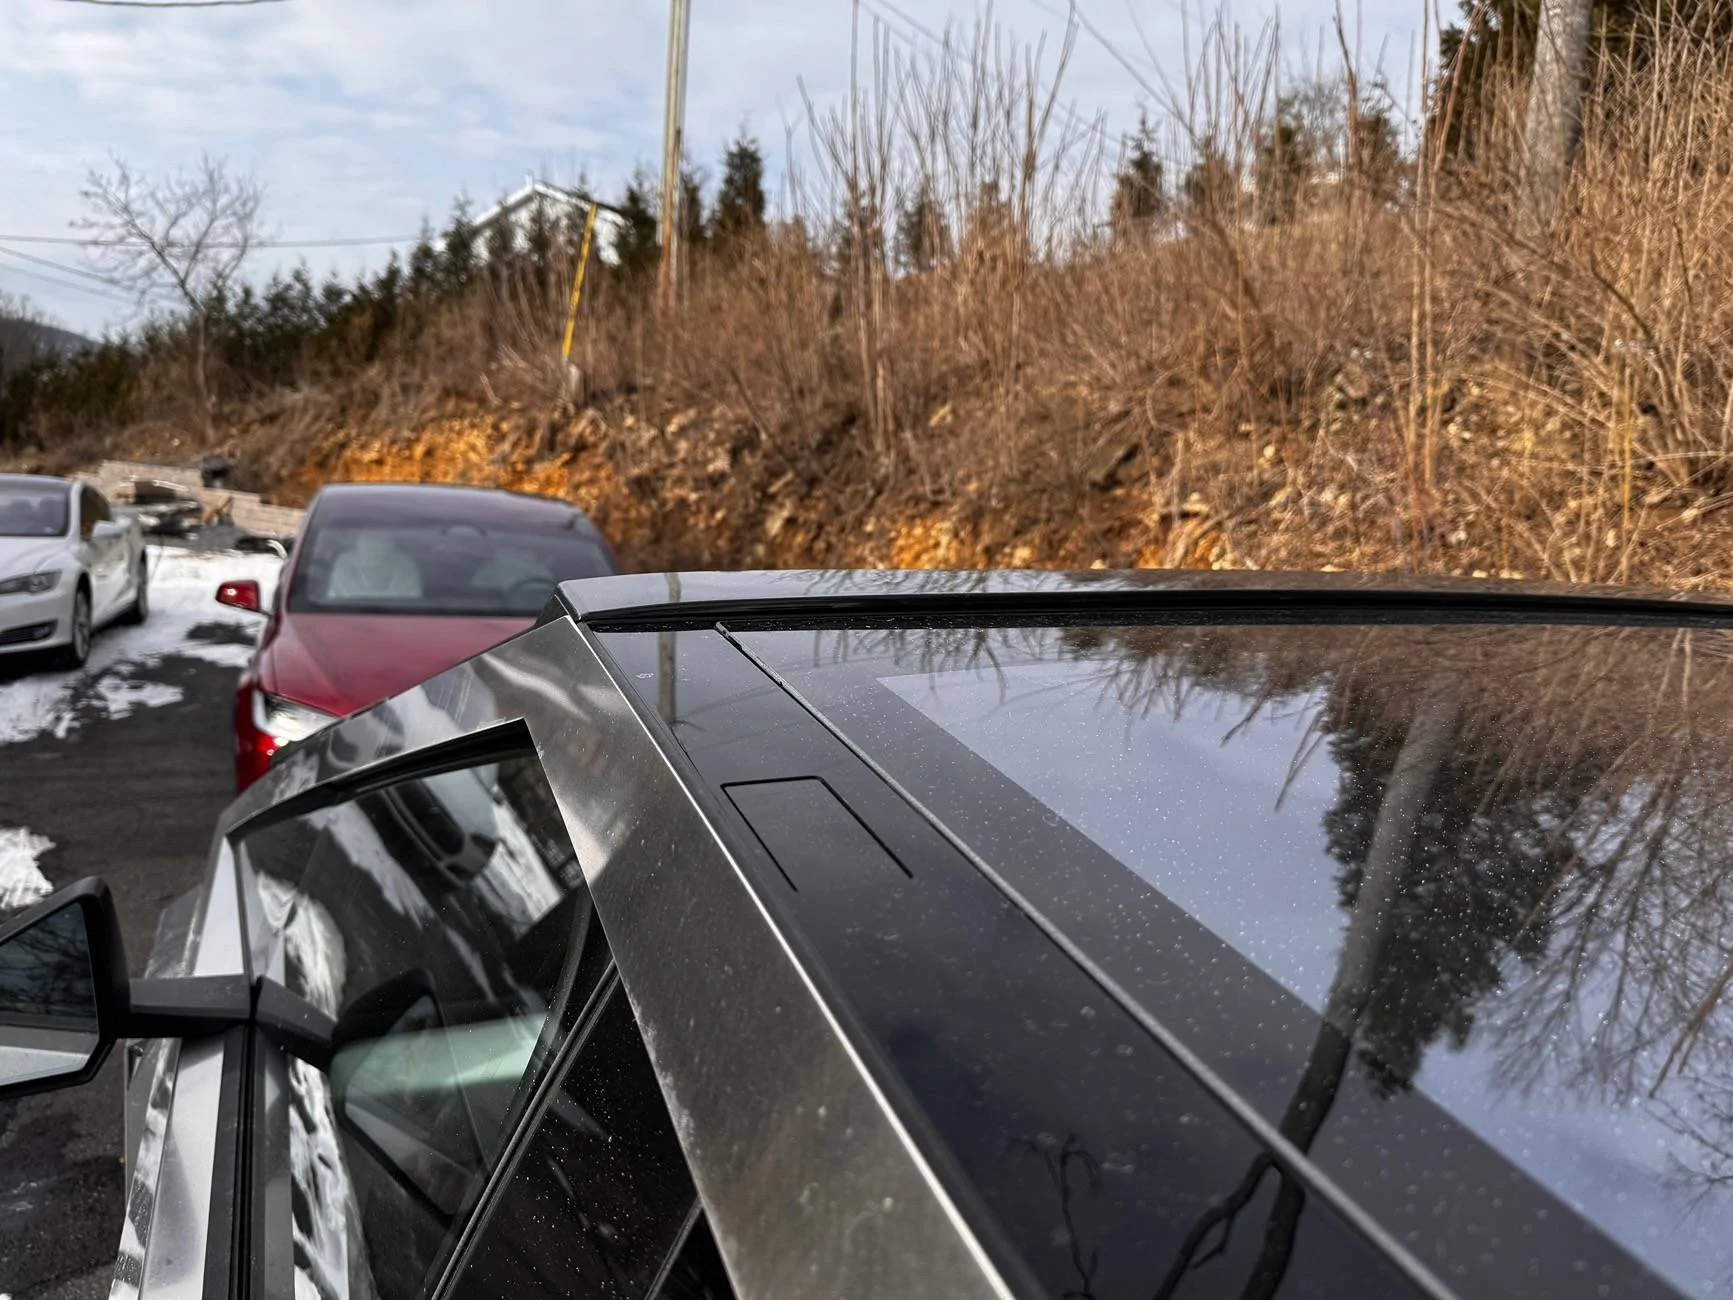
When I set my appointment for the lightbar Installation (the first one they had ever done at this location) it was prior stated and shown in many YouTube videos and service documentation that the soldering within the roof glass area was done by the customer as a final installation step in order to “activate” the lightbar for operation. This was done by passing the heat shrink tubes and zip ties etc as part of a customer kit to the customer to solder & finalize this step at a later time.
However as the OP stated and as in my case as well, there is now a new R2 procedure where the delivery/service center does the soldering in the roof power outlet connection area, this harness also carries down to the RH B pillar location and the service center is to then remove the RH B pillar and disconnect that connector within the b pillar, which thereby disconnects the roof accessory power.
The customer then has to make that connection by plugging the harness behind the RH B pillar once home and also remove the lightbar light blocking security tape.
This also depends on the state it’s being installed in, I am guessing in other states they can actually complete the entire install, but for most others it has to be this way now based on the updated R2 service bulletins.
My guess is also that these procedures were modified as there were probably too many issues with customers not having soldering experience (not my problem as I am an electronics tech with decades of soldering and using heat shrink) and perhaps also not understanding basic electronic harness connections B+ grounds etc.
When I arrived home, I thought I had to perform the B pillar connection and removed the RH B pillar cover with the 10mm bolt only to find it was already connected!
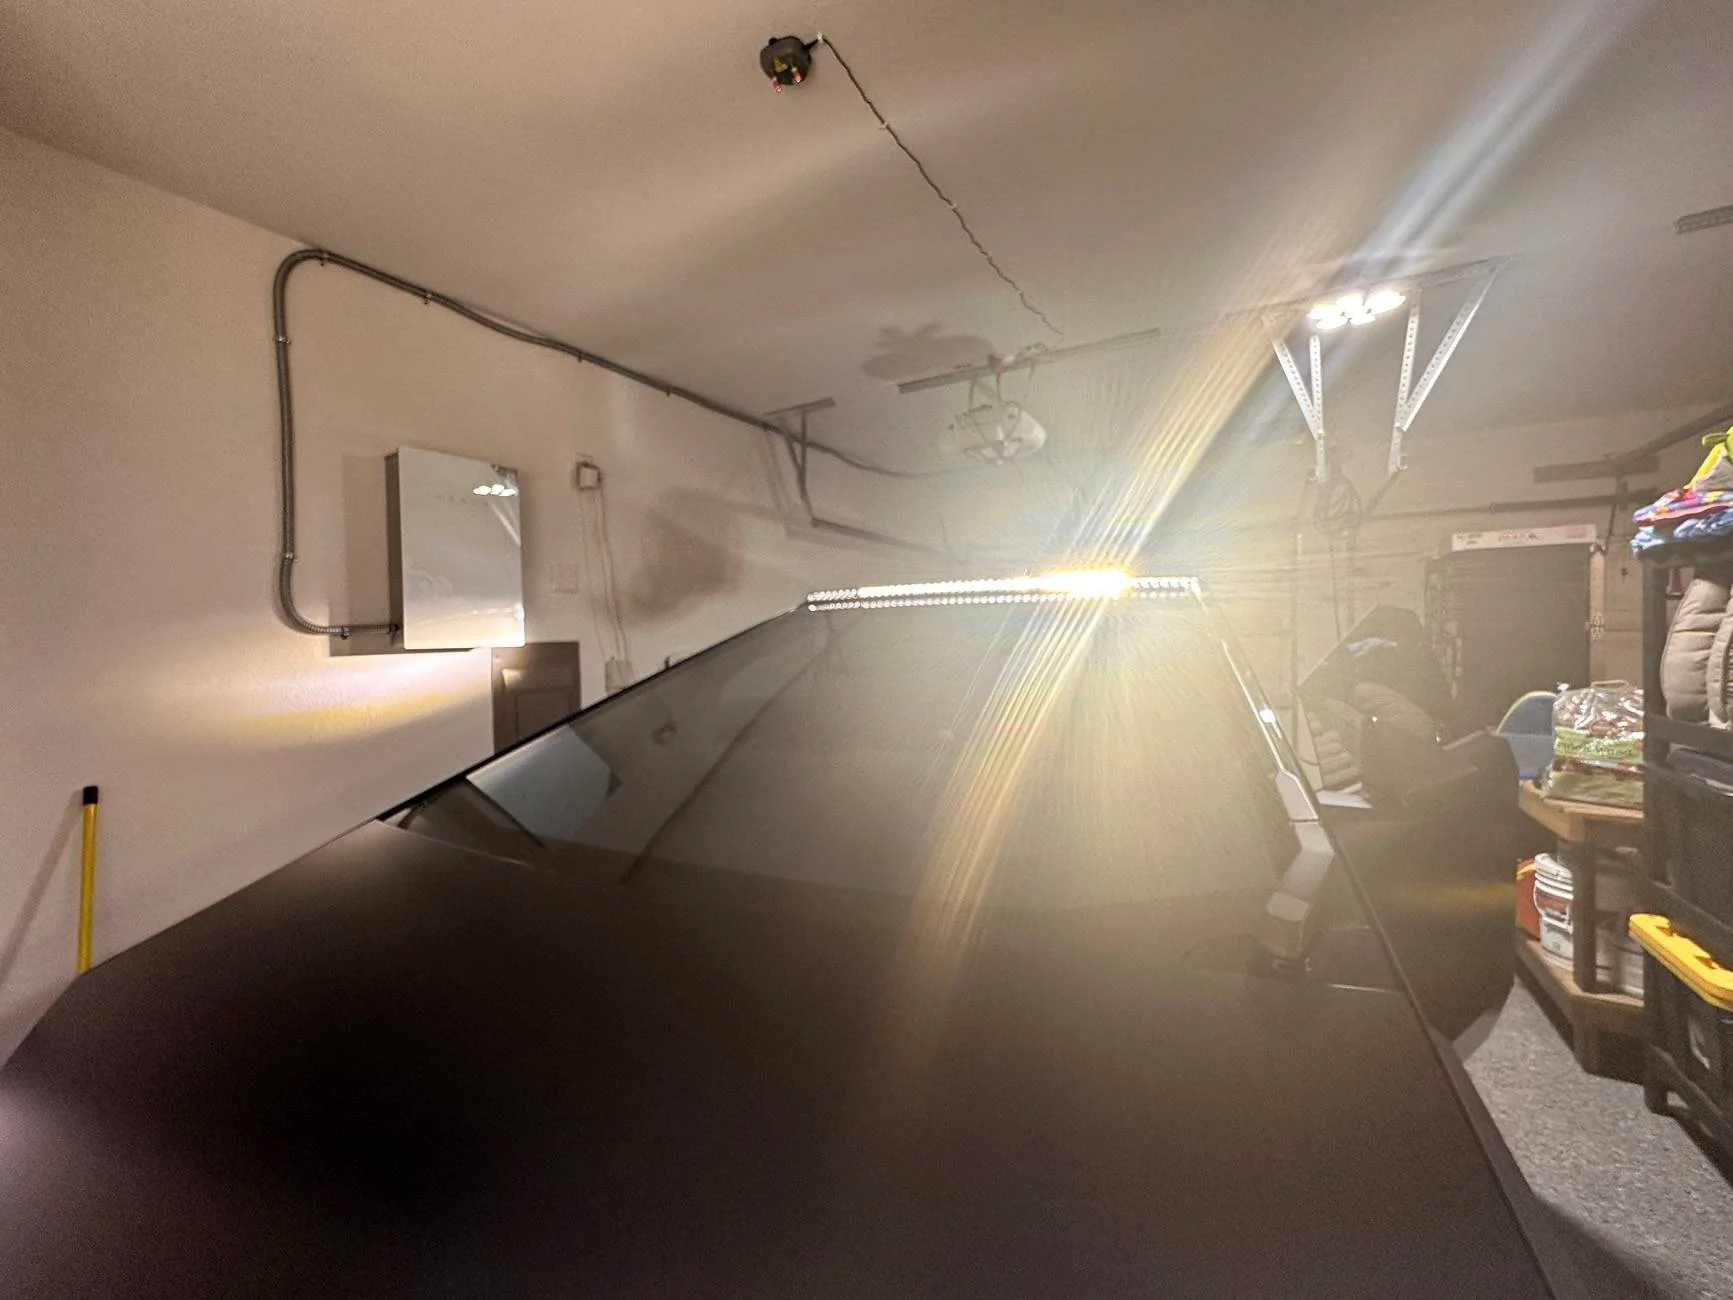
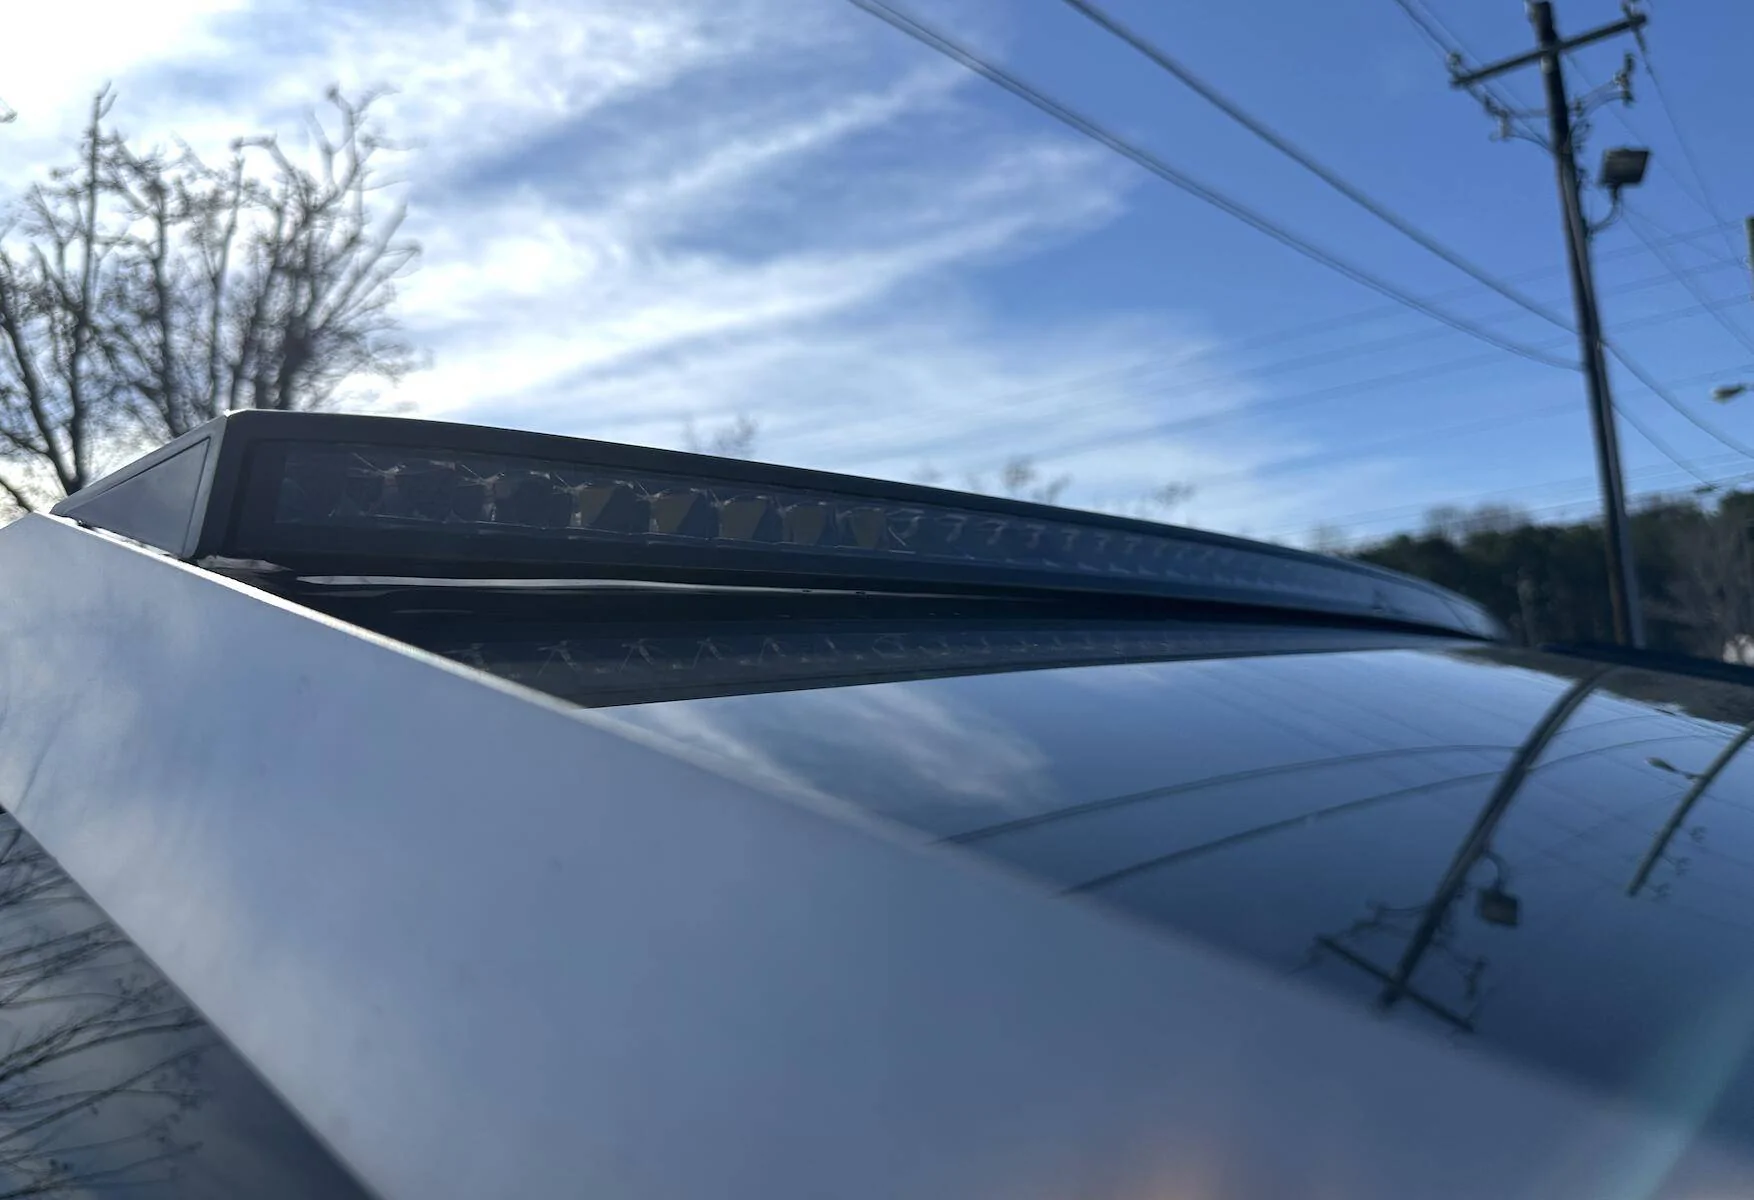
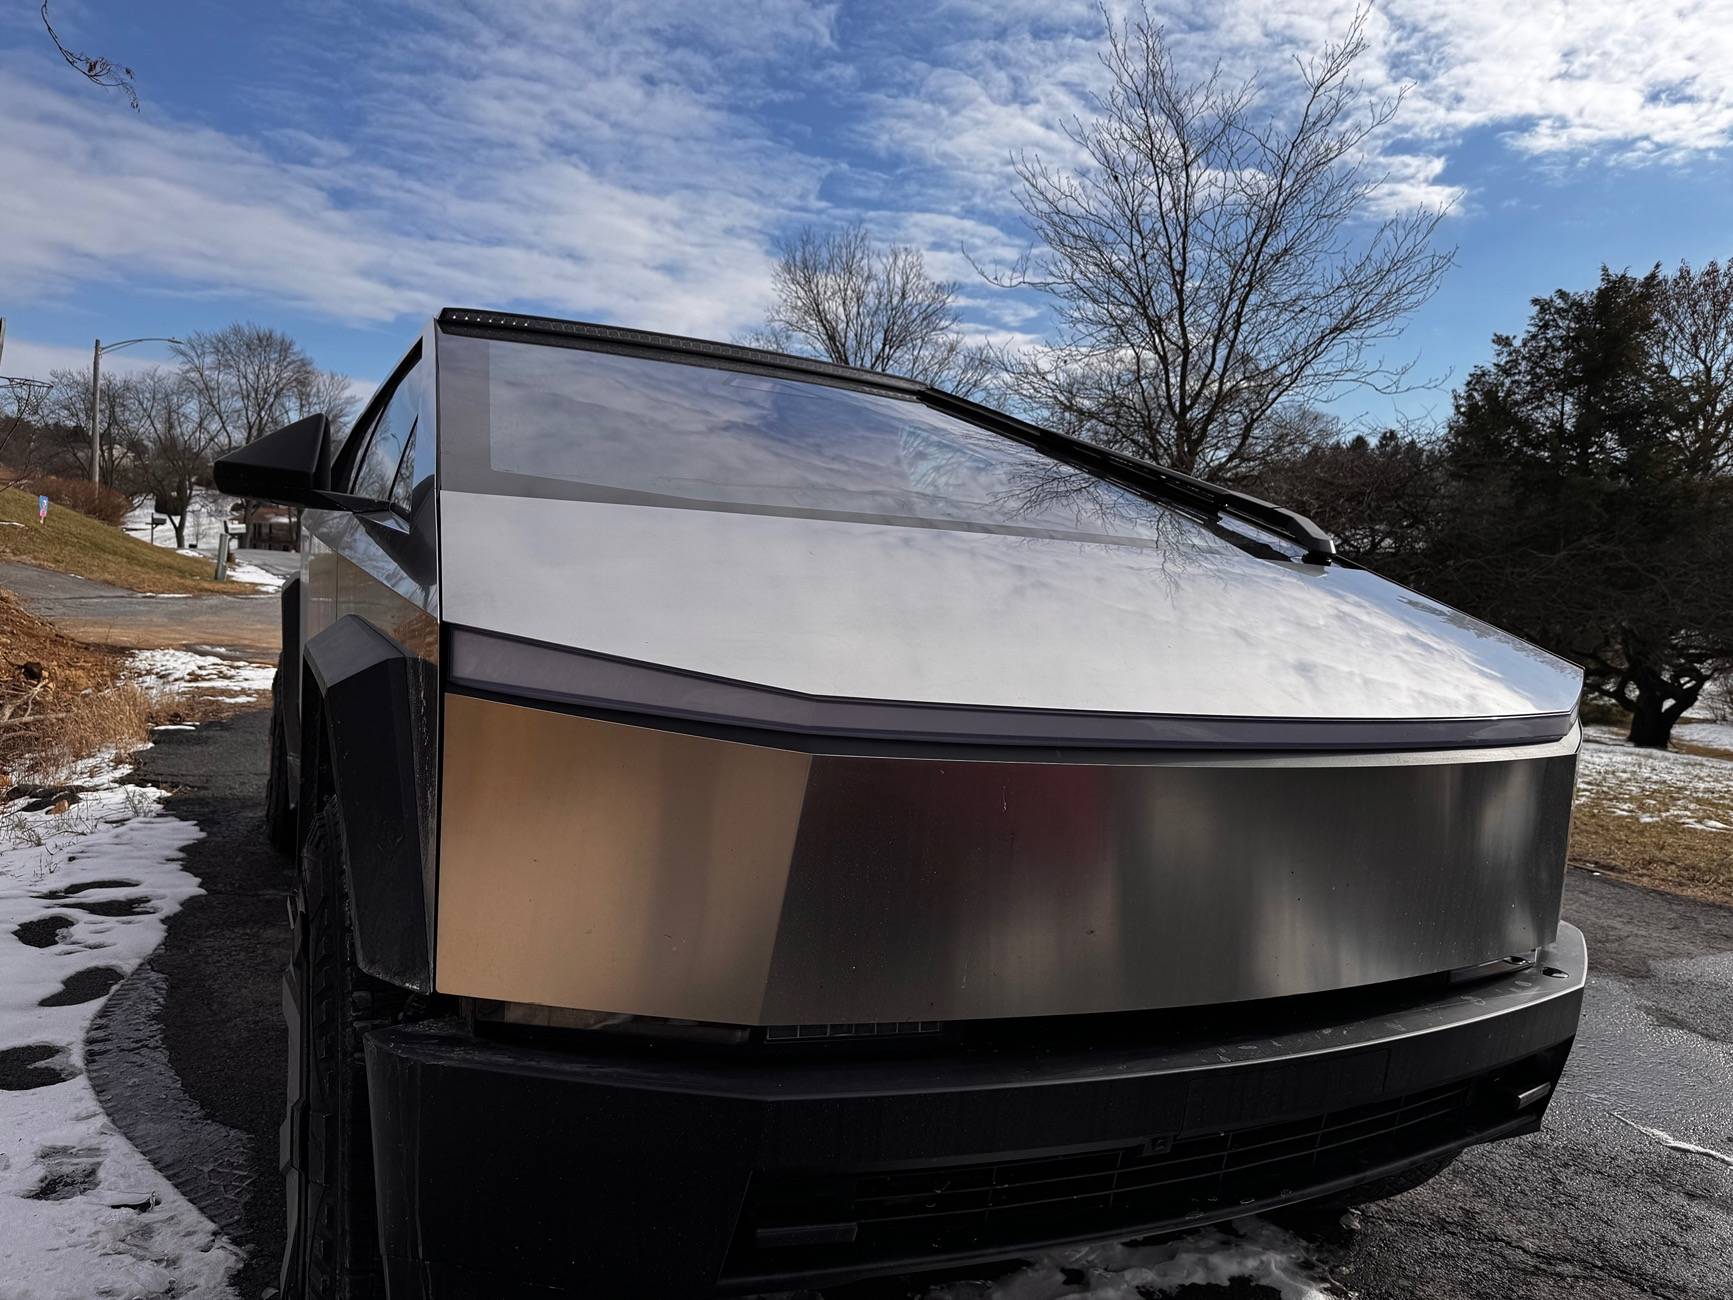
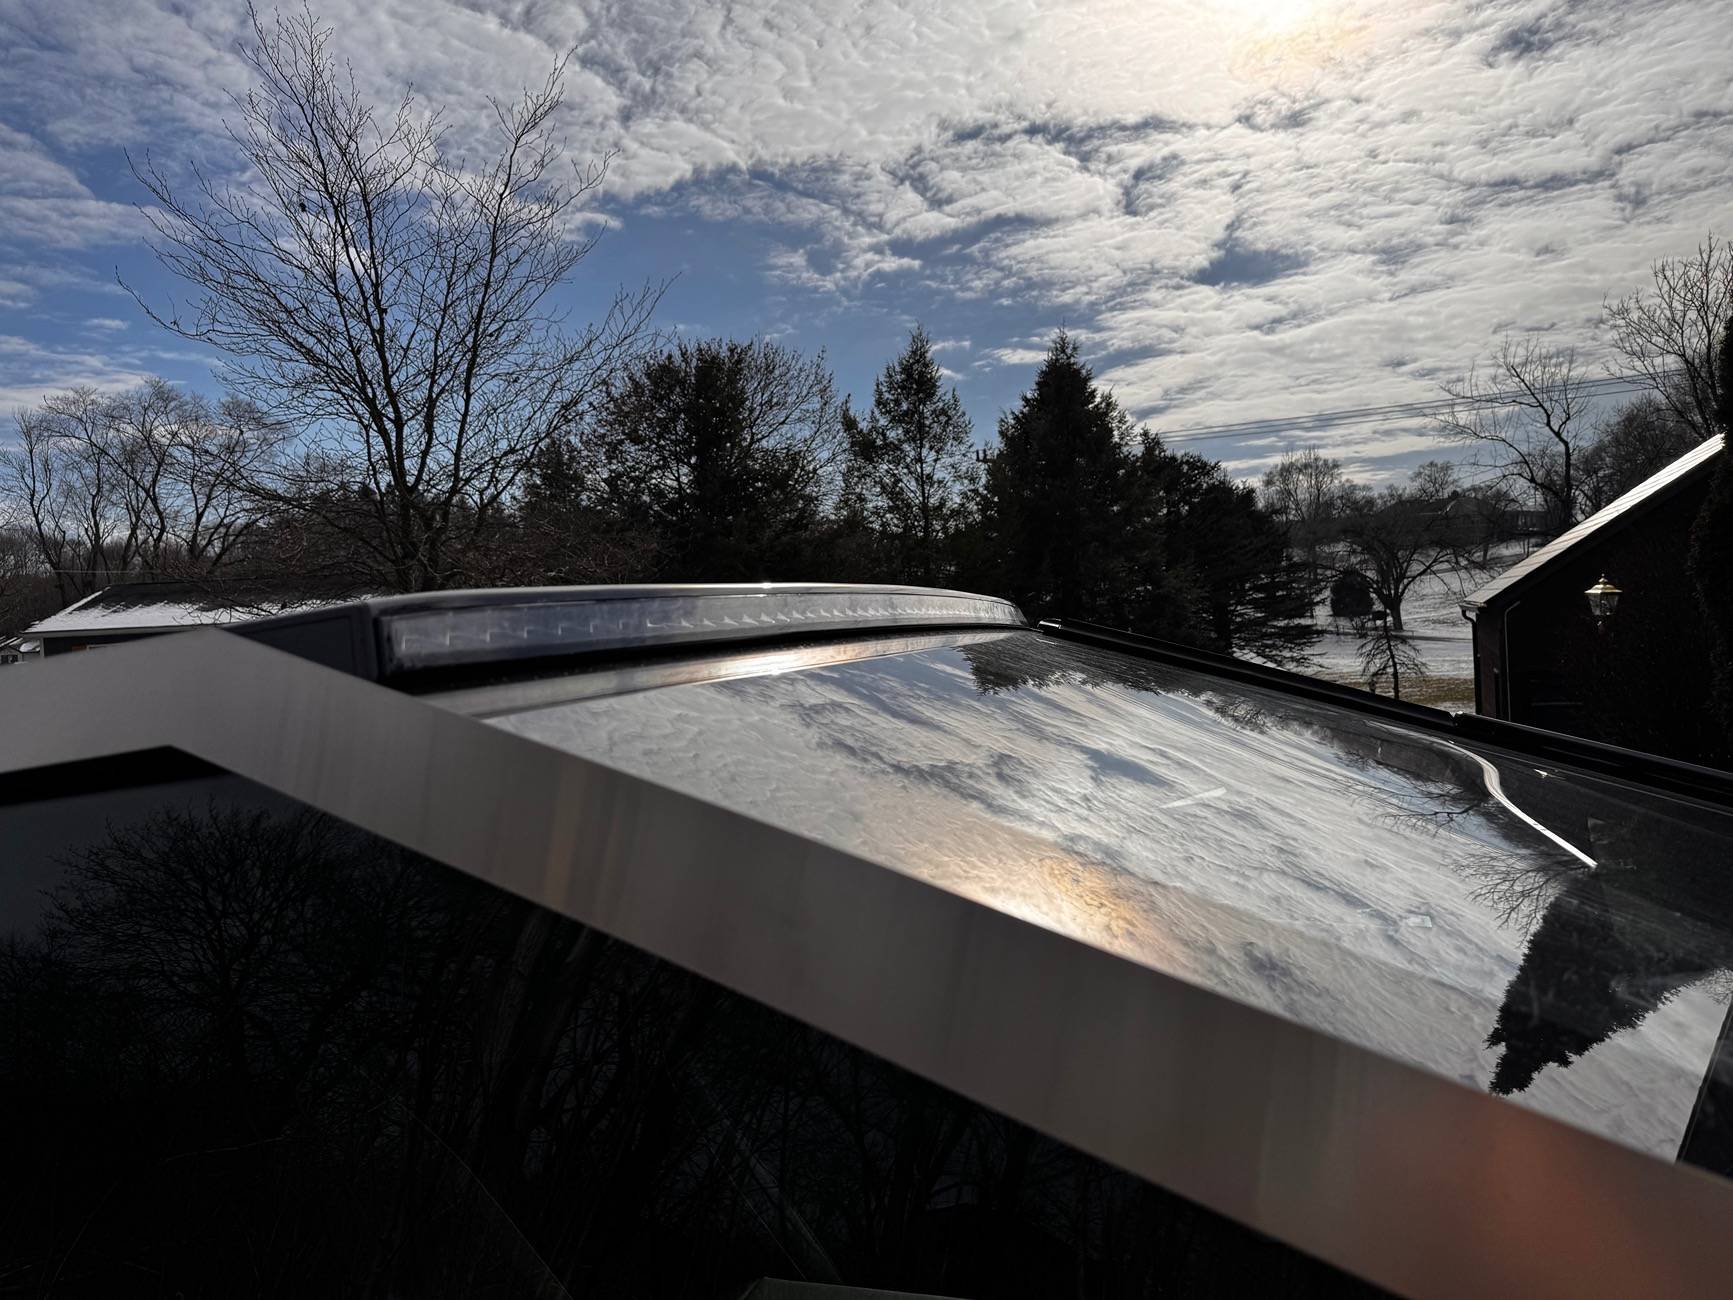
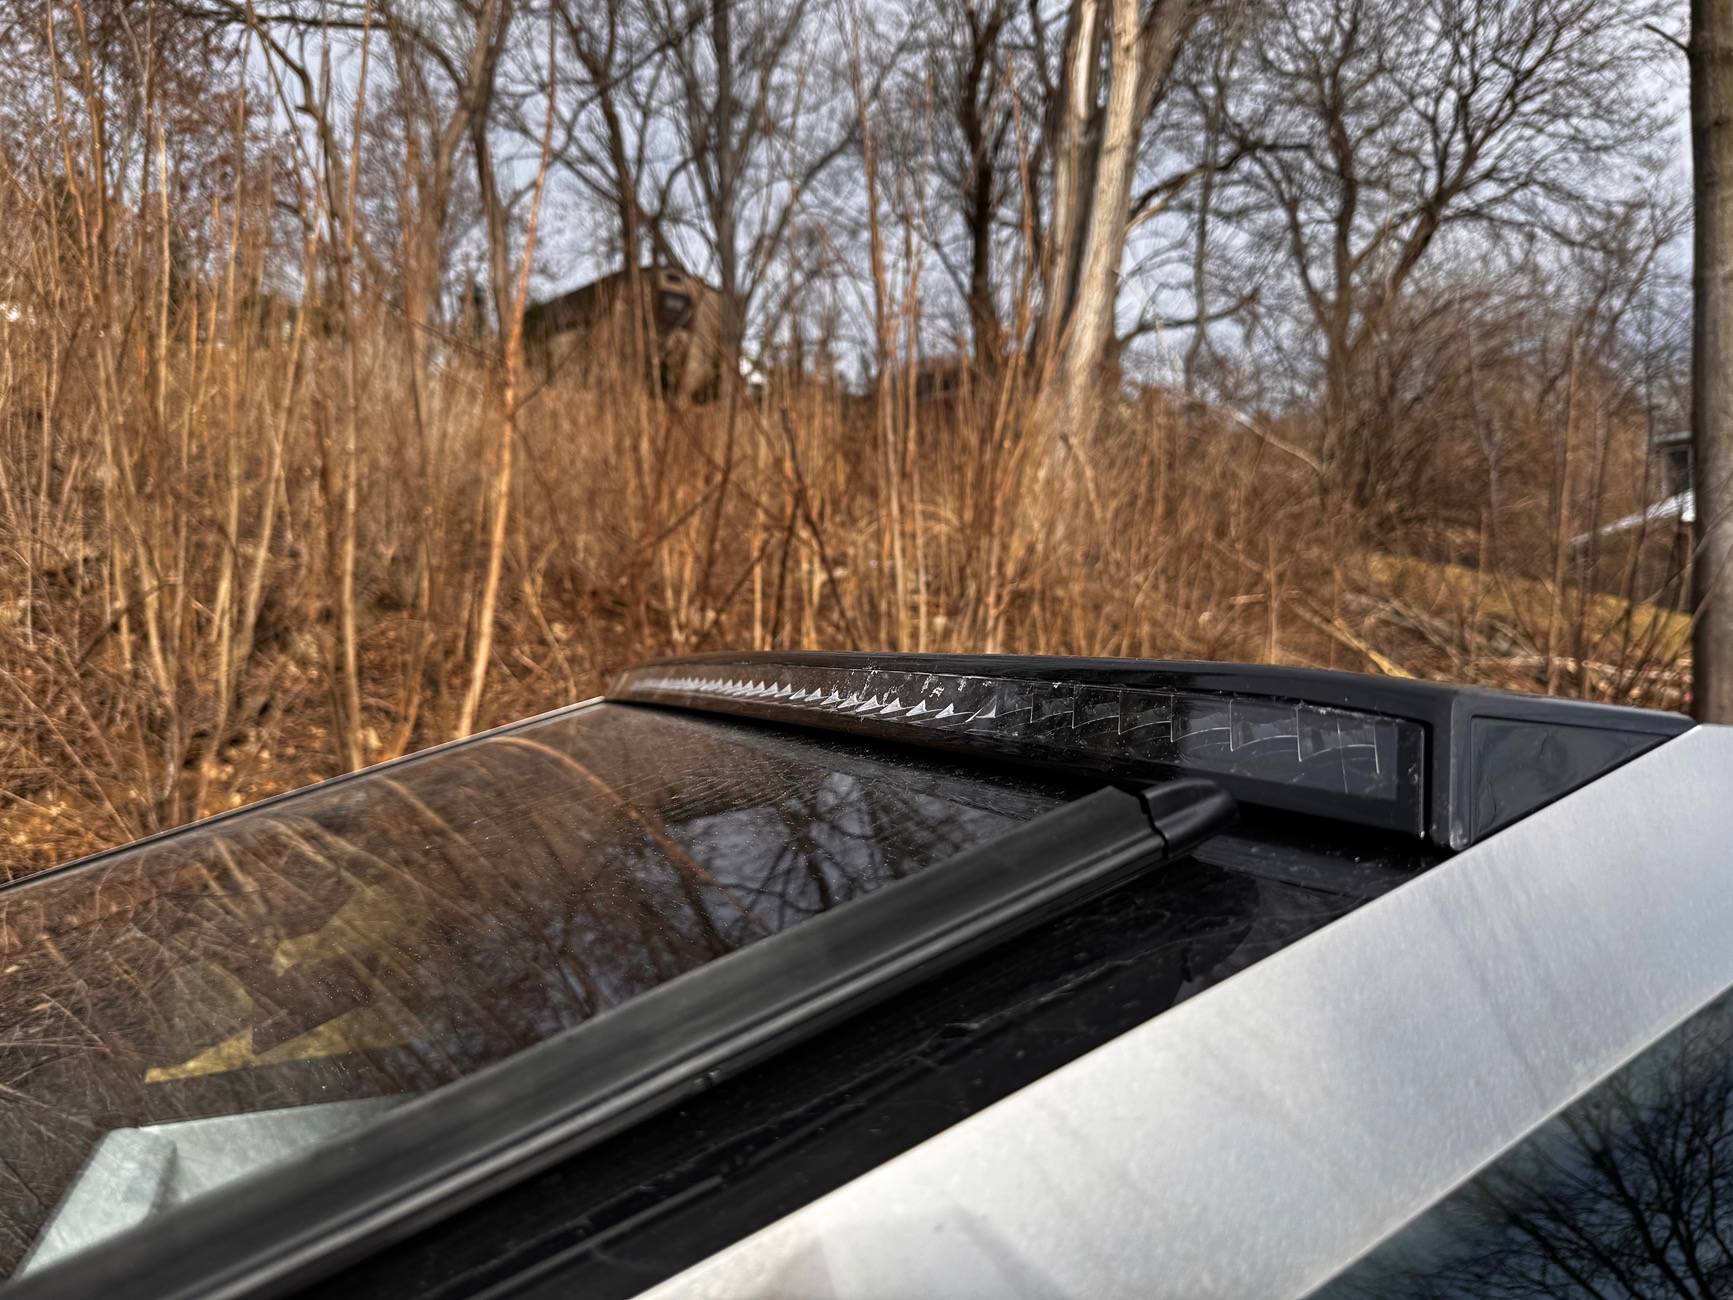
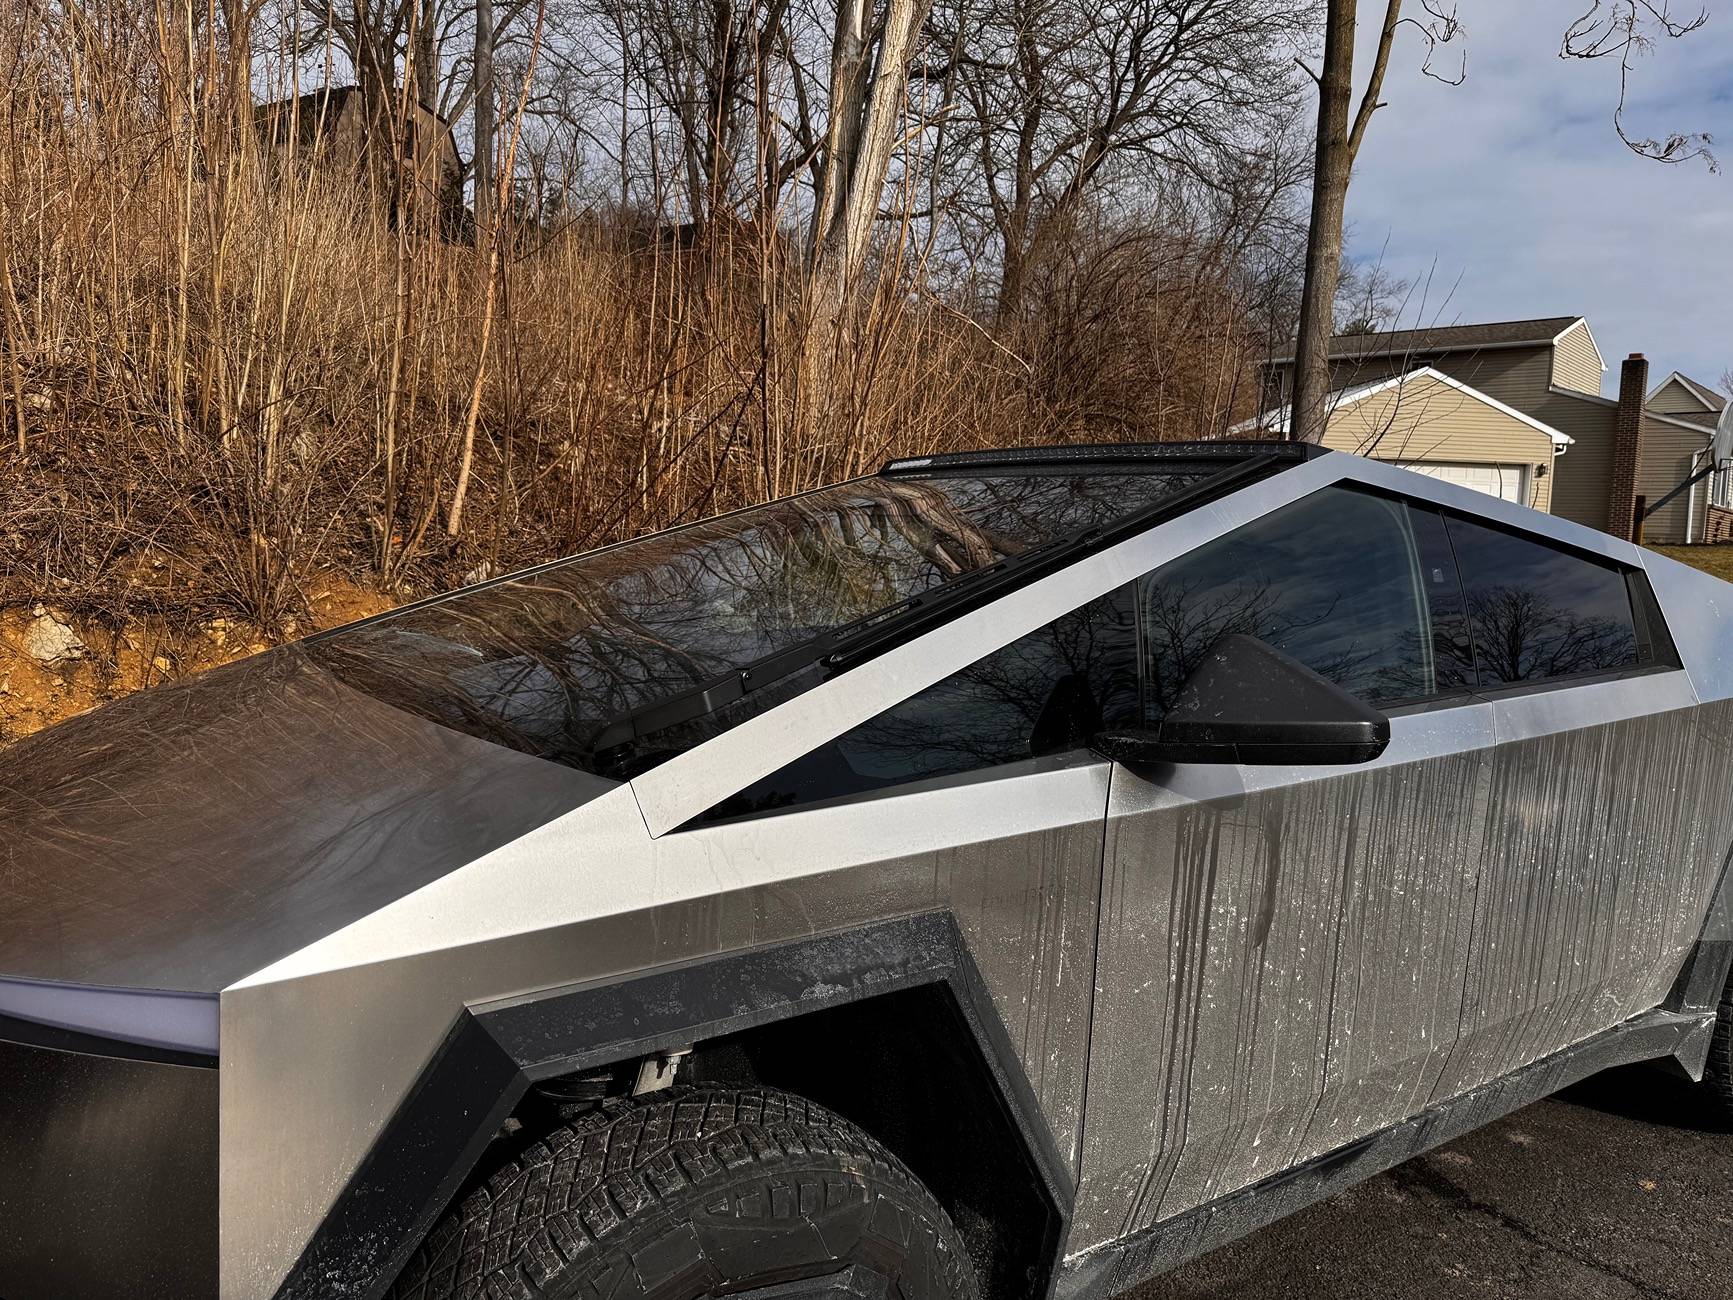
I reassembled the cover and removed the tape from the lightbar and enabled the roof outlets in the gui, mine is now fully functioning for off-roading only in PA.
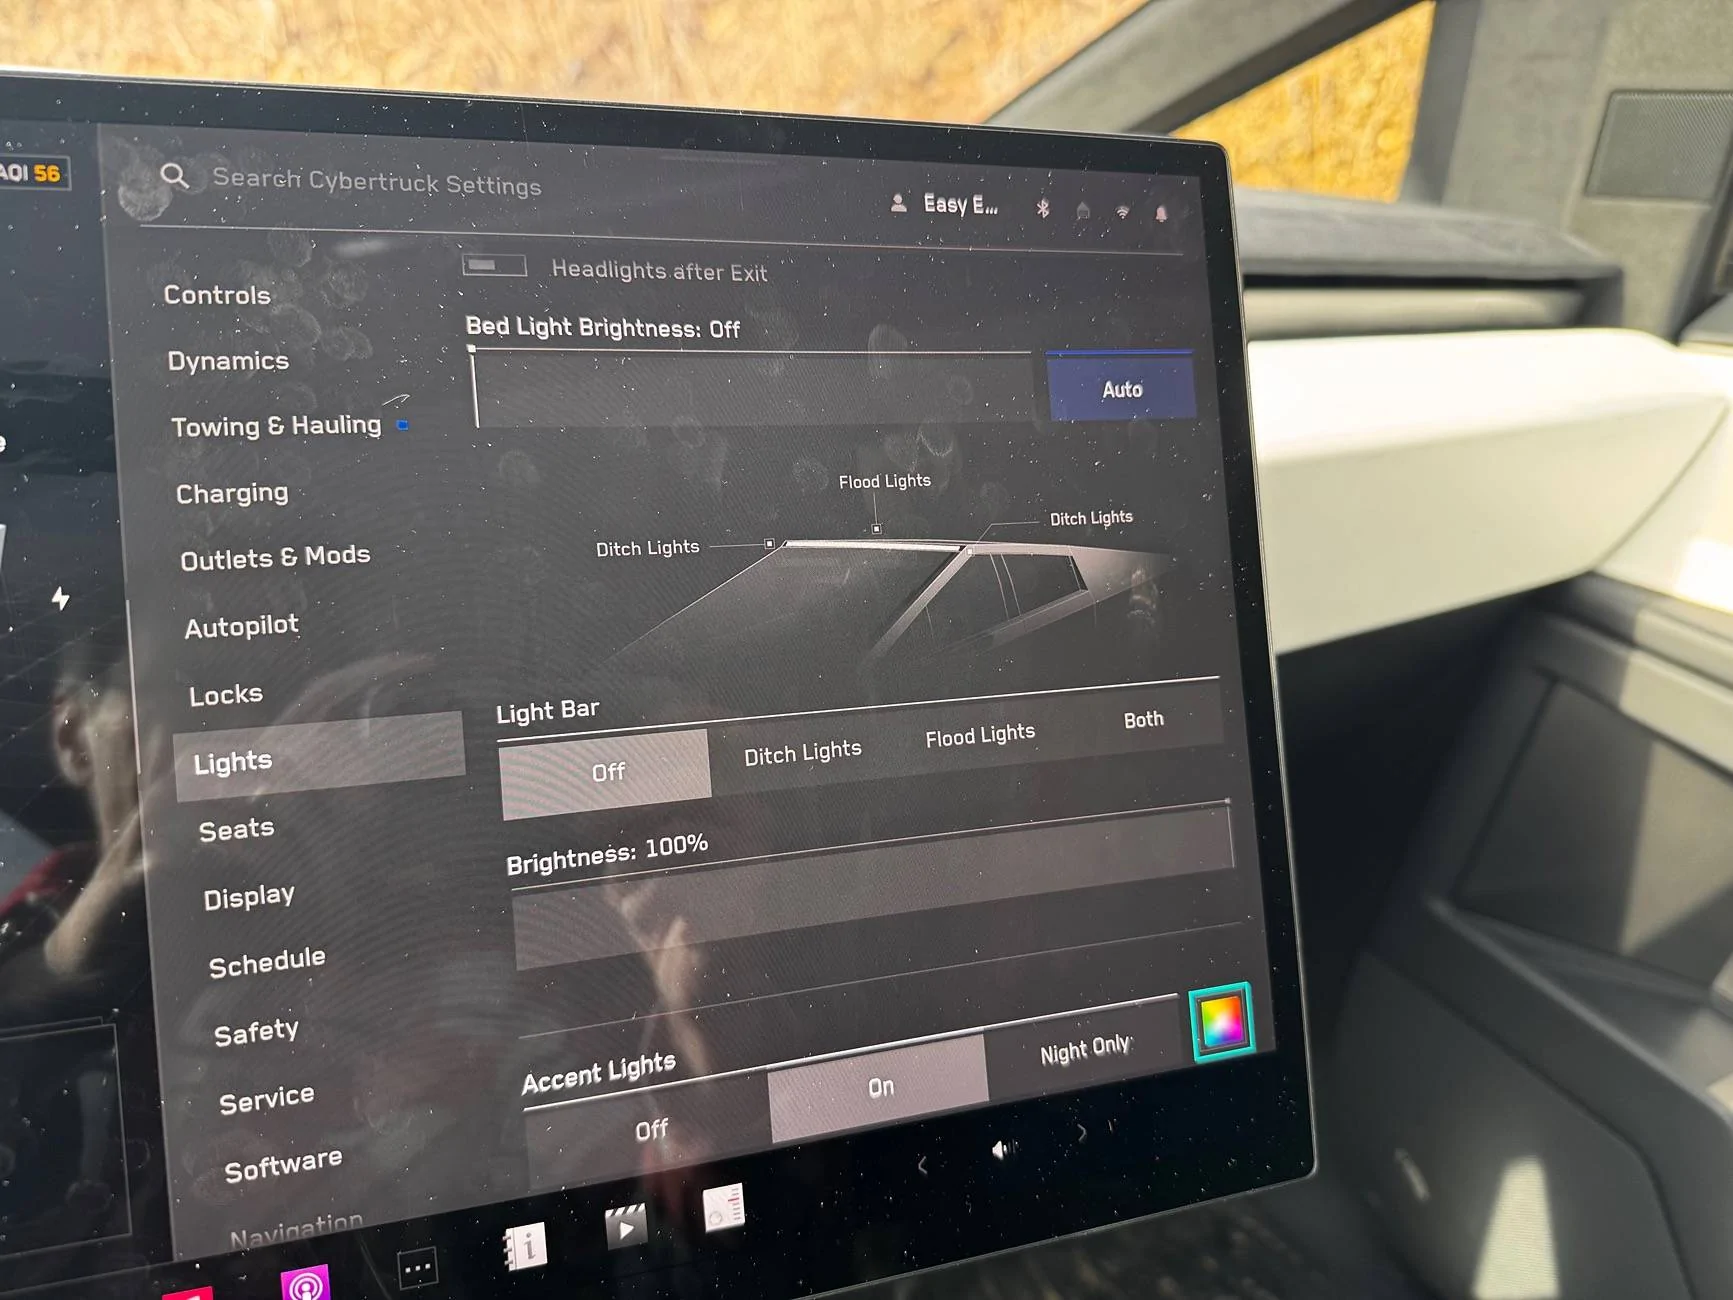
I have used it in my driveway for snow removal and also off road on a back logging road just to test the ditch lights etc, which can all be individually set as Off - Ditch Lights - Flood Lights - Both as All on or just flood under the light settings in the menu.
There is no current shortcut using scroll wheel or otherwise, other than the menu selection in menu as well as brightness levels.
EDIT: I tried posting this afternoon and photos would not attach.. had to wait until this evening and now voila it all the sudden works. SO Random

The service guys there are top notch and polite as ever.
When I set my appointment for the lightbar Installation (the first one they had ever done at this location) it was prior stated and shown in many YouTube videos and service documentation that the soldering within the roof glass area was done by the customer as a final installation step in order to “activate” the lightbar for operation. This was done by passing the heat shrink tubes and zip ties etc as part of a customer kit to the customer to solder & finalize this step at a later time.
However as the OP stated and as in my case as well, there is now a new R2 procedure where the delivery/service center does the soldering in the roof power outlet connection area, this harness also carries down to the RH B pillar location and the service center is to then remove the RH B pillar and disconnect that connector within the b pillar, which thereby disconnects the roof accessory power.
The customer then has to make that connection by plugging the harness behind the RH B pillar once home and also remove the lightbar light blocking security tape.
This also depends on the state it’s being installed in, I am guessing in other states they can actually complete the entire install, but for most others it has to be this way now based on the updated R2 service bulletins.
My guess is also that these procedures were modified as there were probably too many issues with customers not having soldering experience (not my problem as I am an electronics tech with decades of soldering and using heat shrink) and perhaps also not understanding basic electronic harness connections B+ grounds etc.
When I arrived home, I thought I had to perform the B pillar connection and removed the RH B pillar cover with the 10mm bolt only to find it was already connected!
I reassembled the cover and removed the tape from the lightbar and enabled the roof outlets in the gui, mine is now fully functioning for off-roading only in PA.
I have used it in my driveway for snow removal and also off road on a back logging road just to test the ditch lights etc, which can all be individually set as Off - Ditch Lights - Flood Lights - Both as All on or just flood under the light settings in the menu.
There is no current shortcut using scroll wheel or otherwise, other than the menu selection in menu as well as brightness levels.
EDIT: I tried posting this afternoon and photos would not attach.. had to wait until this evening and now voila it all the sudden works. SO Random
Sponsored