igoreka
Active member
- First Name
- Igor
- Joined
- Jun 7, 2020
- Threads
- 2
- Messages
- 42
- Reaction score
- 127
- Location
- Colorado
- Vehicles
- Model 3
- Thread starter
- #1
For me, My Q has not been working for many reasons, WI-FI wasn't strong, I tried extenders, Truck would loose GPS signal in the garage and so it wouldn't Auto-close and MyQ would have server issues, it was a never ending problem. So I always carried a garage door opener with me. Finally, I decided to do something small and discrete to open/close the garage door. And I thought the best place to locate a button would be on the overhead PRND console. I wanted it to look as small as possible. Heck it just needs to be a tiny button. So amazon has this little remote for $15. and of all remotes it has the smallest chip footprint.
https://www.amazon.com/dp/B0F1N3P9KQ?ref=ppx_yo2ov_dt_b_fed_asin_title&th=1

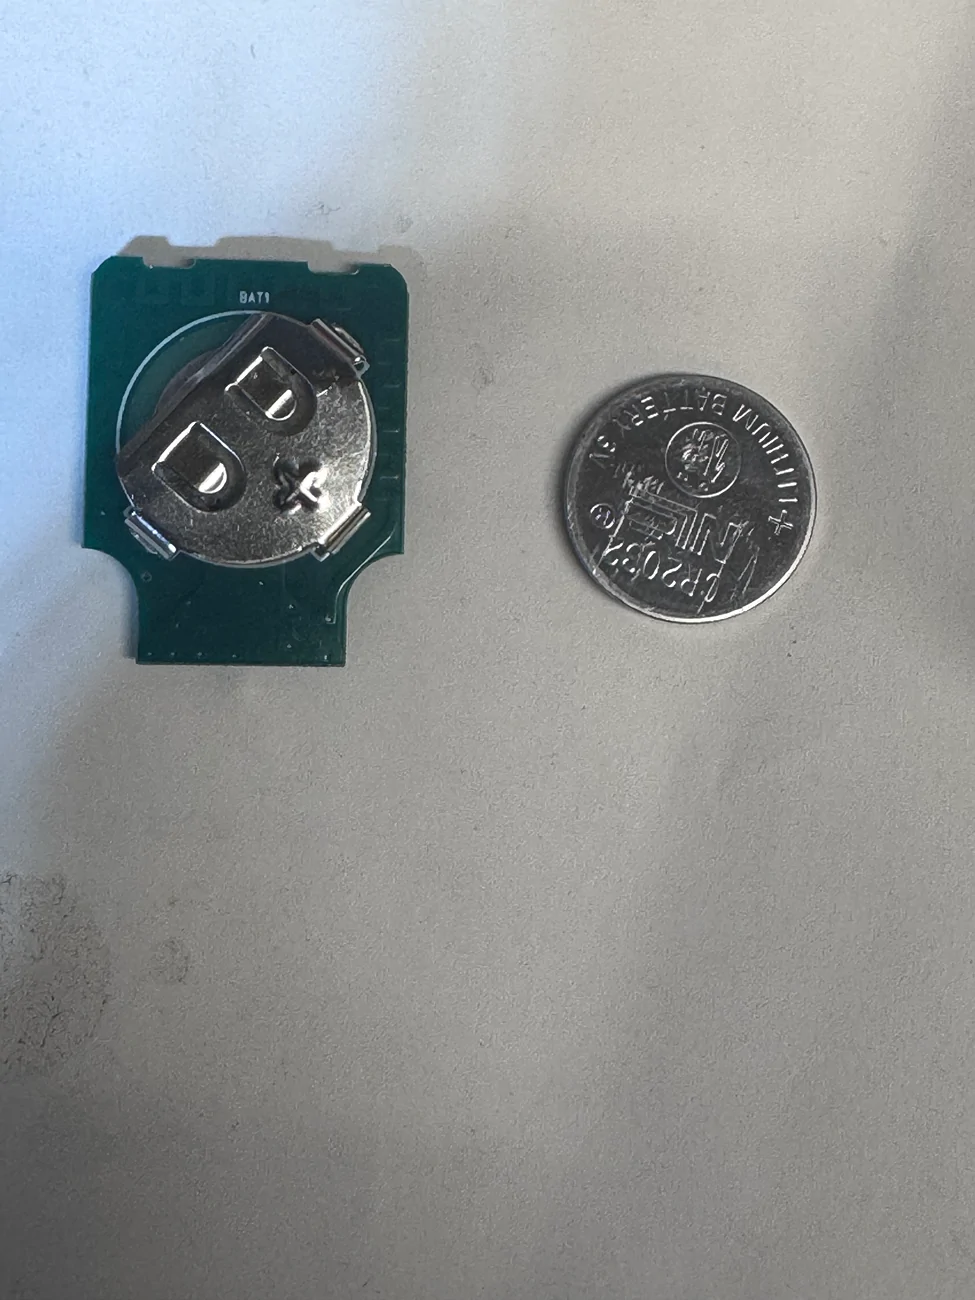
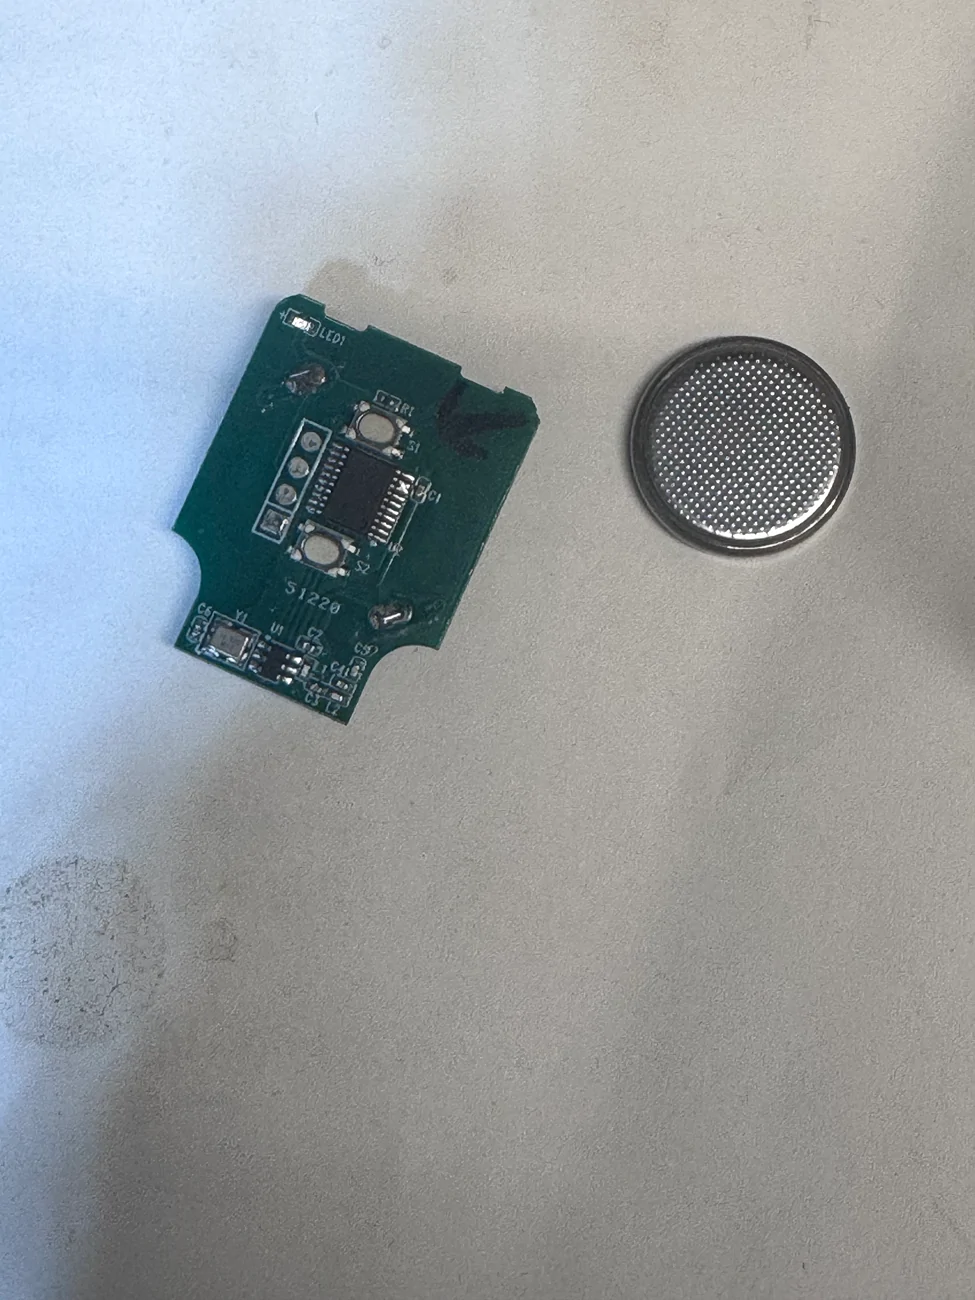
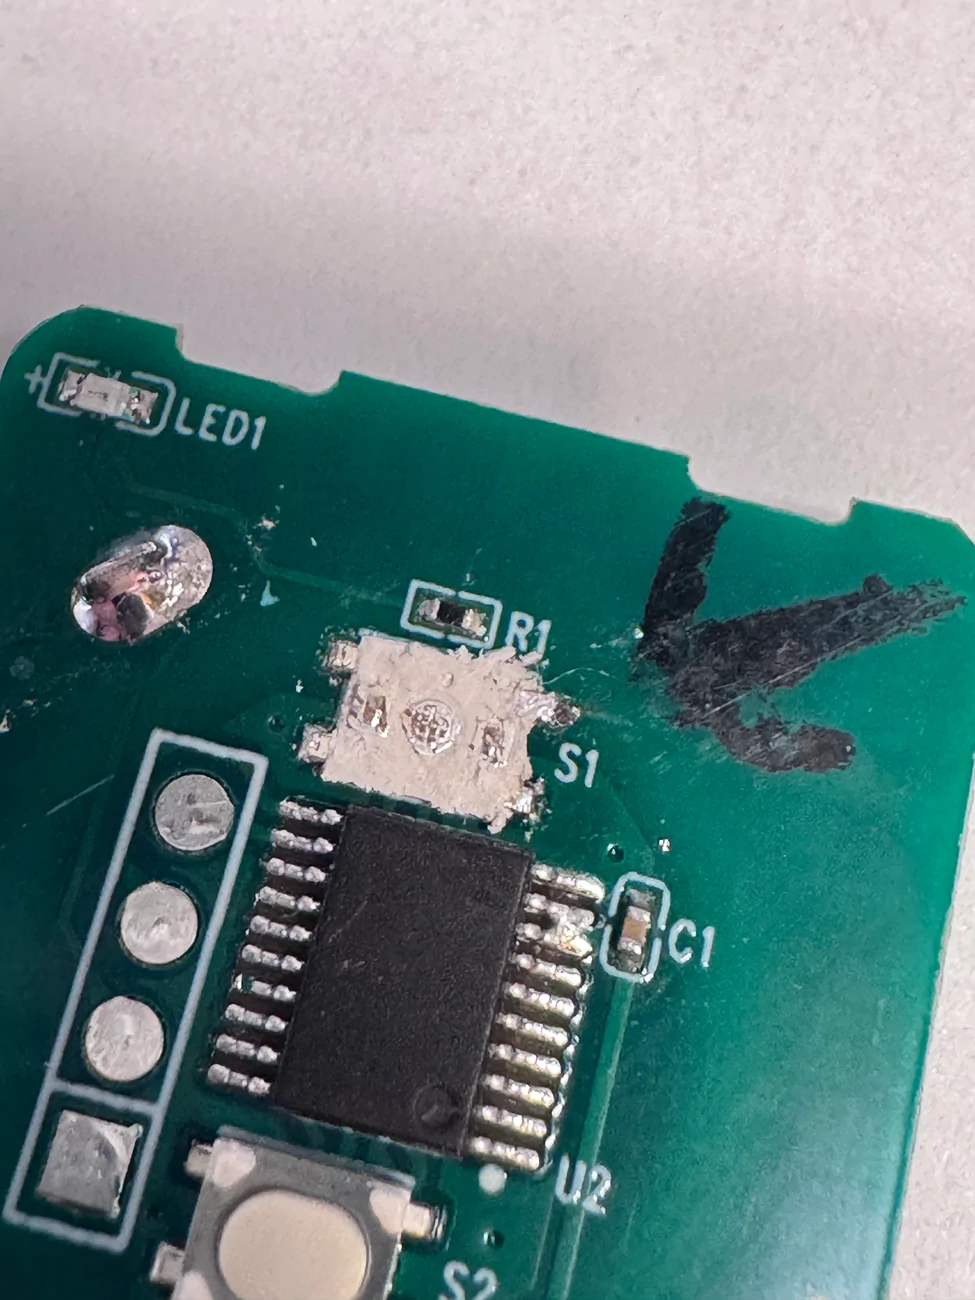
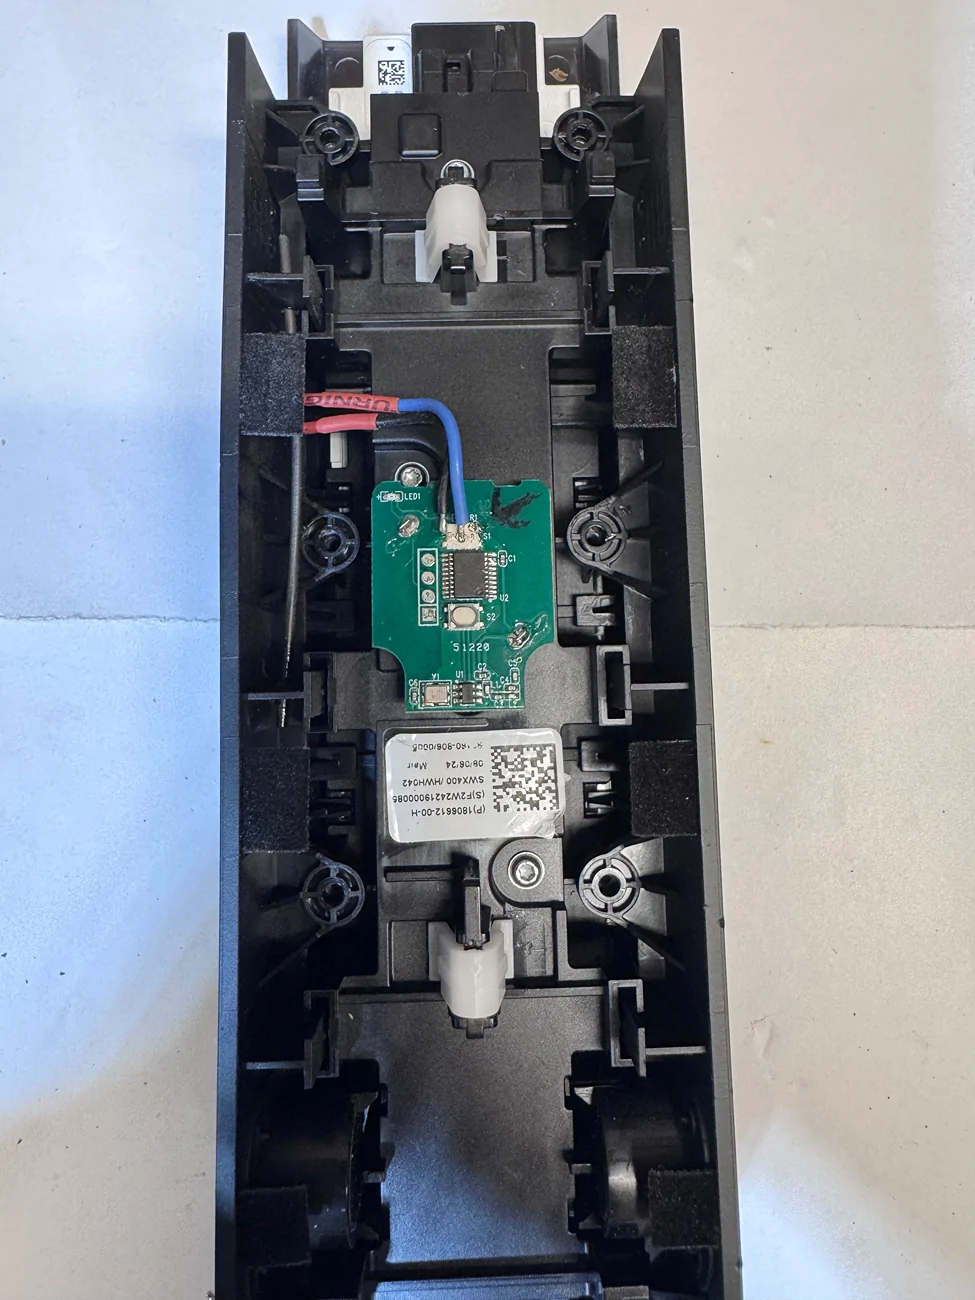
Here is what it looks like on the inside. This remote has two buttons, I only used one, but if you need a second for the gate or something - it can do that.

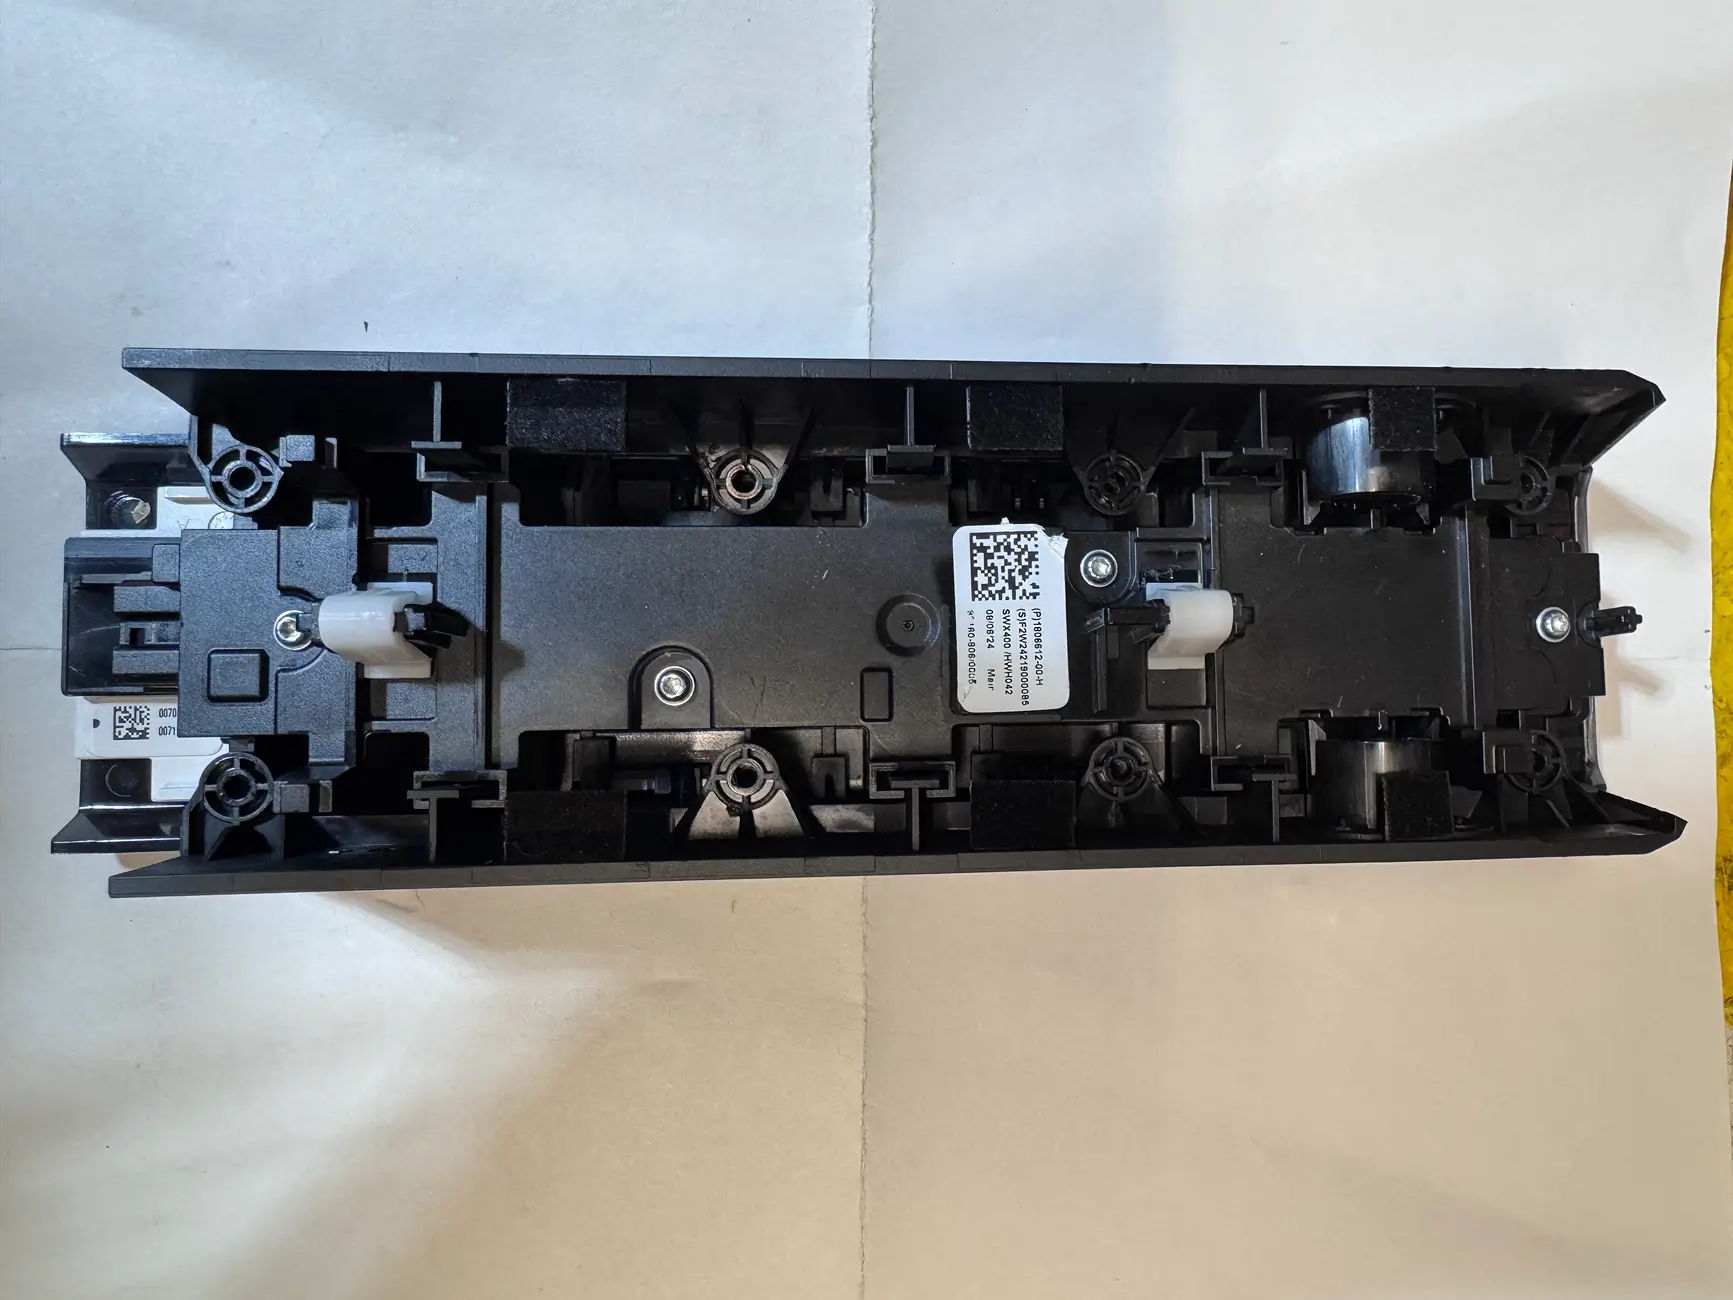
Her are the pics of the other side of the PRND console, the side screws are removed. to allow the side plastics to slide in and out, that helped me get an idea of where to place the chip.

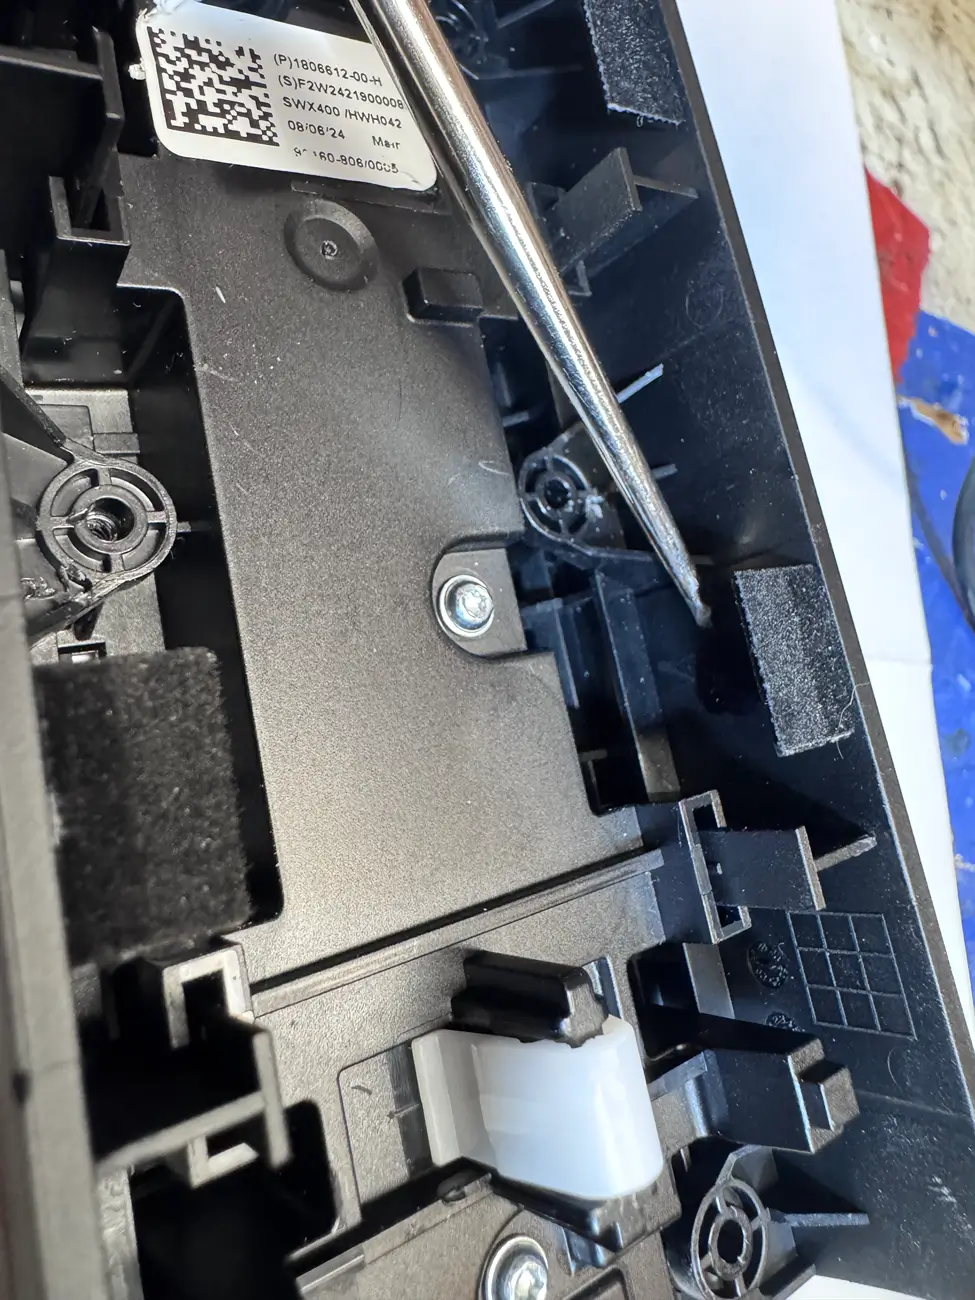
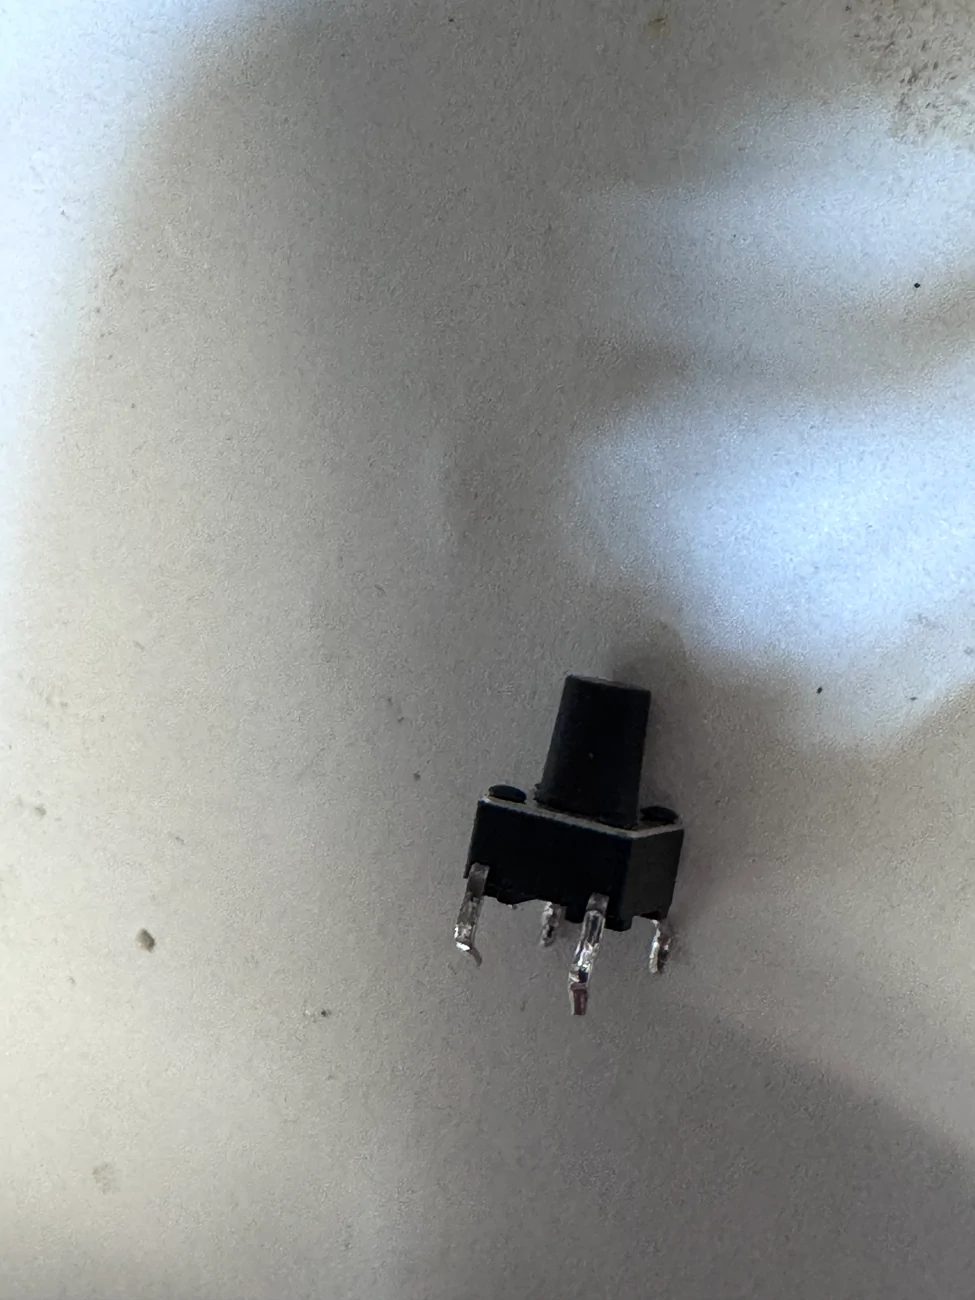
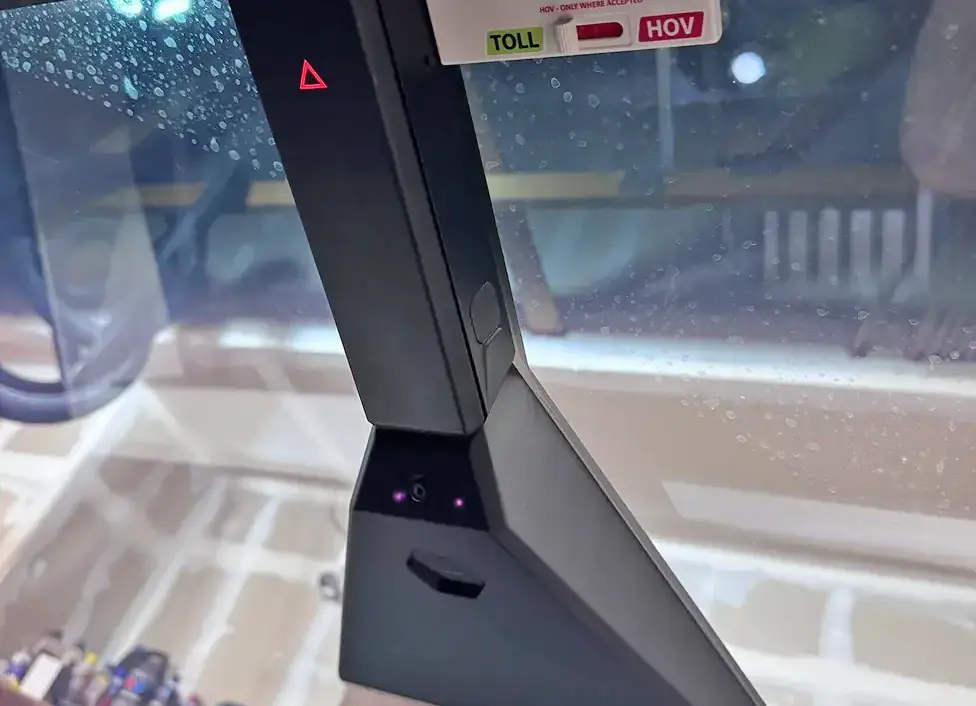
Right there is where I wanted to place the button. And here is the pic of the button. This button has a long push button thingy, long enough to pass through the plastic and protrude a few millimeters.
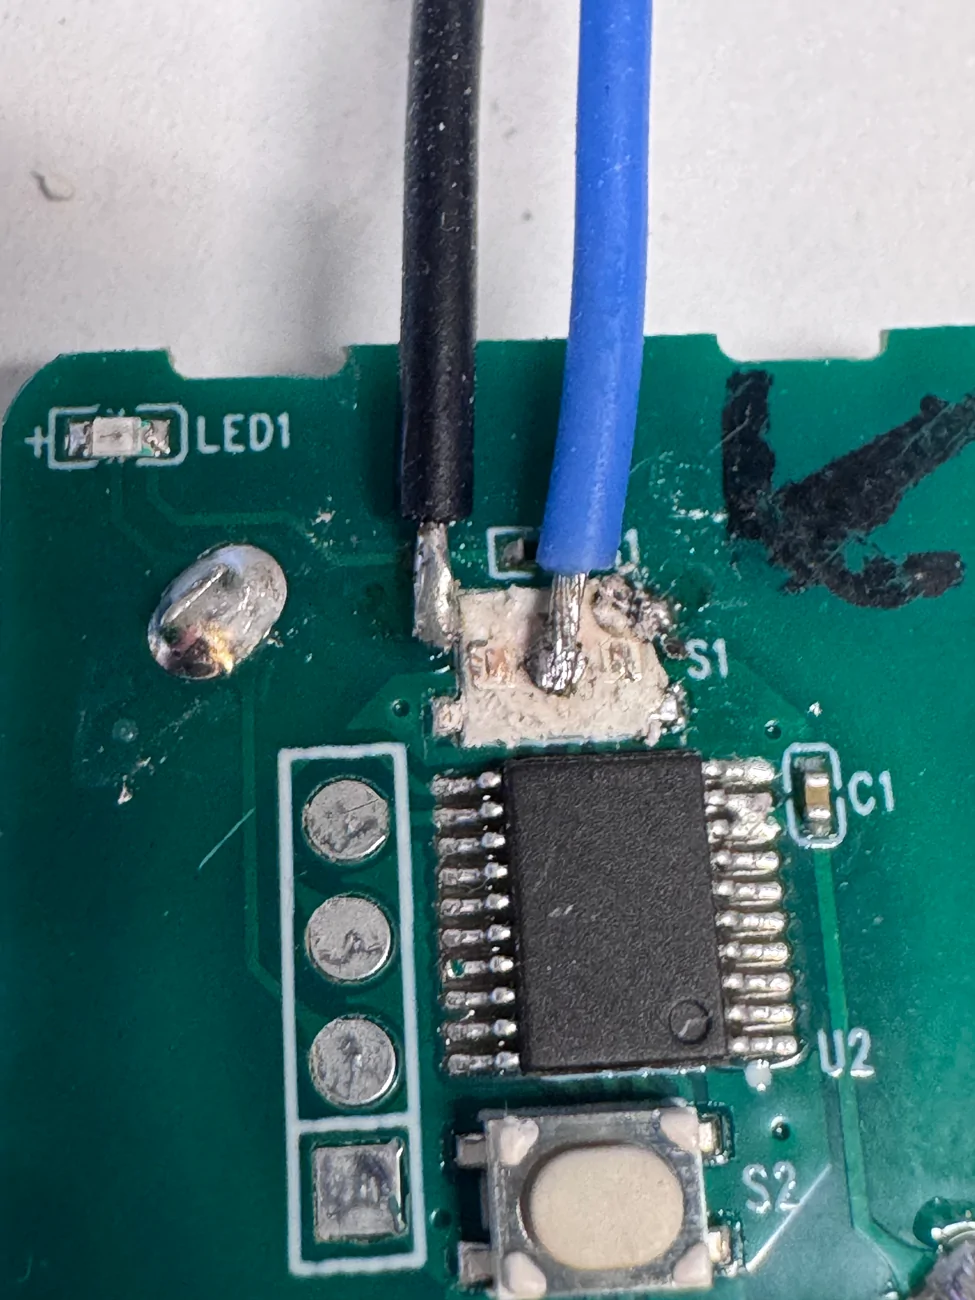
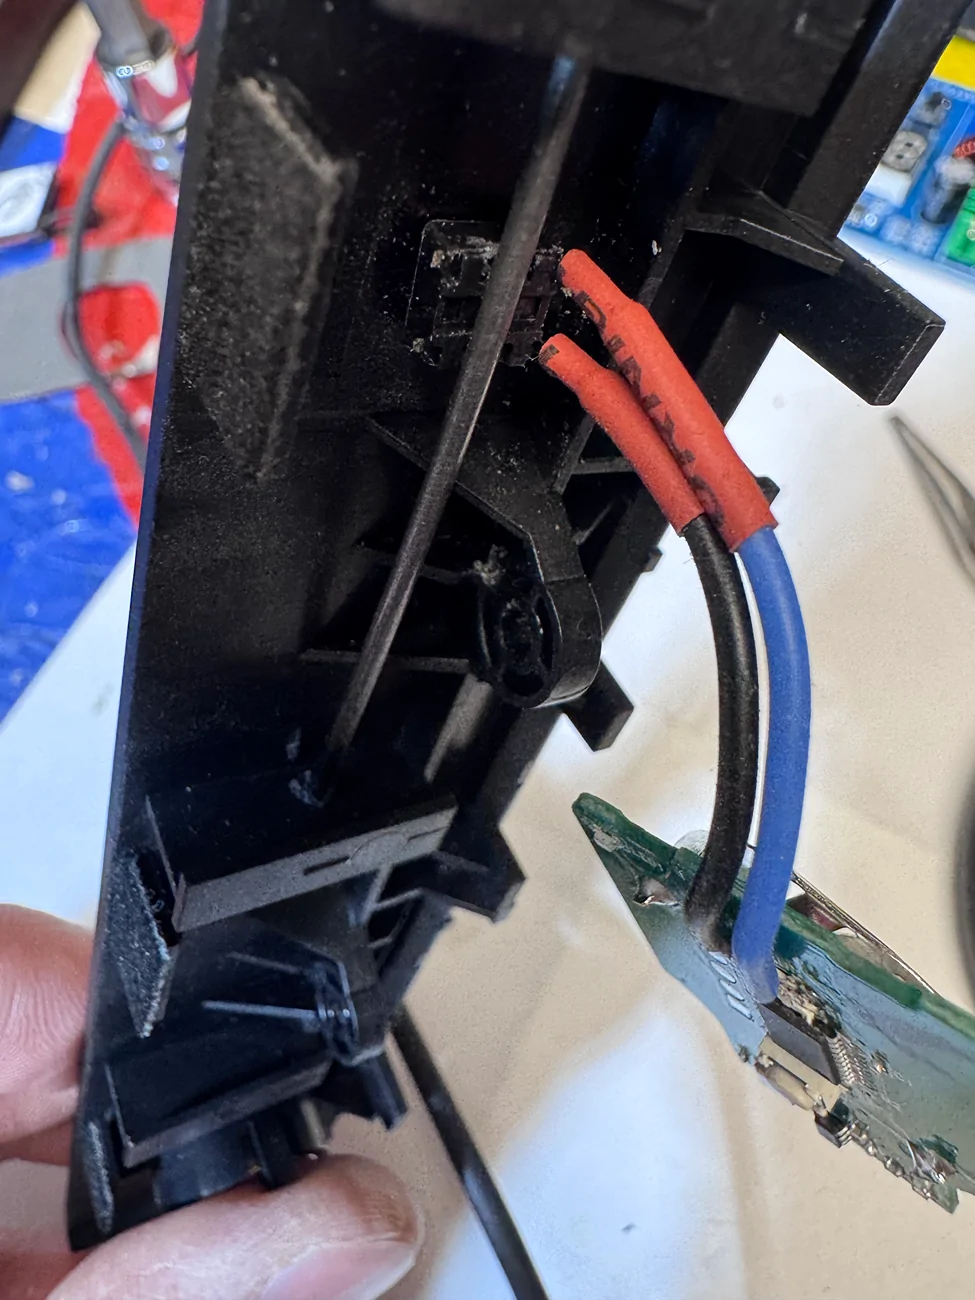
After destroying the OG push button, I have attached a couple of wires. It may not look pretty but it works and nothing is shorting and it is solid.
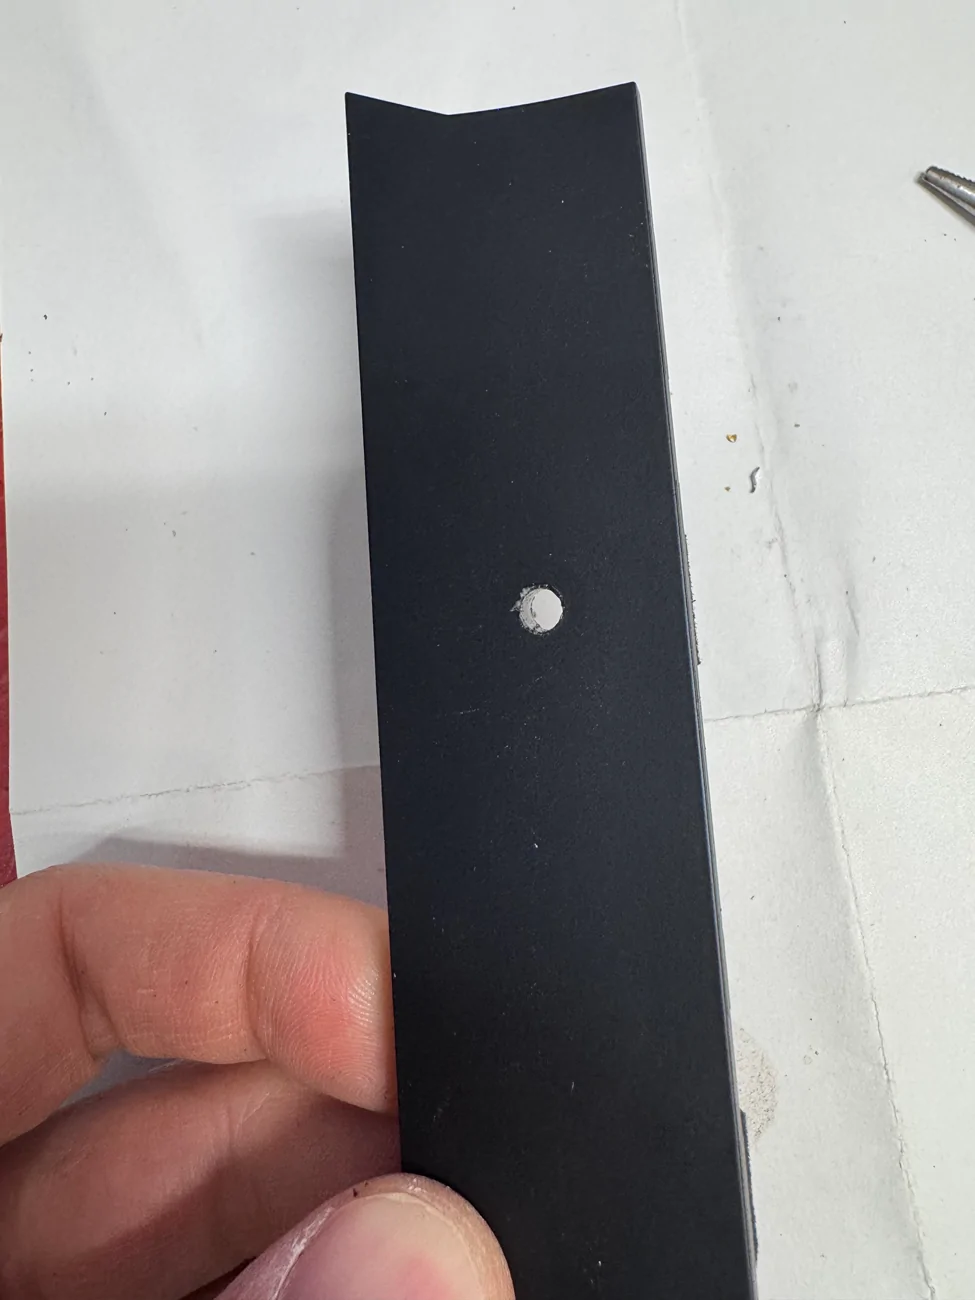
Obviously you need a hole. It's not that easy to make a super clean hole, but that’s my best. I think the hard part here is fixating the push button. I used a metal rod to press it against the plastic. It was heated and just pushed through the plastic. It's solid and does not move.
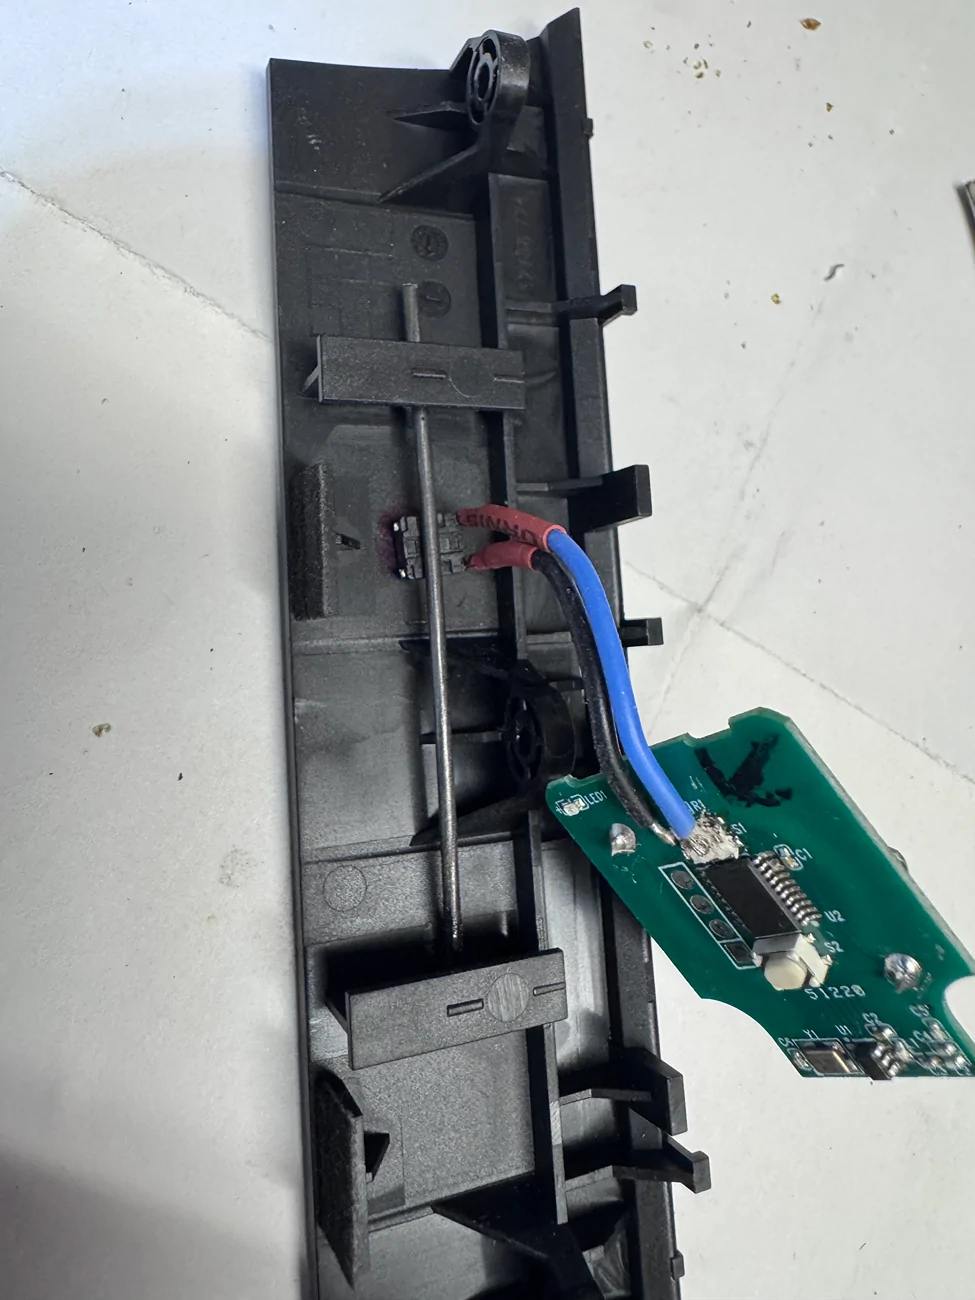
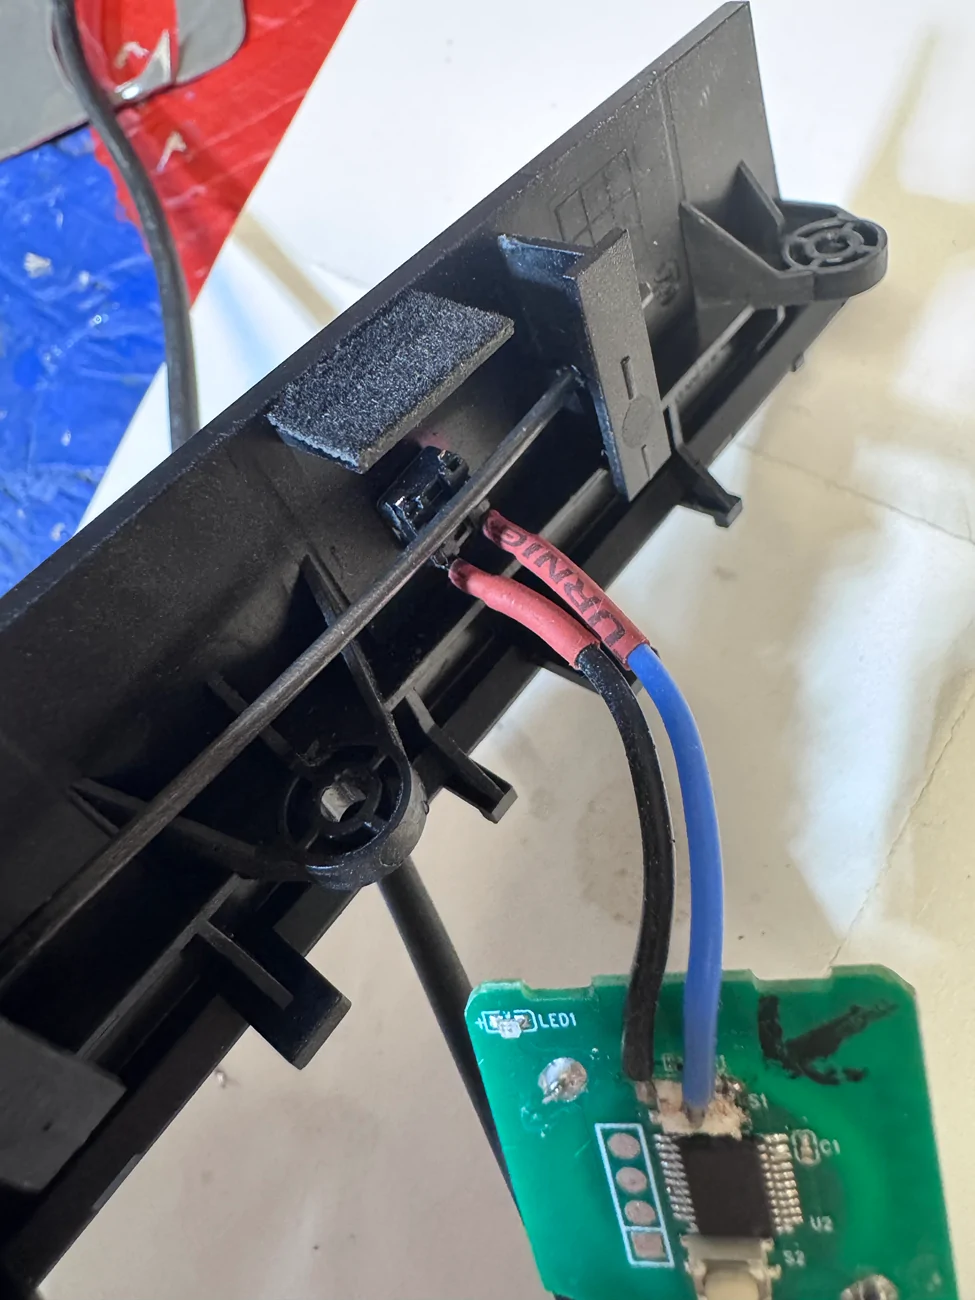
Double sided tape to glue the chip and put the rest back together. The position is also important, that’s the only spot it will clear.
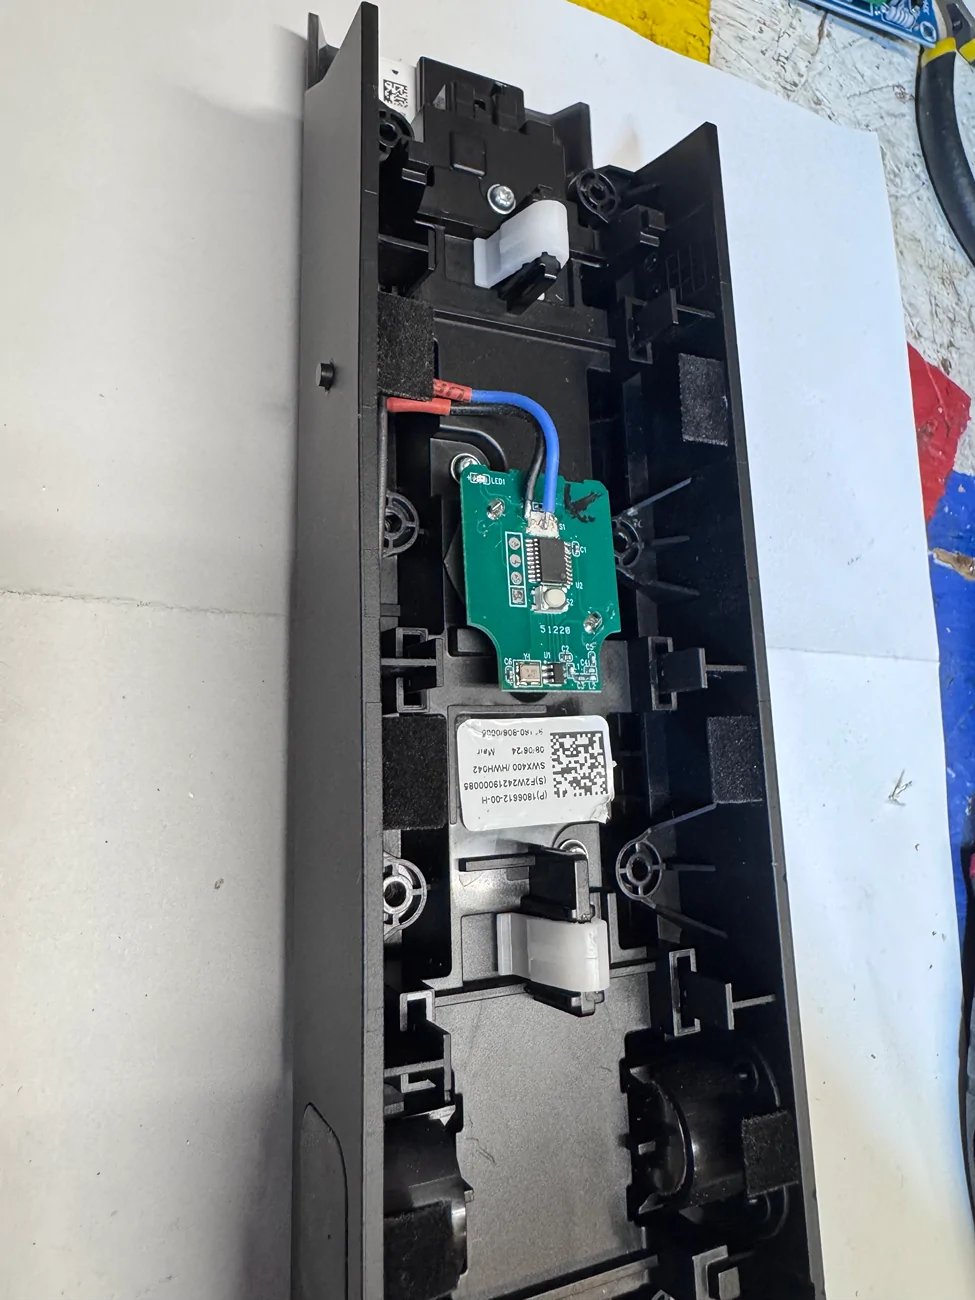
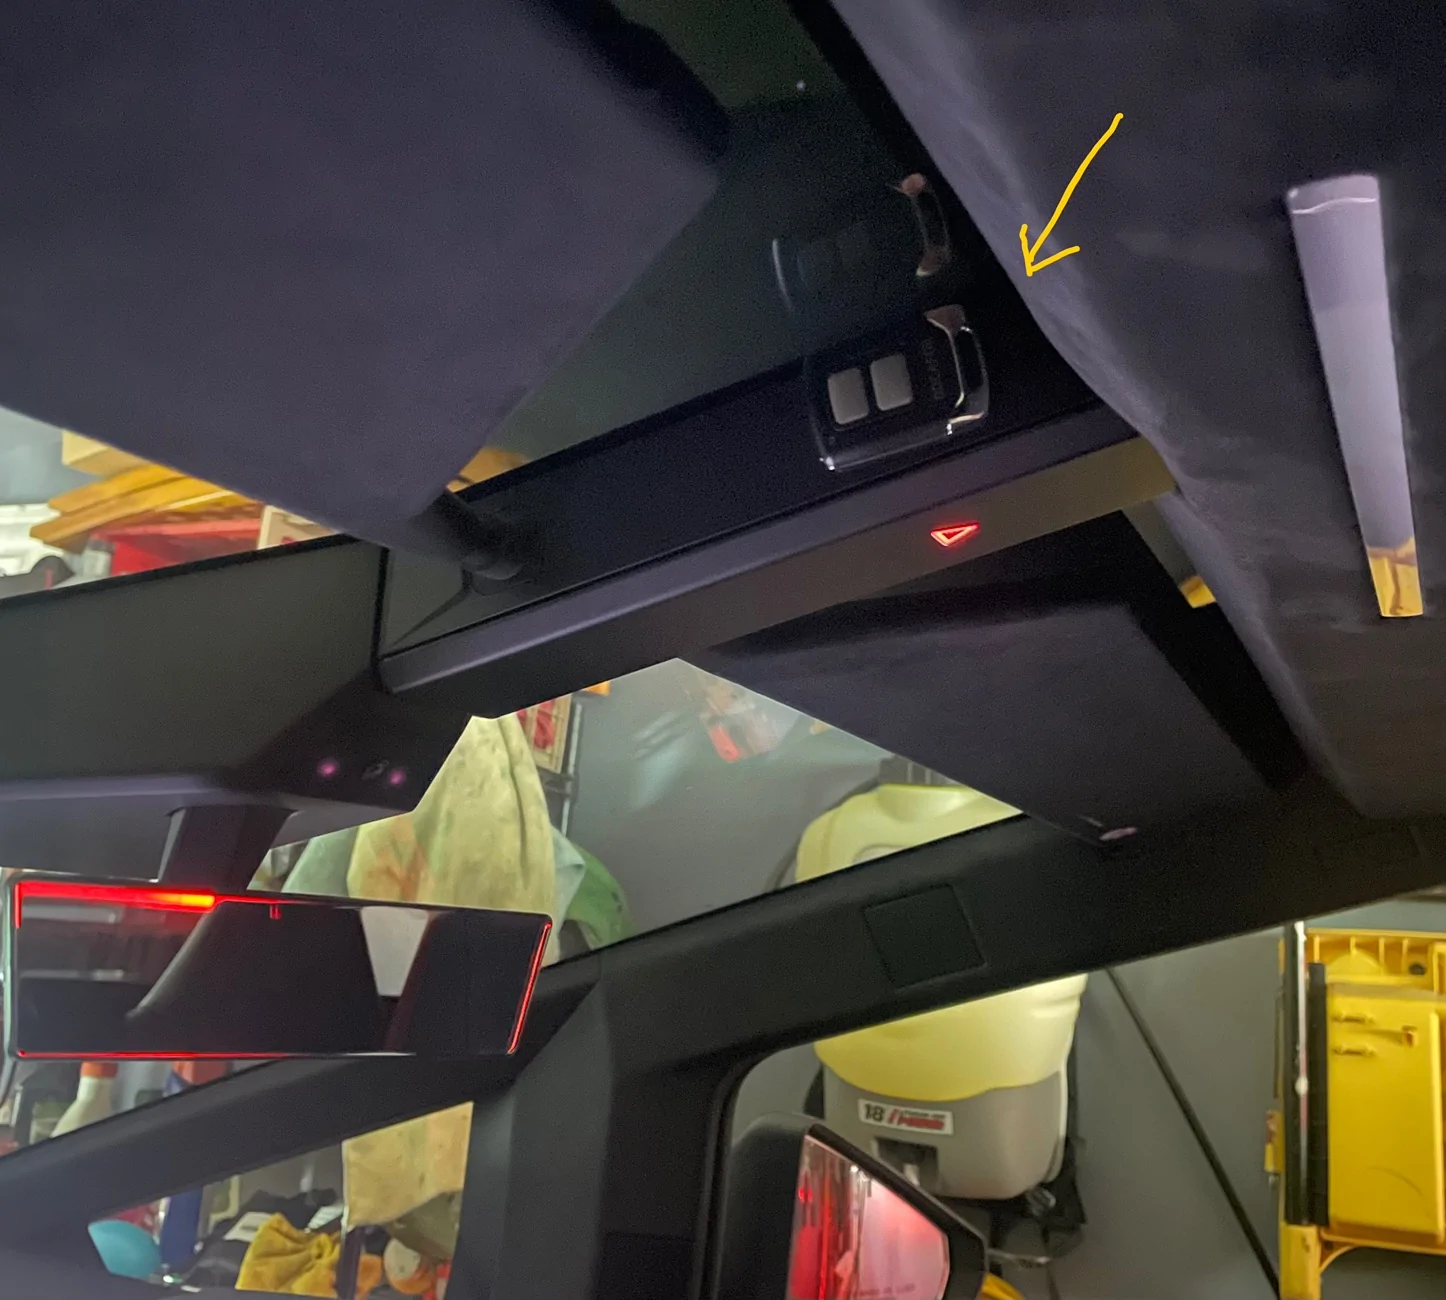
This is what it looks like in the car. I did have to remove a couple of tabs that hold the console but it is still sturdy. You can barely see it, fully functional.

https://www.amazon.com/dp/B0F1N3P9KQ?ref=ppx_yo2ov_dt_b_fed_asin_title&th=1

Here is what it looks like on the inside. This remote has two buttons, I only used one, but if you need a second for the gate or something - it can do that.
Her are the pics of the other side of the PRND console, the side screws are removed. to allow the side plastics to slide in and out, that helped me get an idea of where to place the chip.
Right there is where I wanted to place the button. And here is the pic of the button. This button has a long push button thingy, long enough to pass through the plastic and protrude a few millimeters.
After destroying the OG push button, I have attached a couple of wires. It may not look pretty but it works and nothing is shorting and it is solid.

Obviously you need a hole. It's not that easy to make a super clean hole, but that’s my best. I think the hard part here is fixating the push button. I used a metal rod to press it against the plastic. It was heated and just pushed through the plastic. It's solid and does not move.
Double sided tape to glue the chip and put the rest back together. The position is also important, that’s the only spot it will clear.
This is what it looks like in the car. I did have to remove a couple of tabs that hold the console but it is still sturdy. You can barely see it, fully functional.
Sponsored
Last edited:


")