NorthernVirginiaCT
Member
- Joined
- Mar 7, 2024
- Threads
- 3
- Messages
- 23
- Reaction score
- 59
- Location
- Leesburg, VA
- Vehicles
- 2020 Y Performance & 2022 Y Performance
- Thread starter
- #1
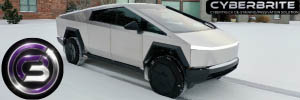
I recently deep-cleaned my Cybertruck, which turned its color from a greyish brown and red into a bright silver, and I also installed ProtectaClear. Since then, my Cybertruck has been virtually immune from fingerprints, and it's also been much easier to clean bugs off the stainless steel panels.
I just posted the video below to YouTube covering the key steps on how to do it.
Detailed Steps
Also, here are some much more detailed instructions on how to do it, much of which I obtained from Coleton's Out of Spec/Clear Detailing video on ProtectaClear
Prepping the Cybertruck: 17:47 (Click here to watch the Out of Spec / Clear Detailing ProtectaClear Video)
1. Wash the Cybertruck (e.g., foam cannon, rinseless wash, etc.), and make sure it is completely dry, including in all the seams and crevices.
It is very important that it is dry.
Keep in mind that even if most of the truck looks dry after washing it, sometimes water can be located in crevises that slowly leaks out over time even if you use a tool to dry it faster.
2. Tape off the plastic and rubber areas of your Cybertruck, as well as your lights, using painter's tape. Take extra care taping off the soft rubber areas around the bottom of your windows where the painter's tape might not stick quite as well. You will use painter's tape twice.
First, put painter's tape before you use Bar Keeper's Friend and Windex, followed by isopropyl alcohol.
Then, remove the painter's tape and add new painter's tape before you apply ProtectaClear. This second application of painter's tape helps avoid a situation where isopropyl alcohol would eat away at the adhesive layer of the painter's tape that could make it less effective.
3. Wear gloves throughout the entire process to avoid leaving fingerprints and to avoid certain chemicals coming into contact with your skin.
Apply Bar Keeper's Friend to a towel you folded twice, and apply it to the steel panel by panel. By folding each towel twice, you will have eight sides to use for each towel. This will remove any tea staining, fingerprints, and impurities to create an even bright silver finish.
Right after you finish the Bar Keeper's Friend for a panel, spray original Windex (with ammonia) on a separate towel, and wipe down the panel. The ammonia in the Windex will neutralize the acid in the Bar Keeper's Friend.
Perfom these steps to each panel (i.e., Bar Keeper's Friend followed by Windex) before you move on to the next step.
Note: Although Everbrite prefers the spray+foam spray bottle version of Bar Keeper's Friend, Out of Spec Detailing/Clear Detailing prefers the soft cleanser compound (bottle) version, which includes microabrasives that could be more powerful at cleaning your cybertruck. [My personal view is that the soft cleanser version seems to do a better job.]
5. Post-Bar Keeper's Friend and Windex Step
If You Bought Everbrite's Cybertruck Kit:
Put Stainless Steel Rust Remover in a metal pan (e.g., aluminum disposable loaf pan), and dip a new towel in it.
Also, put EZ Prep in another pan (mixing 1-2 ounces of EZ Prep per gallon of water).
Apply the Stainless Steel Rust Remover to the entire truck, and as you apply it, within 30-60 seconds go back over each spot with the EZ Prep/water mixture (i.e., wipe it first with the Stainless Steel Rust Remover, and then wipe on top of it with the EZ Prep/water mixture).
If You Didn't Buy Everbrite's Cybertruck Kit:
Spray each panel with CARPRO's IronX Iron Remover. You will see any rust turn purple if there is any present. After about 60 seconds, wipe away the IronX before you move to the next panel. Although IronX works very well, the smell is unpleasant. [Note: I had already performed this step prior to creating the video, but I recommend performing it if you want your Cybertruck to look amazing.]
6. Wipe down each panel with original Windex (with ammonia) to further clean your truck and neutralize the pH, while being careful to avoid getting any on your tinted windows.
7. Wipe the entire truck with 99% isopropyl alcohol to ensure the surface is completely clean, dry, and residue-free before coating. This gives you a more even finish, but the main reason why it's important is that it removes any remaining water to allow the ProtectaClear to properly bond to the metal.
Applying ProtectaClear: 43:50
2. Pour about 4 oz of ProtectaClear into a solvent-safe container like a glass bowl or a metal pan (e.g., aluminum disposable loaf pan). Do not use a plastic pan (unless it is solvent-rated), as the coating will eat through it.
3. Before you use the blue, circular microfiber applicator (https://shop.everbritecoatings.com/index.php?main_page=product_info&cPath=52&products_id=167), hit it against something for 30 seconds to get some of the lint off of it (1:07:53). Dip one of these applicators into the coating. Saturate it, but squeeze out the excess so it is damp but not dripping wet.
4. Application of ProtectaClear
Dip the blue, circular microfiber applicator in the ProtectaClear. Fully submerge the bottom of it so there are no dry spots, but wring it out so there is not too much on it. You don't want it to be dripping wet.
Work on one full panel at a time; quickly apply the coating to the Cybertruck in a thin, even layer using light pressure and long, overlapping strokes.
It's better to put it on too thin than too thick. The rainbowing (i.e., due to too little application) is much easier to fix than it is to fix drips and runs from using too much.
Use only the bottom of the applicator to apply it while avoiding touching the sides of the applicator to your Cybertruck.
Start at the top of the panel and work your way down. When you remove the applicator from a section, go "up and away" (i.e., wipe the applicator to the edge as you remove it) to avoid leaving a circle of bubbles (e.g., by directly pulling it away).
Use long wipes across the entire panel (e.g., all the way from the top left to the top right, then down slightly, then back all the way to the left, etc.).
Use very light pressure as you apply the ProtectaClear.
Use only the bottom of the applicator, and avoid using the sewn side edge of the applicator to apply ProtectaClear.
As you apply ProtectaClear, inspect the coating and quickly smooth out any drips, runs, or missed spots before moving on.
Some slight rainbowing is normal. However, if more than about a minute has passed since you initially applied ProtectaClear to a section, wait for it to dry (at least 30-40 minutes) before you go back and fix it. The warmer it is, the faster the ProtectaClear is going to dry and vice versa.
Although you will likely see streaks after you apply ProtectaClear, it typically levels out as it dries.
You can then use a small rectangular applicator only for the areas that would be hard to reach with the blue, circular microfiber applicator (https://shop.everbritecoatings.com/index.php?main_page=product_info&cPath=52&products_id=167).
As soon as you're done with an applicator, cover it in aluminum. This allows you to re-use it later in the day to perform touch-up if needed without it drying out first.
Right after you apply it, the ProtectaClear coating is 1 millimeter thick. However, after the solvent evaporates and only the polymer resin remains, it is only 3-4 microns thick (i.e., a very thin coating). Do the hood (i.e., the top of the frunk) before you do the front of the frunk; this is because you don't want to have to lean over a section that's wet that you just completed and risk rubbing against it.
5. If you take a break in between applying ProtectaClear to different panels, wrap the applicator tightly in aluminum foil to keep it from drying out. However, if the bottom of the applicator is firm when you take it out of the aluminum, throw it away and use a new one.
6. Allow the first coat to dry for at least 30-40 minutes until it is dry to the touch.
7. If you see rainbows, it means more coating is necessary. For these areas, after waiting 30-40 minutes to allow the previous coating to dry, apply a second coat using the same method. Move the applicator faster this time. The second coat will help even out any rainbowing or imperfections.
8. Allow the coating to cure for 24 hours before driving, if possible. Wait a week before washing. The coating will fully cure in 4-5 days.
Fixing imperfections: 1:21:09
2. Use a shop towel, which is like a paper towel but is less likely to leave lint behind (e..g, from Amazon, CostCo, AutoZone, etc.). Wipe the solvent on the problem area using circular motions to dissolve and liquefy the coating. The coating will start to ball up or streak as you work the area. If it starts to feel sticky, switch to a new shop towel. Continue wiping until the coating is spread into a thin, even layer. The way to know that you're done is that you no longer feel any significant stickiness/tackiness when you wipe. However, if you're going to re-apply ProtectaClear, it's fine if there's still a small amount of stickiness.
3. You do not need to remove the coating completely down to the bare metal. Your goal is to spread out the imperfection and create a thin, uniform base layer for the new coating to blend into. Some slight streaking is normal and will not affect the final result.
4. Once you have the problem area evened out into a thin, smooth layer, stop wiping and discard the towel. Then, using your applicator, reapply a thin coat of ProtectaClear over the area you just leveled. The fresh coating will melt into the existing layer and self-level as it dries, blending invisibly with the surrounding finish.
Some useful insights and tips:
- Prepping properly is the most time-consuming part but also the most important for good results. Take your time and do it right.
- Having adequate lighting is very helpful to see what you're doing when applying the coating.
- Avoid installing in direct sunlight, high humidity over 80%, or temperatures below 40°F.
- Keep your applicator damp but not overly saturated to avoid drips and runs. Squeeze out excess and rewrap in aluminum foil between sections.
- Start with smaller, easier panels first to get a feel for the process before tackling large panels.
- Applying in thin coats is better than thick - you can always add another coat to fix imperfections, but drips and runs are harder to fix.
- Don't stress over small imperfections; the coating is very forgiving, and you can always fix problem areas later by removing them and reapplying them.
- Use the small round applicators to get into tight spaces around mirrors, handles, etc.
- Have patience, take your time, and don't rush it. Walk away and take breaks as needed, especially during the curing phase.
The Windex Controversy
I just posted the video below to YouTube covering the key steps on how to do it.
Detailed Steps
Also, here are some much more detailed instructions on how to do it, much of which I obtained from Coleton's Out of Spec/Clear Detailing video on ProtectaClear
Prepping the Cybertruck: 17:47 (Click here to watch the Out of Spec / Clear Detailing ProtectaClear Video)
1. Wash the Cybertruck (e.g., foam cannon, rinseless wash, etc.), and make sure it is completely dry, including in all the seams and crevices.
It is very important that it is dry.
Keep in mind that even if most of the truck looks dry after washing it, sometimes water can be located in crevises that slowly leaks out over time even if you use a tool to dry it faster.
2. Tape off the plastic and rubber areas of your Cybertruck, as well as your lights, using painter's tape. Take extra care taping off the soft rubber areas around the bottom of your windows where the painter's tape might not stick quite as well. You will use painter's tape twice.
First, put painter's tape before you use Bar Keeper's Friend and Windex, followed by isopropyl alcohol.
Then, remove the painter's tape and add new painter's tape before you apply ProtectaClear. This second application of painter's tape helps avoid a situation where isopropyl alcohol would eat away at the adhesive layer of the painter's tape that could make it less effective.
3. Wear gloves throughout the entire process to avoid leaving fingerprints and to avoid certain chemicals coming into contact with your skin.
- Note: Perform steps 4-6 on each side of the truck before moving on to the next side of the truck. This keeps the acid from the Bar Keeper's Friend from sitting too long in any one area. Then, perform step 7 on the entire truck.
Apply Bar Keeper's Friend to a towel you folded twice, and apply it to the steel panel by panel. By folding each towel twice, you will have eight sides to use for each towel. This will remove any tea staining, fingerprints, and impurities to create an even bright silver finish.
Right after you finish the Bar Keeper's Friend for a panel, spray original Windex (with ammonia) on a separate towel, and wipe down the panel. The ammonia in the Windex will neutralize the acid in the Bar Keeper's Friend.
Perfom these steps to each panel (i.e., Bar Keeper's Friend followed by Windex) before you move on to the next step.
Note: Although Everbrite prefers the spray+foam spray bottle version of Bar Keeper's Friend, Out of Spec Detailing/Clear Detailing prefers the soft cleanser compound (bottle) version, which includes microabrasives that could be more powerful at cleaning your cybertruck. [My personal view is that the soft cleanser version seems to do a better job.]
5. Post-Bar Keeper's Friend and Windex Step
If You Bought Everbrite's Cybertruck Kit:
Put Stainless Steel Rust Remover in a metal pan (e.g., aluminum disposable loaf pan), and dip a new towel in it.
Also, put EZ Prep in another pan (mixing 1-2 ounces of EZ Prep per gallon of water).
Apply the Stainless Steel Rust Remover to the entire truck, and as you apply it, within 30-60 seconds go back over each spot with the EZ Prep/water mixture (i.e., wipe it first with the Stainless Steel Rust Remover, and then wipe on top of it with the EZ Prep/water mixture).
If You Didn't Buy Everbrite's Cybertruck Kit:
Spray each panel with CARPRO's IronX Iron Remover. You will see any rust turn purple if there is any present. After about 60 seconds, wipe away the IronX before you move to the next panel. Although IronX works very well, the smell is unpleasant. [Note: I had already performed this step prior to creating the video, but I recommend performing it if you want your Cybertruck to look amazing.]
6. Wipe down each panel with original Windex (with ammonia) to further clean your truck and neutralize the pH, while being careful to avoid getting any on your tinted windows.
7. Wipe the entire truck with 99% isopropyl alcohol to ensure the surface is completely clean, dry, and residue-free before coating. This gives you a more even finish, but the main reason why it's important is that it removes any remaining water to allow the ProtectaClear to properly bond to the metal.
Applying ProtectaClear: 43:50
- Note: You want to install ProtectaClear in a shaded area and not in direct sunlight. A garage is the best place to do it. If there are a lot of things in the air near you (e.g., pollen, bugs, etc.), consider installing ProtectaClear in a different environment (e.g., a parking garage). Apply it with a temperature of 40-100 degrees Fahrenheit and humidity below 80%. You want to have the best lighting possible, so consider bringing extra lights to better see what you're doing.
2. Pour about 4 oz of ProtectaClear into a solvent-safe container like a glass bowl or a metal pan (e.g., aluminum disposable loaf pan). Do not use a plastic pan (unless it is solvent-rated), as the coating will eat through it.
3. Before you use the blue, circular microfiber applicator (https://shop.everbritecoatings.com/index.php?main_page=product_info&cPath=52&products_id=167), hit it against something for 30 seconds to get some of the lint off of it (1:07:53). Dip one of these applicators into the coating. Saturate it, but squeeze out the excess so it is damp but not dripping wet.
4. Application of ProtectaClear
Dip the blue, circular microfiber applicator in the ProtectaClear. Fully submerge the bottom of it so there are no dry spots, but wring it out so there is not too much on it. You don't want it to be dripping wet.
Work on one full panel at a time; quickly apply the coating to the Cybertruck in a thin, even layer using light pressure and long, overlapping strokes.
It's better to put it on too thin than too thick. The rainbowing (i.e., due to too little application) is much easier to fix than it is to fix drips and runs from using too much.
Use only the bottom of the applicator to apply it while avoiding touching the sides of the applicator to your Cybertruck.
Start at the top of the panel and work your way down. When you remove the applicator from a section, go "up and away" (i.e., wipe the applicator to the edge as you remove it) to avoid leaving a circle of bubbles (e.g., by directly pulling it away).
Use long wipes across the entire panel (e.g., all the way from the top left to the top right, then down slightly, then back all the way to the left, etc.).
Use very light pressure as you apply the ProtectaClear.
Use only the bottom of the applicator, and avoid using the sewn side edge of the applicator to apply ProtectaClear.
As you apply ProtectaClear, inspect the coating and quickly smooth out any drips, runs, or missed spots before moving on.
Some slight rainbowing is normal. However, if more than about a minute has passed since you initially applied ProtectaClear to a section, wait for it to dry (at least 30-40 minutes) before you go back and fix it. The warmer it is, the faster the ProtectaClear is going to dry and vice versa.
Although you will likely see streaks after you apply ProtectaClear, it typically levels out as it dries.
You can then use a small rectangular applicator only for the areas that would be hard to reach with the blue, circular microfiber applicator (https://shop.everbritecoatings.com/index.php?main_page=product_info&cPath=52&products_id=167).
As soon as you're done with an applicator, cover it in aluminum. This allows you to re-use it later in the day to perform touch-up if needed without it drying out first.
Right after you apply it, the ProtectaClear coating is 1 millimeter thick. However, after the solvent evaporates and only the polymer resin remains, it is only 3-4 microns thick (i.e., a very thin coating). Do the hood (i.e., the top of the frunk) before you do the front of the frunk; this is because you don't want to have to lean over a section that's wet that you just completed and risk rubbing against it.
5. If you take a break in between applying ProtectaClear to different panels, wrap the applicator tightly in aluminum foil to keep it from drying out. However, if the bottom of the applicator is firm when you take it out of the aluminum, throw it away and use a new one.
6. Allow the first coat to dry for at least 30-40 minutes until it is dry to the touch.
7. If you see rainbows, it means more coating is necessary. For these areas, after waiting 30-40 minutes to allow the previous coating to dry, apply a second coat using the same method. Move the applicator faster this time. The second coat will help even out any rainbowing or imperfections.
8. Allow the coating to cure for 24 hours before driving, if possible. Wait a week before washing. The coating will fully cure in 4-5 days.
Fixing imperfections: 1:21:09
- Note: ProtectaClear consists of a solvent and a polymer resin, and the solvent is what melts the resin. After you apply ProtectaClear, the solvent evaporates, and the resin remain. Therefore, when you apply another coat of ProtectaClear, it will mix with and melt the existing resin from your previous application, and after the solvent evaporates, you will have a uniform coat.
2. Use a shop towel, which is like a paper towel but is less likely to leave lint behind (e..g, from Amazon, CostCo, AutoZone, etc.). Wipe the solvent on the problem area using circular motions to dissolve and liquefy the coating. The coating will start to ball up or streak as you work the area. If it starts to feel sticky, switch to a new shop towel. Continue wiping until the coating is spread into a thin, even layer. The way to know that you're done is that you no longer feel any significant stickiness/tackiness when you wipe. However, if you're going to re-apply ProtectaClear, it's fine if there's still a small amount of stickiness.
3. You do not need to remove the coating completely down to the bare metal. Your goal is to spread out the imperfection and create a thin, uniform base layer for the new coating to blend into. Some slight streaking is normal and will not affect the final result.
4. Once you have the problem area evened out into a thin, smooth layer, stop wiping and discard the towel. Then, using your applicator, reapply a thin coat of ProtectaClear over the area you just leveled. The fresh coating will melt into the existing layer and self-level as it dries, blending invisibly with the surrounding finish.
Some useful insights and tips:
- Prepping properly is the most time-consuming part but also the most important for good results. Take your time and do it right.
- Having adequate lighting is very helpful to see what you're doing when applying the coating.
- Avoid installing in direct sunlight, high humidity over 80%, or temperatures below 40°F.
- Keep your applicator damp but not overly saturated to avoid drips and runs. Squeeze out excess and rewrap in aluminum foil between sections.
- Start with smaller, easier panels first to get a feel for the process before tackling large panels.
- Applying in thin coats is better than thick - you can always add another coat to fix imperfections, but drips and runs are harder to fix.
- Don't stress over small imperfections; the coating is very forgiving, and you can always fix problem areas later by removing them and reapplying them.
- Use the small round applicators to get into tight spaces around mirrors, handles, etc.
- Have patience, take your time, and don't rush it. Walk away and take breaks as needed, especially during the curing phase.
The Windex Controversy
- At about 33:04 they cover how the use of Windex on the Cybertruck is controversial. Although they don't cover this in the video, here are some related data points.
- I saw in a YouTube video from another continent creator perform a metal assessment that determined Tesla likely used 304 stainless steel in the Cybertruck (i.e., with the "X" in 30X being a 4). If this is the case, then Windex should be fine. However, if Tesla had used a different type of stainless steel (e.g., 420), then Windex would have been an issue. That being said, Windex can damage window tinting.
- Stainless steel is generally resistant to corrosion from ammonia, but the extent of its resistance depends on the specific type of stainless steel and the concentration of the ammonia solution.
- Austenitic stainless steels (e.g., 304 and 316) have excellent resistance to ammonia corrosion due to their high chromium and nickel content. These types of stainless steel are commonly used in applications involving ammonia, such as refrigeration systems and fertilizer production.
- Ferritic stainless steels (e.g., 430 and 444) have lower corrosion resistance compared to austenitic grades. They may be suitable for use with low concentrations of ammonia but are more susceptible to stress corrosion cracking (SCC) in the presence of chlorides.
- Martensitic stainless steels (e.g., 410 and 420) have the lowest corrosion resistance among the three main types of stainless steel. They are not recommended for use with ammonia due to their high susceptibility to SCC.
Sponsored
