Stefan224
New member
- First Name
- Stefan
- Joined
- Jan 4, 2025
- Threads
- 1
- Messages
- 4
- Reaction score
- 18
- Location
- Ridgefield, WA
- Vehicles
- Cybertruck AWD
- Thread starter
- #1
Hello!
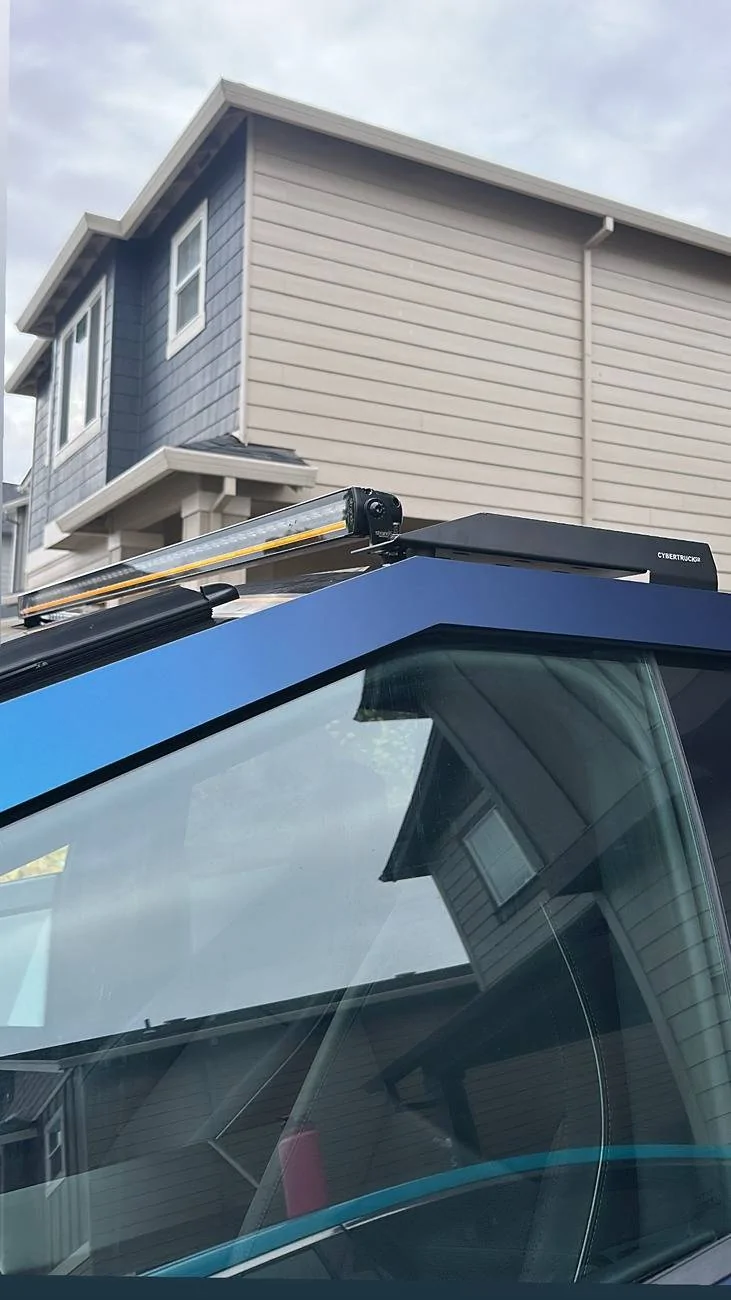
First post on this forum here, I wanted to share all the information I've learned installing a lightbar with a DRL in it. The main goal was to have the DRL of the lightbar come on with the trucks.
This was harder to achieve than I thought and the method I have come up with has been seamless for my use case.
I am hoping this will save a lot of time for anyone looking to do the same. The light I am using is the Strands America Single row Siberia 50" Lightbar with the @CYBERTRUCKco lightbar mounting bracket.
Siberia Single Row (12"-50") – StrandsAmerica
Tesla Cybertruck Top Light Bar Brackets | CYBERTRUCKco
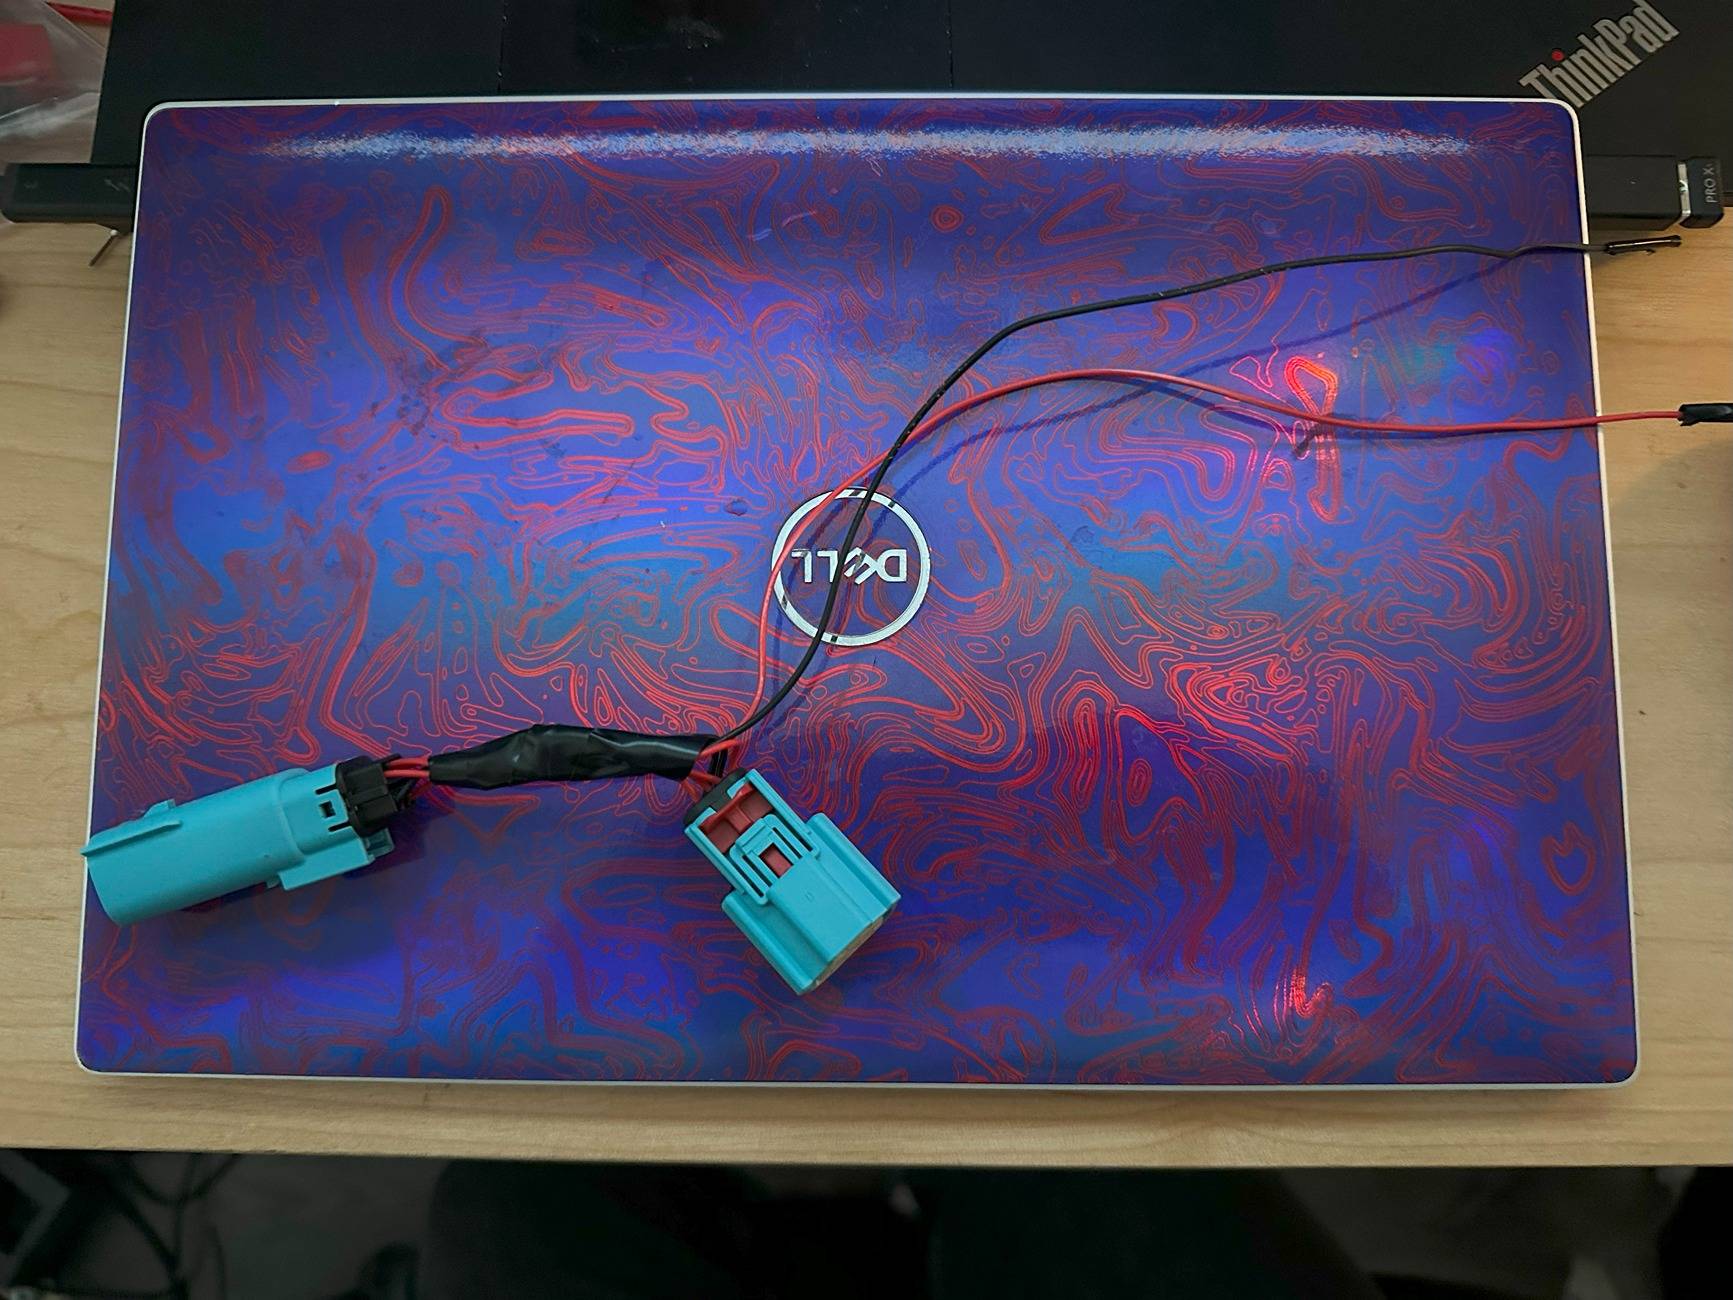
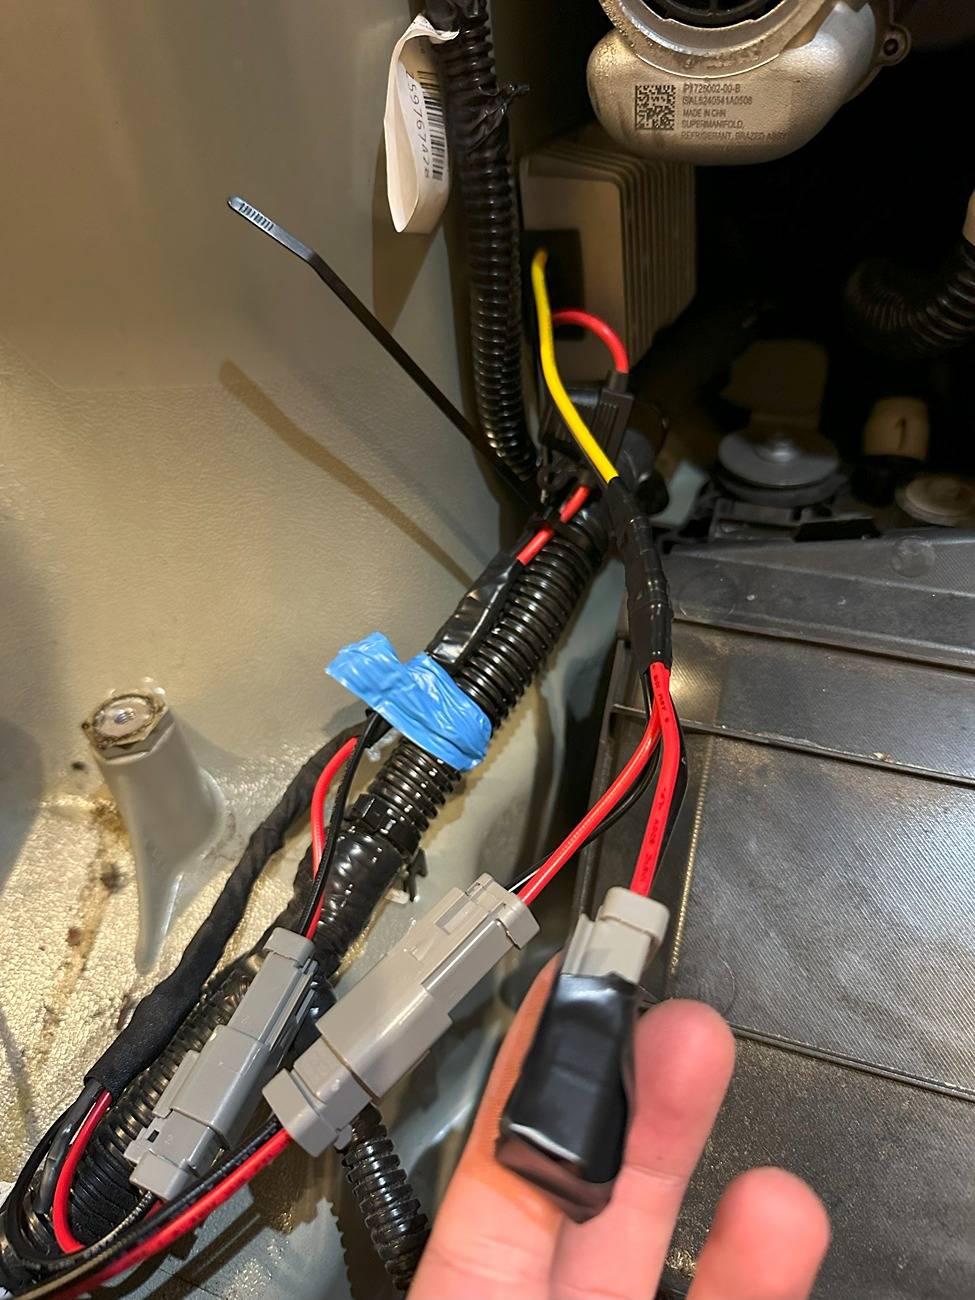
1.) I looked at the schematics of the truck and found where the DRL connector is, right under the passenger front wheel well, I ordered the same connectors from mouser and pinned it out with the DRL power split off to avoid damaging the harness.

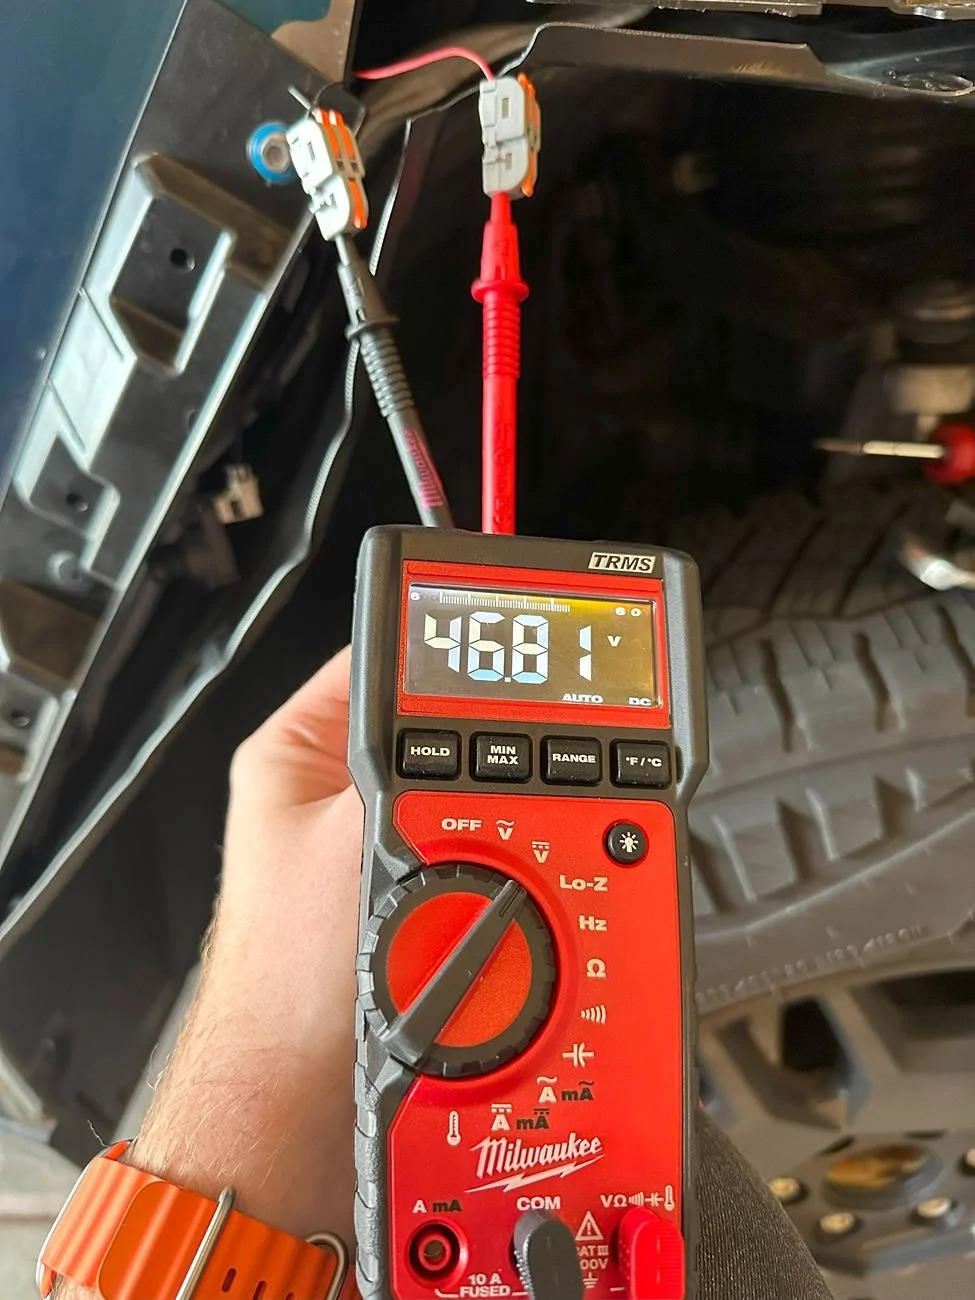
It turns out, there are 2 can bus wires also leading to the DRL light - so I was not very hopeful that it turns power on and off at that point and strictly uses the can bus (Which I know nothing about how to use) but wanted to be 100% sure. I left the multi-meter attached and left for about 10 minutes and it still was powered.

2.) This left me with just two other options for the DRL, using 12v power behind the mirror or having a second frunk wire ran and using both mod power areas for the light. When testing the mirror 12v, it worked great and was able to power the LEDs without any problem, except when sentry mode is on, the power remines live.
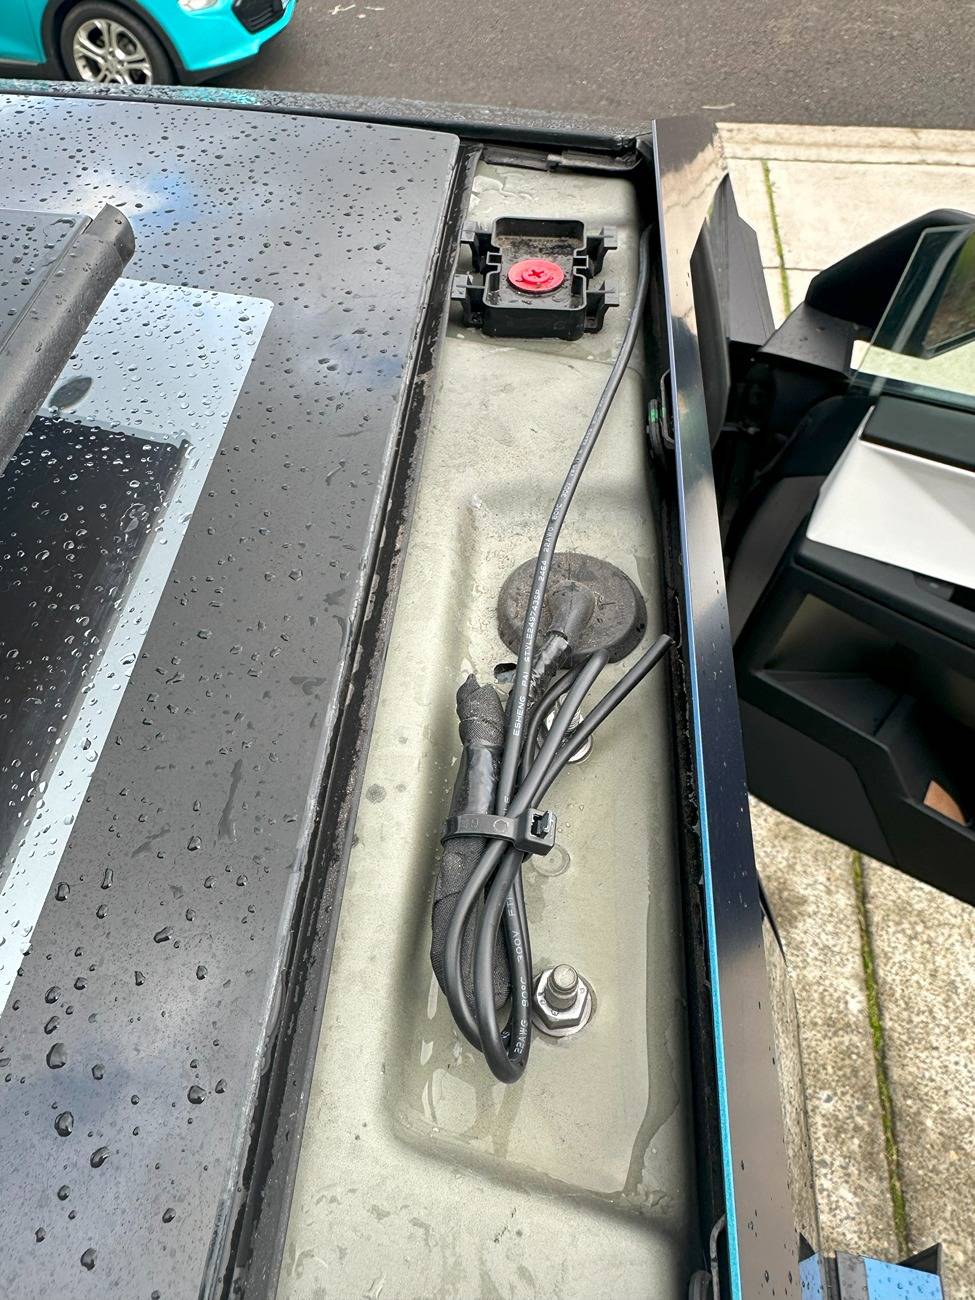
Since I use sentry mode and wanted to have seamless use, this was not an option, so I ran the frunk mod power feed up the side of the windshield which actually works fantastic and covers the wire with a rubber seal.
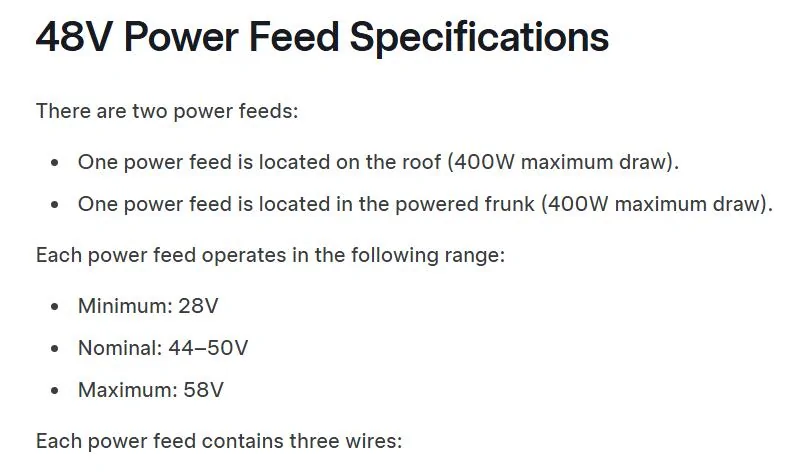
3.) Converting down to 12-36v the light requires:
Both power feeds were connected to their own buck converter to get down to 12v. The manual of the truck has a very important figure I did not see at first for the power feeds which led me to multiple returns of buck converters.
Sure its a 48v connection, but it actually can reach 58v which exceeded the inrush current my 48v to 12v buck converter could handle.
I instead went with a 72v, 60v, 48v to 12v converter and it worked perfectly for the frunk. The 48v to 12v for the actual light bar ended up being just fine at the roof feed and the only issue was with the frunk feed. Inrush current was too high and would trip the cars Mosfet. I attached connectors to everything and plugged it all in.
Amazon.com: Pro Chaser DC-DC 72V 60V 48V Volt Voltage to 12V Step Down Voltage Reducer Regulator 360W 30A for Scooters & Bicycles Golf Cart (30A 360W) : Electronics

I added a secondary 12v connector in the frunk if I ever want to plug something else in.
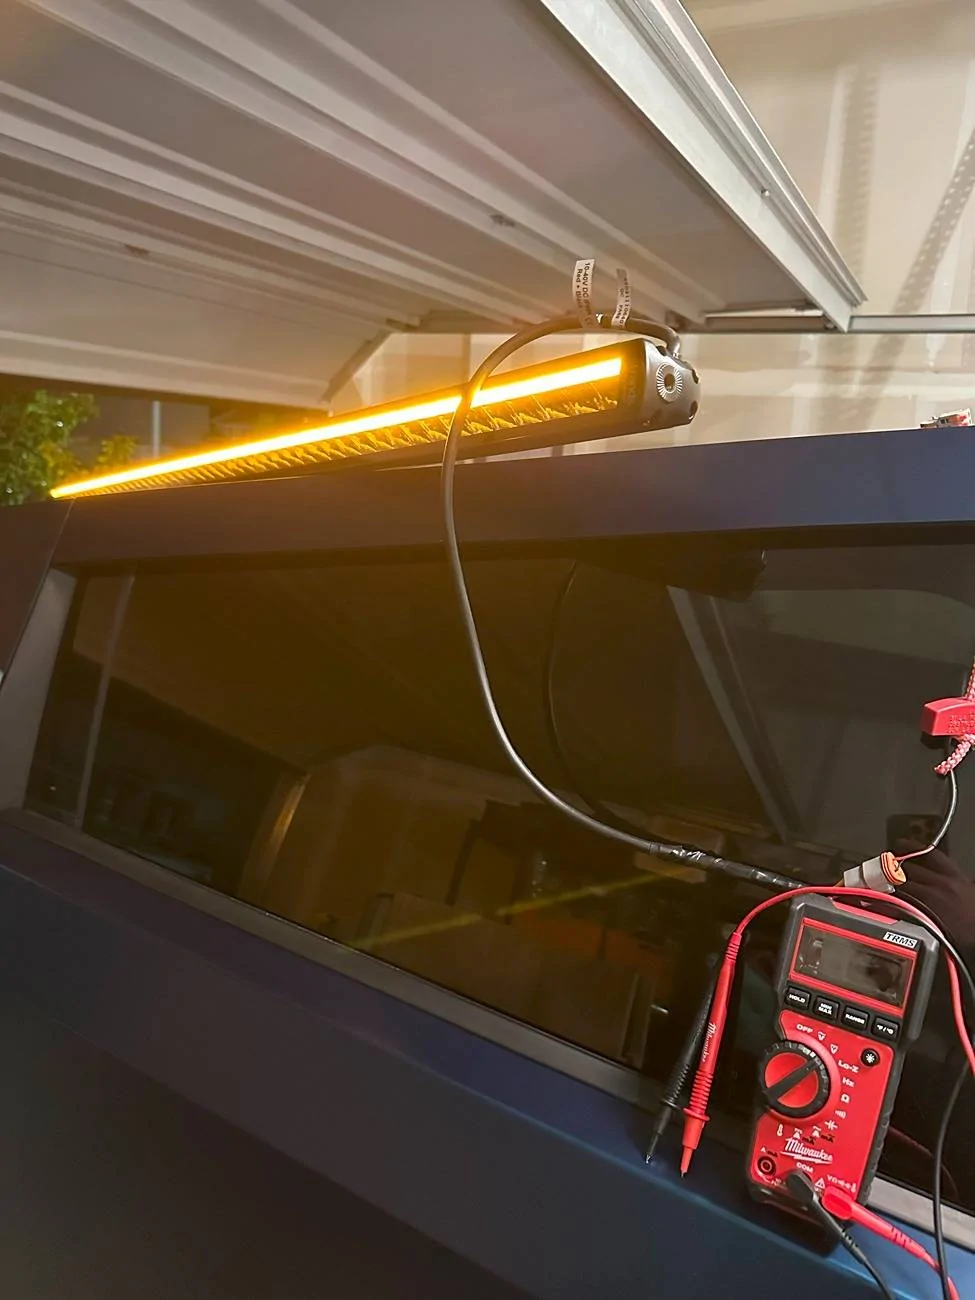
4.) Now all the power to the light worked great, DRL would turn on with Frunk power feed, and the bright LEDs of the bar with roof feed switches, all that was left is to make the DRL turn on and off with the cars.
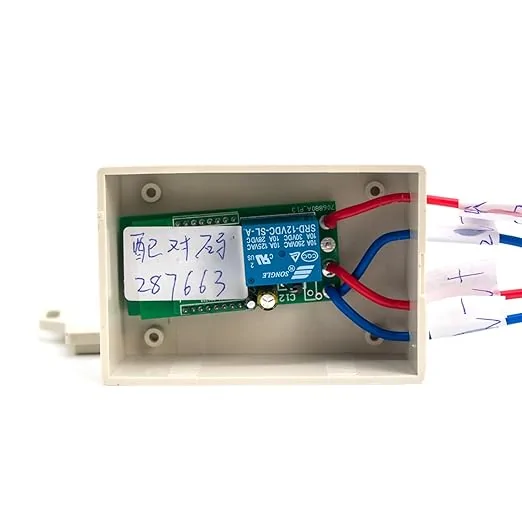
To achieve this, I found a perfect solution - just attach a Bluetooth switch that is normally off - whenever it picked up my phone bluetooth, the switch would turn on, no app or manual switch/relay required! Since I use the phone as a key anyways, this sounded great. As of writing they are out of stock of the 12v variation I bought, so this link would work if you just stepped down to 24v.
24V ONLY, make sure you check the variation in the description.
Amazon.com: DykbRadio DC 5V 12V 24V Phone Bluetooth Automatic Switch Control NO Key Bluetooth Proximity Switch auto Connect Start Open/Close Power (DC 24V) : Automotive

Once everything was wired up I put the frunk back together and tested the range - seemed like when I got within 5-7 feet of the truck the DRL would light up.
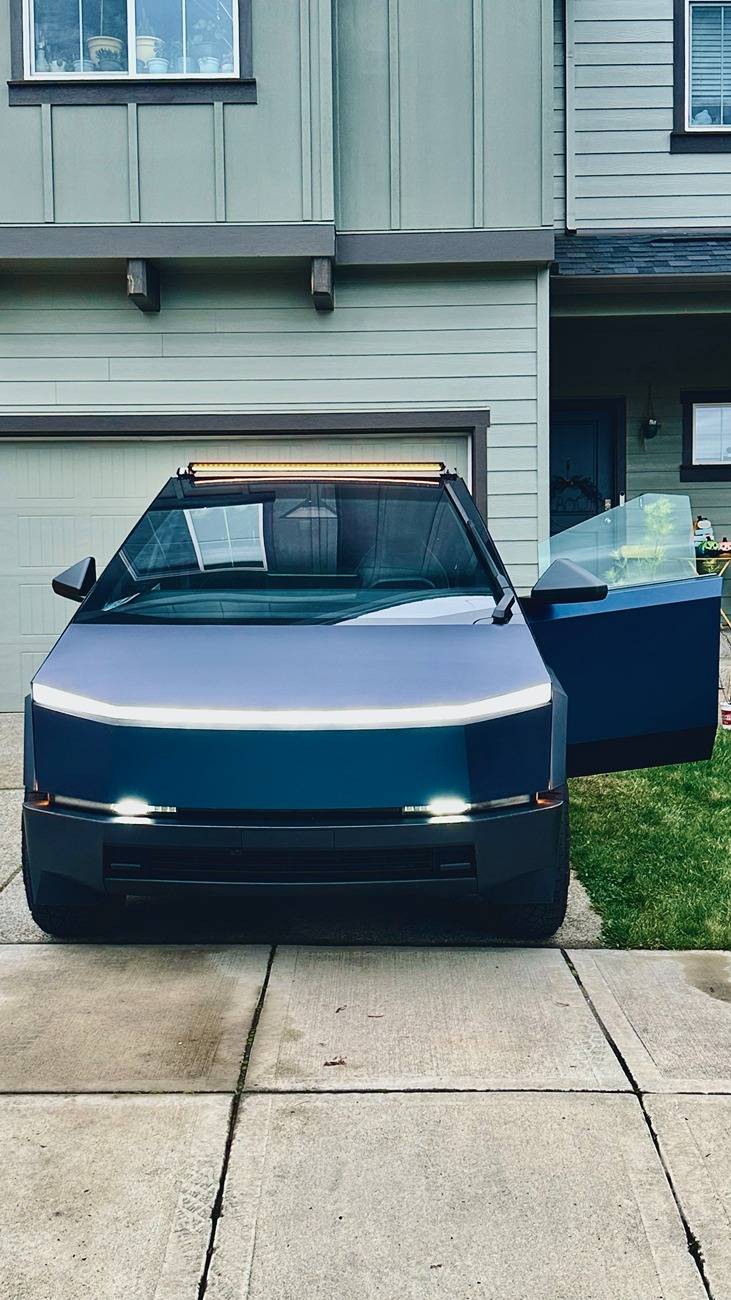
Hopefully some of this information helps others in deciding how to go about installing theirs! Now our truck looks a lot different than other on the road!
(Wrap color is Avery Dennison Frozen Ocean)

First post on this forum here, I wanted to share all the information I've learned installing a lightbar with a DRL in it. The main goal was to have the DRL of the lightbar come on with the trucks.
This was harder to achieve than I thought and the method I have come up with has been seamless for my use case.
I am hoping this will save a lot of time for anyone looking to do the same. The light I am using is the Strands America Single row Siberia 50" Lightbar with the @CYBERTRUCKco lightbar mounting bracket.
Siberia Single Row (12"-50") – StrandsAmerica
Tesla Cybertruck Top Light Bar Brackets | CYBERTRUCKco
1.) I looked at the schematics of the truck and found where the DRL connector is, right under the passenger front wheel well, I ordered the same connectors from mouser and pinned it out with the DRL power split off to avoid damaging the harness.
It turns out, there are 2 can bus wires also leading to the DRL light - so I was not very hopeful that it turns power on and off at that point and strictly uses the can bus (Which I know nothing about how to use) but wanted to be 100% sure. I left the multi-meter attached and left for about 10 minutes and it still was powered.
2.) This left me with just two other options for the DRL, using 12v power behind the mirror or having a second frunk wire ran and using both mod power areas for the light. When testing the mirror 12v, it worked great and was able to power the LEDs without any problem, except when sentry mode is on, the power remines live.
Since I use sentry mode and wanted to have seamless use, this was not an option, so I ran the frunk mod power feed up the side of the windshield which actually works fantastic and covers the wire with a rubber seal.
3.) Converting down to 12-36v the light requires:
Both power feeds were connected to their own buck converter to get down to 12v. The manual of the truck has a very important figure I did not see at first for the power feeds which led me to multiple returns of buck converters.
Sure its a 48v connection, but it actually can reach 58v which exceeded the inrush current my 48v to 12v buck converter could handle.
I instead went with a 72v, 60v, 48v to 12v converter and it worked perfectly for the frunk. The 48v to 12v for the actual light bar ended up being just fine at the roof feed and the only issue was with the frunk feed. Inrush current was too high and would trip the cars Mosfet. I attached connectors to everything and plugged it all in.
Amazon.com: Pro Chaser DC-DC 72V 60V 48V Volt Voltage to 12V Step Down Voltage Reducer Regulator 360W 30A for Scooters & Bicycles Golf Cart (30A 360W) : Electronics
I added a secondary 12v connector in the frunk if I ever want to plug something else in.

4.) Now all the power to the light worked great, DRL would turn on with Frunk power feed, and the bright LEDs of the bar with roof feed switches, all that was left is to make the DRL turn on and off with the cars.
To achieve this, I found a perfect solution - just attach a Bluetooth switch that is normally off - whenever it picked up my phone bluetooth, the switch would turn on, no app or manual switch/relay required! Since I use the phone as a key anyways, this sounded great. As of writing they are out of stock of the 12v variation I bought, so this link would work if you just stepped down to 24v.
24V ONLY, make sure you check the variation in the description.
Amazon.com: DykbRadio DC 5V 12V 24V Phone Bluetooth Automatic Switch Control NO Key Bluetooth Proximity Switch auto Connect Start Open/Close Power (DC 24V) : Automotive
Once everything was wired up I put the frunk back together and tested the range - seemed like when I got within 5-7 feet of the truck the DRL would light up.
Hopefully some of this information helps others in deciding how to go about installing theirs! Now our truck looks a lot different than other on the road!
(Wrap color is Avery Dennison Frozen Ocean)
Sponsored
