Bobo_LaDouche
Well-known member
- Joined
- Nov 13, 2024
- Threads
- 8
- Messages
- 179
- Reaction score
- 268
- Location
- Carson City, Nevada
- Vehicles
- Cybertruck, Model 3
- Thread starter
- #1
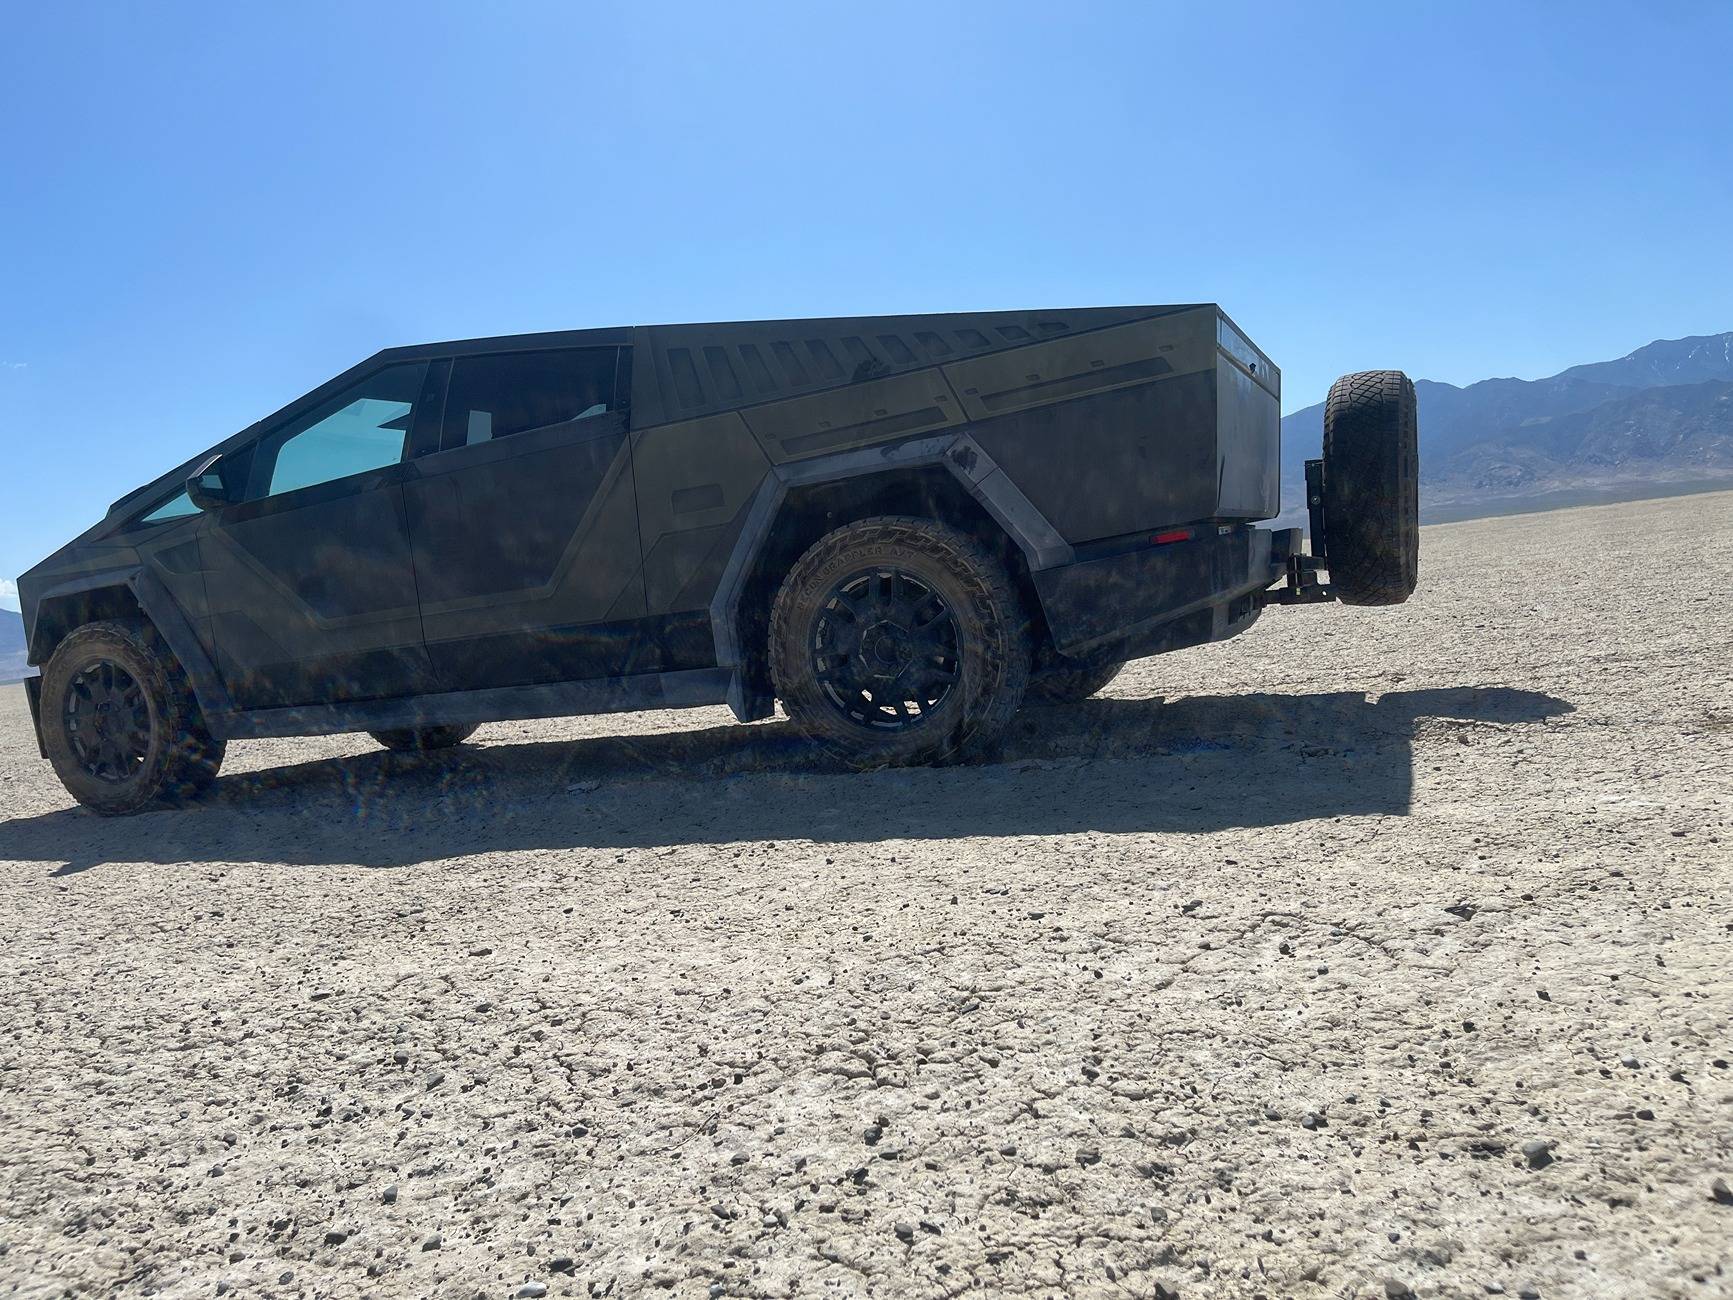
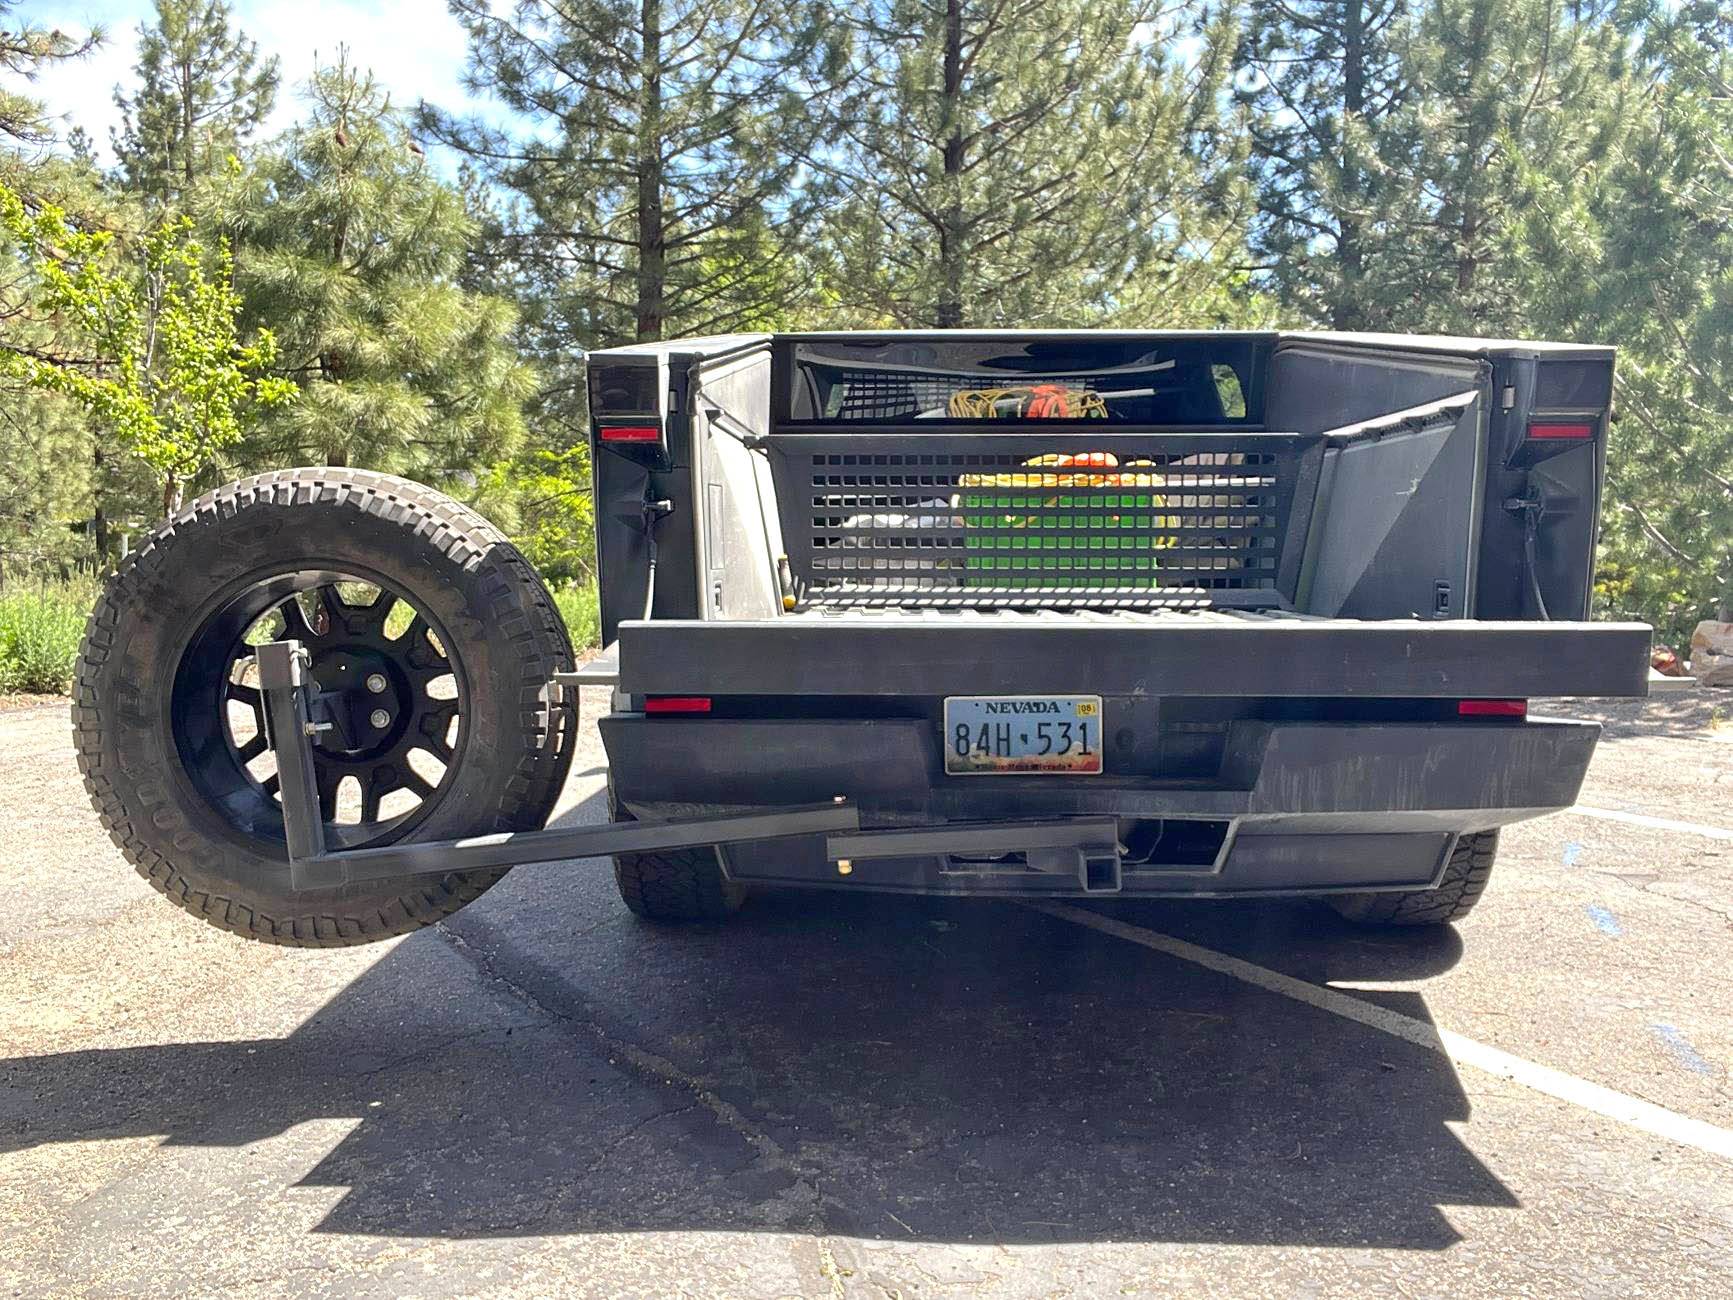
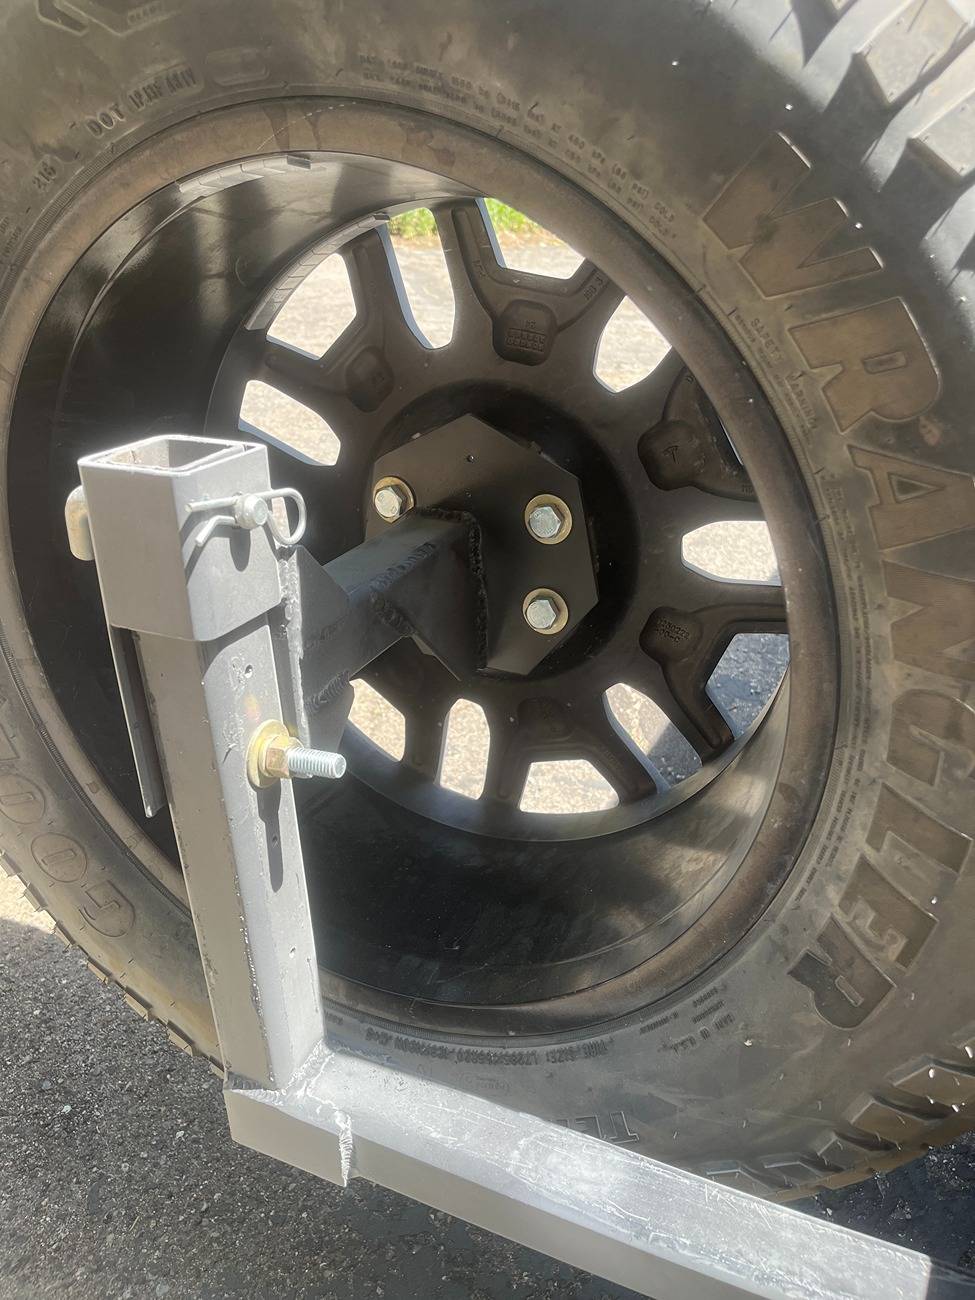
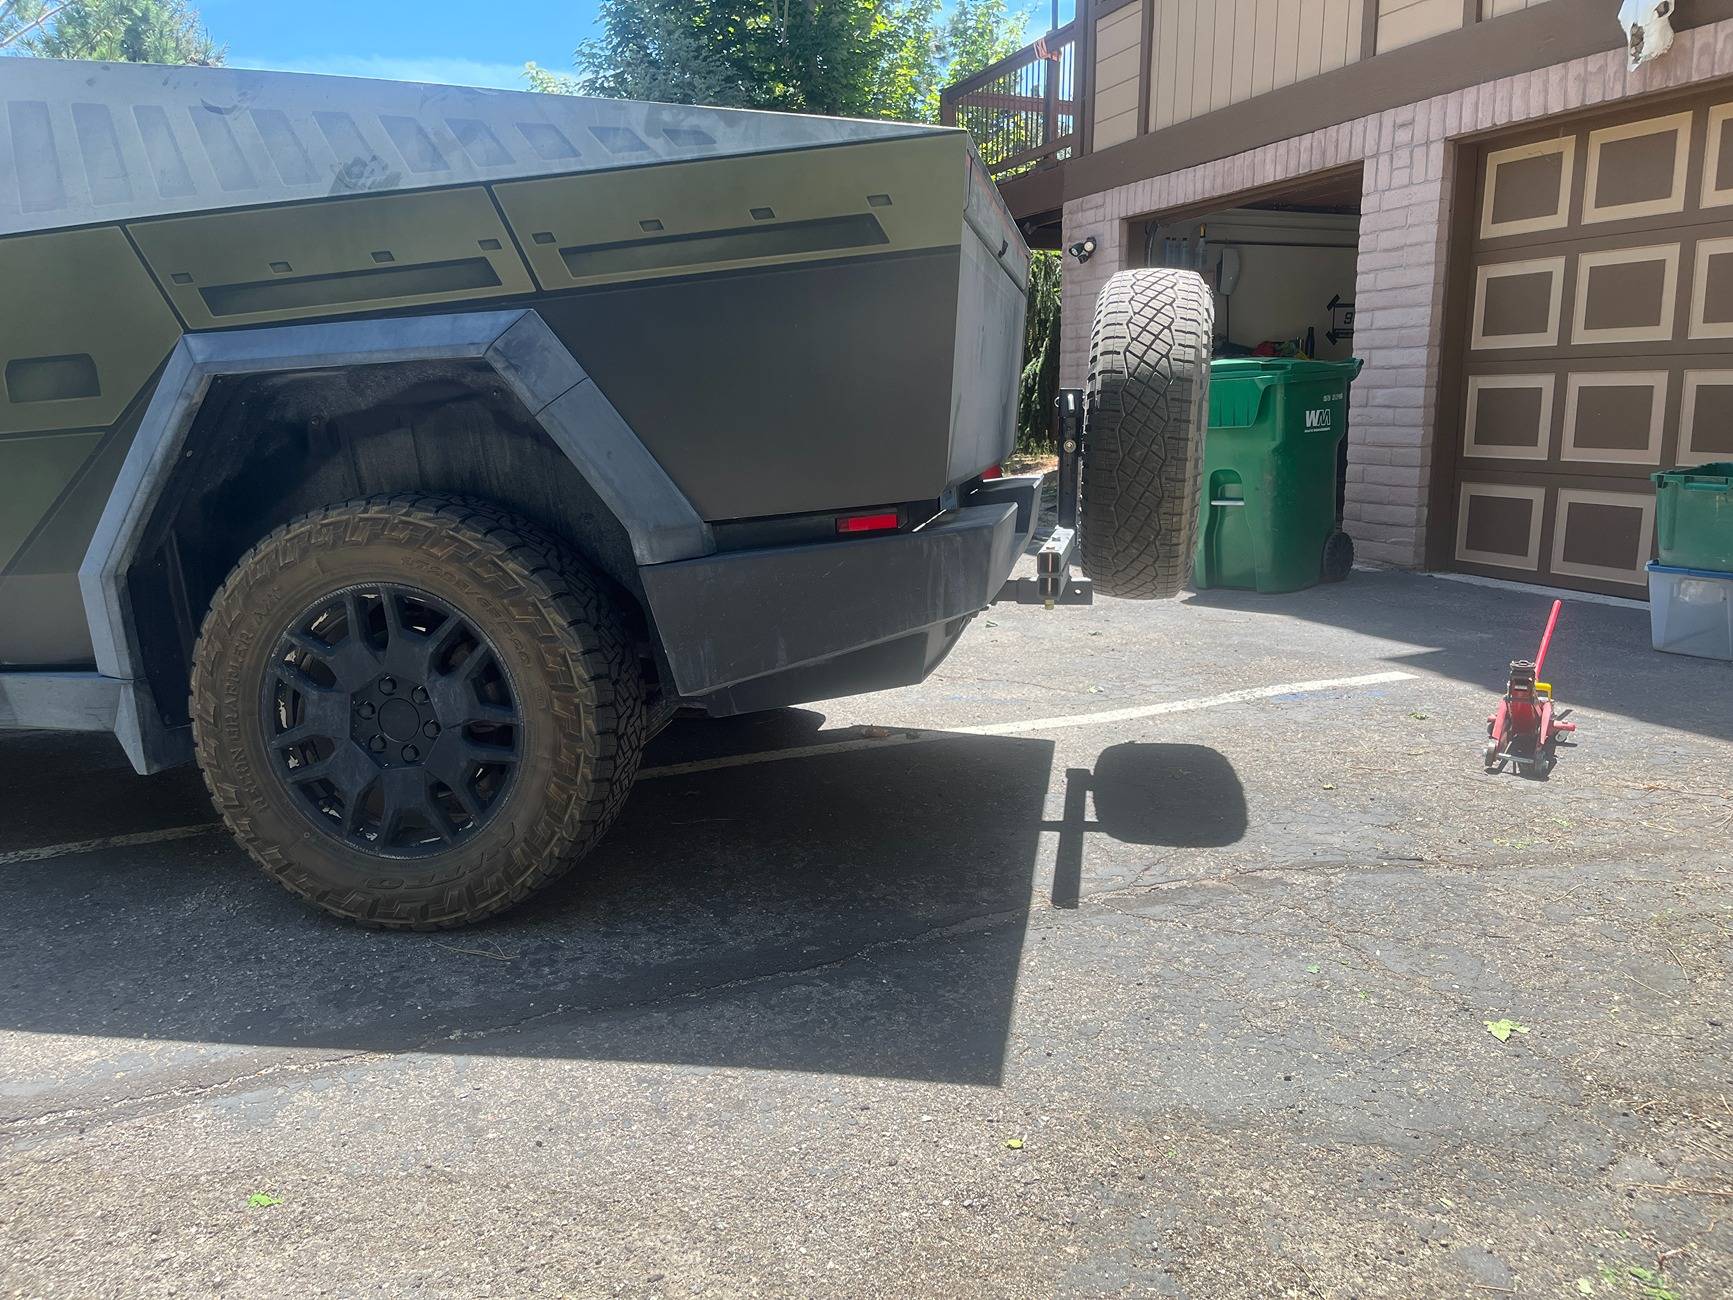
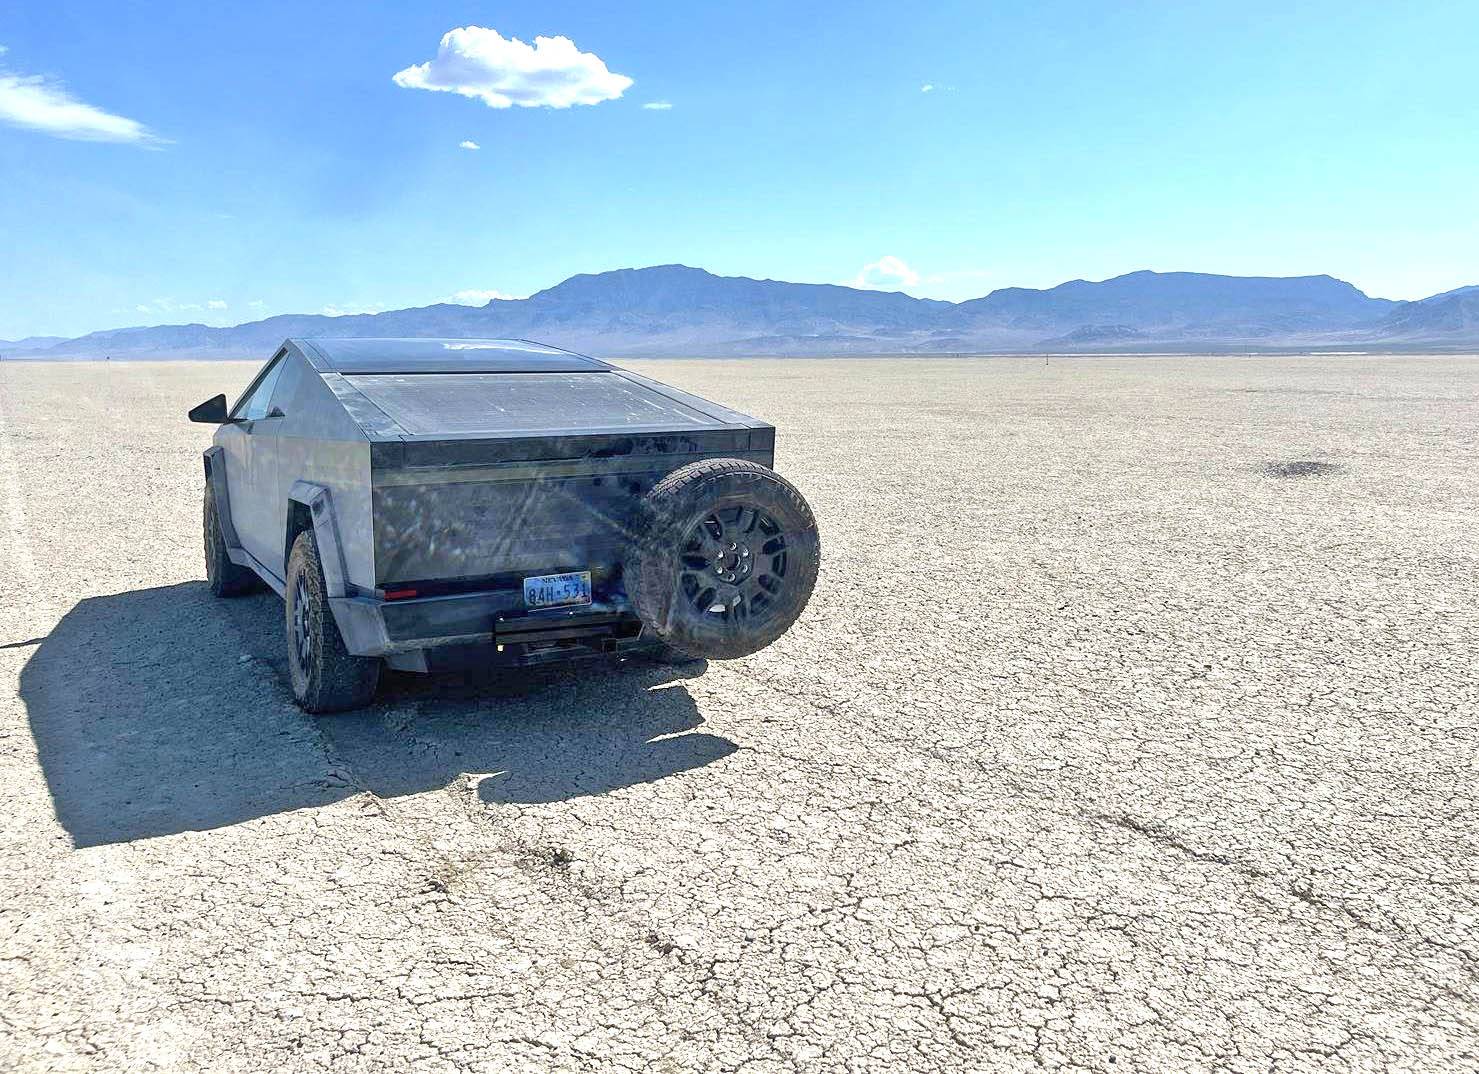
I have been perplexed how to carry a spare, so I built this. The criteria are to be strong, off-center so the camera works, low wind resistance, able to swing wide to use the tailgate, and easy to attach the tire without a heave-ho-hold-the-tire while you bolt it down. I used 2x2" square tube 3/16" thick for most, and a 9" piece of 2 1/2" square tube for the slider part. There are several gussets for reinforcements. This thing works great. I have attached quite a few photos with details, and a scaled diagram. I moved the license plate to the left, and the tail lights are not obstructed. FSD works, and when I back up there is a red dot/warning on the screen where the tire is located, and the back-up beeper sounds when I am in reverse.
I mount the wheel on a 7 sided polygon (septagon) shaped like the wheel, and threaded with Tesal-equivelent studs (14mm x 1.5 t/cm?). Also, the bolts are lugnuts for CT wheels.
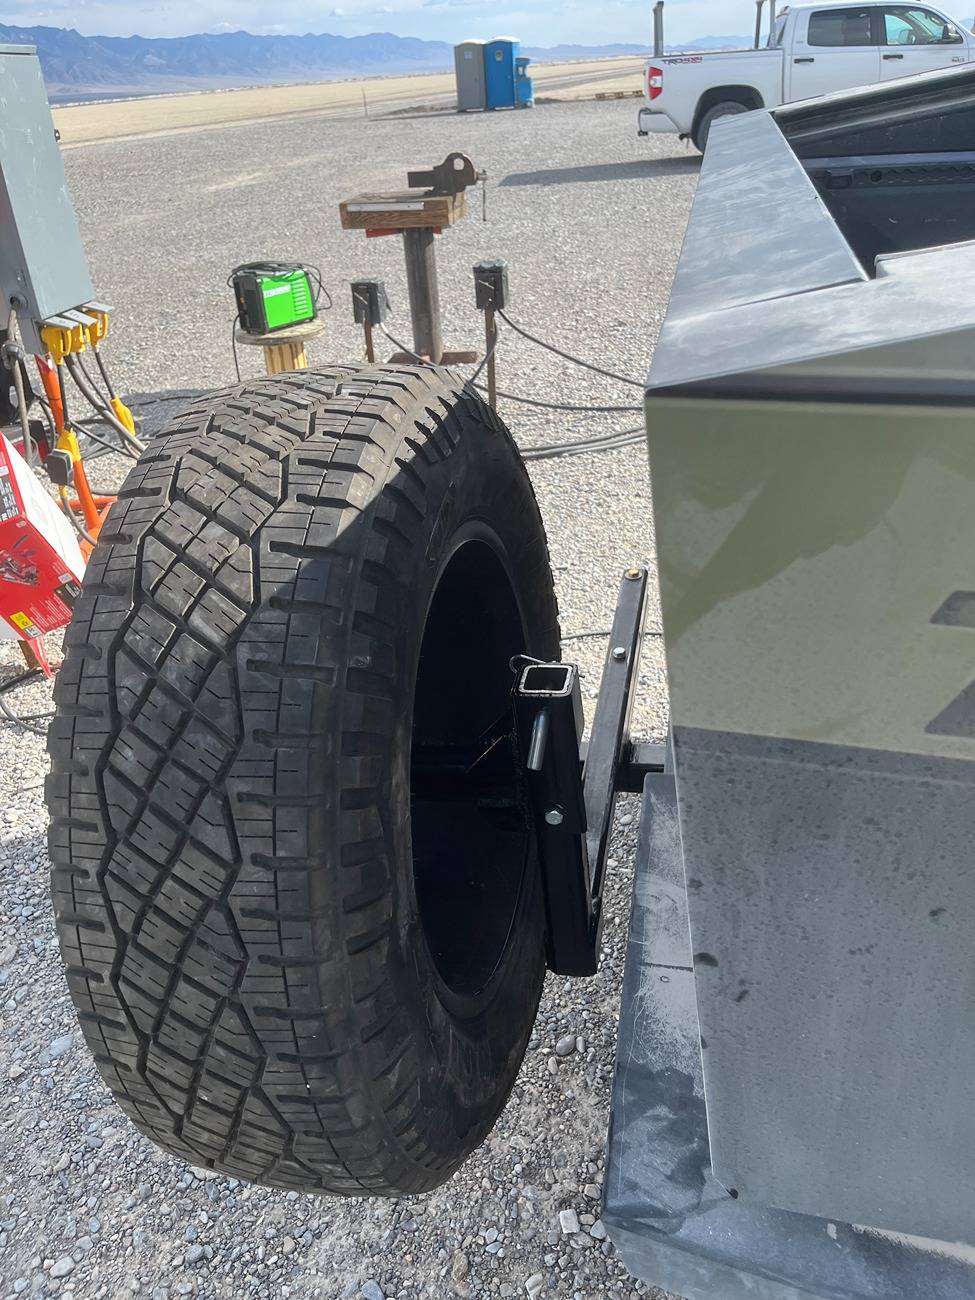
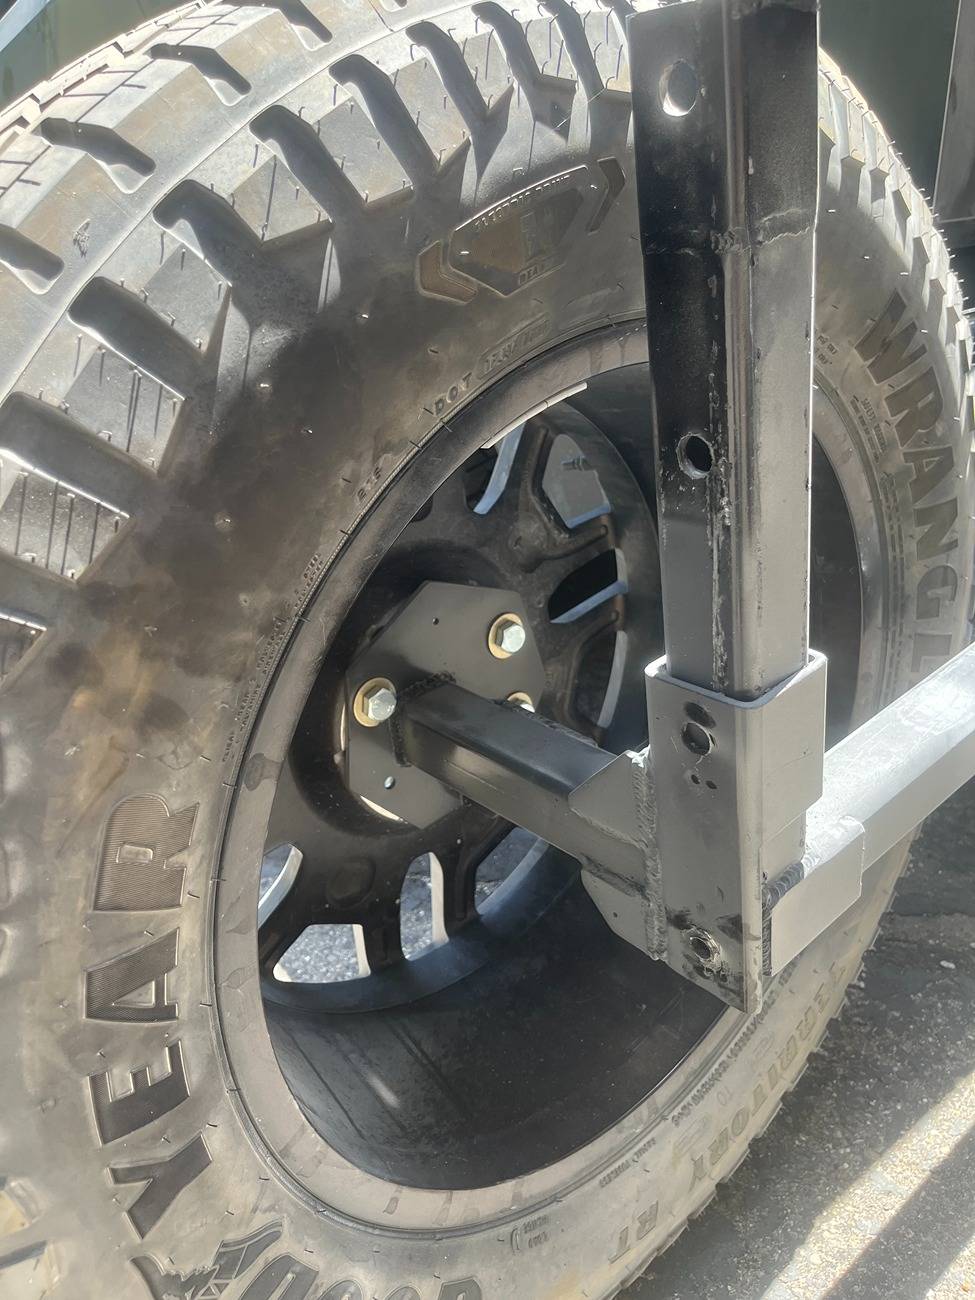
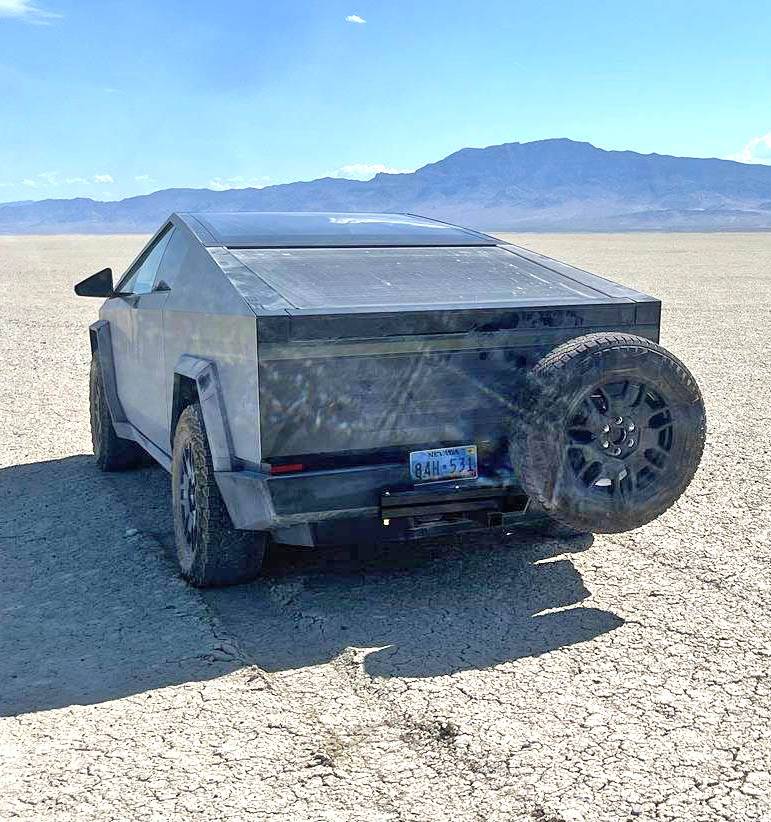
Images 1, 2, and 3 show viewpoints of the set up. Note that if the tailgate is accidentally opened, then it hits the tire, and not the steel rack.
Image 4 shows the wheel swung to the side, and in the "up" position, before the slider is deployed.
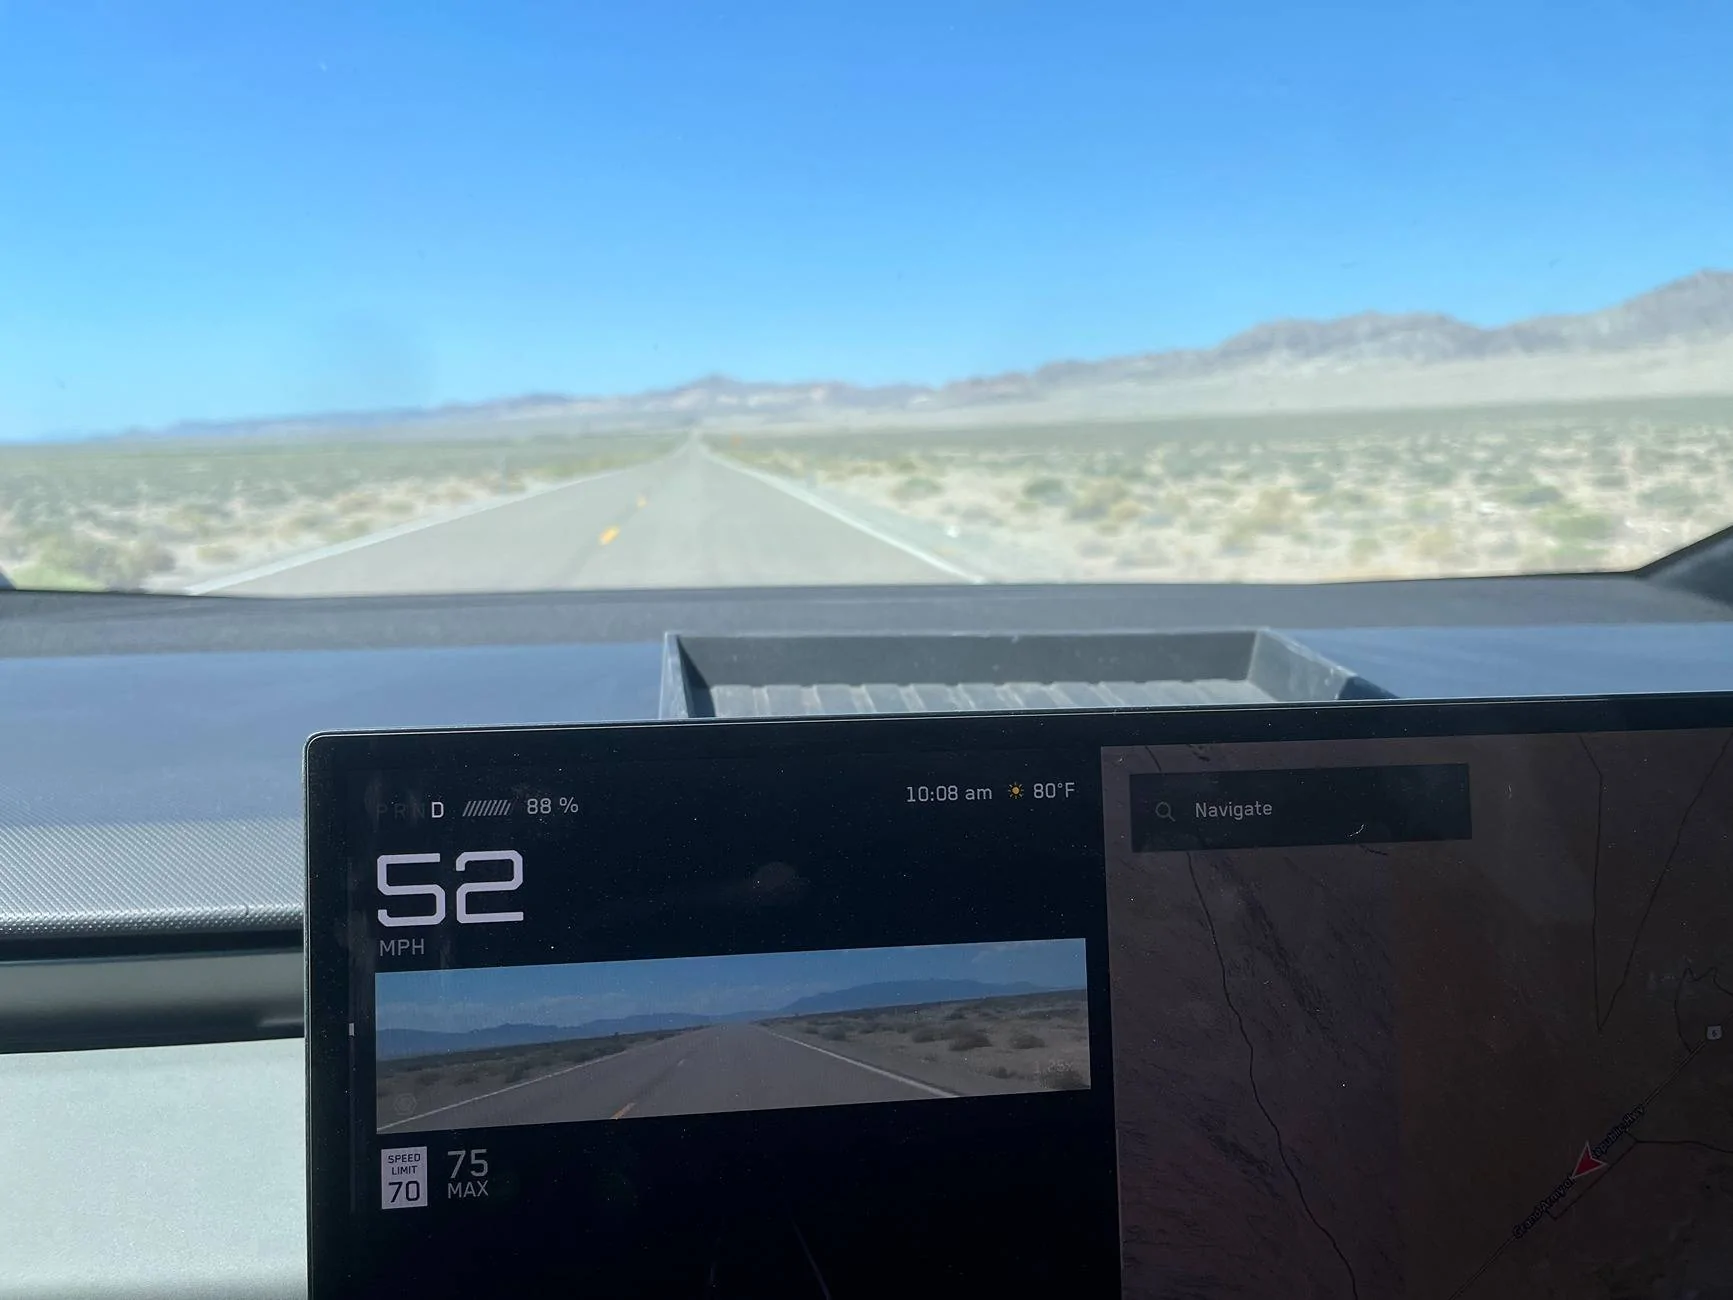
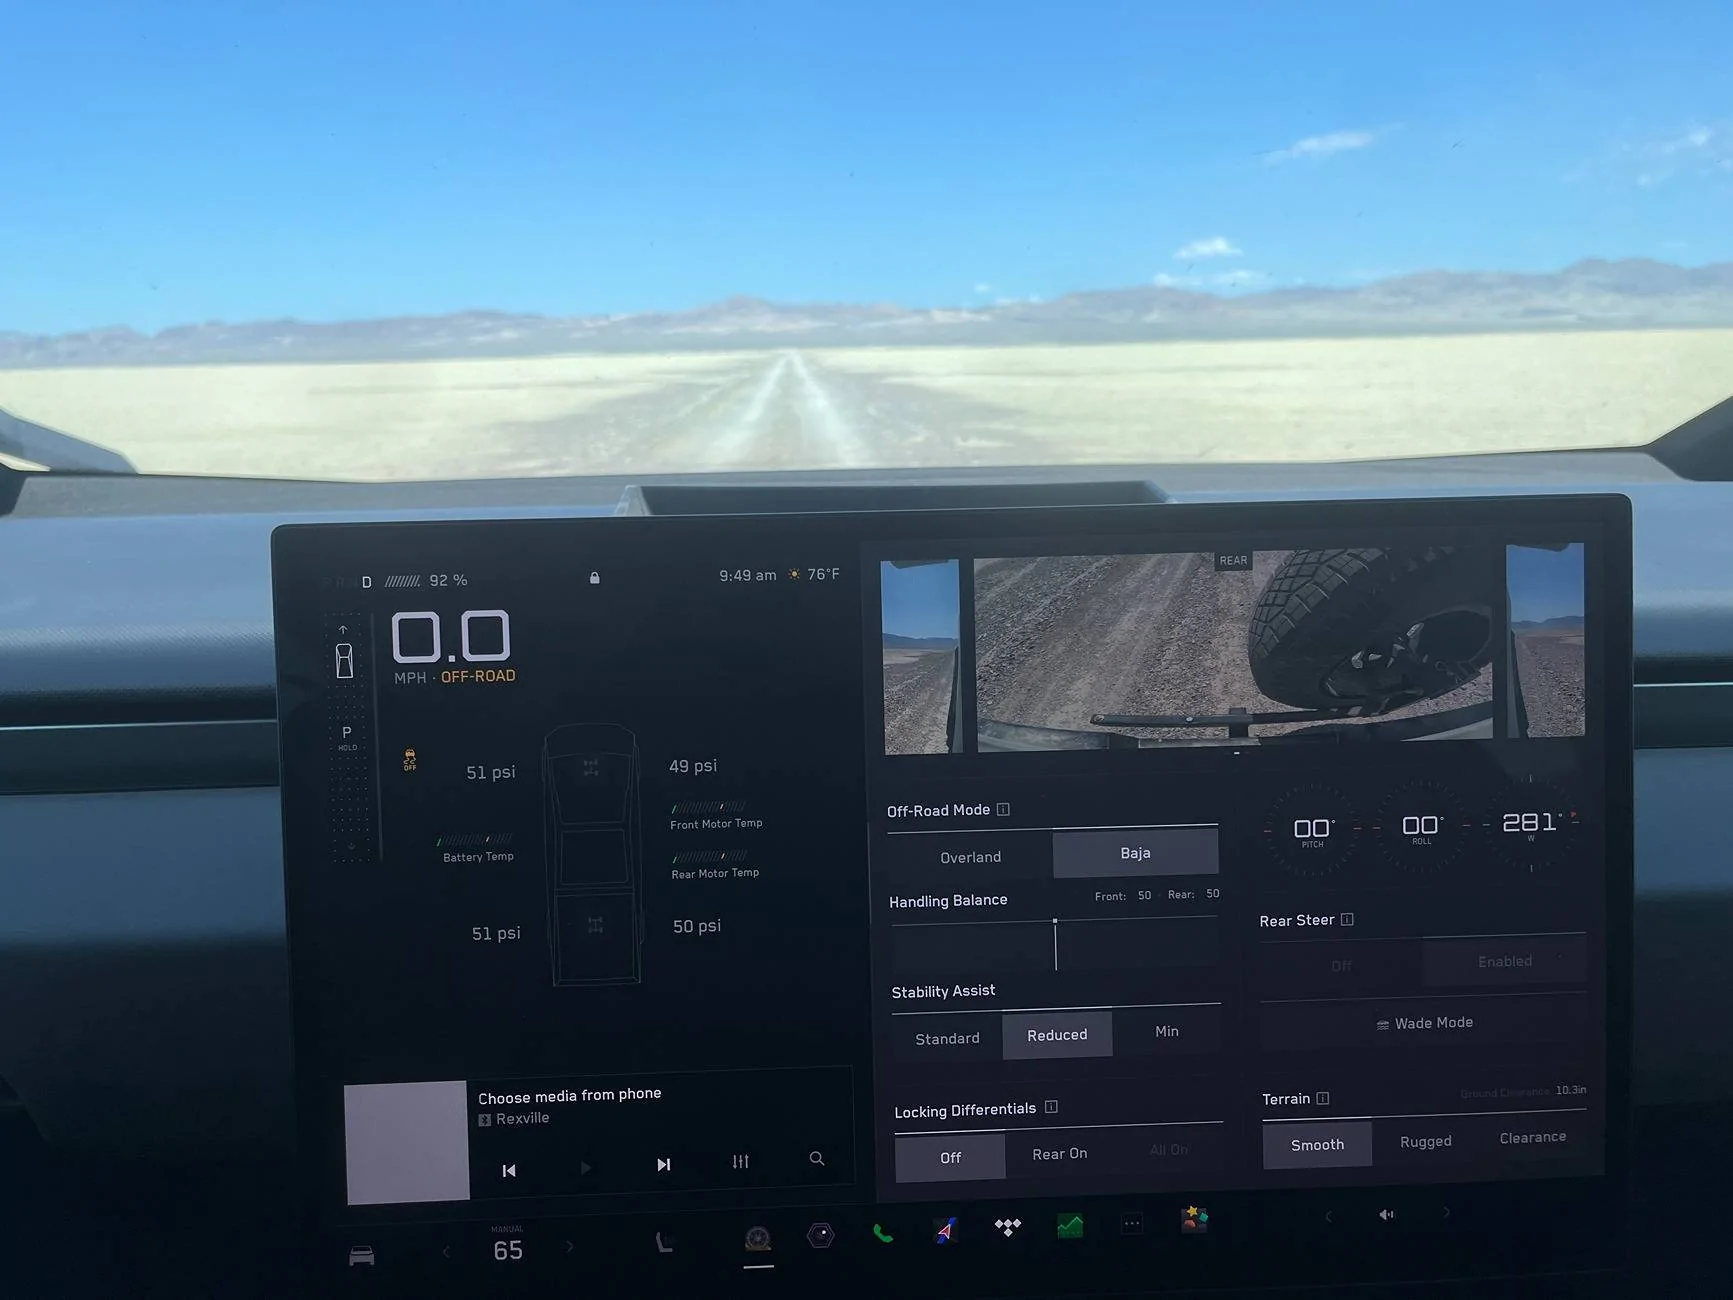
Image 5 shows the view through the rear view mirror on the pavement. Image 6 is the rearview mirror in Baja Mode, and the base of the tire is clearly visible for driving off of ramps.
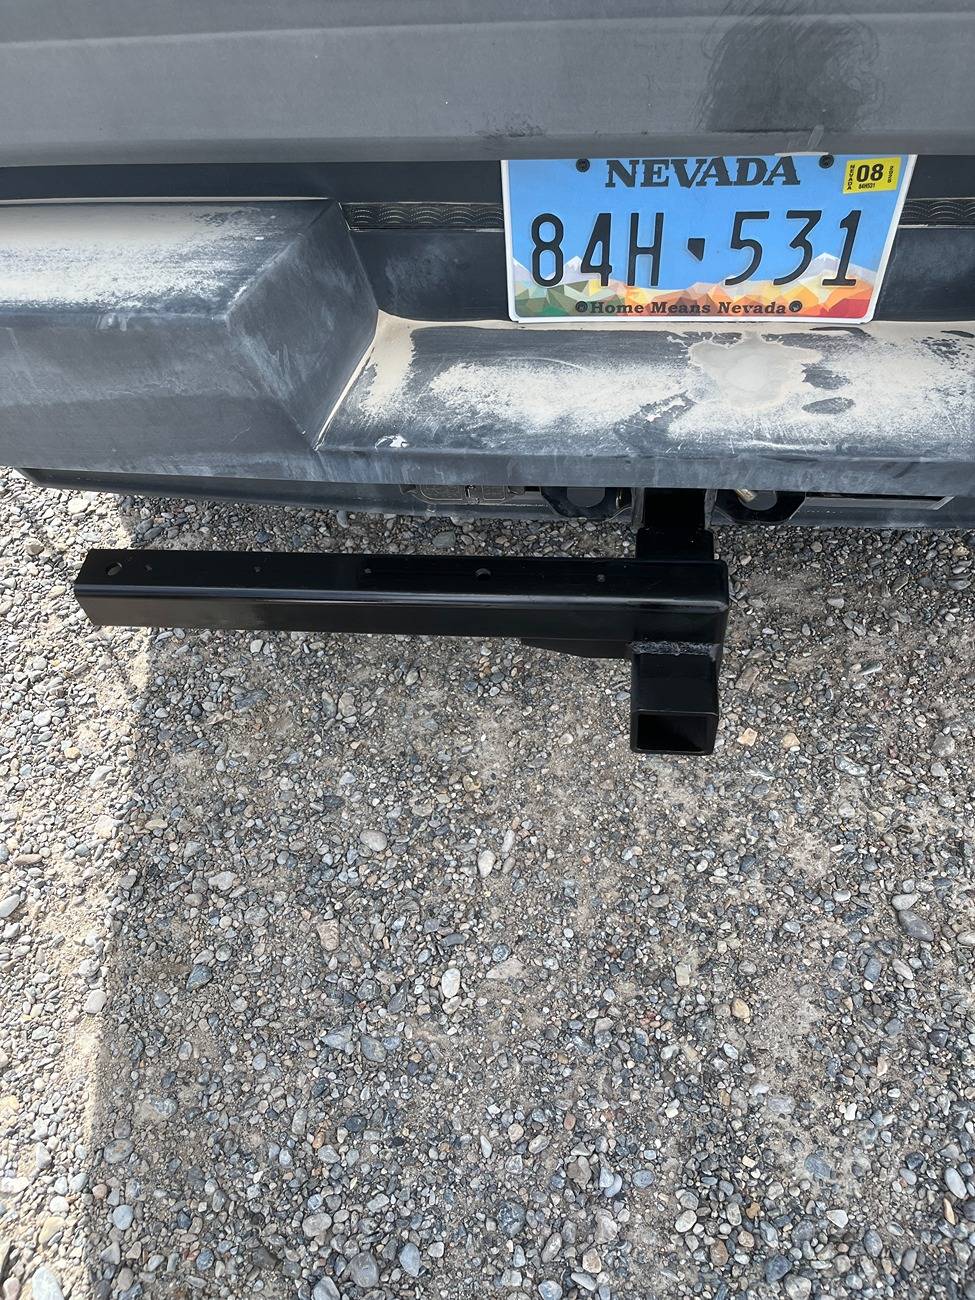
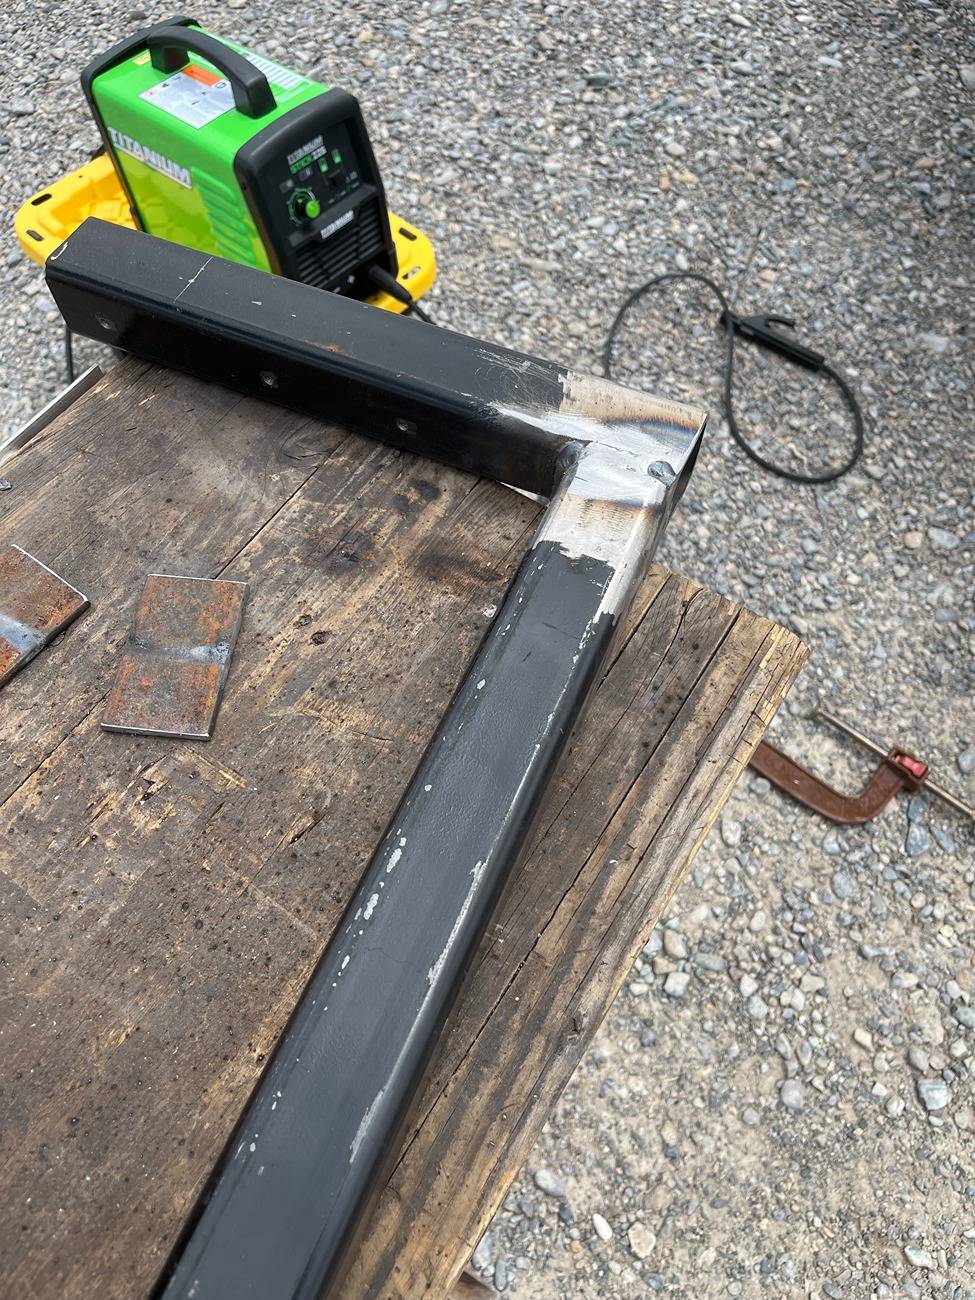
Image 7 is the lower support, welded to the trailer hitch attachment "extender". I bought the extender at Tractor Supply. Image 8 is the upper support - 38" long, with the upright support welded to it. The upper and lower supports are attached by a 5/8" bolt that acts as the hinge. There is an additional bolt used that keeps these two pieces from swinging apart while driving.
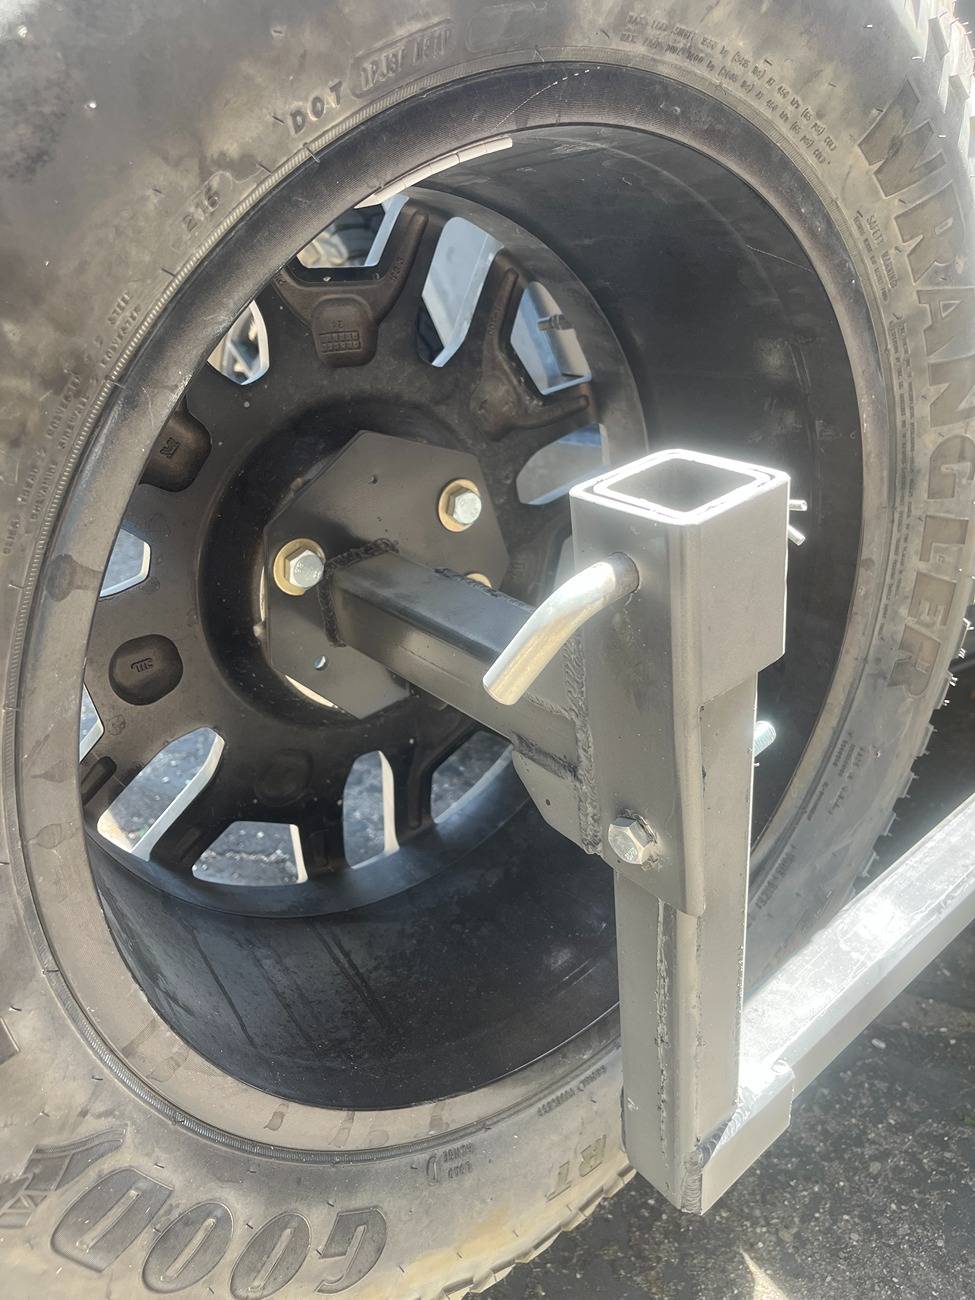
Images 9 and 10 show details of the slider piece that the wheel bolts to; this slides up and down for convenience, so that the wheel can be placed on the ground for bolting/unbolting to the tire rack.
Image 11 is the slider piece in the down position.
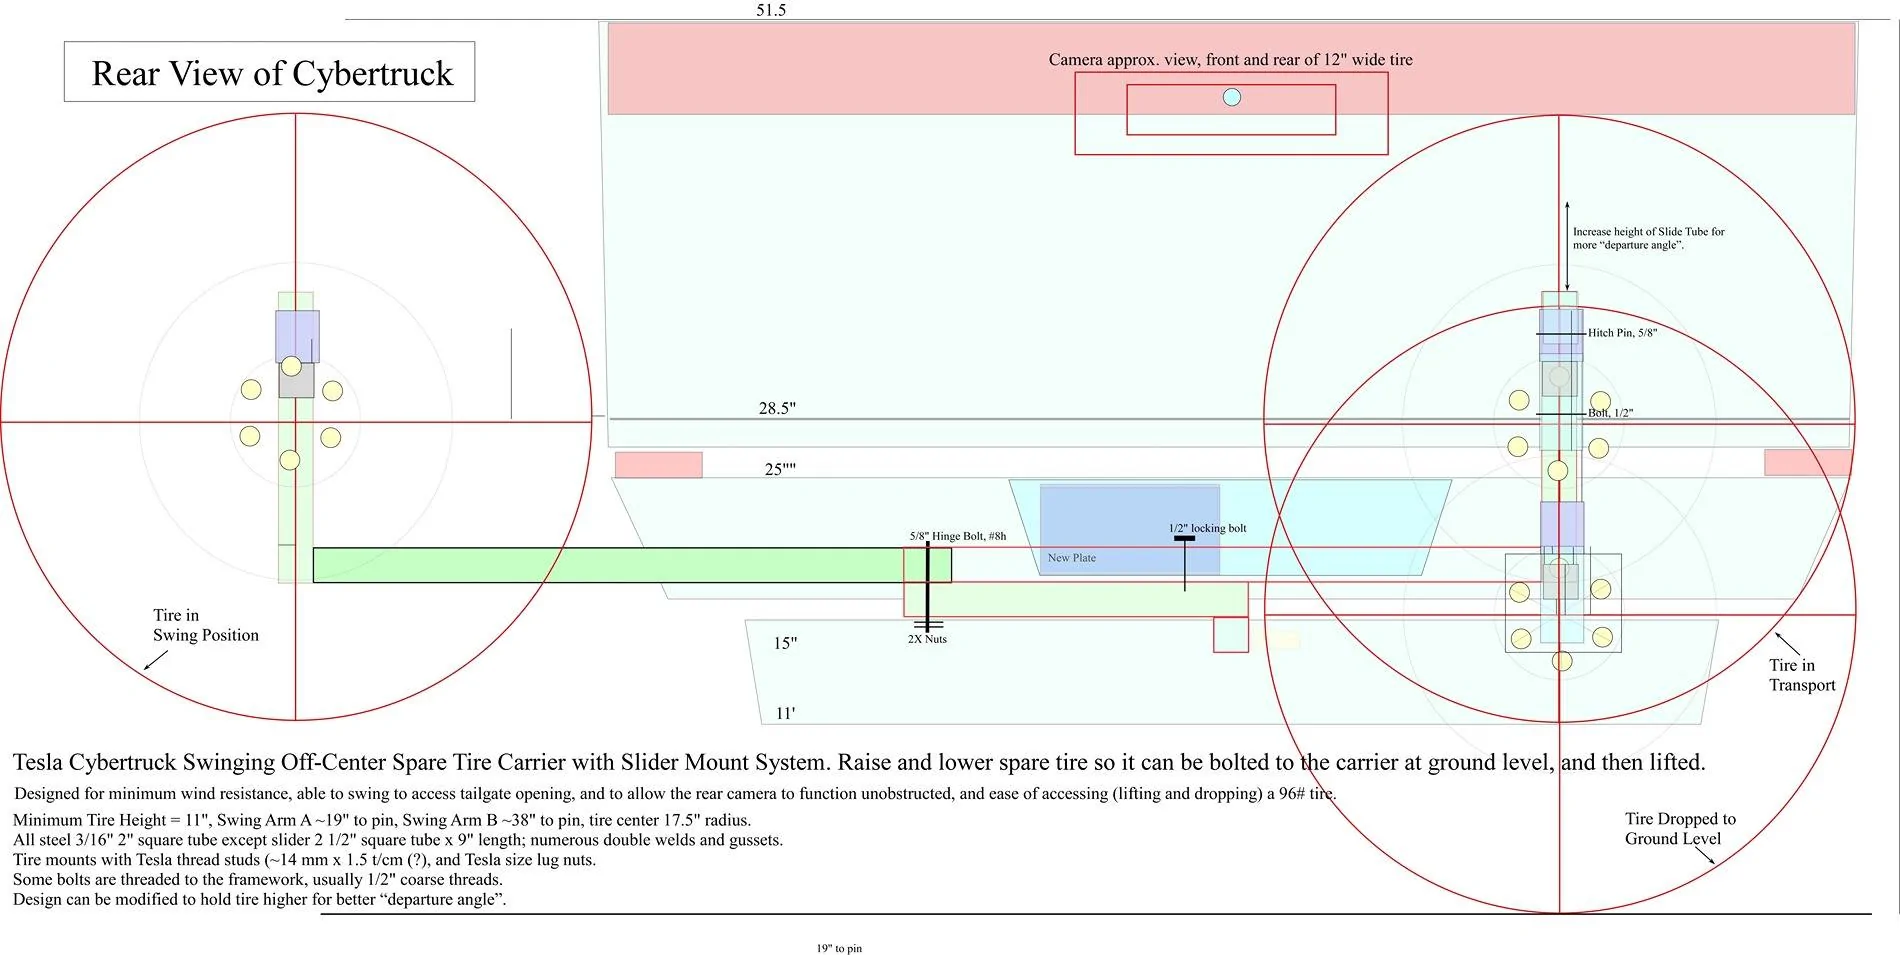
Image 12 is the diagram I used for the design.
Image 13 is another photo of how the tire fits and looks from behind the vehicle.
I will probably now add a piece between the hitch and extender to keep these pieces from wriggling. It does not, due to the weight of the tire, but I do not like the fit. All hitches are this way, but I still do not like it.
Please enjoy the design. This is proto-type #1. Not perfect, but very functional.


I mount the wheel on a 7 sided polygon (septagon) shaped like the wheel, and threaded with Tesal-equivelent studs (14mm x 1.5 t/cm?). Also, the bolts are lugnuts for CT wheels.
Images 1, 2, and 3 show viewpoints of the set up. Note that if the tailgate is accidentally opened, then it hits the tire, and not the steel rack.
Image 4 shows the wheel swung to the side, and in the "up" position, before the slider is deployed.
Image 5 shows the view through the rear view mirror on the pavement. Image 6 is the rearview mirror in Baja Mode, and the base of the tire is clearly visible for driving off of ramps.
Image 7 is the lower support, welded to the trailer hitch attachment "extender". I bought the extender at Tractor Supply. Image 8 is the upper support - 38" long, with the upright support welded to it. The upper and lower supports are attached by a 5/8" bolt that acts as the hinge. There is an additional bolt used that keeps these two pieces from swinging apart while driving.
Images 9 and 10 show details of the slider piece that the wheel bolts to; this slides up and down for convenience, so that the wheel can be placed on the ground for bolting/unbolting to the tire rack.
Image 11 is the slider piece in the down position.
Image 12 is the diagram I used for the design.
Image 13 is another photo of how the tire fits and looks from behind the vehicle.
I will probably now add a piece between the hitch and extender to keep these pieces from wriggling. It does not, due to the weight of the tire, but I do not like the fit. All hitches are this way, but I still do not like it.
Please enjoy the design. This is proto-type #1. Not perfect, but very functional.

Sponsored
Last edited: