jflaplante
Member
- First Name
- Jean-Francois
- Joined
- May 19, 2025
- Threads
- 1
- Messages
- 10
- Reaction score
- 34
- Location
- Québec, Canada
- Vehicles
- CYX
- Thread starter
- #1
Part 1 ... Part DEUX is later in this thread
I needed a portable camping solution. I tried to find a suitable used original Cybertent but nothing was easily available. A "want to buy" post in one of the Facebook Cybertruck group was even rejected because I quote the admin: "Too many scammers dude" so I decided to make my own. A brand new Cybertent goes for 3805$CAN and the JoyTuTus setup didn't have a false floor so I was loosing too much cargo space.
So I got inspired by this post from a US owner:
https://www.cybertruckownersclub.co...-bed-tent-solution-w-custom-tent-mount.50556/
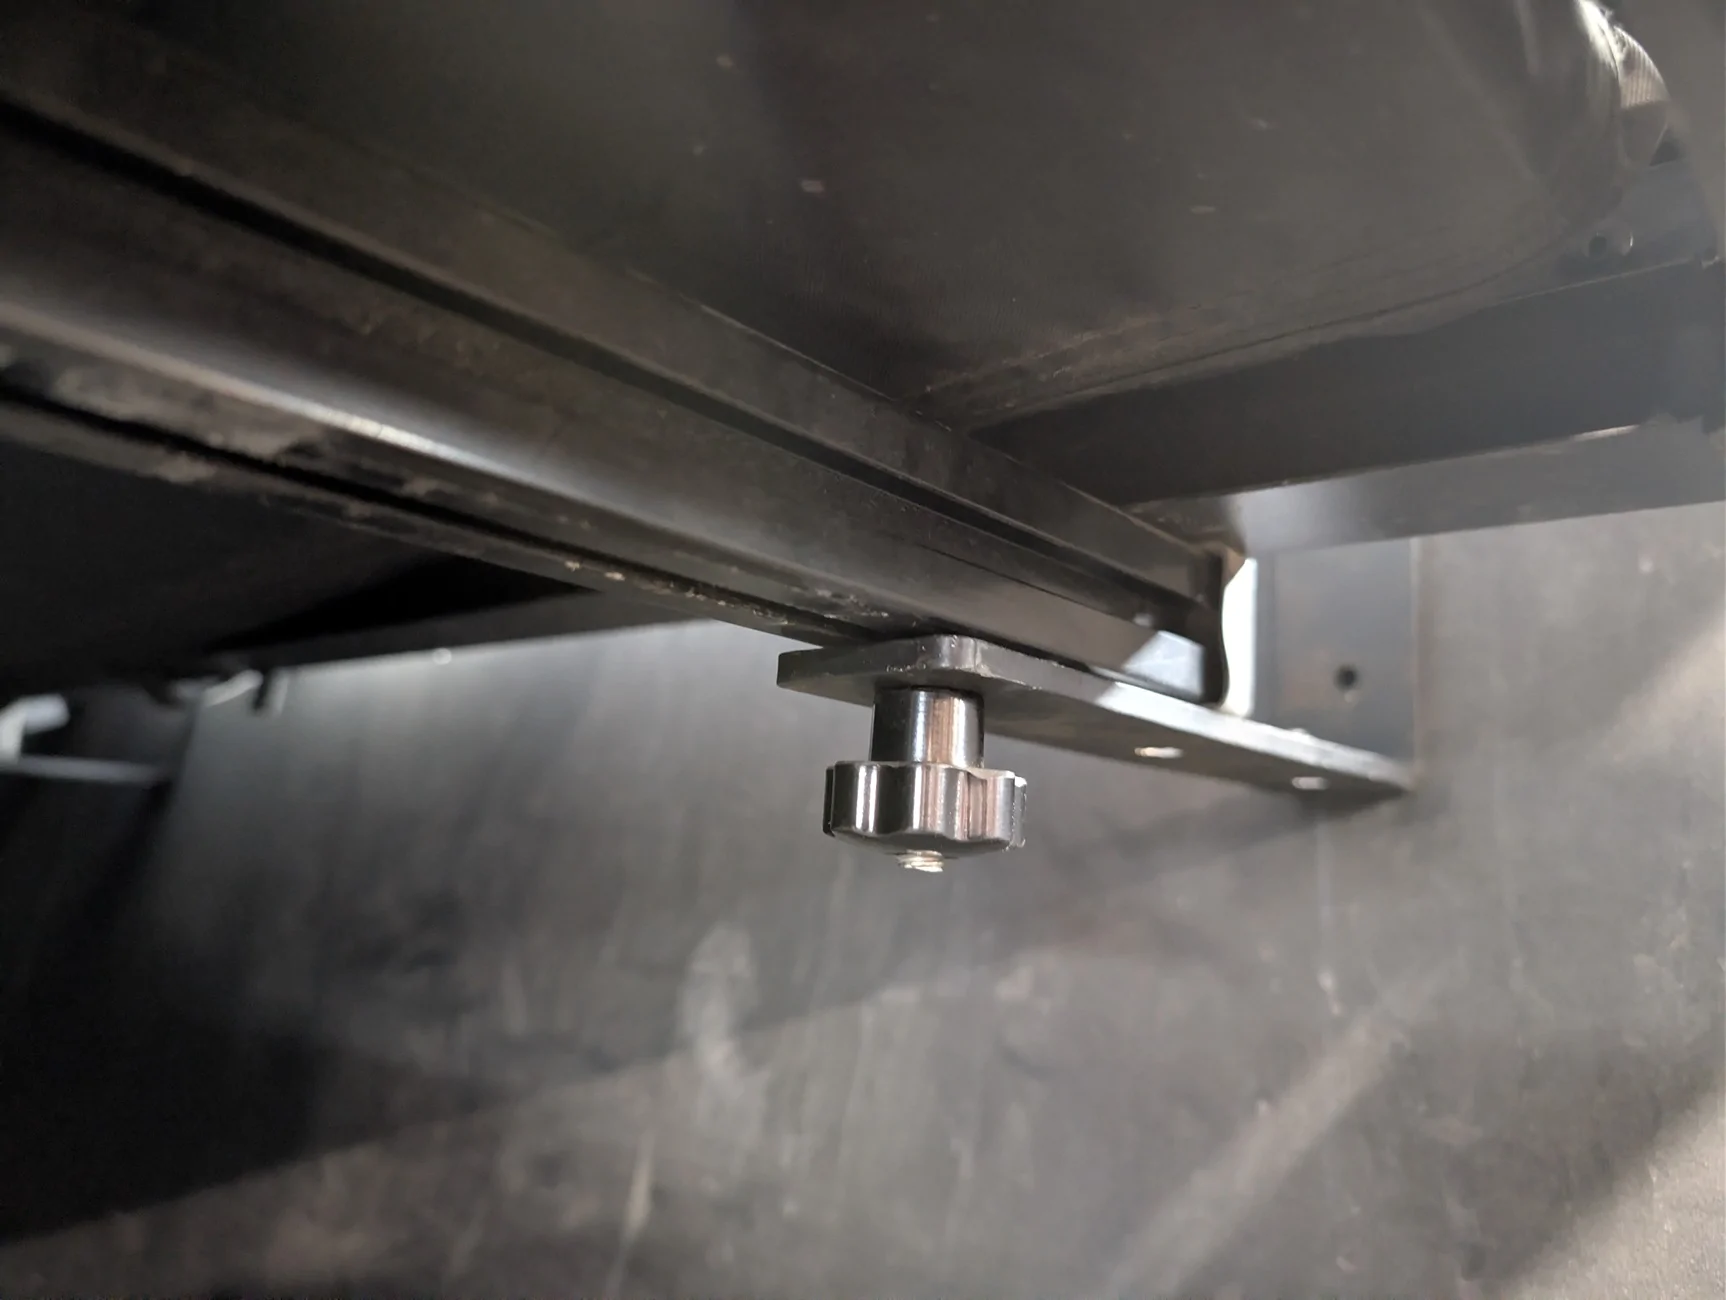
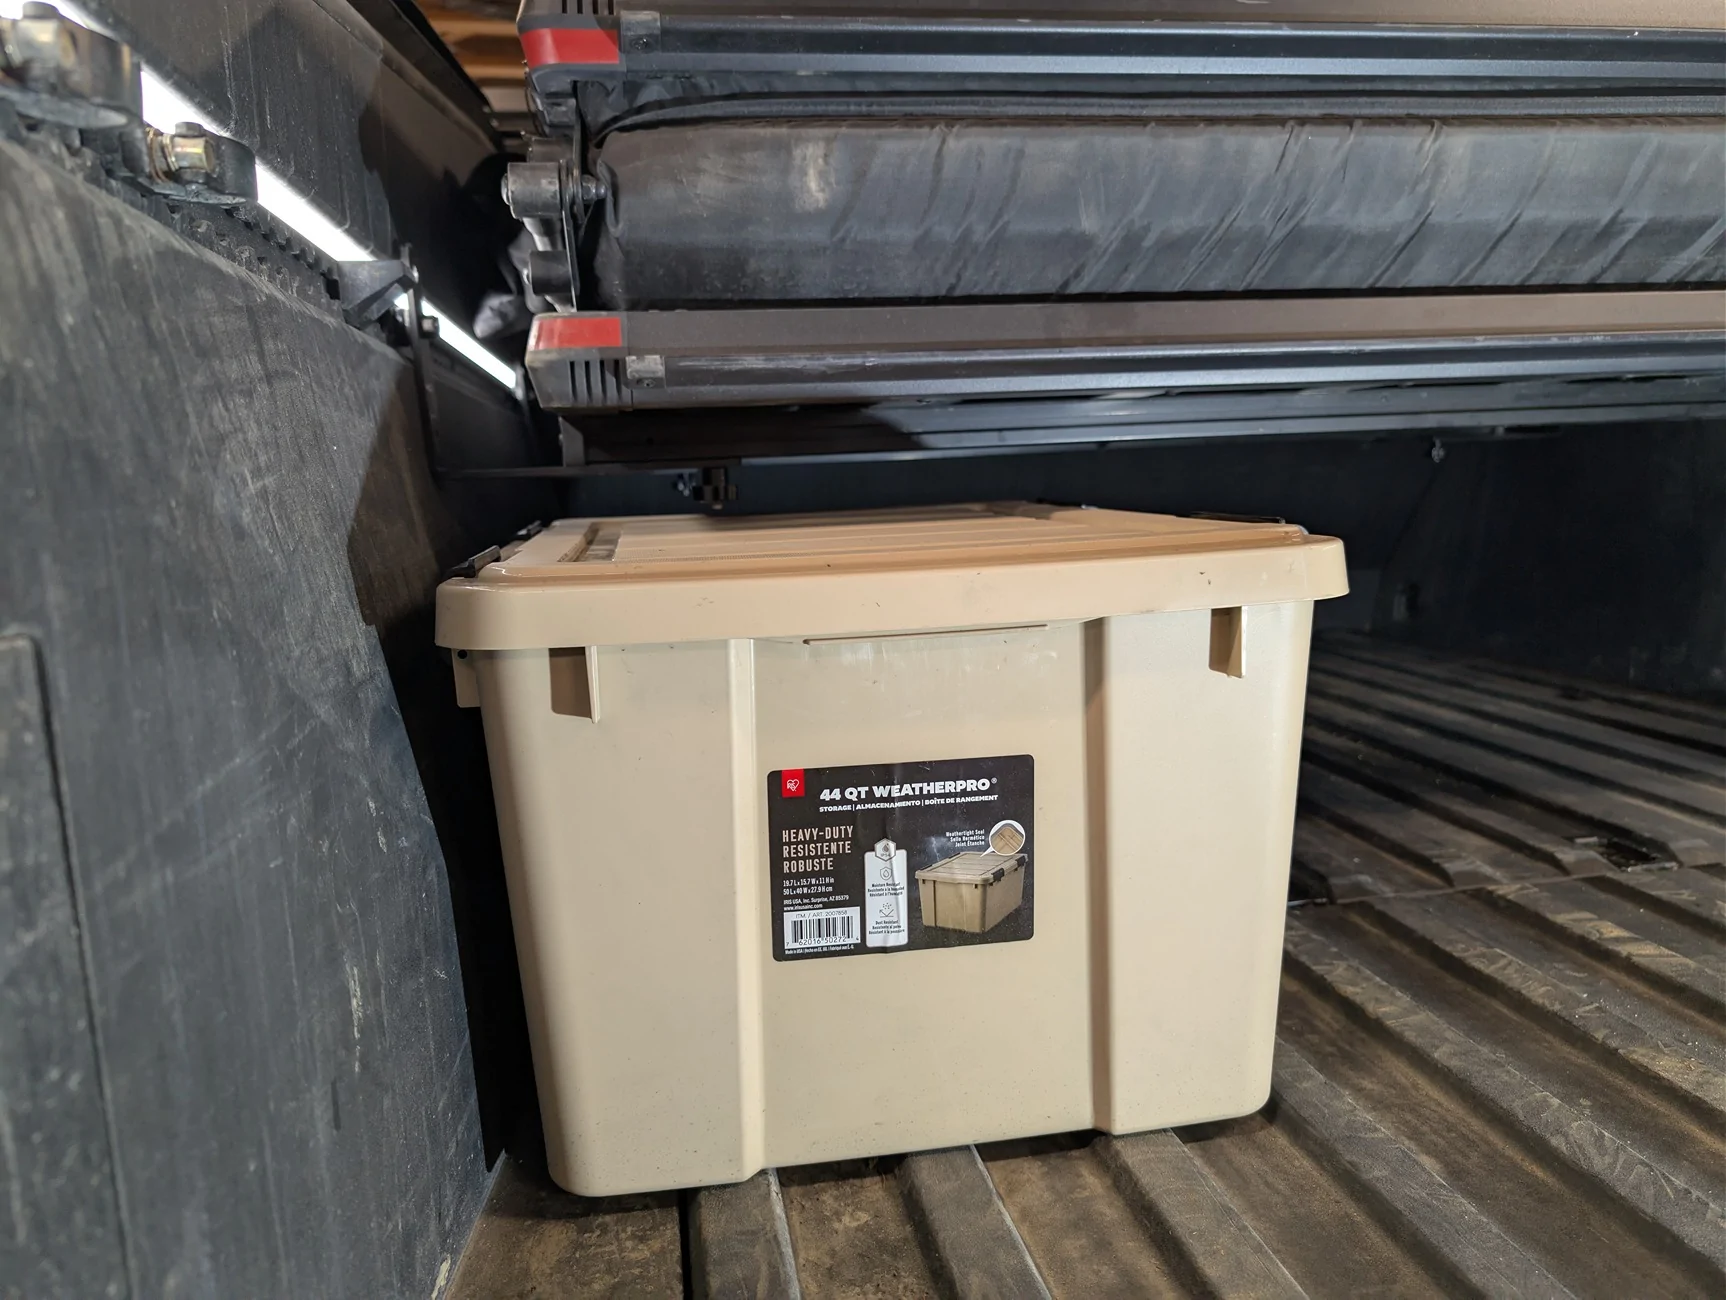
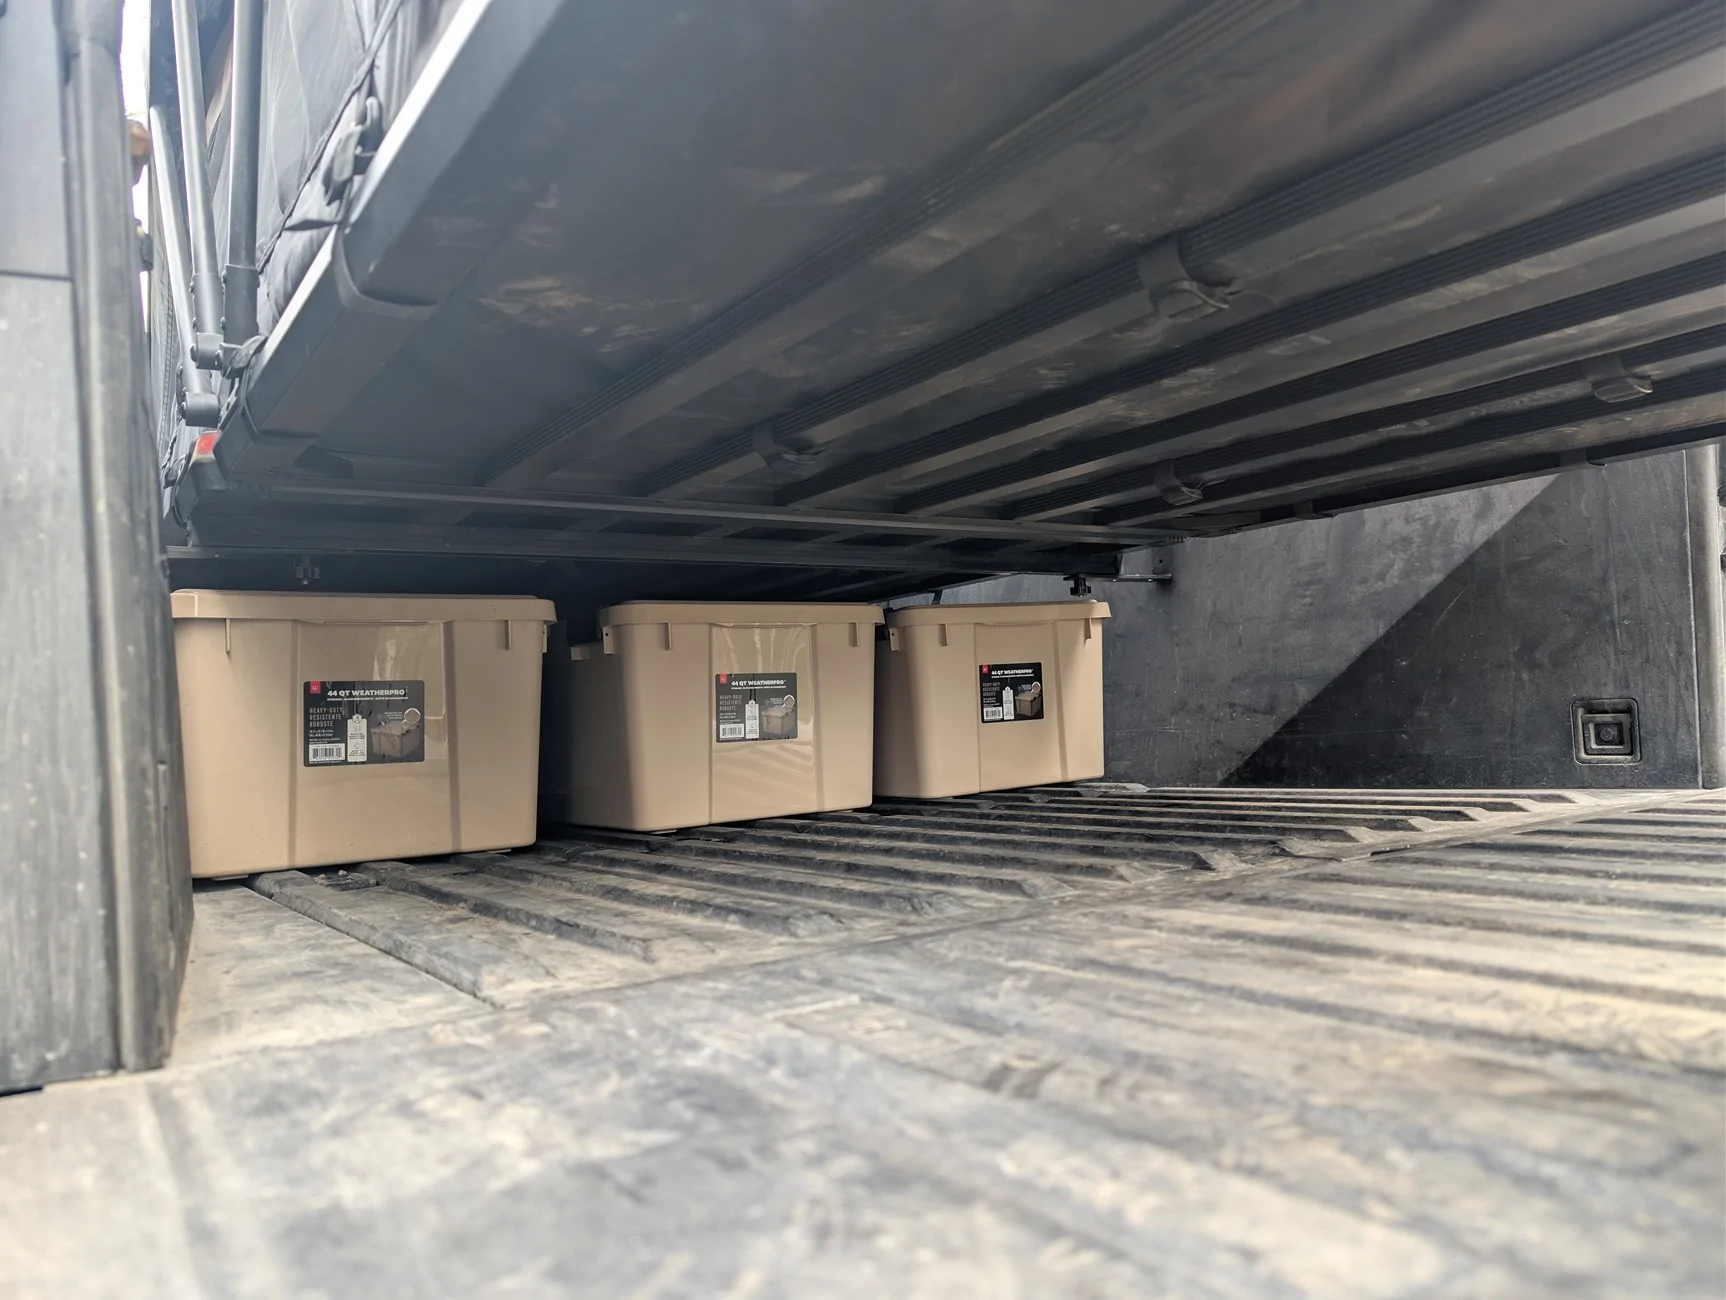
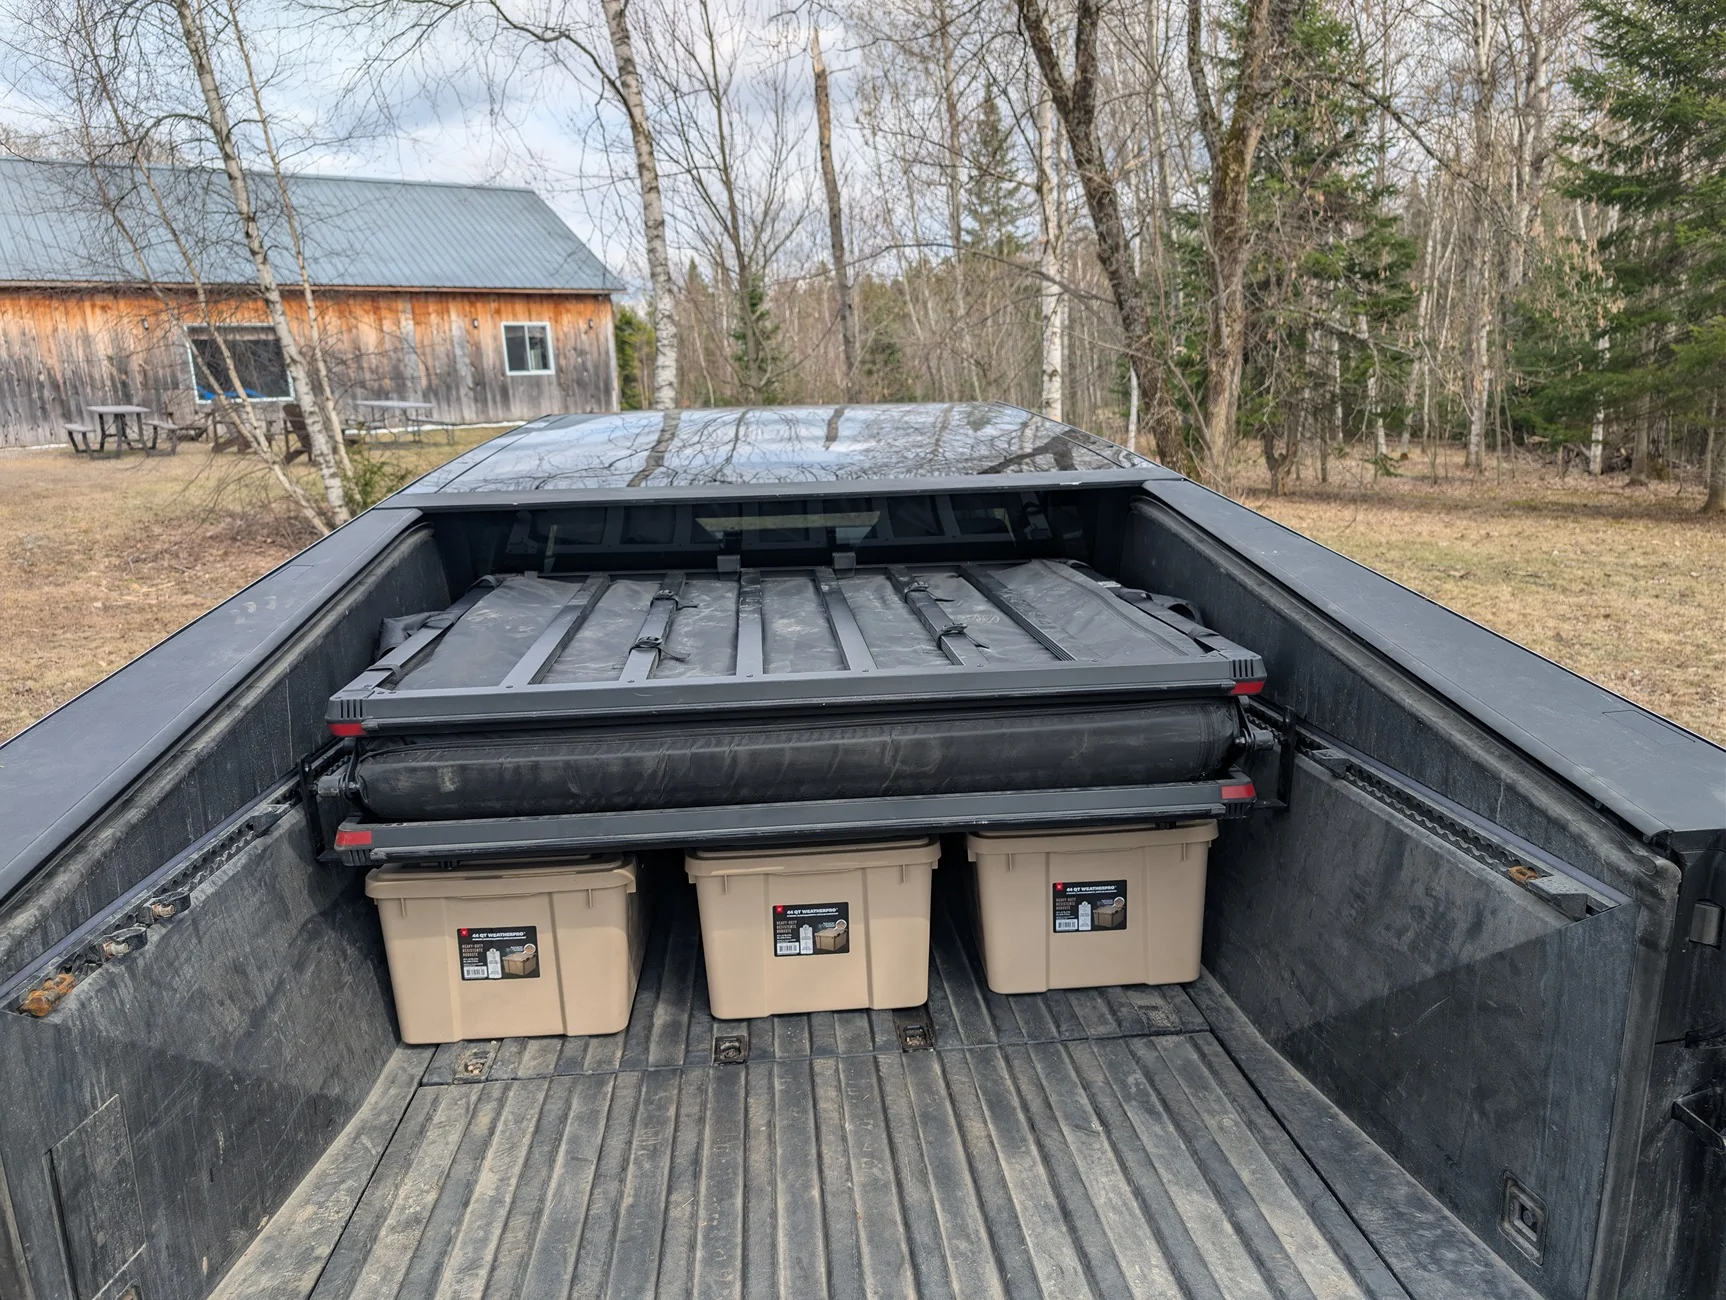
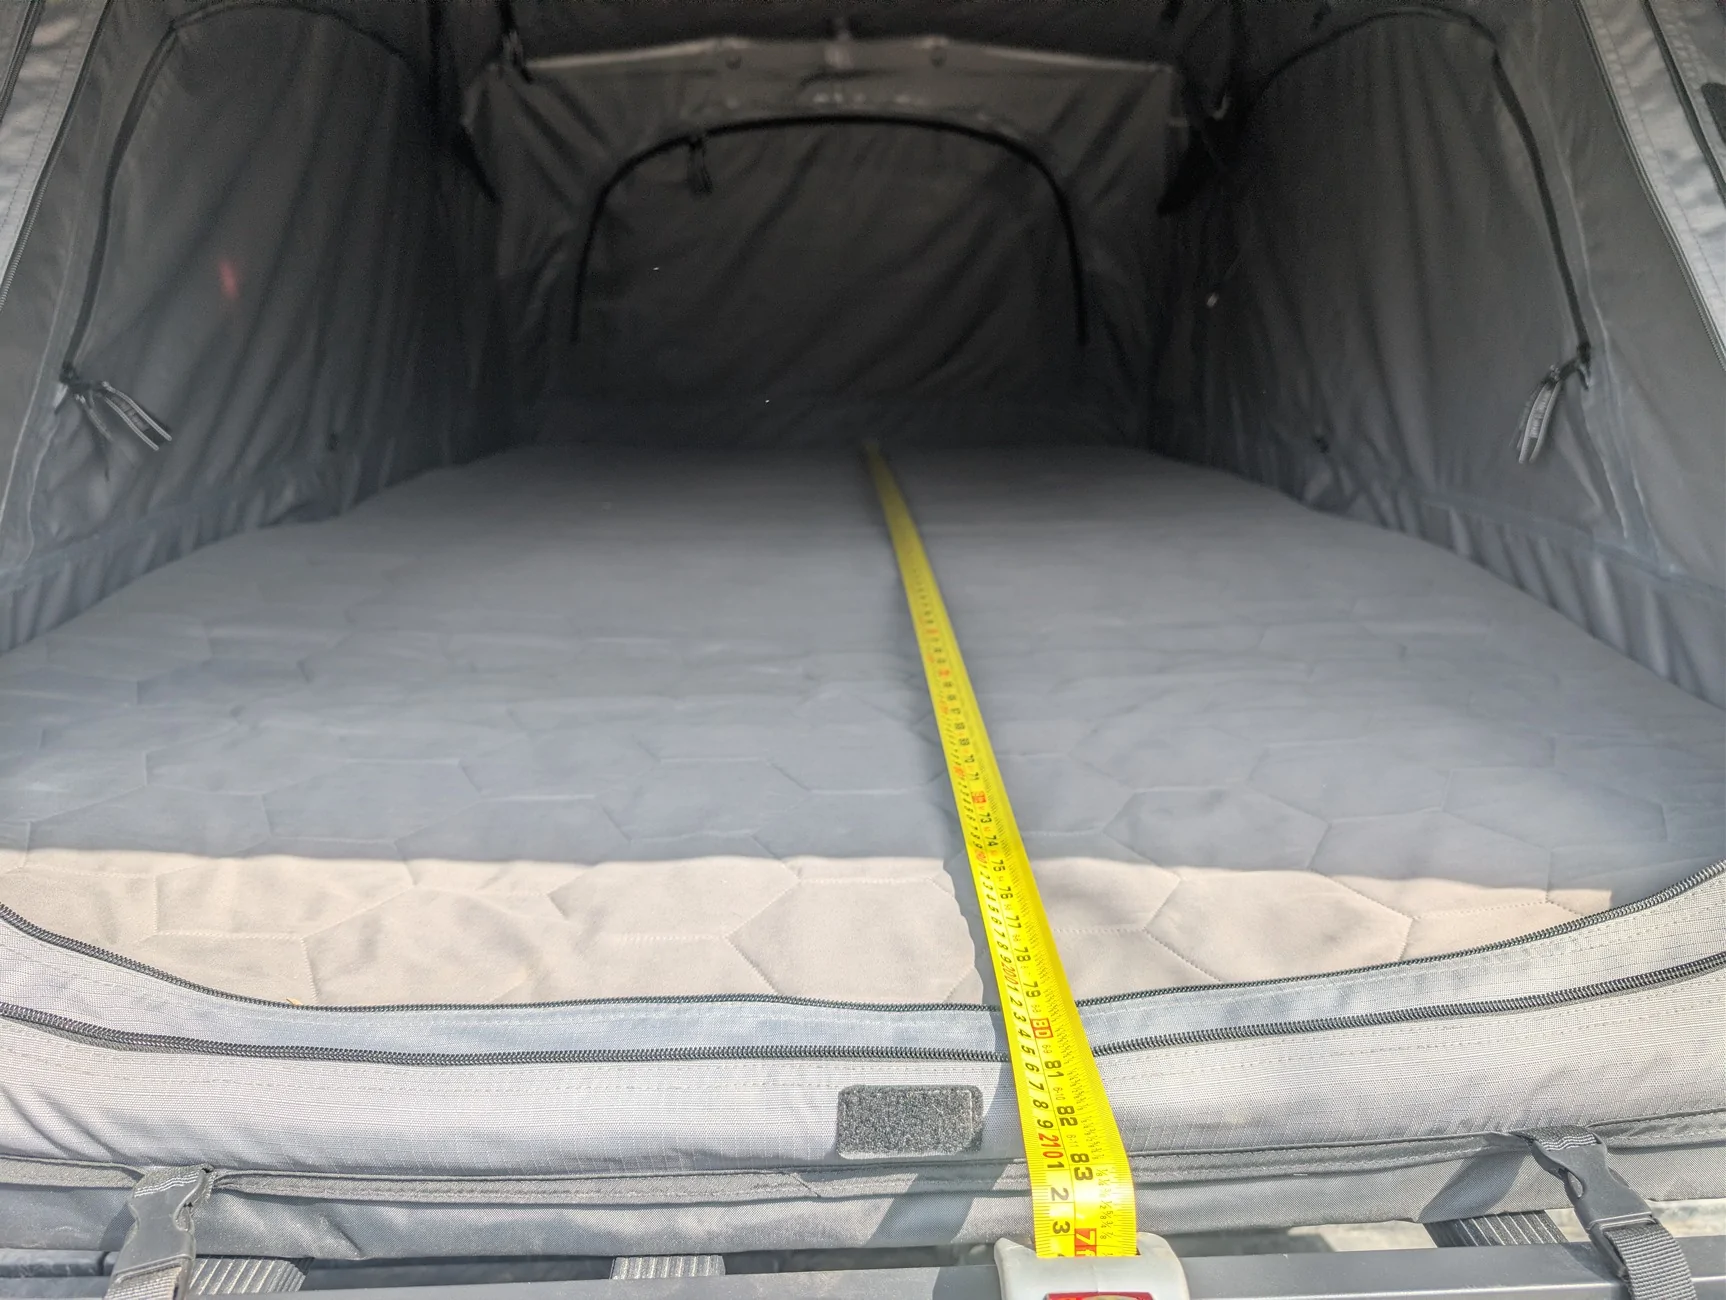
I replicated the project but with a few modification for stuff that was important to me and available from Canadian distributors. First of all, I wanted to maximize the space under the tent in order to have as much cargo space as possible. I ended up with a little bit over 13" of height available and that was enough for my storage bins and toolboxes. The T Bolt holding the tent to my mounting brackets are eating a little bit of space and I will eventually replace them with shorter ones. I used the stainless ones that came with the tent.
The specific tent used in the original post is not available on amazon.ca and no similar models are available either. I chose and similar variant from a Canadian Online seller who provided excellent service and was very knowledgeable. There is a 15% rebate that brought the price to approximately the same as amazon.com if I was going to have it shipped to Canada.
https://rooftopcamp.ca/products/mini-tente-de-toit-compacte
That specific tent already came with 3030 aluminium extrusion under it so I didn't have to purchase and cut those like it was the case in the original post.
All I had to buy beside the tent was this:
L-track lugs: https://www.amazon.ca/dp/B0CRKRW8N5
8" x 6" Brackets: https://www.amazon.ca/dp/B0DX25K3H7?th=1
Total expense including the tent was less than 1600$CAN
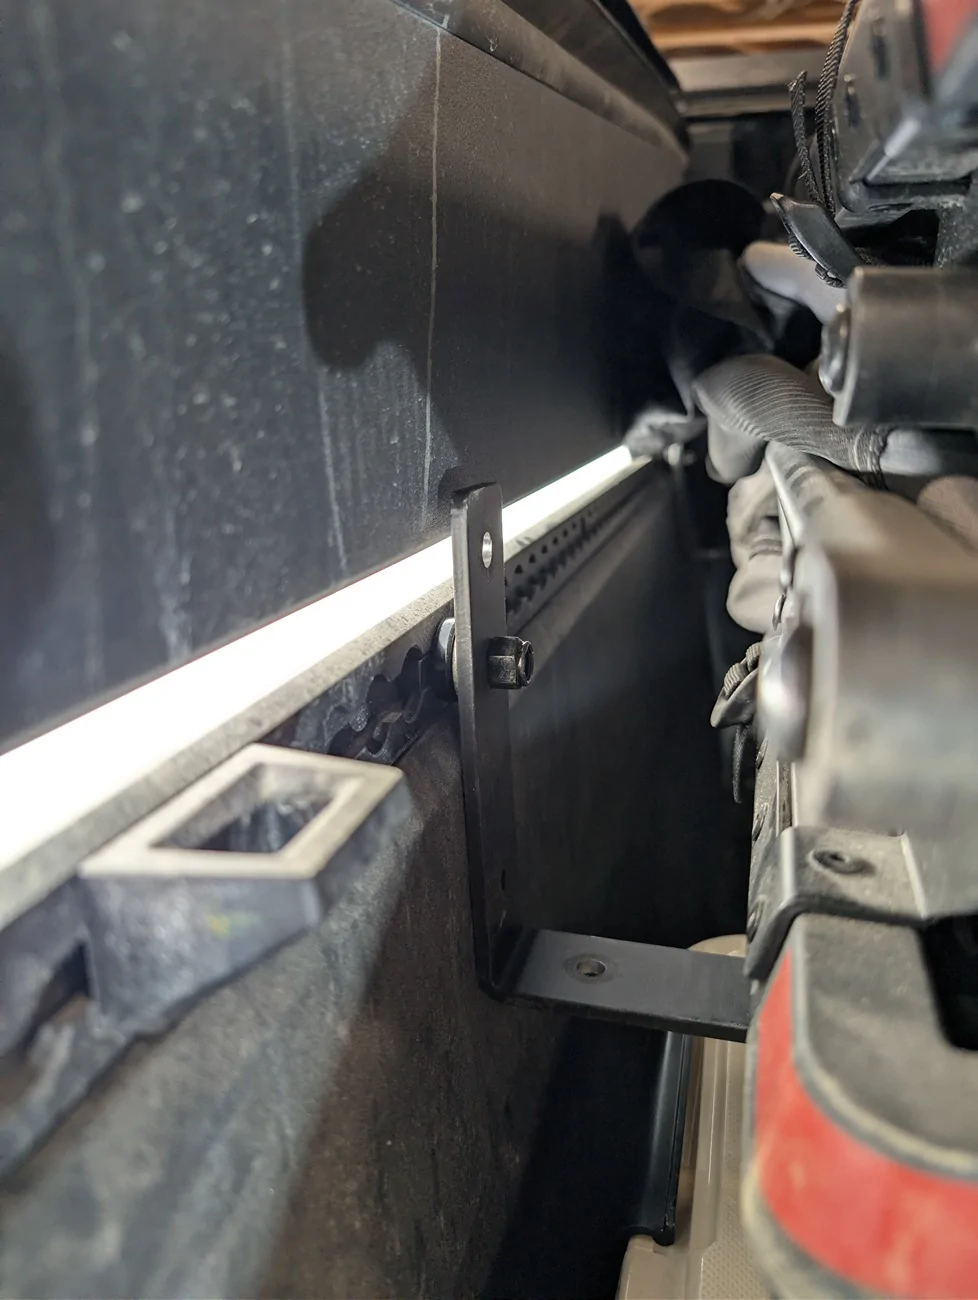
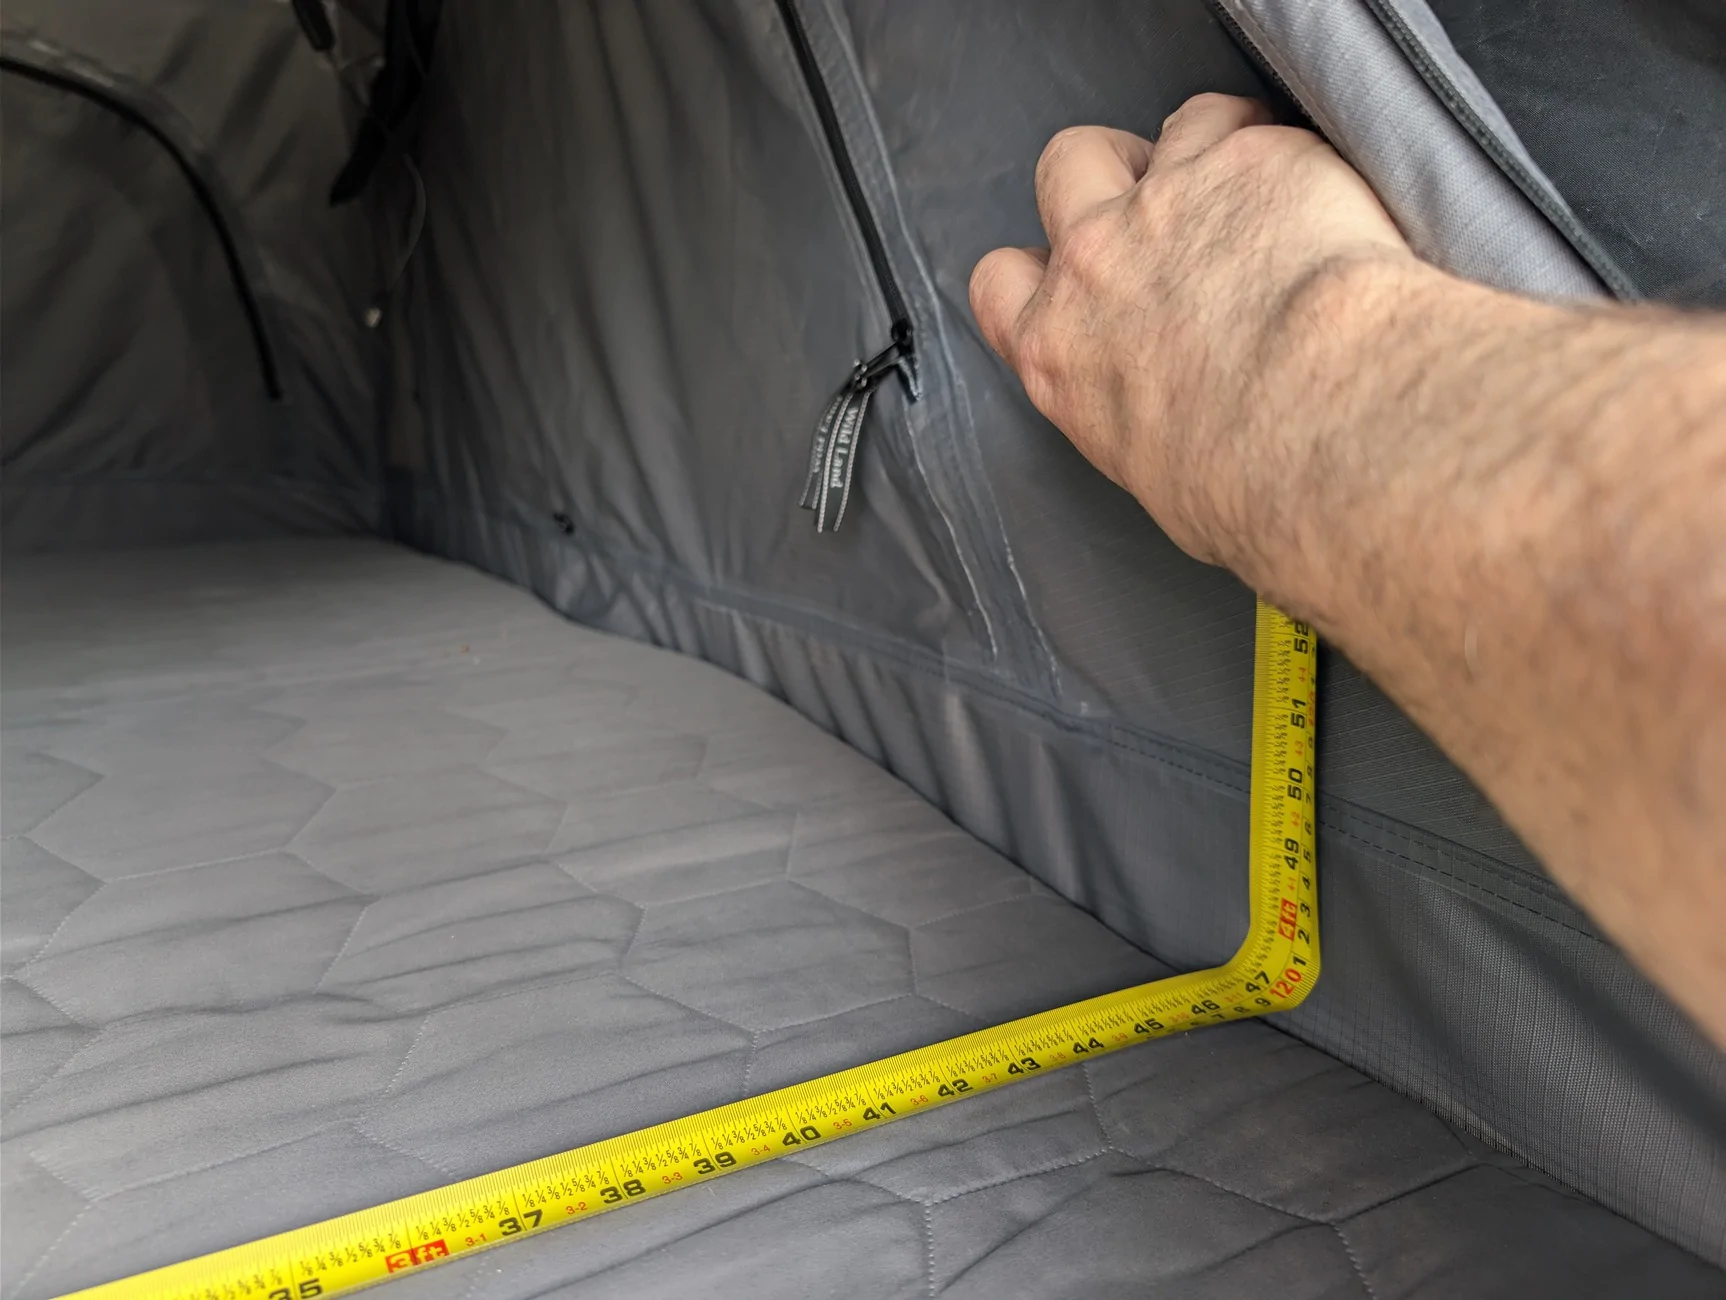
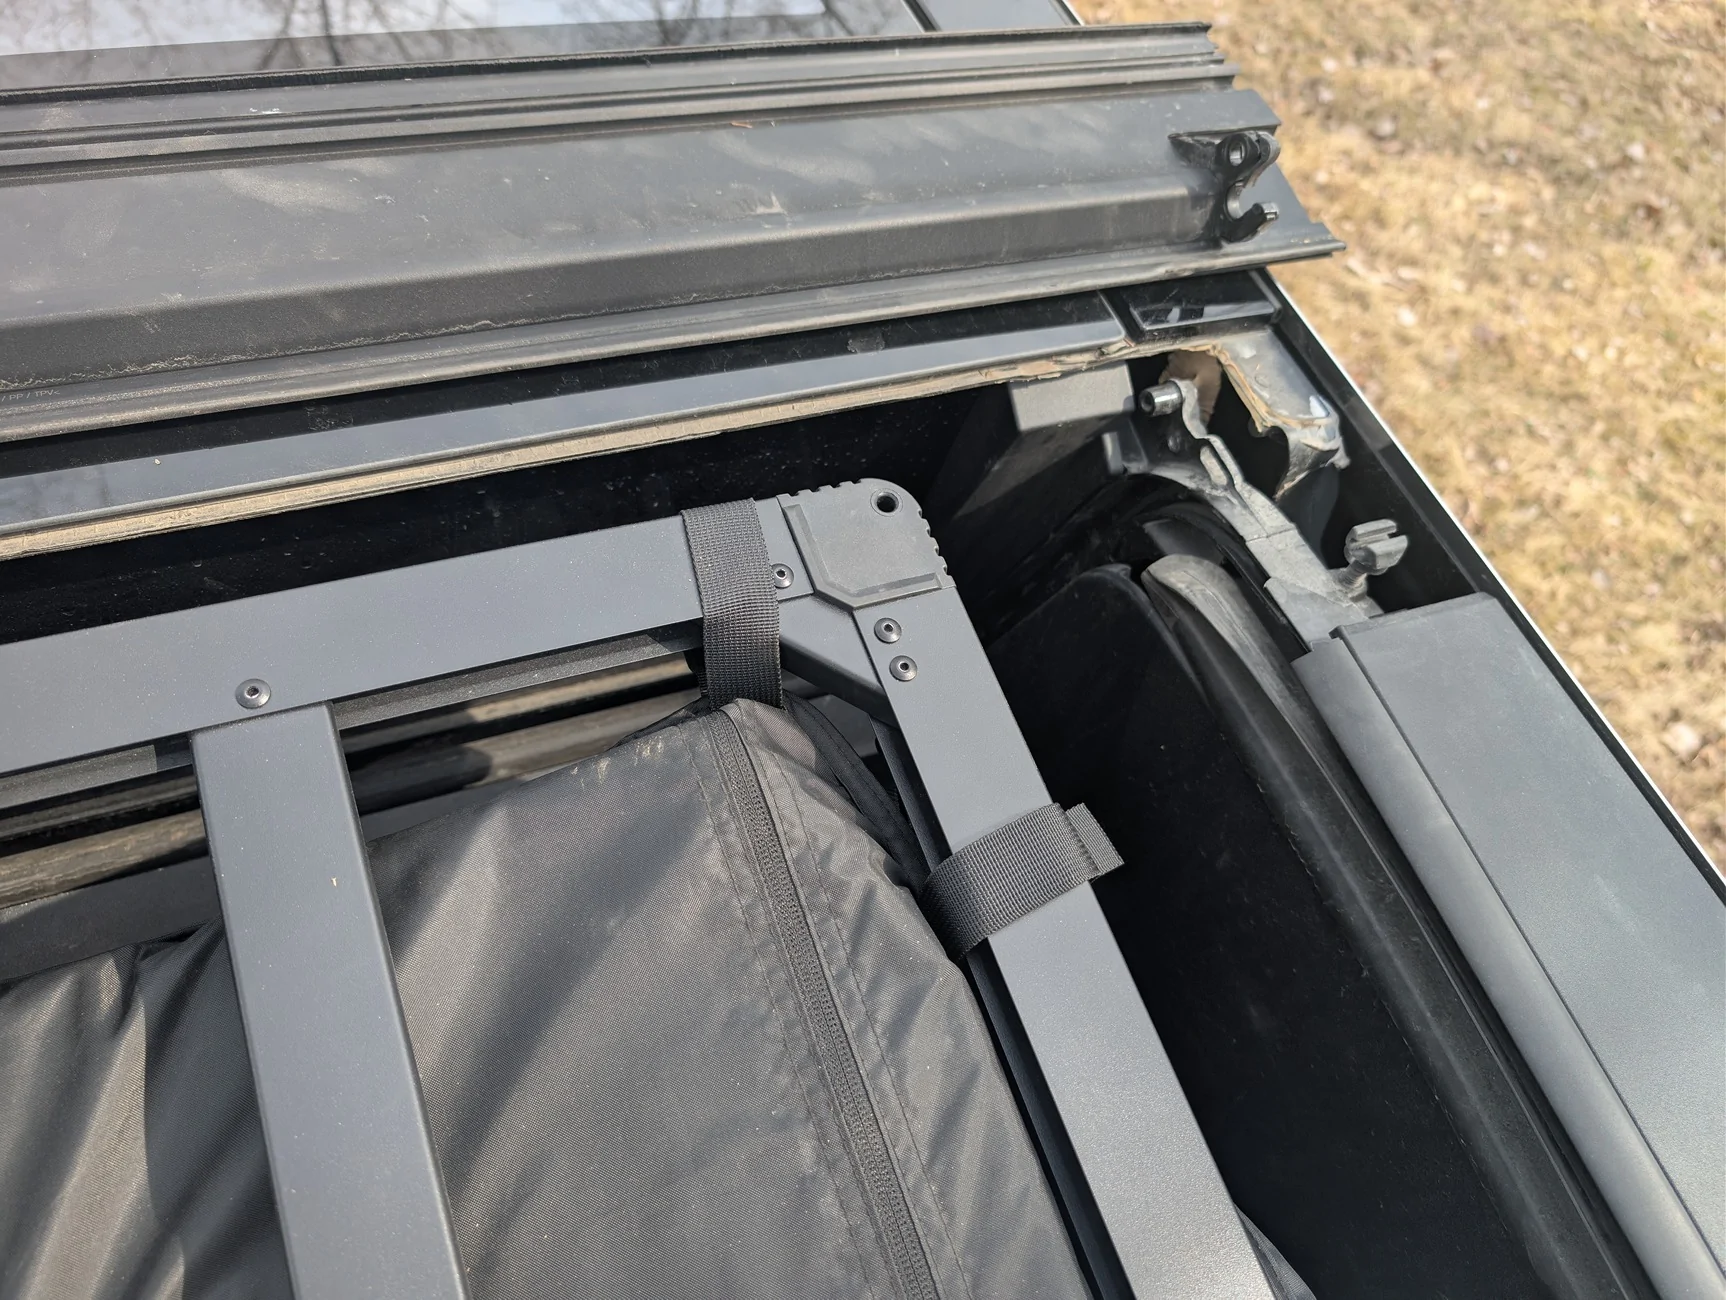
I specifically chose the 8" x 6" brackets because the tent was about 6" narrower than the bed and I wanted to have enough length (8") to be able to use the t-slot built in the tent to attach it to the brackets. Of course, I had to make bigger holes to accommodate both the L-Track lugs and the T-Bolt and, like in the original post, I had to bend the brackets a little with a pipe to match the bed angle. An additional hole was made to maximize the height with the L-Tracks.
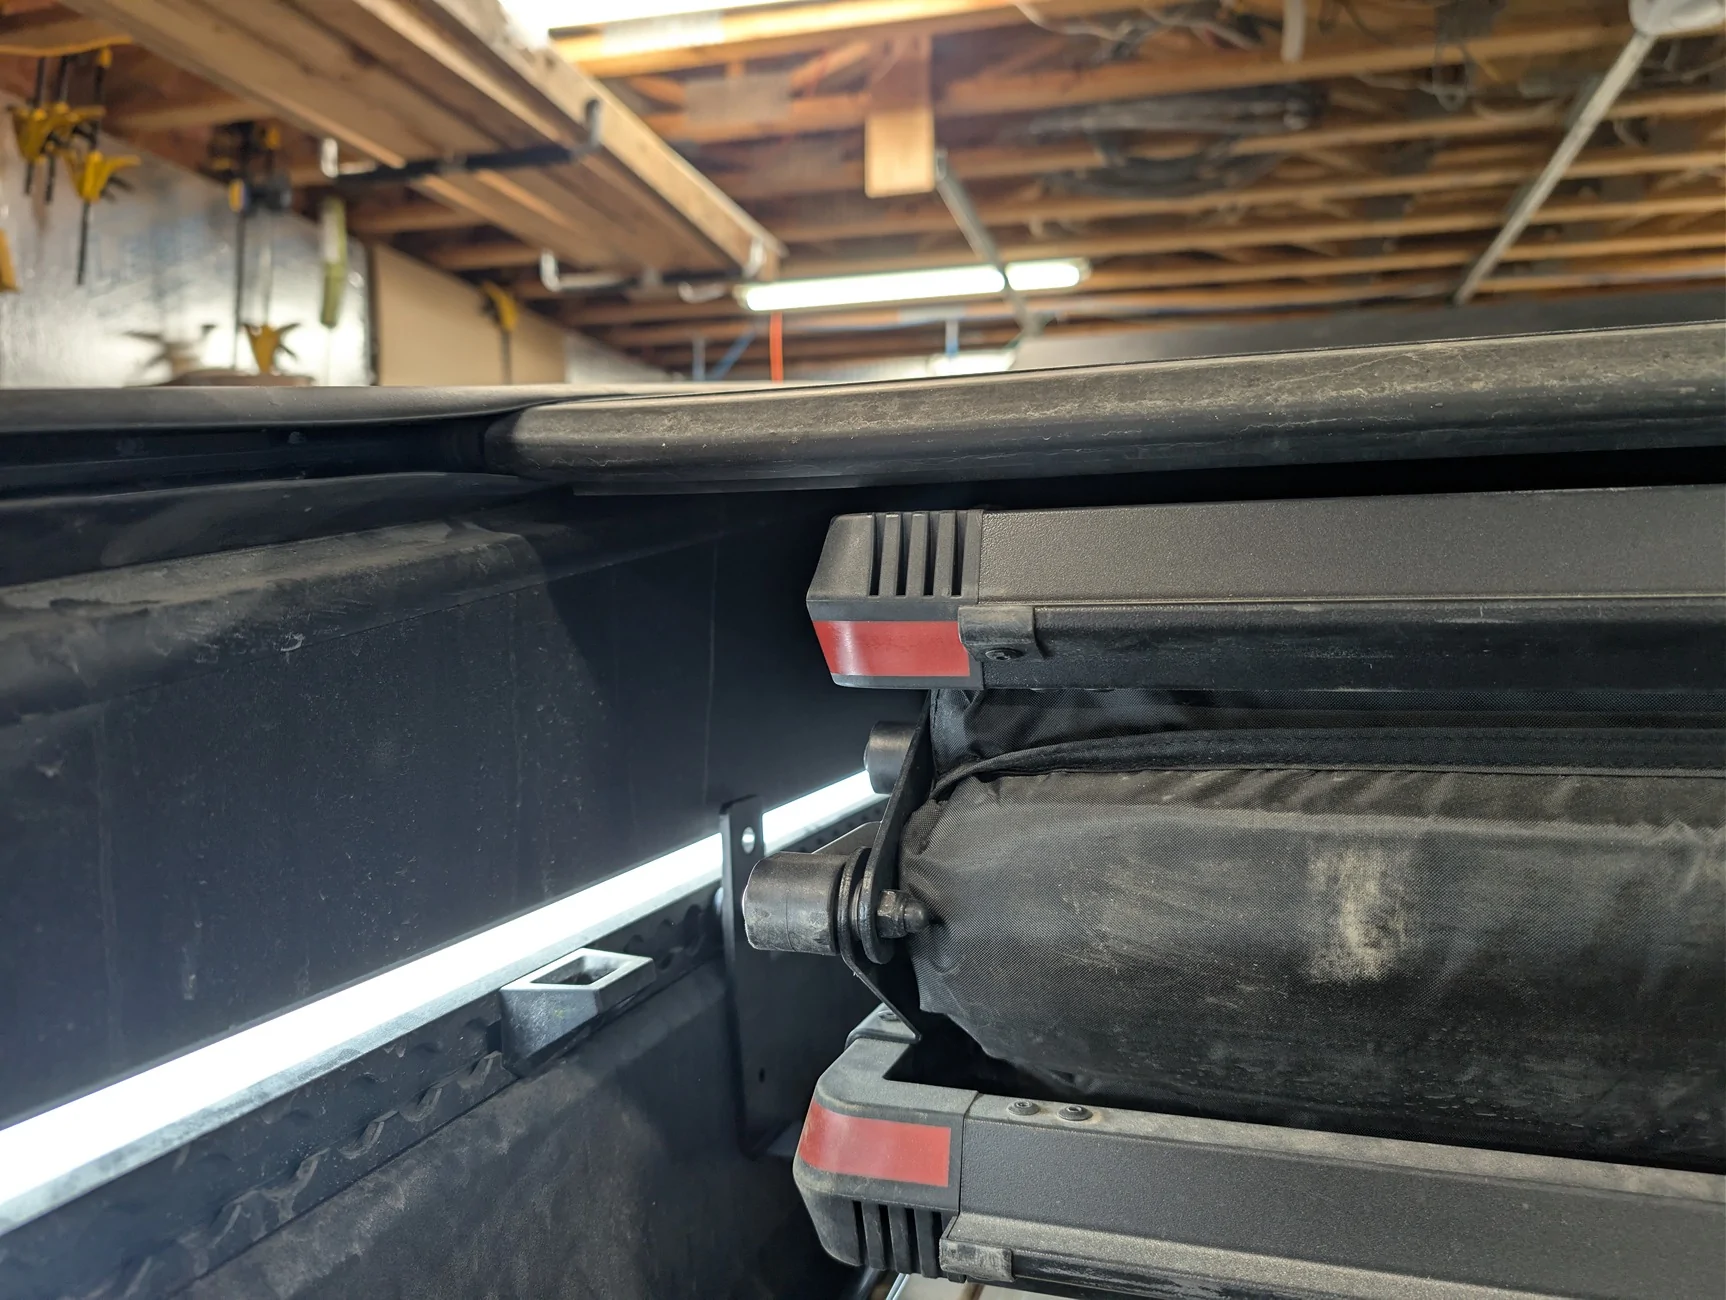
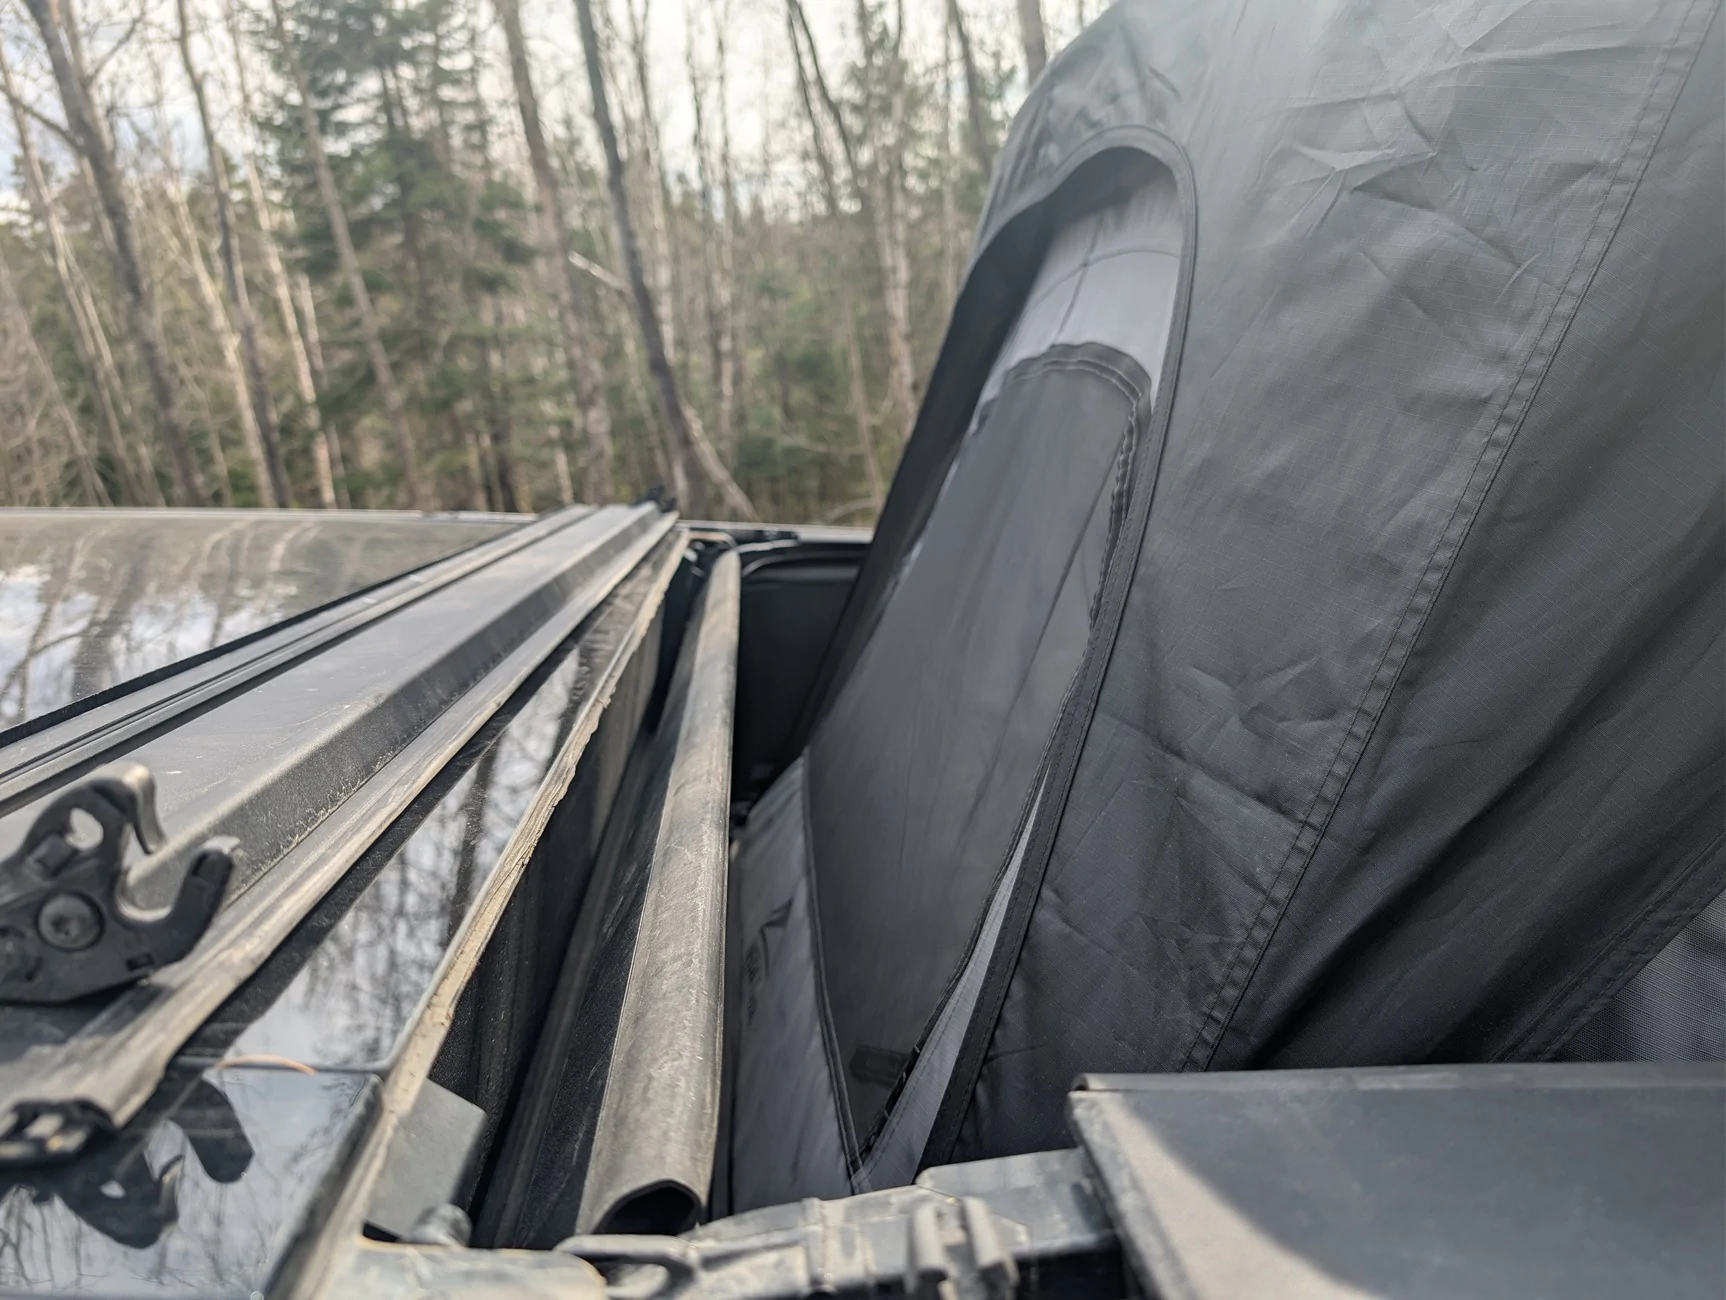
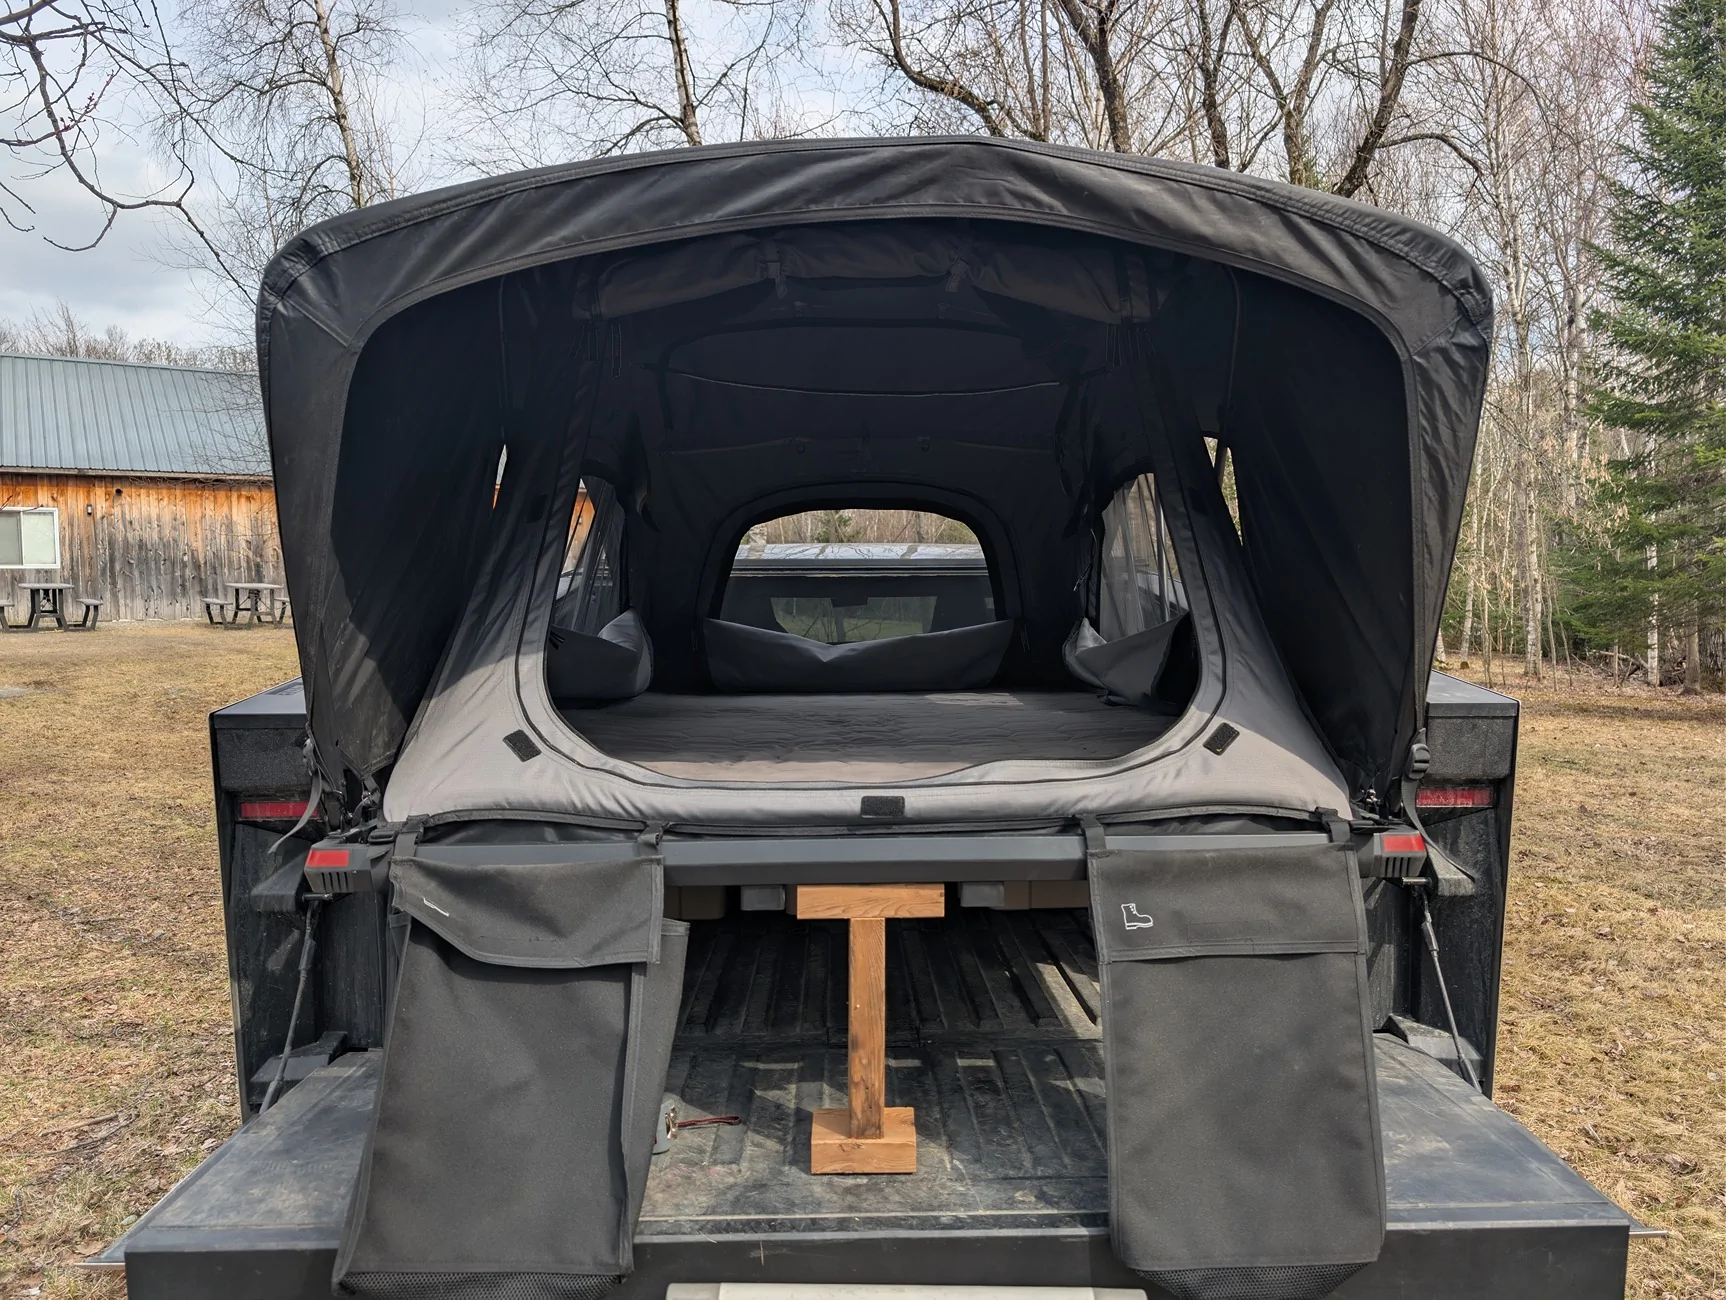
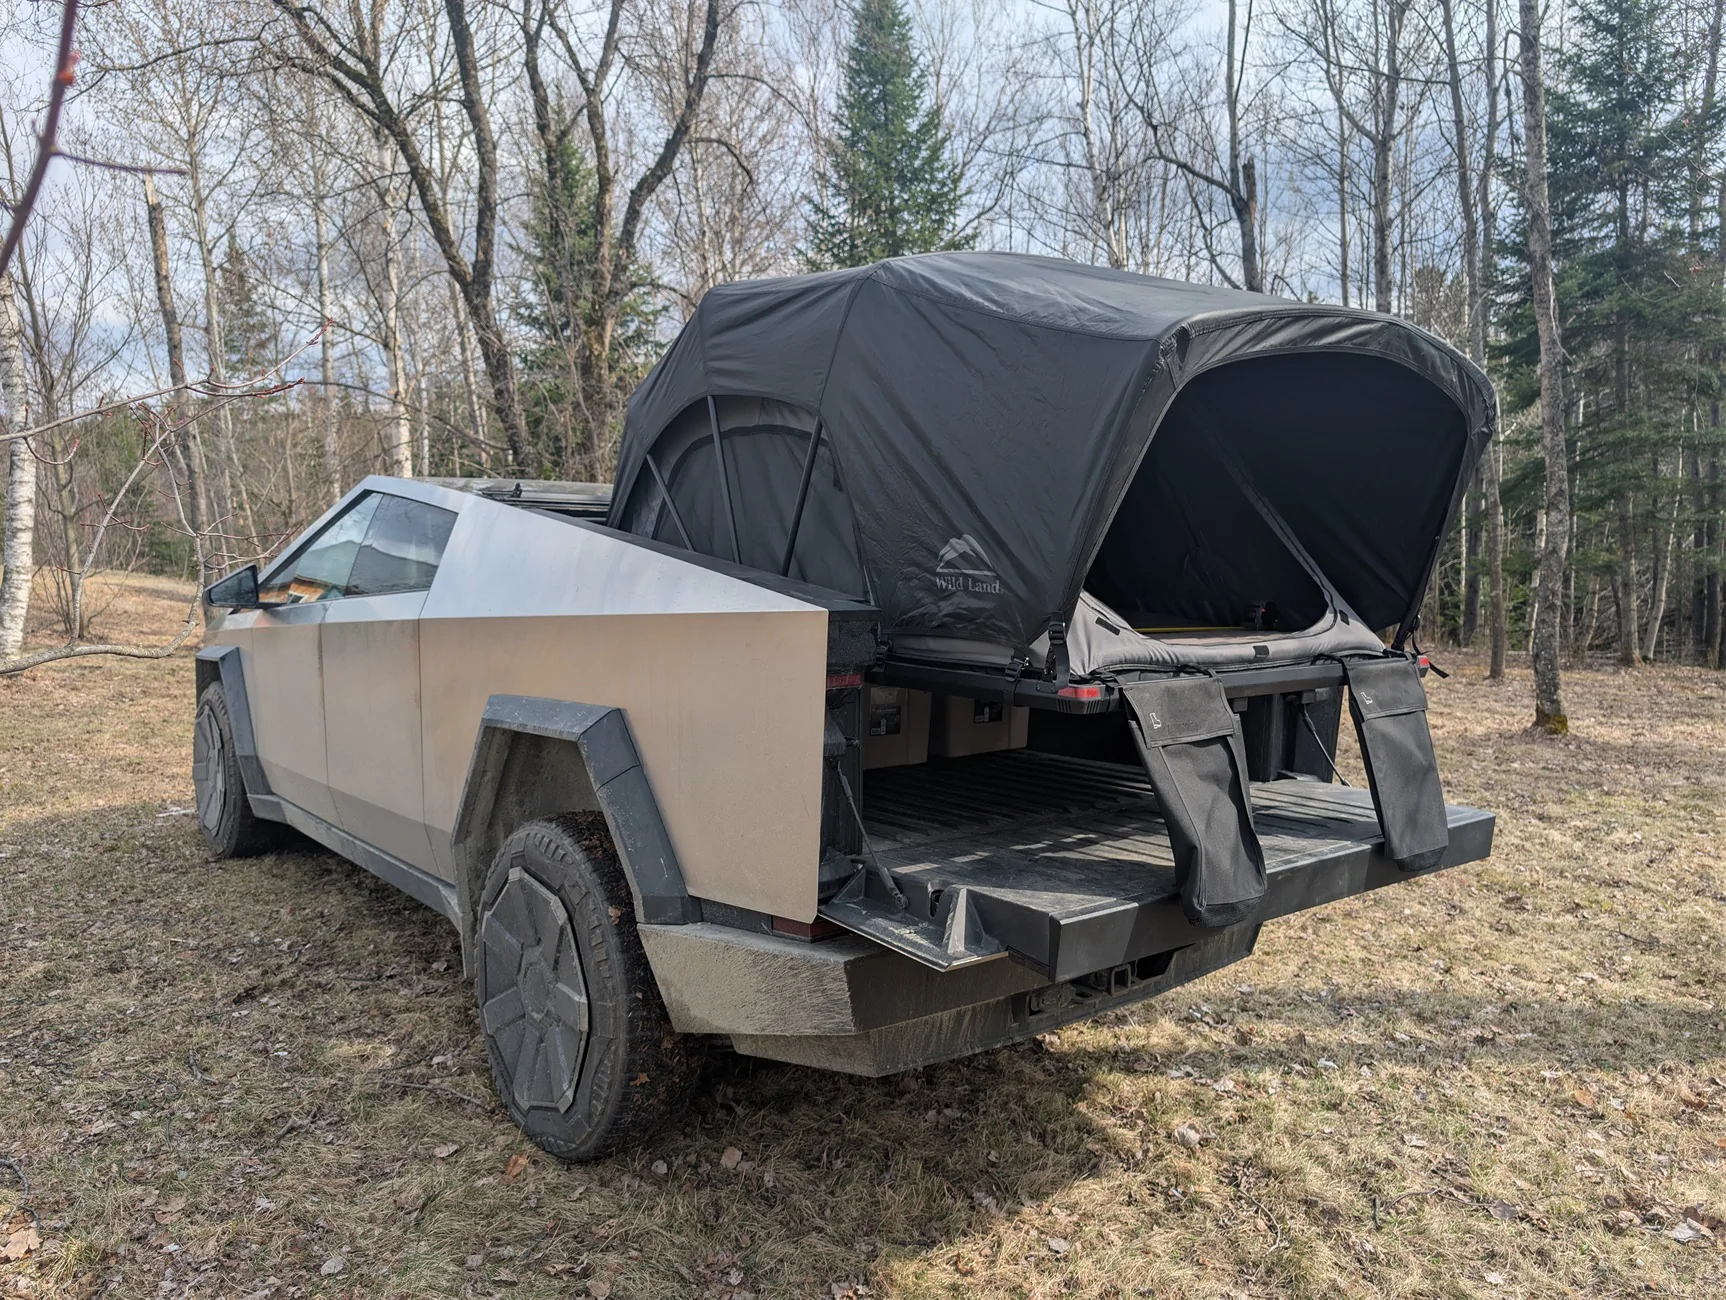
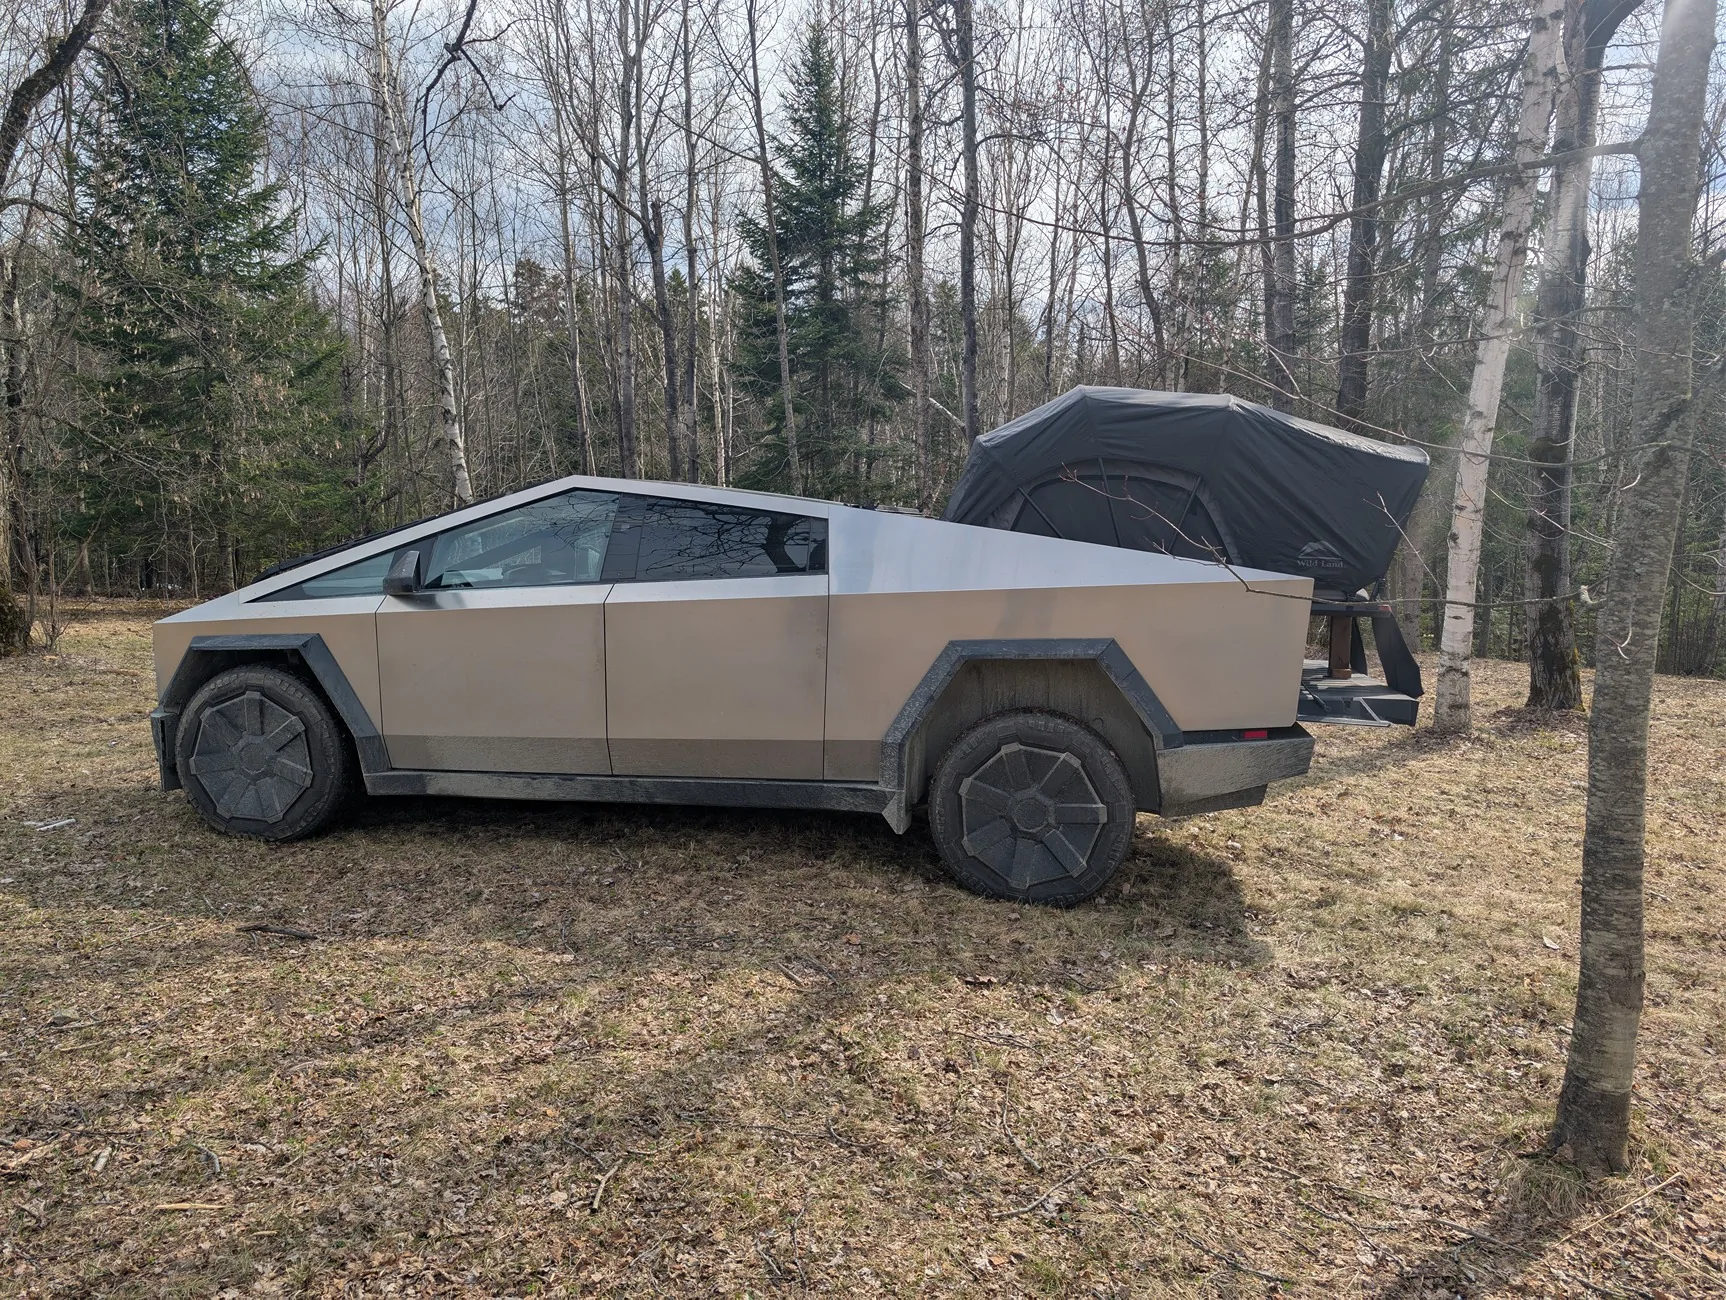
As you can see by the photos, the vault clearance is about half an inch but I chose to remove the tent ladder and use a small stool between the tailgate and the tent. The ladder legs cost about 3-4" of storage height underneath and it seemed too high a price for the usefulness. It is entirely possible to store the ladder sideways on top of the tent and put it back when deploying the tent.
Also, my setup is dependent on having the tonneau cover appliqué removed when unfolding the tent in order to gain 3-4" of bed space and corresponding height, it can be put back when deployment is done or when it is folded. This appliqué being removable is dependent on a Cybertent part that I can't seem to be able to buy in Canada despite having the exact part number. See this Facebook post to see what I'm talking about:
https://www.facebook.com/share/p/1EFCz3w7gd/
That's it... here's a few install specific photos:


(Part DEUX)
After playing with the setup a little I realized that I forgot to mention a few things.
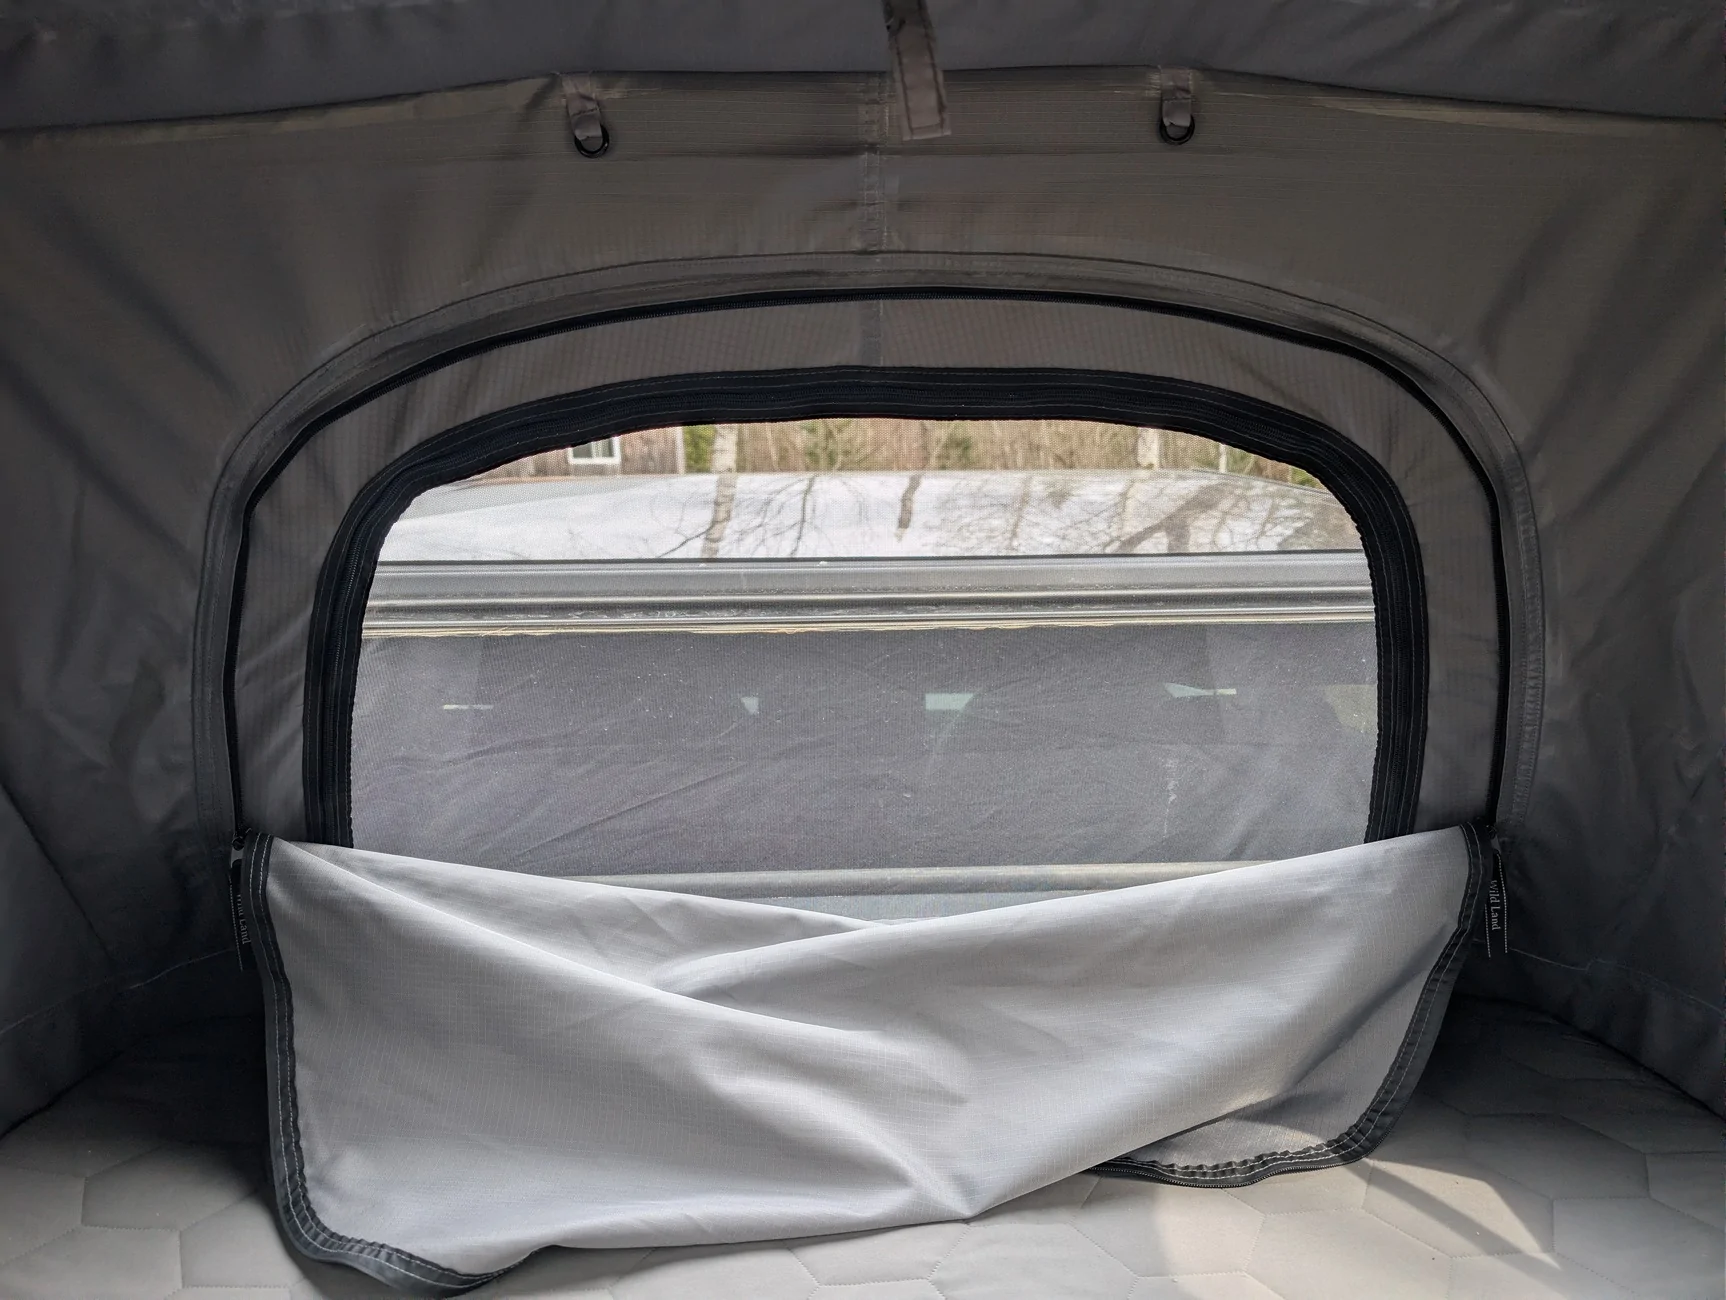
Here a few additional pics. Feel free to ask any questions and I can take additional pics if needed.

I needed a portable camping solution. I tried to find a suitable used original Cybertent but nothing was easily available. A "want to buy" post in one of the Facebook Cybertruck group was even rejected because I quote the admin: "Too many scammers dude" so I decided to make my own. A brand new Cybertent goes for 3805$CAN and the JoyTuTus setup didn't have a false floor so I was loosing too much cargo space.
So I got inspired by this post from a US owner:
https://www.cybertruckownersclub.co...-bed-tent-solution-w-custom-tent-mount.50556/
I replicated the project but with a few modification for stuff that was important to me and available from Canadian distributors. First of all, I wanted to maximize the space under the tent in order to have as much cargo space as possible. I ended up with a little bit over 13" of height available and that was enough for my storage bins and toolboxes. The T Bolt holding the tent to my mounting brackets are eating a little bit of space and I will eventually replace them with shorter ones. I used the stainless ones that came with the tent.
The specific tent used in the original post is not available on amazon.ca and no similar models are available either. I chose and similar variant from a Canadian Online seller who provided excellent service and was very knowledgeable. There is a 15% rebate that brought the price to approximately the same as amazon.com if I was going to have it shipped to Canada.
https://rooftopcamp.ca/products/mini-tente-de-toit-compacte
That specific tent already came with 3030 aluminium extrusion under it so I didn't have to purchase and cut those like it was the case in the original post.
All I had to buy beside the tent was this:
L-track lugs: https://www.amazon.ca/dp/B0CRKRW8N5
8" x 6" Brackets: https://www.amazon.ca/dp/B0DX25K3H7?th=1
Total expense including the tent was less than 1600$CAN
I specifically chose the 8" x 6" brackets because the tent was about 6" narrower than the bed and I wanted to have enough length (8") to be able to use the t-slot built in the tent to attach it to the brackets. Of course, I had to make bigger holes to accommodate both the L-Track lugs and the T-Bolt and, like in the original post, I had to bend the brackets a little with a pipe to match the bed angle. An additional hole was made to maximize the height with the L-Tracks.
As you can see by the photos, the vault clearance is about half an inch but I chose to remove the tent ladder and use a small stool between the tailgate and the tent. The ladder legs cost about 3-4" of storage height underneath and it seemed too high a price for the usefulness. It is entirely possible to store the ladder sideways on top of the tent and put it back when deploying the tent.
Also, my setup is dependent on having the tonneau cover appliqué removed when unfolding the tent in order to gain 3-4" of bed space and corresponding height, it can be put back when deployment is done or when it is folded. This appliqué being removable is dependent on a Cybertent part that I can't seem to be able to buy in Canada despite having the exact part number. See this Facebook post to see what I'm talking about:
https://www.facebook.com/share/p/1EFCz3w7gd/
That's it... here's a few install specific photos:

(Part DEUX)
After playing with the setup a little I realized that I forgot to mention a few things.
- Tolerances are really low so Cybertent mode should be enabled only after deployment and disabled before folding. The reason being the automatic positioning of the tonneau cover will interfere with unfolding/folding operation.
- Just repeating but the Tonneau appliqué must be removed if you want to keep the setup as high and deep in the bed as possible.
- I forgot to mention that I added a few washers to the L-Track lugs to prevent the brackets from touching the bed lining but this can be avoided by cutting the unused top part of the bracket (I made a second hole a little lower).
- Complete setup time from closed bed to usable tent is about 2 minutes including removing the appliqué.
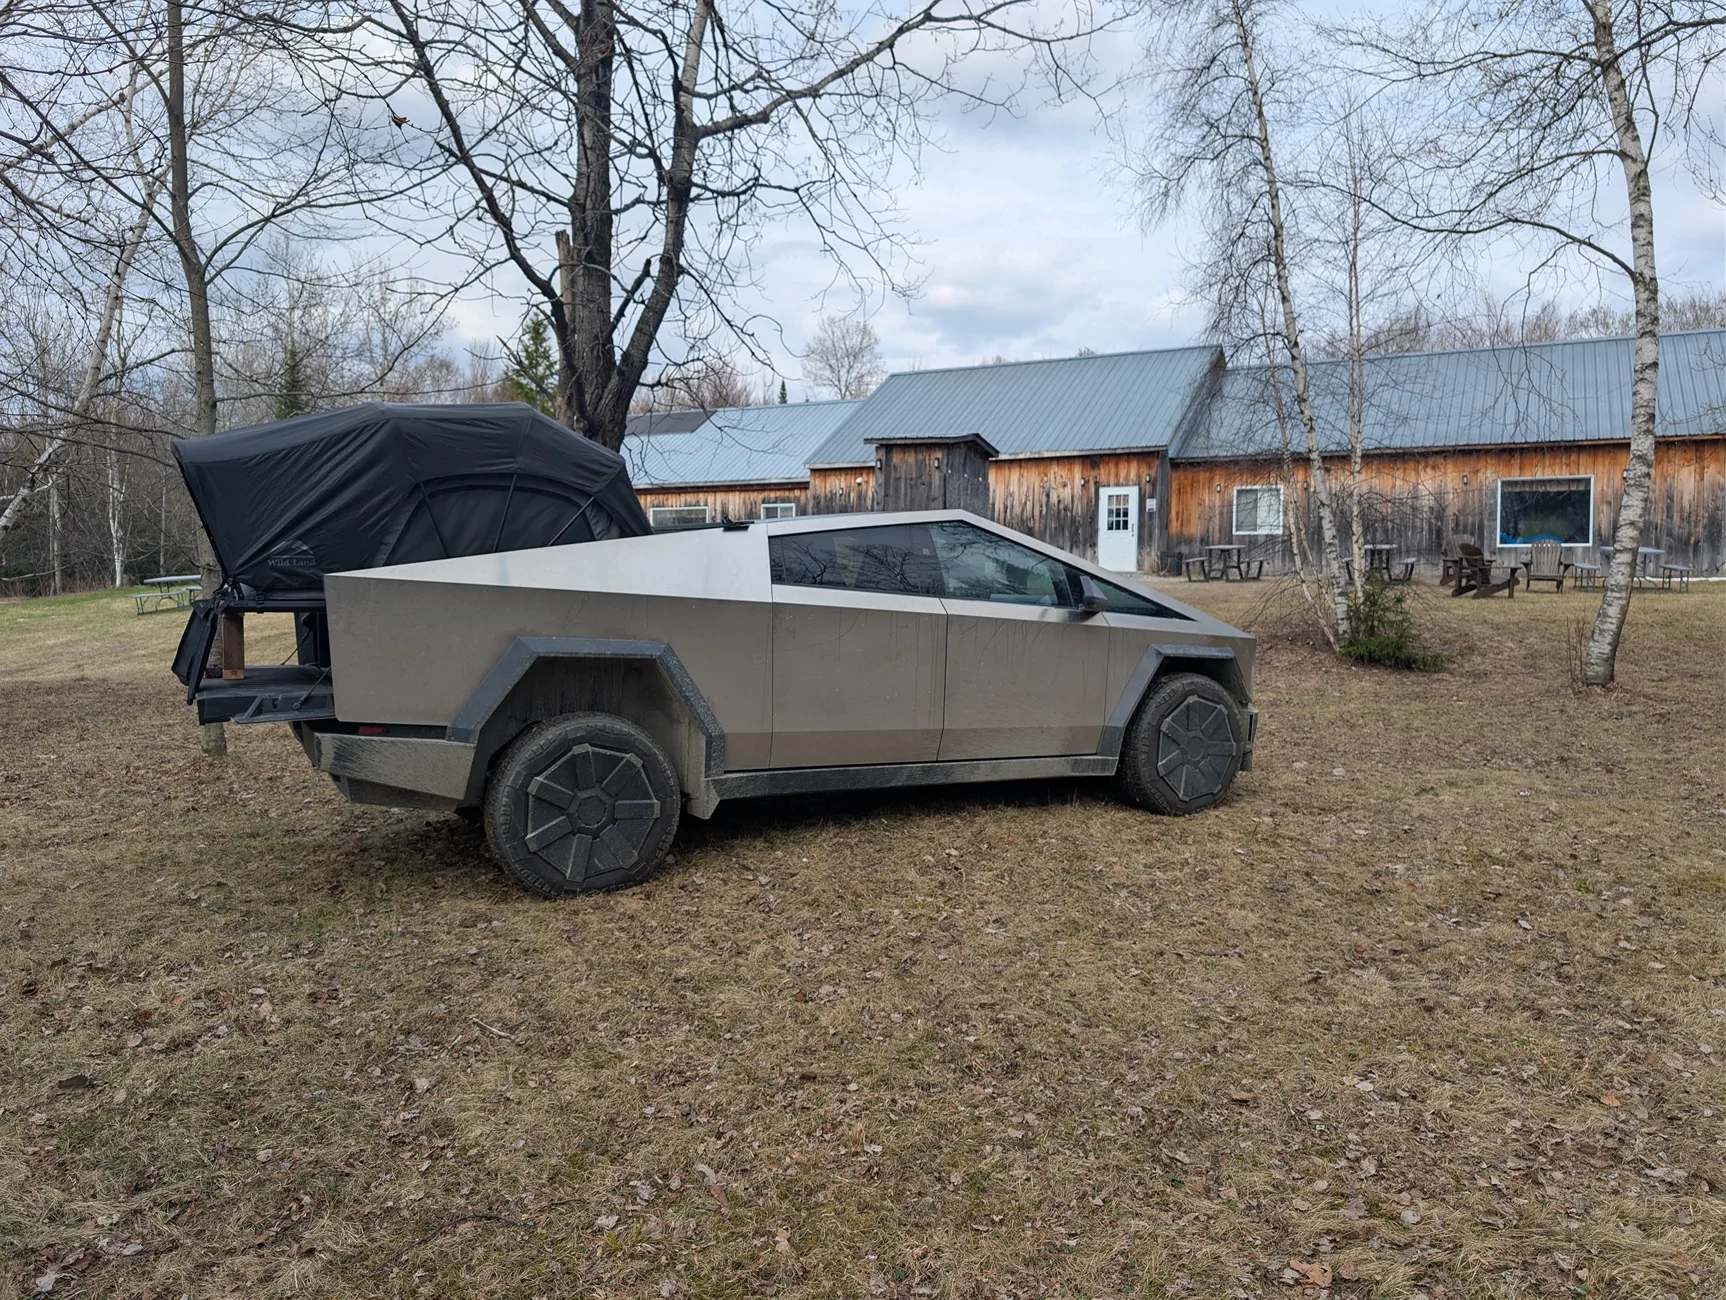
- I decided that the built-in ladder is useless and only taking up space since the tent's height is so low, I prefer to hold the floating end with a small stool (a 2x4 rig is on the photos but it is only temporary). Holding it against the open tailgate also let you move the truck around a little without anything hanging outside the truck.
- As for 'climbing' into the tent, I prefer using a small step ladder. It takes up less space than the built-in ladder and is also more useful to have around for other tasks
Here a few additional pics. Feel free to ask any questions and I can take additional pics if needed.
Sponsored