Sponsored

Caught my CT in the sun and...

That Beast Mode

Well-known member
First Name
Phil
Joined
Mar 15, 2025
Threads
14
Messages
1,349
Reaction score
1,799
Location
New Jersey
Vehicles
Cybertruck
Country flag
@That Beast Mode has entered the chat. This post has officially come unhinged just by his presence.

Why is Scarlet Johansson not testing if the bacon is done with her tongue, though?
Why thank you...

So the tongue makes it sexual - kinda agree with Grok on this one.

Tesla Cybertruck Caught my CT in the sun and... grok_image_lsmx3j


I also took some artistic flair and told it to add in a derailed train wreck... solid job Grok

Tesla Cybertruck Caught my CT in the sun and... grok_image_xe49qc9
 

HaulingAss

Well-known member
Joined
Oct 3, 2020
Threads
28
Messages
10,335
Reaction score
20,756
Location
Western Washington, USA
Vehicles
Cybertruck DM, 2010 F-150, 2018 Performance Model 3, 2024 Performance Model 3
Country flag
Oh I hear you, I treat it as such. The weird swirls are just odd and unappealing to look at. It's something I've only recently noticed so that's why it's fresh in my mind. I probably would get over it eventually but if I can fix it quickly I would. And I think Bar Keepers Friend is a good start.
Bar Keepers Friend cannot repair swirl marks. It needs to be sanded. You could use BKF before sanding so any surface contaminates don't get ground into the surface or your abrasive pads (but I would just wash it with soap and water if it's not particularly contaminated).


BeFamousVideo

Well-known member
First Name
Vincent
Joined
Feb 16, 2024
Threads
6
Messages
572
Reaction score
638
Location
Orange County, CA
Vehicles
CT Beast delivered May 2024
Occupation
Automation Agency
Country flag
Noticed this really odd sanding job from factory. Has anyone had this addressed by Tesla? I'm thinking about clear ppfing the truck and would rather address this beforehand if possible.
20250919_164337(1).webp
If you take this to service, be prepared with a flash light or something to show them the imperfection.
 

Tallgeese179

Well-known member
First Name
Nikola
Joined
Sep 11, 2025
Threads
3
Messages
167
Reaction score
344
Location
Pittsburgh, PA
Vehicles
2025 CT AWD, 21 BMW X7, 15 370Z Nismo
Country flag
I recently went through the refinishing process on my less than month old CT to remove some damage from an accident. While it's relatively easy to do and Tesla provides all of the documentation on how to do it, I would keep this in mind:
  • Minimum cost will be ~$560 in materials, since the Walter Blendex Pads that Tesla spec's are a cool $627 delivered from Grainger. This is due to MoQ of 20 pads and there are three pad steps. The medium grit pad costs the most, but it also does the most work and was necessary in my case.
  • Compared to compounding and polishing automotive paint with a DA polisher you have the upside of not being able to blow through clear coat. However, your pad pressure, hand speed, pad contamination, and machine DA consistency are all more critical, since the macro size scratches left behind are very visible (especially in different lighting) instead of the imperceivable micro/nano size scratches left behind on clear coat that appear to our eyes as a uniform/flat reflection.
  • Remember to passivate the surface after finishing with Citrisurf77. This will help prevent corrosion and help make the surface more uniform by (from what I've read) creating a uniform layer of chromium oxide on the surface. I did this by consistently applying CS77 with a microfiber applicator pad to the panels over a span of 30 mins, followed by a good water rinse.
  • I didn't fully follow the Tesla refinishing instructions and skipped refinishing the front fender side plane surface. Partially to see how well I could blend down to OEM quality and also partially because I was tired. I can't tell a difference, but I'll look more closely one of these days.
All in all, I'm happy with having purchased the pads because now in the future if I want to ceramic coat the panels I know how to finish them to like-new spec right before sealing it all in. Only change I would do in hindsight would be to wash the car more thoroughly and to use something like a coarse compound and foam pad to exfoliate out any tiny debris embedded into the surface of the panel, followed by the Blendex refinishing process, panel prep spray, and finally ceramic coating. Also it's very comforting to know that 3 panel damage that would be thousands in pain repair (and would never be OEM spec) can be repaired outside of my garage in around 8 hours of work. Cybie is really the most truck truck to ever truck.

Link to my post: https://www.cybertruckownersclub.co...-owner-first-ev-80xxx-vin.48120/post-30677699
 
OP
OP
Cybermo

Cybermo

Well-known member
First Name
Mo
Joined
Jan 11, 2025
Threads
4
Messages
113
Reaction score
187
Location
Malibu
Vehicles
Cybertruck AWD, Range Rover Classic
Occupation
Director
Country flag
I recently went through the refinishing process on my less than month old CT to remove some damage from an accident. While it's relatively easy to do and Tesla provides all of the documentation on how to do it, I would keep this in mind:
  • Minimum cost will be ~$560 in materials, since the Walter Blendex Pads that Tesla spec's are a cool $627 delivered from Grainger. This is due to MoQ of 20 pads and there are three pad steps. The medium grit pad costs the most, but it also does the most work and was necessary in my case.
  • Compared to compounding and polishing automotive paint with a DA polisher you have the upside of not being able to blow through clear coat. However, your pad pressure, hand speed, pad contamination, and machine DA consistency are all more critical, since the macro size scratches left behind are very visible (especially in different lighting) instead of the imperceivable micro/nano size scratches left behind on clear coat that appear to our eyes as a uniform/flat reflection.
  • Remember to passivate the surface after finishing with Citrisurf77. This will help prevent corrosion and help make the surface more uniform by (from what I've read) creating a uniform layer of chromium oxide on the surface. I did this by consistently applying CS77 with a microfiber applicator pad to the panels over a span of 30 mins, followed by a good water rinse.
  • I didn't fully follow the Tesla refinishing instructions and skipped refinishing the front fender side plane surface. Partially to see how well I could blend down to OEM quality and also partially because I was tired. I can't tell a difference, but I'll look more closely one of these days.
All in all, I'm happy with having purchased the pads because now in the future if I want to ceramic coat the panels I know how to finish them to like-new spec right before sealing it all in. Only change I would do in hindsight would be to wash the car more thoroughly and to use something like a coarse compound and foam pad to exfoliate out any tiny debris embedded into the surface of the panel, followed by the Blendex refinishing process, panel prep spray, and finally ceramic coating. Also it's very comforting to know that 3 panel damage that would be thousands in pain repair (and would never be OEM spec) can be repaired outside of my garage in around 8 hours of work. Cybie is really the most truck truck to ever truck.

Link to my post: https://www.cybertruckownersclub.co...-owner-first-ev-80xxx-vin.48120/post-30677699
Thanks for info! Great stuff.
 

HaulingAss

Well-known member
Joined
Oct 3, 2020
Threads
28
Messages
10,335
Reaction score
20,756
Location
Western Washington, USA
Vehicles
Cybertruck DM, 2010 F-150, 2018 Performance Model 3, 2024 Performance Model 3
Country flag
All in all, I'm happy with having purchased the pads because now in the future if I want to ceramic coat the panels I know how to finish them to like-new spec right before sealing it all in.
I would caution that "sealing" the surface of stainless steel is generally a mistake. While it's highly corrosion resistant, that's because it creates a protective layer in the presence of oxygen. When stainless steel does corrode, it's almost always because it's in an environment starved of oxygen.

For example, on boats, stainless steel drive shafts are made from special alloys that are even more resistant to crevice corrosion than marine grade 316 since they are often sitting in stagnant water that is depleted of oxygen. Even then, corrosion is common because the water in a shaft alleyway is often depleted of oxygen. When deck fittings corrode, it's generally if the metal has been painted and water migrates behind the paint film or where it's bedded to the deck and water has seeped in between the fitting and the bedding compound. Both cases are due to water depleted of oxygen.

I don't know how oxygen permeable ceramic coatings are, but coating stainless steel is often more trouble than it's worth. Just keep it washed free of oils and waxes so it can self-passivate and it will remain bright and corrosion free.
 

HaulingAss

Well-known member
Joined
Oct 3, 2020
Threads
28
Messages
10,335
Reaction score
20,756
Location
Western Washington, USA
Vehicles
Cybertruck DM, 2010 F-150, 2018 Performance Model 3, 2024 Performance Model 3
Country flag
I recently went through the refinishing process on my less than month old CT to remove some damage from an accident. While it's relatively easy to do and Tesla provides all of the documentation on how to do it, I would keep this in mind:
  • Minimum cost will be ~$560 in materials, since the Walter Blendex Pads that Tesla spec's are a cool $627 delivered from Grainger. This is due to MoQ of 20 pads and there are three pad steps. The medium grit pad costs the most, but it also does the most work and was necessary in my case.
I used Festool abrasive pads and discs with excellent results. The Vlies pads are available in 10 packs in all grits and the Platin discs in 15 packs. You could easily get by with 2 grit levels of the Vlies if you don't have deep scratches to sand out. I bought the Platin discs because I wanted to experiment.


Tallgeese179

Well-known member
First Name
Nikola
Joined
Sep 11, 2025
Threads
3
Messages
167
Reaction score
344
Location
Pittsburgh, PA
Vehicles
2025 CT AWD, 21 BMW X7, 15 370Z Nismo
Country flag
@HaulingAss

You may have a good point here :unsure:
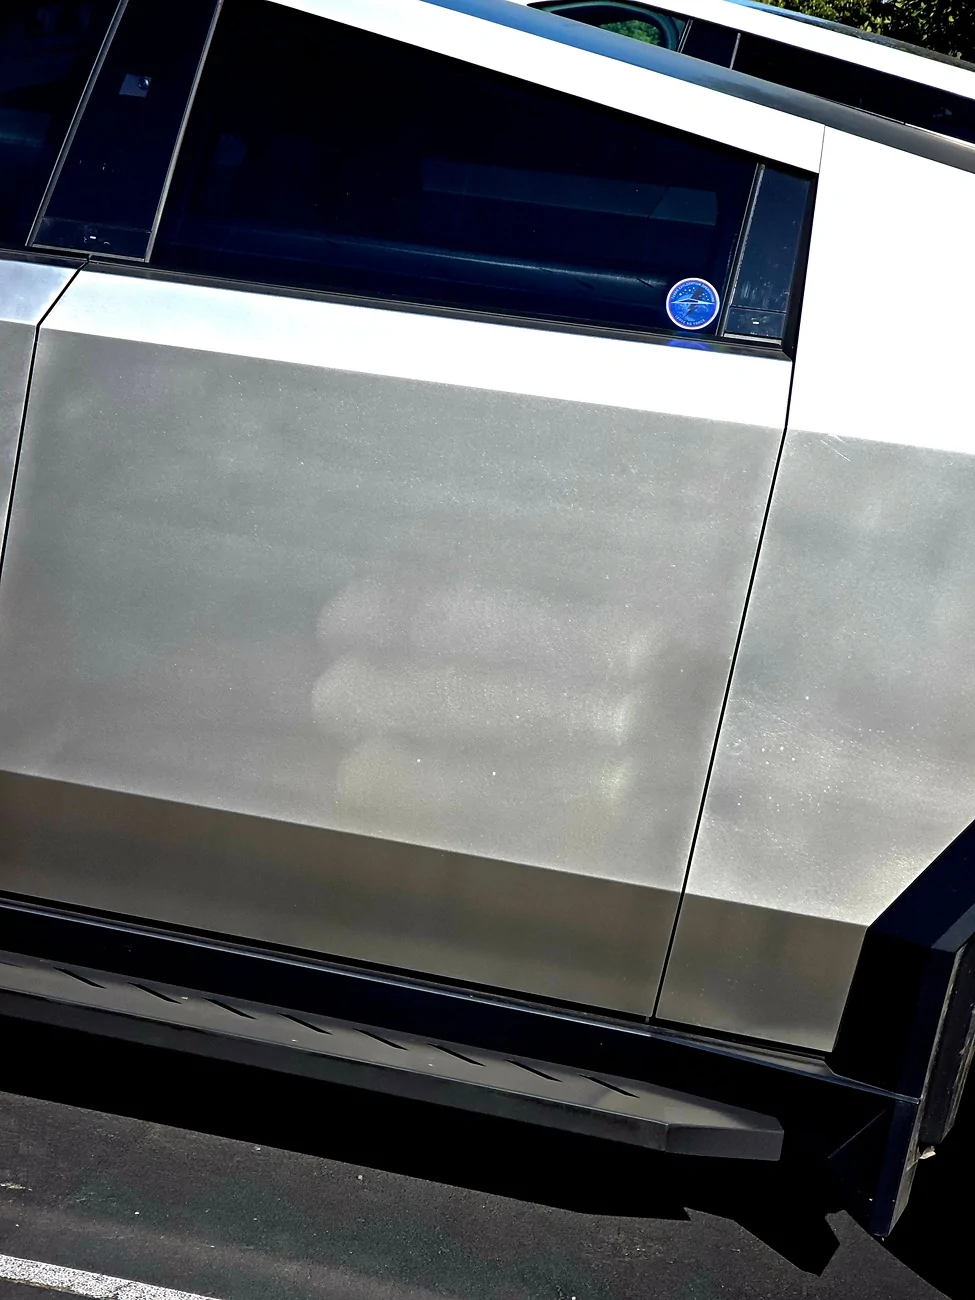
. After washing my truck over the weekend I tried to apply Carpro Elixir (ceramic infused spray coating) and it instantly made the hood streaky and yellowish. I was able to get it off with some SD-20 that I had handy. After that I used SprayAway and it left the surface looking less streaky (SD-20 caused some streaks).

Maybe the best approach is just an occasional mechanical decon with CS77 or the VeryFine grit pads I used in the last step of refinishing. Probably only necessary after Pittsburgh winters and the associated salt on the roads.

There is something appealing about just running it raw 🤙
 

Tallgeese179

Well-known member
First Name
Nikola
Joined
Sep 11, 2025
Threads
3
Messages
167
Reaction score
344
Location
Pittsburgh, PA
Vehicles
2025 CT AWD, 21 BMW X7, 15 370Z Nismo
Country flag
I used Festool abrasive pads and discs with excellent results. The Vlies pads are available in 10 packs in all grits and the Platin discs in 15 packs. You could easily get by with 2 grit levels of the Vlies if you don't have deep scratches to sand out. I bought the Platin discs because I wanted to experiment.
Damn, if only I found this info earlier. I was thinking about decoding which 3M product matched up to these single source Walter pads, but I wanted my new truck to look new sooner rather than later so I just paid up.

The M12 sander I used was a real treat. Running cordless for a very long time and easy to connect my vacuum to when I was doing heavier correction. I have their M18 DA polishers and they're also beasts.
 

HaulingAss

Well-known member
Joined
Oct 3, 2020
Threads
28
Messages
10,335
Reaction score
20,756
Location
Western Washington, USA
Vehicles
Cybertruck DM, 2010 F-150, 2018 Performance Model 3, 2024 Performance Model 3
Country flag
Damn, if only I found this info earlier. I was thinking about decoding which 3M product matched up to these single source Walter pads, but I wanted my new truck to look new sooner rather than later so I just paid up.
Can you confirm what kind of abrasive is used on the Walter Blendex pads you used? I'm guessing it's aluminum oxide, but it looks like some of the Walter Pads use silicone carbide (depending upon the exact product). I say that because the SDS for Blendex pads in general lists both types of abrasives, so it must depend upon the grit or other product variants. I'm looking for the same type of non-woven pad using harder silcone carbide as the abrasive, because it will cut faster and stand up better to the ultra-hard steel used on the Cybertruck, and I suspect I might like the appearance better, based upon my experience with the Platin (paper) discs from Festool. It seems like the silicone carbide might make "sharper" cuts in the metal, which can change the appearance.

I like Festool's Platin polishing discs that are silicone carbide, but they don't go any coarser than 400 grit and the 3D nature of non-woven pads are better for dust extraction (which would be handy for coarser grits, I think).
 

Tallgeese179

Well-known member
First Name
Nikola
Joined
Sep 11, 2025
Threads
3
Messages
167
Reaction score
344
Location
Pittsburgh, PA
Vehicles
2025 CT AWD, 21 BMW X7, 15 370Z Nismo
Country flag
Sadly I don't know what abrasive it is, the boxes they come in don't have any labeling indicating the abrasive media used. If you have some way of visuals identifying it, let me know!

Related to the original post and to refinishing: I think I'll redo my driver's side rear door soon since clearly my hand is better than whoever did this at the factory:

Tesla Cybertruck Caught my CT in the sun and... 4372
Tesla Cybertruck Caught my CT in the sun and... 4373
 

HaulingAss

Well-known member
Joined
Oct 3, 2020
Threads
28
Messages
10,335
Reaction score
20,756
Location
Western Washington, USA
Vehicles
Cybertruck DM, 2010 F-150, 2018 Performance Model 3, 2024 Performance Model 3
Country flag
Sadly I don't know what abrasive it is, the boxes they come in don't have any labeling indicating the abrasive media used. If you have some way of visuals identifying it, let me know!
I don't have any way to identify, short of contacting the company and asking. It might be on their website, but I couldn't find anything definitive.

Related to the original post and to refinishing: I think I'll redo my driver's side rear door soon since clearly my hand is better than whoever did this at the factory:

4372.webp
I'm pretty sure that was not done by a robot (like they use at the factory to create the finish to begin with). Perhaps someone at a Service Center had to touch it up (and didn't know what they were doing).

The secret is move lightly and relatively quickly but, more importantly (and what's wrong with the example above), is to only extend your pattern by one inch on each pass. It looks like they used passes that increased by 3 or 4 inches each pass.
Sponsored


Top