Sponsored

Stickercity

Well-known member
First Name
Dean
Joined
Jul 24, 2024
Threads
64
Messages
220
Reaction score
212
Location
Los Angeles
Vehicles
Teslay model 3
Occupation
After Market Automotive Services
Country flag
I’m considering getting a few of their pre cut packs as well.
what was the outside temp during install?
did you like the feel of the adhesive?
Does it cut easy?
did you need to cut any?
Last question, do you think it could withstand a pressure washer??
I’m considering getting a few of their pre cut packs as well.
what was the outside temp during install?
did you like the feel of the adhesive?
Does it cut easy?
did you need to cut any?
Last question, do you think it could withstand a pressure washer??

Great to hear you're considering our precut packs! Let me answer your questions:

  • Outside Temp During Install: I recommend installing it in temperatures between 60-85°F for the best results. This ensures the adhesive activates properly.
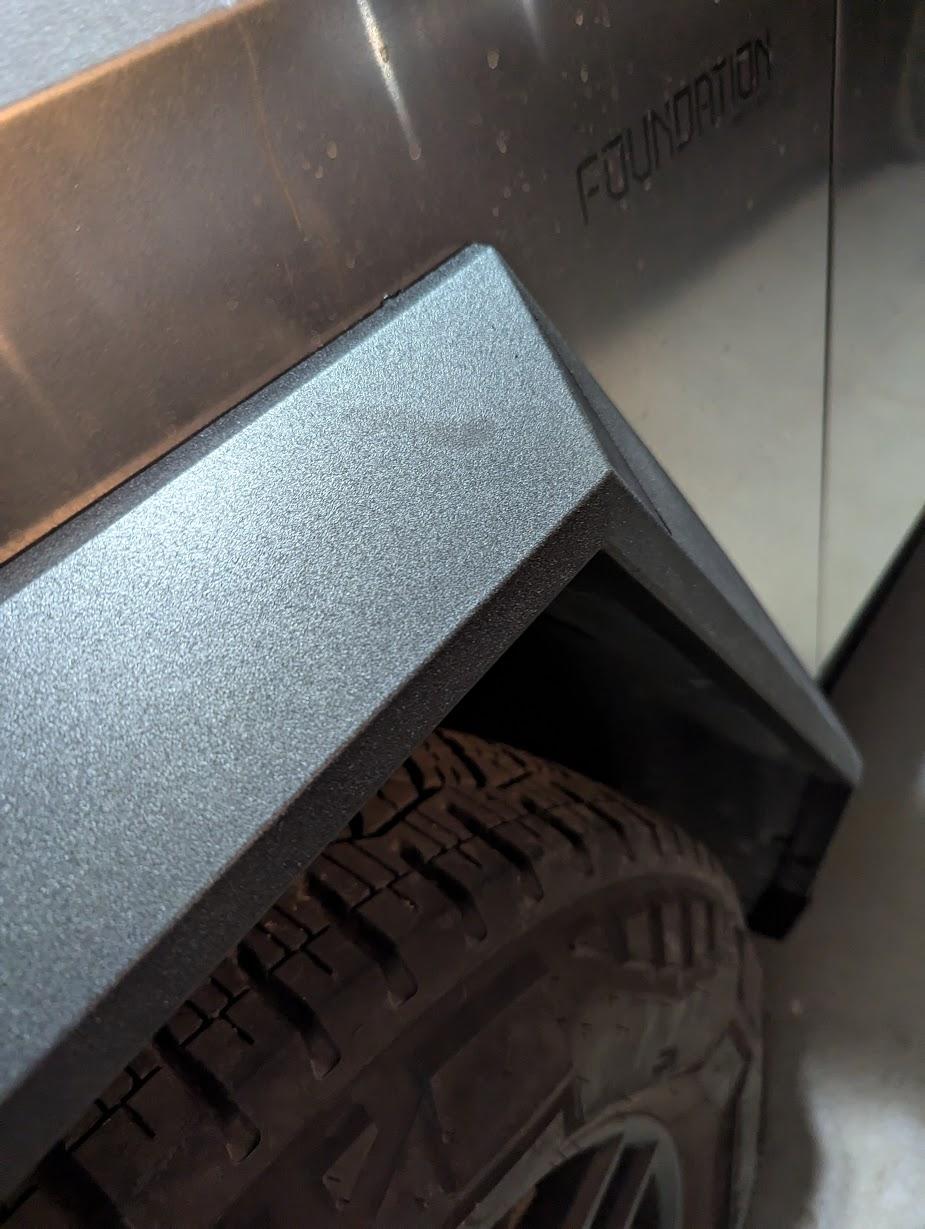
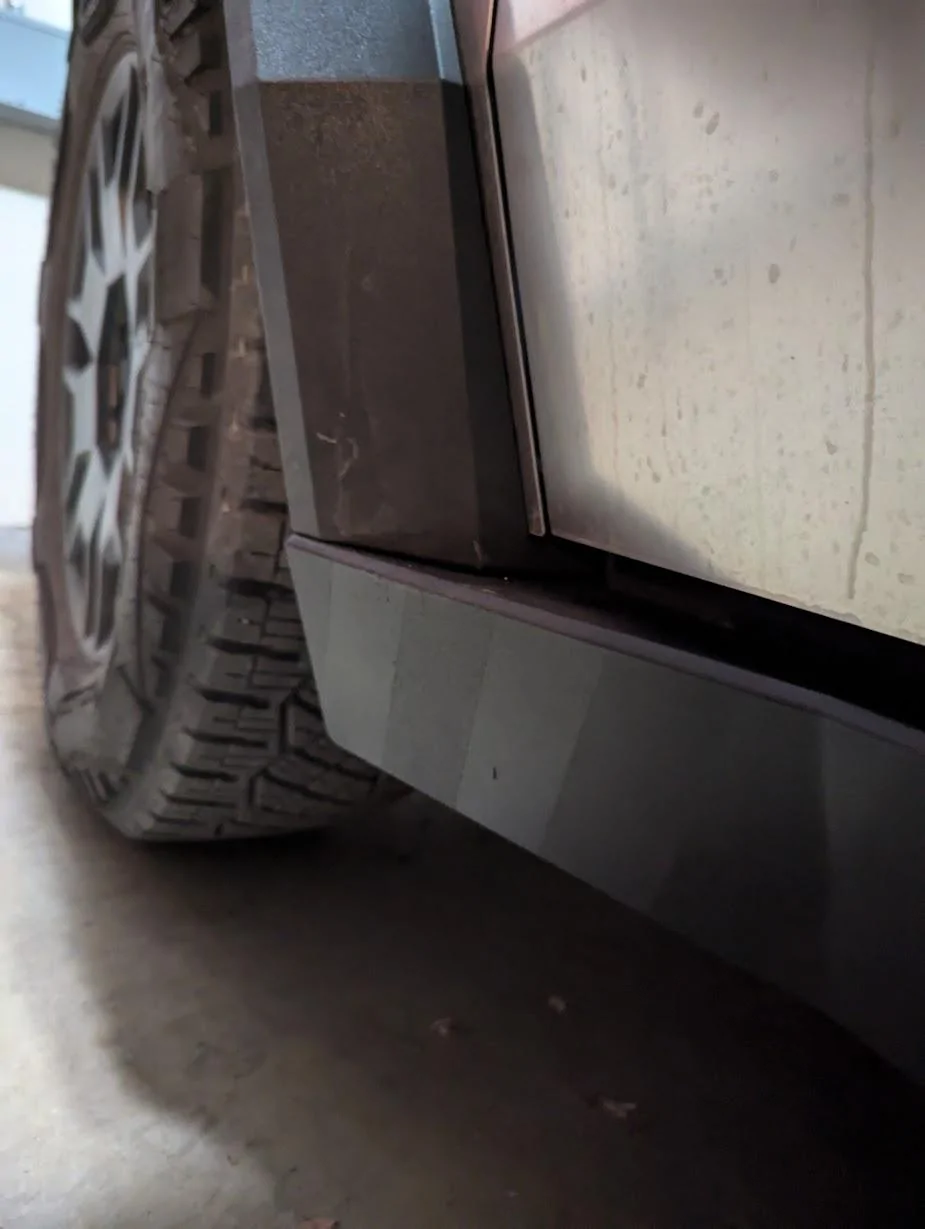
  • Adhesive Feel: The adhesive is indeed thick but also very forgiving, allowing for repositioning if you make a mistake. It’s designed to give you flexibility during installation while still providing a strong hold.
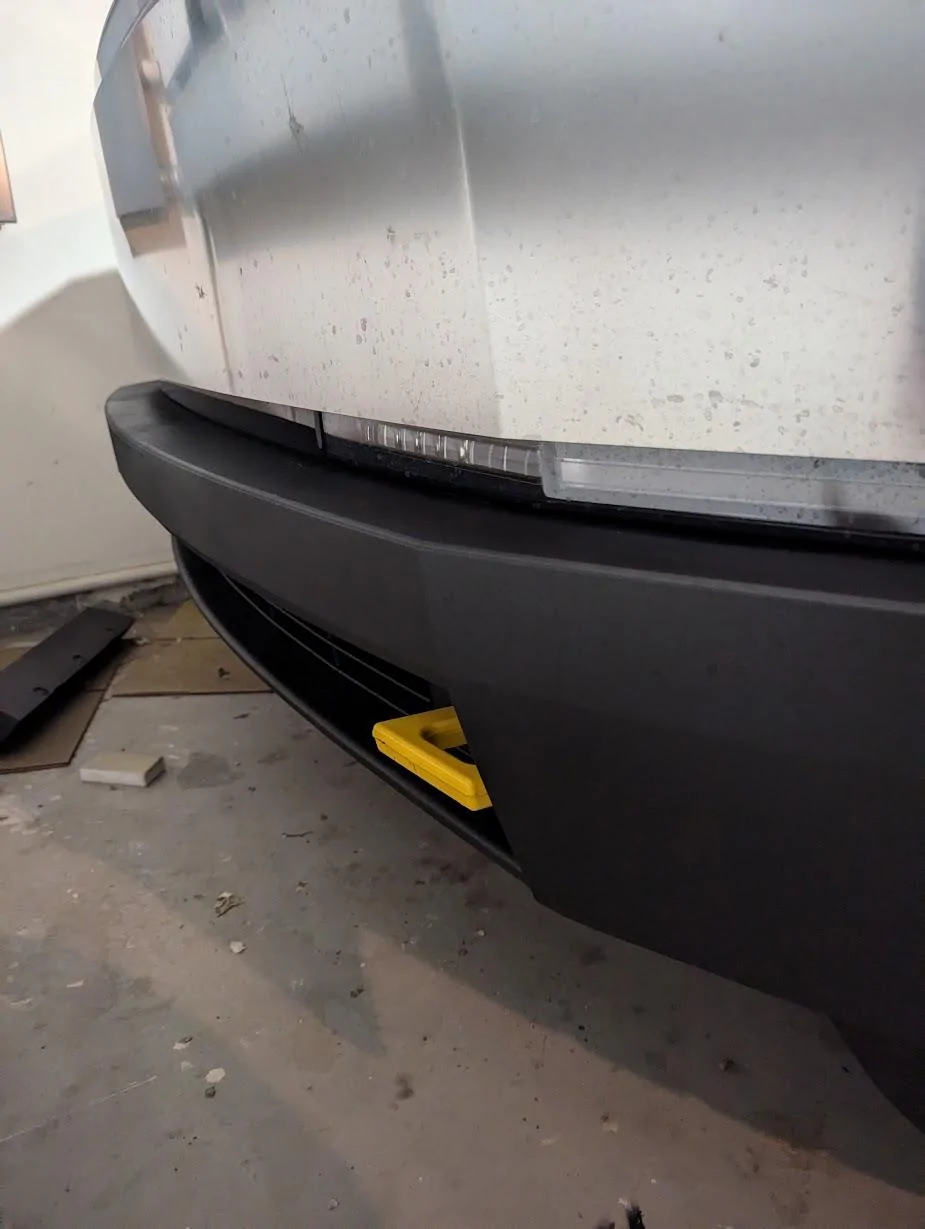
  • Cutting: The entire kit is precut, so you shouldn't need to do any cutting. However, if you do need to make adjustments, it’s easy to cut with a sharp blade.
  • Pressure Washer: After installation, give the wrap 3-5 days to fully adhere before using a pressure washer. Once it’s set, it can withstand a good cleaning without any issues.
If you have any more questions or need further assistance, feel free to ask!
Sponsored


Stickercity

Well-known member
First Name
Dean
Joined
Jul 24, 2024
Threads
64
Messages
220
Reaction score
212
Location
Los Angeles
Vehicles
Teslay model 3
Occupation
After Market Automotive Services
Country flag
Installed early evening time like 70 degrees. Adhesive felt strong and good. Seems I could cut it easily with a razor blade if need, but wasn’t needed. I didn’t trim any pieces. Yes on pressure washer once all water is evaporated and adhesive is fully settled/cured on. I’ll take through a car wash probably on Monday or Tuesday.
Did you do a wet or dry application? If you did a wet application please allow 5 days before washing it for the adhesive to settle in on the plastic.
 

Stickercity

Well-known member
First Name
Dean
Joined
Jul 24, 2024
Threads
64
Messages
220
Reaction score
212
Location
Los Angeles
Vehicles
Teslay model 3
Occupation
After Market Automotive Services
Country flag
Lmao I posted my review of these today. Took me a couple hours for just the vault area. And I just realized I used the tie in port pieces as scrap ?

Awesome video! We really appreciate the feedback. Regarding the bubbles, you can usually push them out or use a syringe to pop them quickly.
As for the driver side where it appeared short, do you think that was due to an installation error, or could we have accidentally sent a kit that was cut short?
Also, just a heads up—the scraps you used were actually designed to protect the roof rack cover brackets.
Thanks again for sharing your experience and please let me know about that short panel piece.
 

Stickercity

Well-known member
First Name
Dean
Joined
Jul 24, 2024
Threads
64
Messages
220
Reaction score
212
Location
Los Angeles
Vehicles
Teslay model 3
Occupation
After Market Automotive Services
Country flag
What about ceramic coating the plastic?
Great question! The ceramic coating will add a glossy finish, which I believe looks even better and helps extend the life of the product by providing added UV protection.


Stickercity

Well-known member
First Name
Dean
Joined
Jul 24, 2024
Threads
64
Messages
220
Reaction score
212
Location
Los Angeles
Vehicles
Teslay model 3
Occupation
After Market Automotive Services
Country flag
Hahahaha not sure why it took you so long. I thought it was very simple. Good video though, I don’t have the patience to do that.
I think doing the video while applying it simultaneously is what makes the application process take a bit longer. I know from experience! lol
 

Stickercity

Well-known member
First Name
Dean
Joined
Jul 24, 2024
Threads
64
Messages
220
Reaction score
212
Location
Los Angeles
Vehicles
Teslay model 3
Occupation
After Market Automotive Services
Country flag
I made another post about this since it was being asked and the prices I've received here in Los Angeles are $3000-$5000 for all the plastic portions which is a bit lower than what I can get them painted for but the painted option looks much better. The main cost is in the back end if you are returning the car or turning back to factory again the parts will cost you $ $5000+ for parts and labor
Here are the pros and cons of LINE-X
LINE-X can be applied to plastic surfaces, and it’s often used to protect and enhance various parts of vehicles, including bumpers, fenders, and other plastic components. Here’s a breakdown of the pros and cons of using LINE-X on plastic:

Pros:
  1. Durability and Protection:
    • LINE-X is highly durable and provides excellent protection against scratches, dings, and impacts. It’s resistant to chemicals, corrosion, and UV rays, which helps prolong the life of the plastic parts.
  2. Waterproof and Weatherproof:
    • The coating creates a waterproof barrier that protects the plastic from moisture, preventing rust and corrosion. It's also resistant to extreme weather conditions, including heat, cold, and UV exposure.
  3. Enhanced Appearance:
    • LINE-X can give plastic parts a rugged, textured appearance that can be aesthetically pleasing, especially on off-road vehicles. It can also be color-matched to suit the vehicle's design.
  4. Slip Resistance:
    • The texture of LINE-X provides a non-slip surface, which can be beneficial for certain applications, such as step areas or cargo beds.
  5. Long-Lasting:
    • Once applied, LINE-X requires minimal maintenance and can last for many years without fading, cracking, or peeling.
Cons:
  1. Cost:
    • LINE-X is more expensive than other coatings or protective films, particularly for large or custom applications.
  2. Permanence:
    • Once LINE-X is applied, it’s very difficult to remove. This permanence can be a disadvantage if you ever want to return the surface to its original state.
  3. Weight:
    • The coating adds weight to the plastic parts, which might be a concern for some vehicle owners, especially if applied extensively.
  4. Texture:
    • The rough, textured finish of LINE-X might not be desirable for everyone, especially on parts of the vehicle where a smooth finish is preferred. You can't polish it
  5. Potential for Chipping:
    • While LINE-X is extremely durable, under extreme impact or stress, it can chip. Repairing these chips can be more challenging compared to other coatings.
Conclusion:
LINE-X is a great option for those looking to add durability and protection to their vehicle’s plastic parts, especially in harsh environments or for off-road use. However, the cost to paint, permanence which will cost you over $5k+ to take back to stock, and added weight should be considered before making a decision.
 

SentinelOne

Well-known member
First Name
Jason
Joined
Dec 18, 2019
Threads
48
Messages
1,434
Reaction score
1,860
Location
Colorado
Vehicles
See Sig
Occupation
IT
Country flag
I made another post about this since it was being asked and the prices I've received here in Los Angeles are $3000-$5000 for all the plastic portions which is a bit lower than what I can get them painted for but the painted option looks much better. The main cost is in the back end if you are returning the car or turning back to factory again the parts will cost you $ $5000+ for parts and labor
Here are the pros and cons of LINE-X
LINE-X can be applied to plastic surfaces, and it’s often used to protect and enhance various parts of vehicles, including bumpers, fenders, and other plastic components. Here’s a breakdown of the pros and cons of using LINE-X on plastic:

Pros:
  1. Durability and Protection:
    • LINE-X is highly durable and provides excellent protection against scratches, dings, and impacts. It’s resistant to chemicals, corrosion, and UV rays, which helps prolong the life of the plastic parts.
  2. Waterproof and Weatherproof:
    • The coating creates a waterproof barrier that protects the plastic from moisture, preventing rust and corrosion. It's also resistant to extreme weather conditions, including heat, cold, and UV exposure.
  3. Enhanced Appearance:
    • LINE-X can give plastic parts a rugged, textured appearance that can be aesthetically pleasing, especially on off-road vehicles. It can also be color-matched to suit the vehicle's design.
  4. Slip Resistance:
    • The texture of LINE-X provides a non-slip surface, which can be beneficial for certain applications, such as step areas or cargo beds.
  5. Long-Lasting:
    • Once applied, LINE-X requires minimal maintenance and can last for many years without fading, cracking, or peeling.
Cons:
  1. Cost:
    • LINE-X is more expensive than other coatings or protective films, particularly for large or custom applications.
  2. Permanence:
    • Once LINE-X is applied, it’s very difficult to remove. This permanence can be a disadvantage if you ever want to return the surface to its original state.
  3. Weight:
    • The coating adds weight to the plastic parts, which might be a concern for some vehicle owners, especially if applied extensively.
  4. Texture:
    • The rough, textured finish of LINE-X might not be desirable for everyone, especially on parts of the vehicle where a smooth finish is preferred. You can't polish it
  5. Potential for Chipping:
    • While LINE-X is extremely durable, under extreme impact or stress, it can chip. Repairing these chips can be more challenging compared to other coatings.
Conclusion:
LINE-X is a great option for those looking to add durability and protection to their vehicle’s plastic parts, especially in harsh environments or for off-road use. However, the cost to paint, permanence which will cost you over $5k+ to take back to stock, and added weight should be considered before making a decision.
Sounds about right. The lineX on my 16 2500HD has held up awesome (applied when truck was new)! Guessing not too much weight for the parts im considering but yes, will add some! I'd go a different route for $3k+ for sure...but thankfully pricing on almost everything here in NoCo is much less than SoCal, maybe it'll work out!
 

REDNAVE

Well-known member
Joined
Jan 28, 2024
Threads
15
Messages
224
Reaction score
318
Location
San Jose
Vehicles
Cybertruck
Country flag
Awesome video! We really appreciate the feedback. Regarding the bubbles, you can usually push them out or use a syringe to pop them quickly.
As for the driver side where it appeared short, do you think that was due to an installation error, or could we have accidentally sent a kit that was cut short?
Also, just a heads up—the scraps you used were actually designed to protect the roof rack cover brackets.
Thanks again for sharing your experience and please let me know about that short panel piece.
Haha yea I noticed what I did with the “scraps” too late.
if you see OPs pic of this thread, his sides are also just a bit too short on the tail end.
 

CyberZephyr

Well-known member
Joined
Jul 8, 2024
Threads
13
Messages
633
Reaction score
583
Location
Long Island, New York
Vehicles
2021 MY, 2023 MX
Country flag
ooh, looks nice! (what's that rectangle in the 3rd pic)


Stickercity

Well-known member
First Name
Dean
Joined
Jul 24, 2024
Threads
64
Messages
220
Reaction score
212
Location
Los Angeles
Vehicles
Teslay model 3
Occupation
After Market Automotive Services
Country flag
Haha yea I noticed what I did with the “scraps” too late.
if you see OPs pic of this thread, his sides are also just a bit too short on the tail end.
Check you Direct messages as well please
 

Litterboxer1

Well-known member
First Name
Steve
Joined
Feb 24, 2023
Threads
3
Messages
96
Reaction score
152
Location
Minnesota
Vehicles
Waiting for Quad Motor
Country flag
Interesting way to go. Considering how easy to remove all the all the plastic trim is, I just got some spray-on bedliner from home depot, threw all the plastic pieces on the lawn, and sprayed the hell out of them!
Do you have pictures of this on your bed surround?
 

jonesw67

Well-known member
First Name
Warren
Joined
Jul 9, 2024
Threads
20
Messages
288
Reaction score
378
Location
AR
Vehicles
FS Cyberbeast
Country flag
Sure, attached.

The bedliner is designed for plastic adhesion and cures as a very rigid "rubber" coat. By rubber I mean that is extremely hard to chip. Sure, you can scratch and gouge it like anything else, but it's much much tougher for things like sticks and branches that mark up the plastic easily. Will it make bumpers damage-proof? Of course not, but it does make them immune to basic cosmetic scratches and rock pitting that plastic is very sensitive to.

As for the look: without actually touching it, it looks completely OEM. But the texture is very rough and diffuses light nicely. I would compare the texture to used medium grit sandpaper, weird but that's the background I have to work with :ROFLMAO:

As for the stripes on the bottom trim, that was done intentionally with tape after a failed experiment.

Out of curiosity, I sanded the back bumper lightly and reapplied the spray bedliner in a location that didn't require me to remove the bumper. I am VERY happy with the repairability results. I can't tell that it was sanded and redone at all.

Here are the products I used:
https://amzn.to/3YUhsev

Cheaper option that I wish I did because it works just as well for this application:
https://amzn.to/4dXOZZC

Even cheaper option that, I'm told, is tougher and more long lasting, but requires know-how to work with:
https://amzn.to/3SZXWta

warning: don't do the clear coat liner, it doesn't sand/repair well. Stick with black or opaque color from whatever product you decide to use.

Cheers!
-t

PXL_20240814_045305208.jpg


PXL_20240814_045237593.jpg


Edit: Don't judge the dirty truck! I'm not a "wrap it and wash it 5x a week" type of truck user... Got a vineyard to run here.

Also the next image makes the dirt look like damage to bed liner. To be clear, I've been running very rough roads for about 2 weeks now with this setup, no scratches or even pitting on the wheel aero covers yet. Better than raw plastic so far.

PXL_20240814_045248545.jpg
Nice. Thanks for this.
How many cans did you use to complete all the plastic ?
 

tmeyer3

Well-known member
First Name
Trevor
Joined
Jun 27, 2021
Threads
31
Messages
2,036
Reaction score
3,615
Location
CA
Website
www.meyerwine.com
Vehicles
Model 3, '73 GMC truck, Wrangler, Tractors
Occupation
Computer Scientist, Vintner
Country flag
Do you have pictures of this on your bed surround?
Will take photos later if you like. I thought I had one on my phone of the upper plastic areas, but I guess not!

Nice. Thanks for this.
How many cans did you use to complete all the plastic ?
I was just winging it and it took me 5 cans and a good part of a day. The front and rear bumper extend a significant way under the truck and are a LOT more surface area than they appear to be at first. Doing it the brush on way is much cheaper and more efficient, but I would practice on some cardboard or something to make sure you like the finish. I decided to just eat the cost for the spray because I didn't want to have to brush the front vent area but also wanted it to be consistent throughout.
 

Sandman1962

Well-known member
First Name
Sel
Joined
Apr 18, 2023
Threads
12
Messages
265
Reaction score
514
Location
San Diego
Vehicles
Model S , Model X
Country flag
I’m interested in covering the sails and tailgate plastic too. Does anyone know if the sails are actually replaced with new parts for the recall? I will wait until I get the recall service before ordering.
Sponsored


Top