resellpanda88
Well-known member
Does the screen shake when you hit bumps?
Sponsored
You get it figured out? The second qr shows a link to the video for the CT. You try that? Need a second pair of eyes? Video call?Absolutely struggling during installation. The instructions (QR code) point to wrong task (for Model Y frunk) and when I finally figured things out and got to the last few steps to connect the USB, there’s no room. I may need to request a refund if I cannot get support with this issue.
I was gonna share the video they posted but looks like you already saw it.You get it figured out? The second qr shows a link to the video for the CT. You try that? Need a second pair of eyes? Video call?
The basic products have been given to the winning customers. I will announce the list later.Thanks for letting us know, it would have been nice if the vendor made a public announcement of each of the winners.
I'm curious to see if someone goes from the V1 that drops 2 inches to the V2 that doesn't drop and if it can be done directly or if yoi have to reinstall some of the original parts which I'm sure I must have around somewhere...
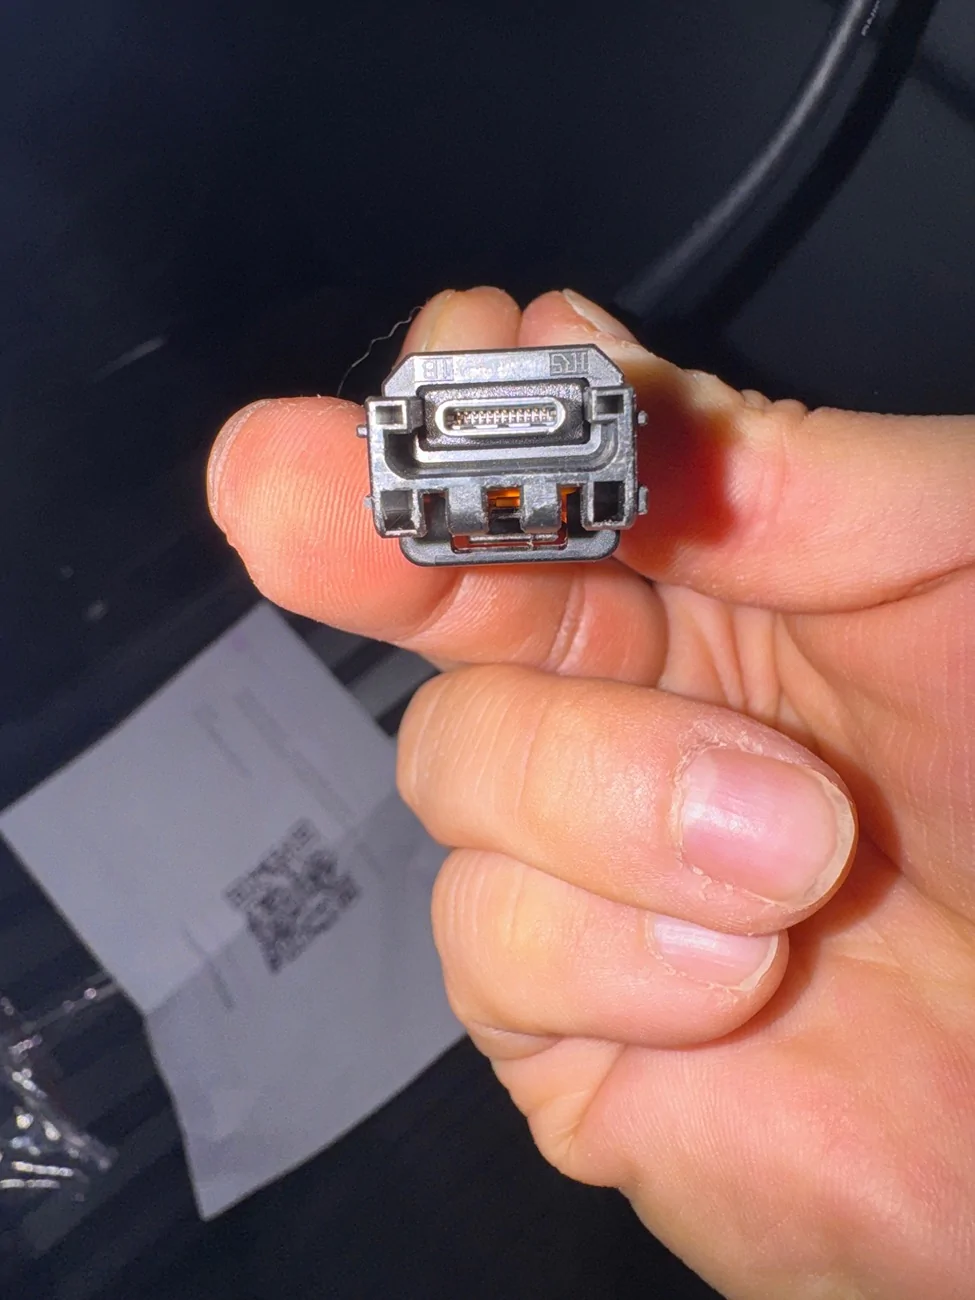
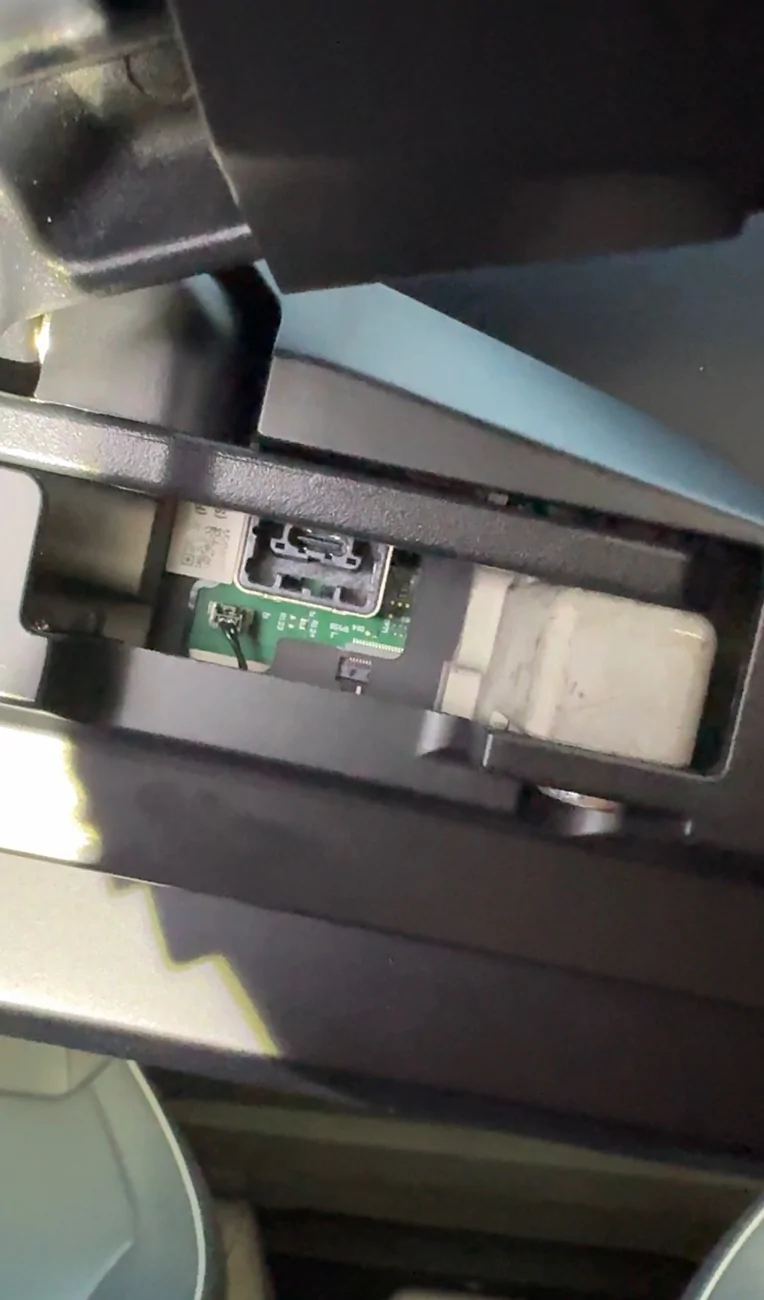
Can you attach that piece first, with everything taken apart, and then install it?I’m struggling with this USB connector plugging into this screen port with the new mount blocking the path. I’m trying to get in touch with after sales customer service to see if i’m missing parts.

Maybe you need to disassemble and connect that first. Then attach the screen to rest of the assembly.Can you attach that piece first, with everything taken apart, and then install it?
Hey, you can do what I did - check out my post and pics in the link below. It's not ideal by any means, but the end result worked and doesn't put any pressure on the clip or bend the connector on the screen (which was my main concern). Mine is the V1 mount, but the problem it has Is the same. Hope it helpsI’m struggling with this USB connector plugging into this screen port with the new mount blocking the path. I’m trying to get in touch with after sales customer service to see if i’m missing parts.
Wow. That's really kind of jacked up. All that modding to get it to work? Seems like they need a V3 to get this sorted properly.Hey, you can do what I did - check out my post and pics in the link below. It's not ideal by any means, but the end result worked and doesn't put any pressure on the clip or bend the connector on the screen (which was my main concern). Mine is the V1 mount, but the problem it has Is the same. Hope it helps
https://www.cybertruckownersclub.co...on-a-screen-swivel.43784/page-4#post-30607638
I don't think that was required with the prior bracket, and not sure that it would be with this newer design either but I haven't seen the newer design in person yet. The prior bracket it wasn't required to do that, there were options in terms of how you routed the cable vis-a-vis the bracket and strangely enough some people reported the cable touching the bracket while others didn't. Maybe there were some manufacturing or design differences in the prior bracket? Hard to say. Kudos to The Beast Mode for finding a solution that worked for him with the prior bracket, let's hope the newer bracket doesn't require such modifications. Hopefully we get some decent install videos soon. I did offer to do a detailed install video but never got a response to my offer. Fingers crossed.Wow. That's really kind of jacked up. All that modding to get it to work? Seems like they need a V3 to get this sorted properly.
For me, yes it required a lot of modification as the gap was large. The bracket was putting a lot of pressure on the connector and the circuit board. If I tightened the screws down as-is I was afraid of breaking something or long term damage, I would have went back to OEM vs tightening it the way it was.Wow. That's really kind of jacked up. All that modding to get it to work? Seems like they need a V3 to get this sorted properly.
I have the V-1, others I spoke to had said that one washer on each side was enough for them to clear the bracket, as you see from the pics for mine it wasn't even close, I would have needed 3 or 4 and the screws would barely engage the mount, I wasn't comfortable with that. I don't know where the difference was, maybe the bracket, maybe the screen design, didn't matter, this was the only way I could figure out to make it work, it did the job and its rock solid still. It looked like OP had the same issue I did so I figured it might help.I don't think that was required with the prior bracket, and not sure that it would be with this newer design either but I haven't seen the newer design in person yet. The prior bracket it wasn't required to do that, there were options in terms of how you routed the cable vis-a-vis the bracket and strangely enough some people reported the cable touching the bracket while others didn't. Maybe there were some manufacturing or design differences in the prior bracket? Hard to say. Kudos to The Beast Mode for finding a solution that worked for him with the prior bracket, let's hope the newer bracket doesn't require such modifications. Hopefully we get some decent install videos soon. I did offer to do a detailed install video but never got a response to my offer. Fingers crossed.
I can see that I will definitely need spacers on each side to provide the connector enough clearance but at that point the plastic shell won’t fit.I have the V-1, others I spoke to had said that one washer on each side was enough for them to clear the bracket, as you see from the pics for mine it wasn't even close, I would have needed 3 or 4 and the screws would barely engage the mount, I wasn't comfortable with that. I don't know where the difference was, maybe the bracket, maybe the screen design, didn't matter, this was the only way I could figure out to make it work, it did the job and its rock solid still. It looked like OP had the same issue I did so I figured it might help.

Dear Cybertruck Owners,
As an innovation leader in Cybertruck accessories, Tesstudio® is thrilled to announce the global release of the Cybertruck Screen Swivel Mount V2. This upgraded model preserves the original screen height while delivering unprecedented viewing angle adjustment and enhanced stability.
Key Upgrades of V2 Version
1. Original Height, Ultimate Control
Unlike competitors that lower the screen, V2 features a patented design enabling 40° horizontal swivel + 20° vertical tilt without altering the factory height, ensuring seamless integration with Cybertruck’s minimalist interior.
2. Military-Grade Stability for Off-Road Adventures
Constructed with aircraft-grade aluminum and dual-axis damping, this mount has been tested in desert terrain, providing rock-solid stability even on the roughest roads.
3. Tool-Free Installation in 3 Minutes
Plug-and-play modular design requires no drilling or modifications, ensuring zero damage to your vehicle.
Comment & Win: 1 Free Mount Every 10 Comments!
To celebrate the launch, we’re hosting a limited-time giveaway:
How to Enter: Leave a comment sharing your Cybertruck screen usage pain points or creative scenarios.
Note: Event subject to Japanese laws. Winners must provide valid shipping details.
Act Now for the Best Screen Experience
Visit the product page to experience Tesstudio® V2:
https://www.tesstudio.com/products/...2&_sid=d7807eb34&_ss=r&variant=51628763513121
Share & Earn Extra Entries
Forward this post to 3 Cybertruck owners and tag them in the comments for additional chances to win!
Join the conversation and elevate your Cybertruck’s smart interaction experience with us!
Tesstudio® Official Team
August 30, 2025
On the bottom of my other post I mentioned this, unfortunately I didn't take a pic of it. I forgot and had mounted the screen back on at that point. I had to remove about 2mm of plastic from the shell (on the top side of where the bracket goes) because when I added the washer it raised it up and when I would tighten down the bolts it would pop the plastic shell off because it was hitting so I had to make clearance for that too. if you do it bench top you'll see where its hitting and where to cut. I'd rather sacrifice metal and plastic from the swivel kit any day over damaging the screen.I can see that I will definitely need spacers on each side to provide the connector enough clearance but at that point the plastic shell won’t fit.