Red Beard Ops
Well-known member
- First Name
- James
- Joined
- Jun 27, 2024
- Threads
- 15
- Messages
- 72
- Reaction score
- 85
- Location
- Texas
- Website
- www.youtube.com
- Vehicles
- 2024 Cybertruck AWD
- Occupation
- Engineer
- Thread starter
- #1
Not sure if this is the best place to put this... But I just went though the process of installing TeslaMate in a docker container on my Synology NAS (Network Attached Storage) device...
It took me 3 hours since I'm an armature and have never done this before... so I thought it could be useful to yall here for a short guide.


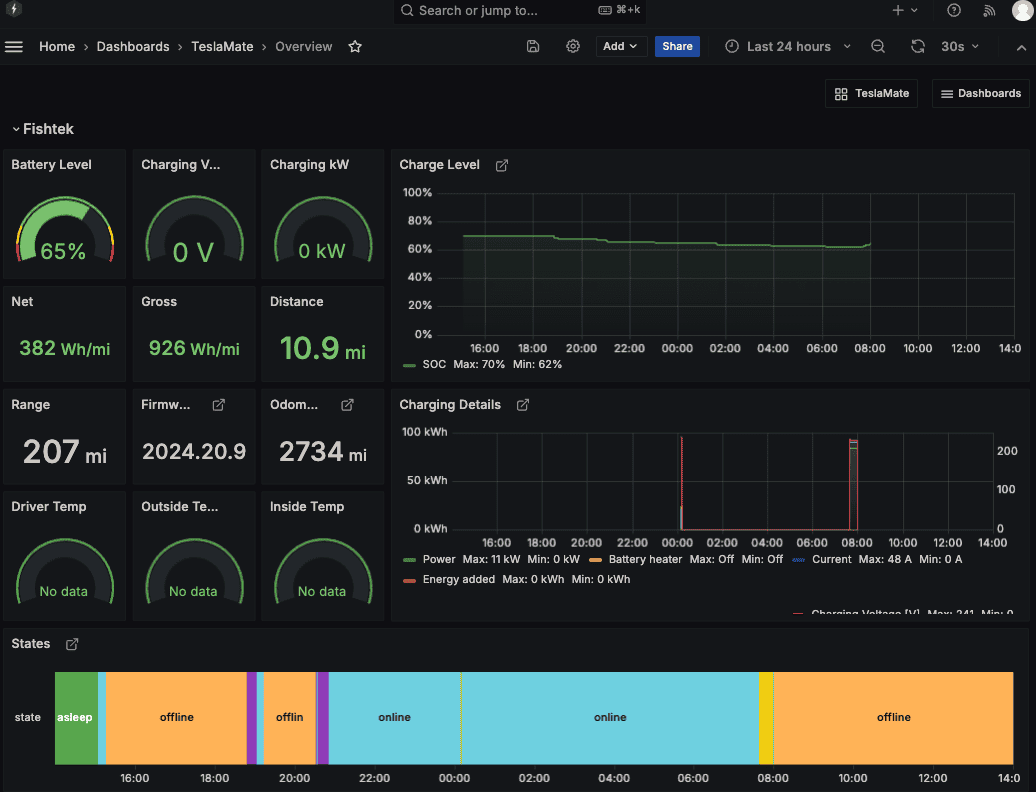
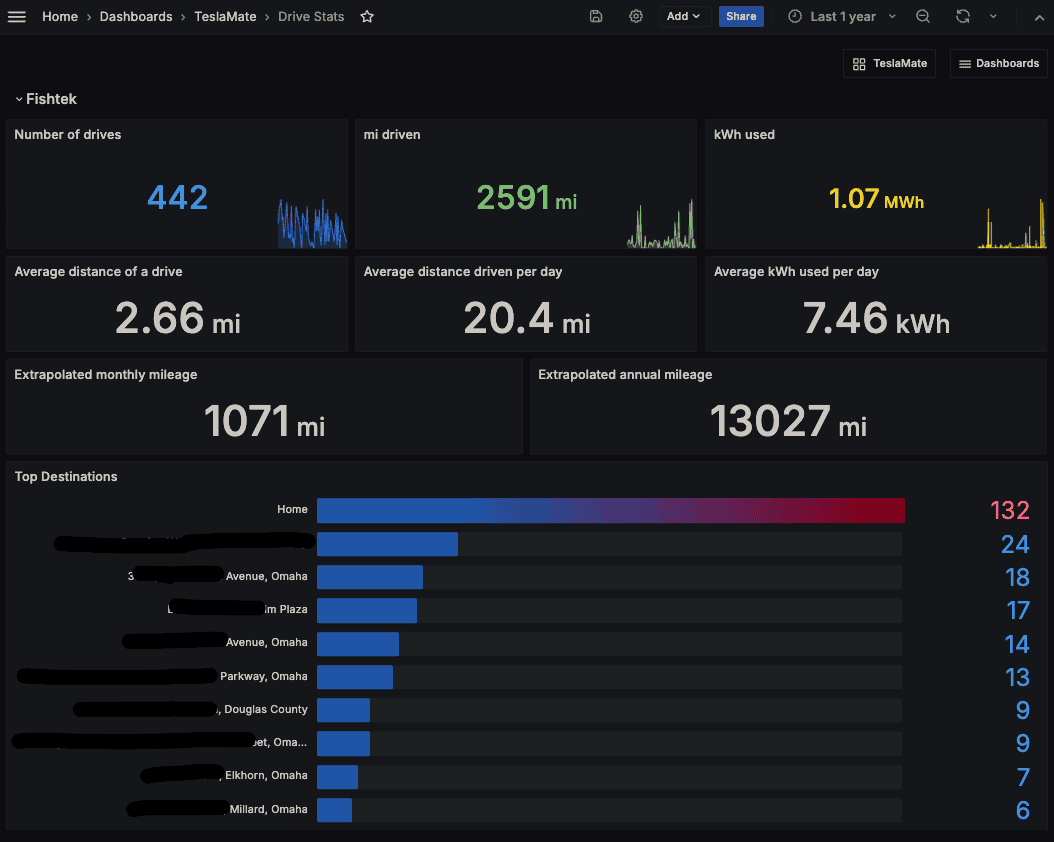
Just ran 1 charge to verify it's collecting:

Hope this helps someone!
Cheers,
Red Beard Ops
It took me 3 hours since I'm an armature and have never done this before... so I thought it could be useful to yall here for a short guide.
- Have this Docker Install Doc on hand - https://docs.teslamate.org/docs/installation/docker/
- Log onto your Synology NAS and install "Container Manager"
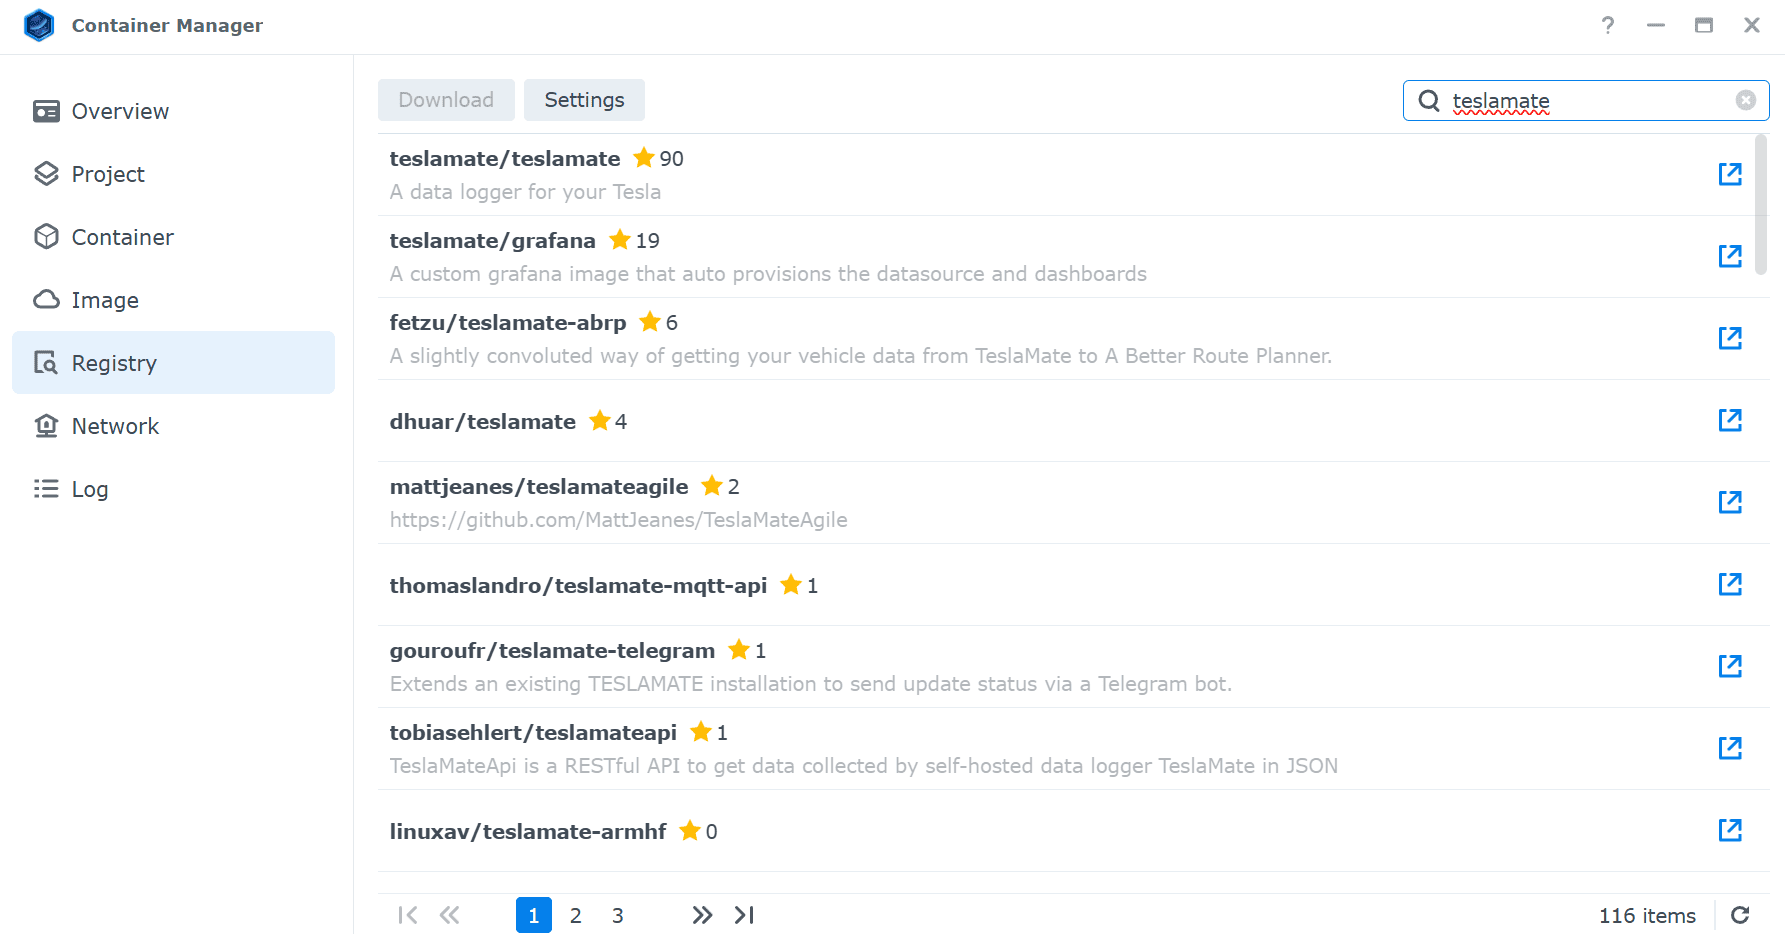
- Go to "Registry" and search for TeslaMate -> Then Download it
- Navigate to your File Station then to the "docker" folder
- Create a folder in here for your docker container ("TeslaMate_CT" for me)
- Go to "Project" and select create new project
- Name project (I did "teslamate")
- Path set to "TeslaMate_CT" from step 4
- Source = Create docker-compose.yml
- Navigate to Docker Install Doc from step 1 and copy and past that into the Create Project window
- Create an ENCRYPTION_KEY (I used a PW manager)
- Create an DATABASE_PASS / POSTGRES_PASSWORD (I used a PW manager for this one too)
- Don't set up the web portal
- Click Done
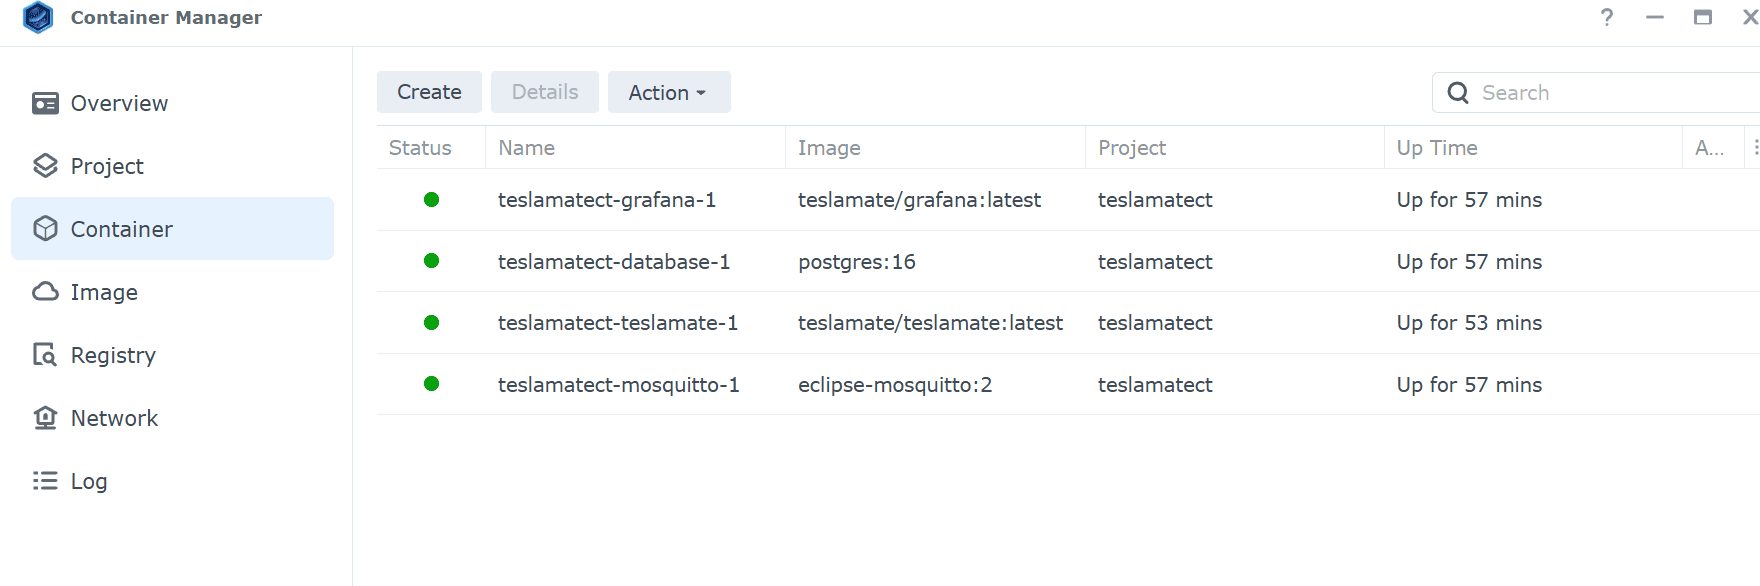
- It then started up 4 containers in the "Container" Tab. One of them was red and not working due to a file path issue.
- to fix this issue I created the folders it says it was missing. One of them was "import" inside of the docker/TeslaMate_CT folder. The second was createing the path docker/TeslaMate_CT/opt/app/import
- Download Tesla_Auth from here to generate API tokens with your Tesla Log-in info - https://github.com/adriankumpf/tesla_auth
- You'll get two tokens
- Open a new tab in your browser and type in your NAS's IP address followed by :4000
- Use your API keys here
- Your vehicle should show up in this viewer with some basic stats
- Open a second tab in your browser and type in your NAS's IP address followed by :3000
- log into this with admin and the user name and admin as the pw... then create a new pw
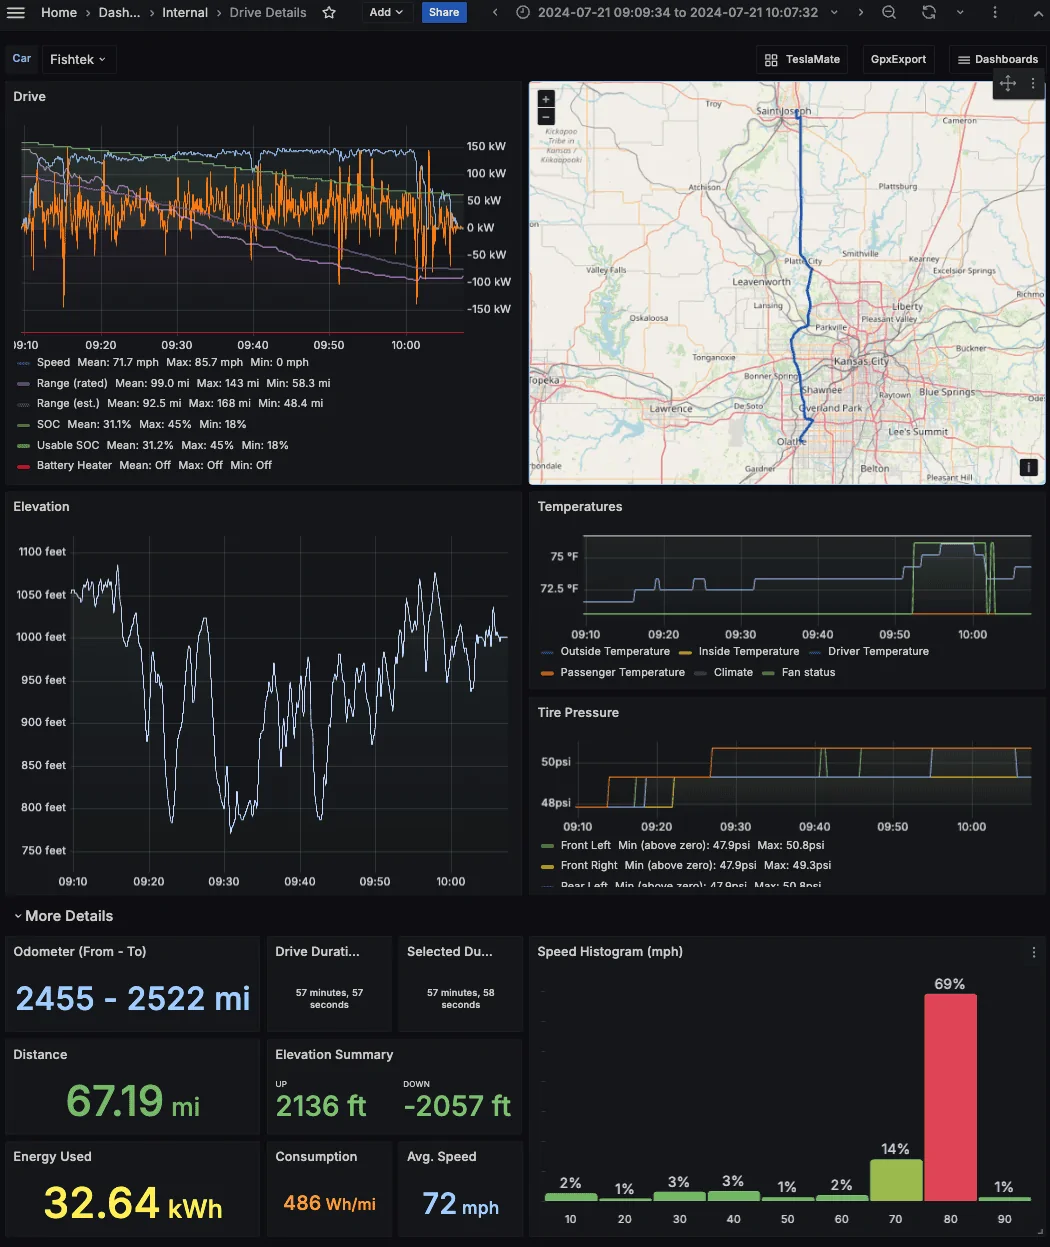
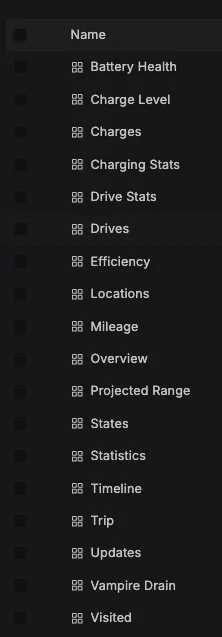
- this is the dashboard that you can use to view your data from Grafana
- Then start driving/charging your car to collect the data!
Just ran 1 charge to verify it's collecting:

Hope this helps someone!
Cheers,
Red Beard Ops
Sponsored

")
