Sponsored

atlbeast

Active member
First Name
Jay
Joined
Aug 30, 2024
Threads
5
Messages
41
Reaction score
50
Location
Atlanta
Vehicles
cyberbeast
Country flag
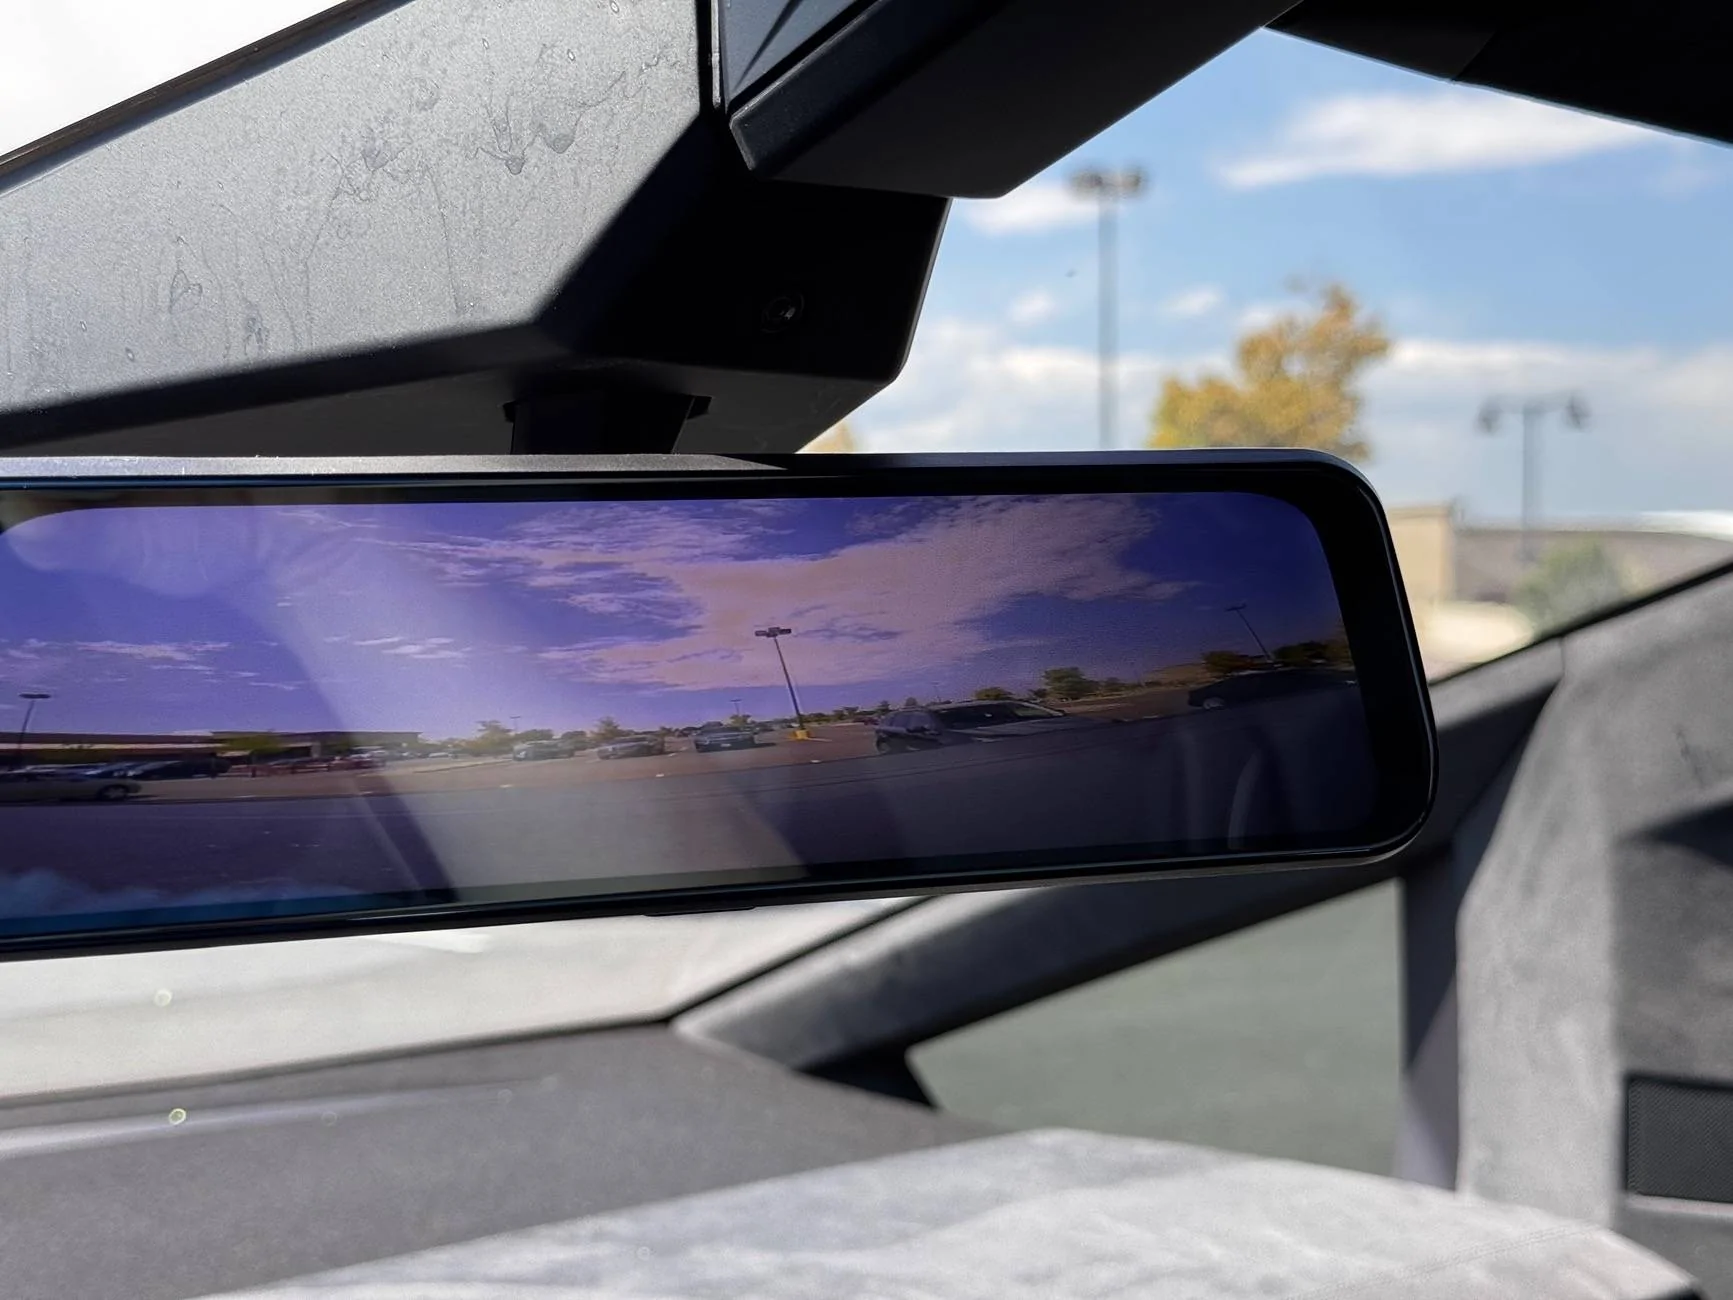
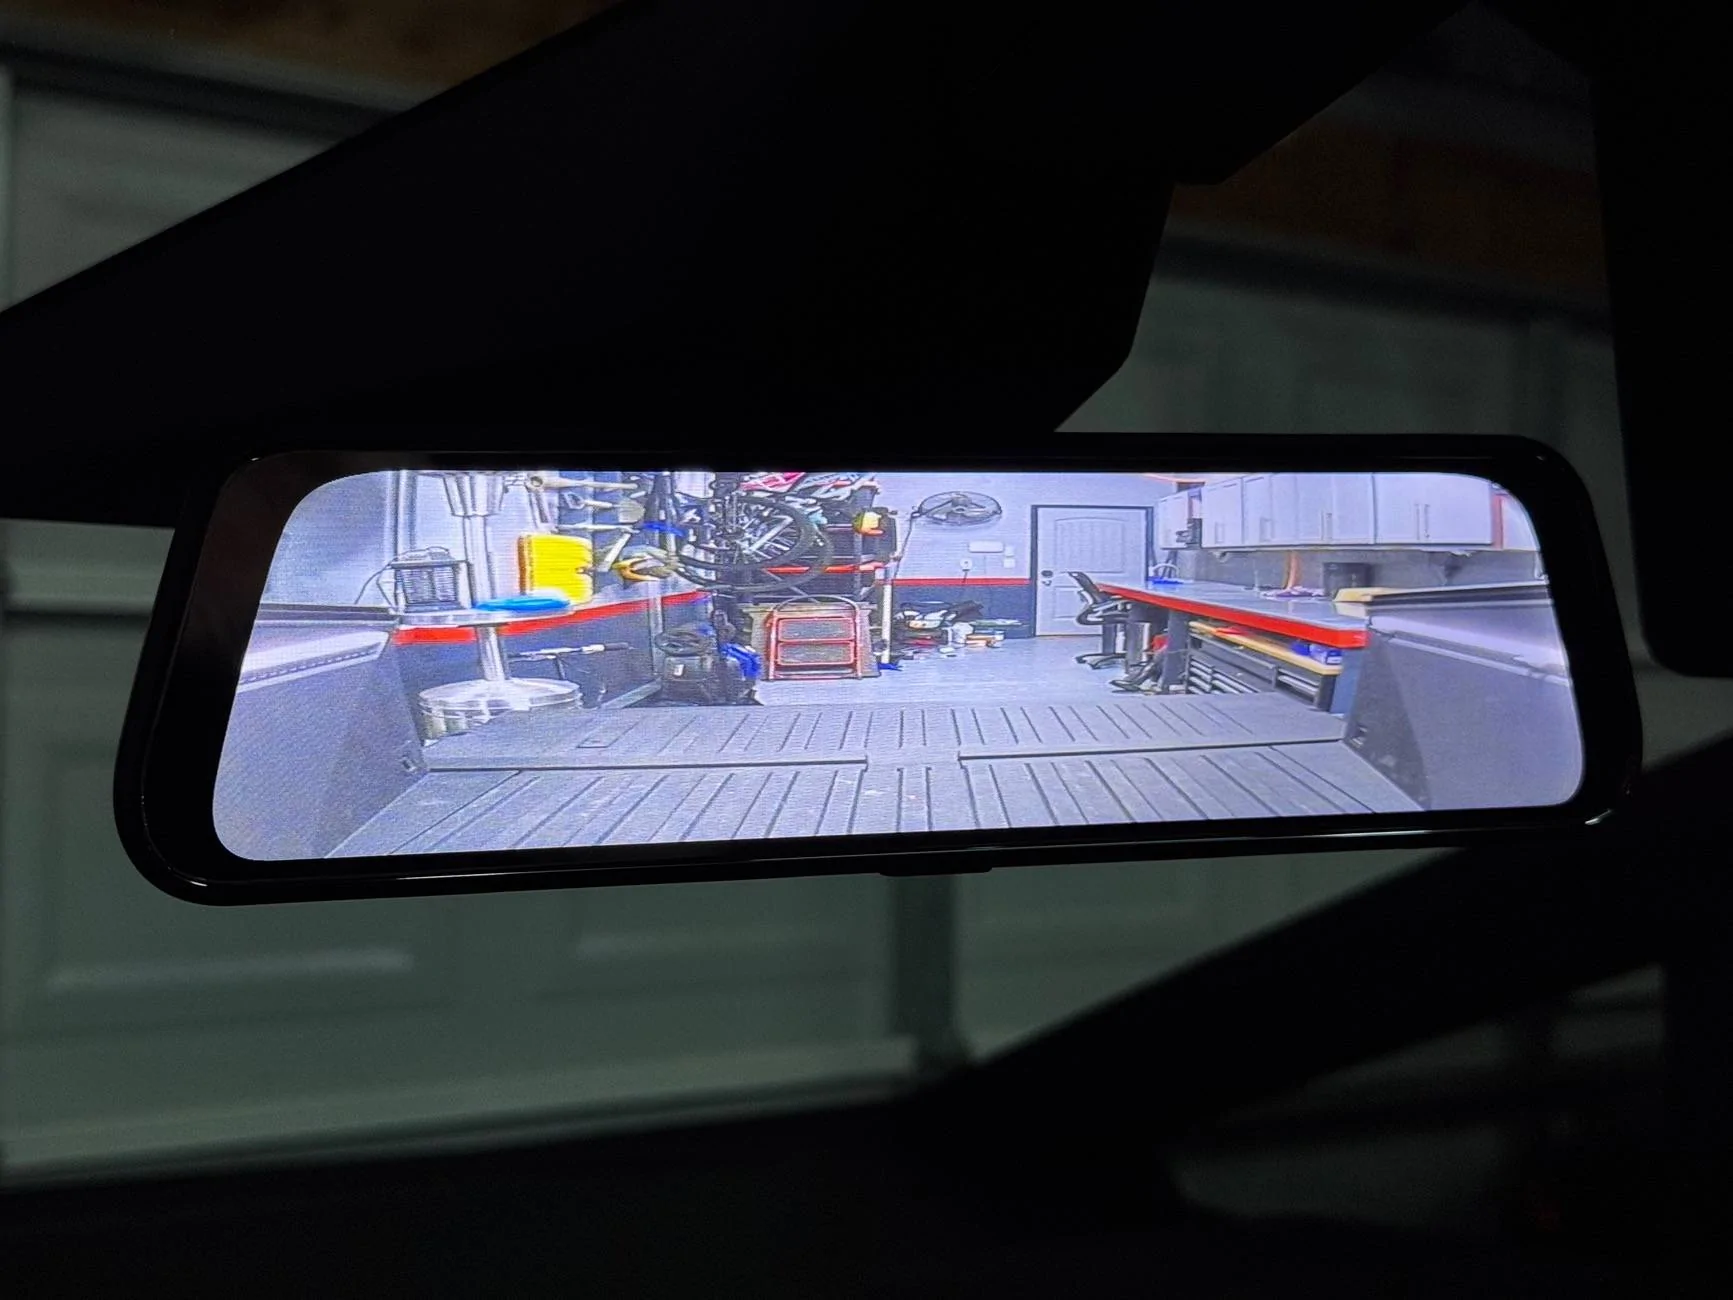
I don’t understand why it didnt come from factory with a video screen as the rearview mirror (aside from cost). Super common nowadays on upper end SUV models and just makes sense if you’re still going to have a mirror up there.
Sponsored


greggertruck

Well-known member
First Name
g
Joined
Mar 30, 2022
Threads
228
Messages
2,628
Reaction score
7,655
Location
Zimbabwe
Website
www.twitter.com
Vehicles
Dual-CT
Occupation
I post Cybertruck stuff on the Internet and people like it.
Country flag
I'm all for affiliate links, but can you share how much that mirror costs without requiring me to sign up for an account?
 

CyberJay

Well-known member
First Name
J
Joined
Dec 6, 2019
Threads
28
Messages
344
Reaction score
605
Location
NJ
Vehicles
Cybertruck AWD (two), Model Y
Occupation
Oncology Biotech Exec | GOD BLESS THE USA
Country flag
I have replace my rear view mirror with a rear view mirror screen. It looks completely factory, even used the CT mirror mount to make it work.

IMG_2463.jpeg
IMG_2473.jpeg
IMG_2474.jpeg
IMG_2475.jpeg


The screen supports 2 inputs. One is on top of the truck and wired in through the tiny-gap between the glass and the trim. The other camera is mounted on the rear headliner and points into the vault.(so I can keep an eye on my dog when she is back there)

the current rear view camera I have sucks, and have a much better one on order, the view angle is just two much. It’s about the same as the factory camera, which is good for reversing, but not good for seeing cars behind you when driving.

This setup also uses 12v I found in the ceiling, and powers on when the car powers on.

Here are some better pics of the mirror, it’s not the best, and there is no way to adjust the brightness, so I’m not sure how great that will be at night.
IMG_2478.jpeg
IMG_2480.jpeg
IMG_2477.jpeg

This is the only thing I hate, but doesn’t look horrible.

I went through 3 mirrors before getting to this one. The others had slightly better image, and CarPlay built in. Which was assume, but they just rubberbanded to the existing mirror, which I would have fixed by just 3D printing a new mirror stem and mounting it to the screen. But the power and camera connection came out the top, making it look horrible. I wanted a factory look. Also this mirror supports two camera inputs, the others only supported one

Mirror:
https://www.crutchfield.com/I-rRAFc0001/rf/5ac54708-2806-4413-8283-b697c2e4b7f4/ use this link to sign up, and you get $20 rewards points.
after you create an account, buy the mirror here.

Vault camera:
https://a.co/d/cGqgwzf

Rear view camera:
https://a.co/d/7lFGqNM current one(not recommended, but works)
https://a.co/d/aUNTucG on order will update when I get it installed.

Extension cable for vault camera:
https://a.co/d/6U8Yt5S

Adapter for rear view camera:
https://a.co/d/eyGCxl3
You’ll also need 2.1mm barrel plugs to wire in.

Instructions (very vague, could make video if enough interest)
1. Remove all header trim from the interior of the truck, can leave driver side. (Tesla docs has instruction)
2. Find 12v power supply, I used the radio antenna module, it’s above the driver. I haven’t used radio in 15 years, so I left it unplugged, to avoid pulling too much amperage from that circuit. Note: It’s actually 15ish volts, but all hardware is for commercial applications, so it was rated at 12-24 volt
3. Remove factory mirror, will need to destroy it(unless you’re lucky, but consider it a loss, it was worthless anyway (although it was beautiful in its design)).
4. Open both mirrors and swap out the stem from the factory to the new one. Had to open it and remove the screen and electronics to make this work, take your time, it’s worth it.
5. Remove triangle cover on front window, and the PRDL panel and route the wires up into the main header trim.
6. Worst part: route the wires from the header to the back top of the truck. I went up through the 48 accessory hole, cut the grommet and siliconed the new wires in place, had to remove that whole top sail, and the panel above the door open button. Tesla docs again
7. I double sided the rear view camera to the top see pics, and routed the wires through a tiny hole I cut in the rubber gasket between the glass and the back. Tiny amount of silicon to seal it back up.
8. Mount the vault camera to the rear header trim, double sided sticky tape, I removed all mounting hardware and front glass from the camera(get closer to the window, so the IR lights don’t wash out the video)
9. Tuck it all back together and post pics here.
Instruction video please ! - AWESOME
 

Green Gene

Well-known member
First Name
Gene
Joined
Oct 20, 2023
Threads
2
Messages
46
Reaction score
69
Location
California
Vehicles
Cyber Truck
Occupation
Self Employed
Country flag
I have replace my rear view mirror with a rear view mirror screen. It looks completely factory, even used the CT mirror mount to make it work.

IMG_2463.jpeg
IMG_2473.jpeg
IMG_2474.jpeg
IMG_2475.jpeg


The screen supports 2 inputs. One is on top of the truck and wired in through the tiny-gap between the glass and the trim. The other camera is mounted on the rear headliner and points into the vault.(so I can keep an eye on my dog when she is back there)

the current rear view camera I have sucks, and have a much better one on order, the view angle is just two much. It’s about the same as the factory camera, which is good for reversing, but not good for seeing cars behind you when driving.

This setup also uses 12v I found in the ceiling, and powers on when the car powers on.

Here are some better pics of the mirror, it’s not the best, and there is no way to adjust the brightness, so I’m not sure how great that will be at night.
IMG_2478.jpeg
IMG_2480.jpeg
IMG_2477.jpeg

This is the only thing I hate, but doesn’t look horrible.

I went through 3 mirrors before getting to this one. The others had slightly better image, and CarPlay built in. Which was assume, but they just rubberbanded to the existing mirror, which I would have fixed by just 3D printing a new mirror stem and mounting it to the screen. But the power and camera connection came out the top, making it look horrible. I wanted a factory look. Also this mirror supports two camera inputs, the others only supported one

Mirror:
https://www.crutchfield.com/I-rRAFc0001/rf/5ac54708-2806-4413-8283-b697c2e4b7f4/ use this link to sign up, and you get $20 rewards points.
after you create an account, buy the mirror here.

Vault camera:
https://a.co/d/cGqgwzf

Rear view camera:
https://a.co/d/7lFGqNM current one(not recommended, but works)
https://a.co/d/aUNTucG on order will update when I get it installed.

Extension cable for vault camera:
https://a.co/d/6U8Yt5S

Adapter for rear view camera:
https://a.co/d/eyGCxl3
You’ll also need 2.1mm barrel plugs to wire in.

Instructions (very vague, could make video if enough interest)
1. Remove all header trim from the interior of the truck, can leave driver side. (Tesla docs has instruction)
2. Find 12v power supply, I used the radio antenna module, it’s above the driver. I haven’t used radio in 15 years, so I left it unplugged, to avoid pulling too much amperage from that circuit. Note: It’s actually 15ish volts, but all hardware is for commercial applications, so it was rated at 12-24 volt
3. Remove factory mirror, will need to destroy it(unless you’re lucky, but consider it a loss, it was worthless anyway (although it was beautiful in its design)).
4. Open both mirrors and swap out the stem from the factory to the new one. Had to open it and remove the screen and electronics to make this work, take your time, it’s worth it.
5. Remove triangle cover on front window, and the PRDL panel and route the wires up into the main header trim.
6. Worst part: route the wires from the header to the back top of the truck. I went up through the 48 accessory hole, cut the grommet and siliconed the new wires in place, had to remove that whole top sail, and the panel above the door open button. Tesla docs again
7. I double sided the rear view camera to the top see pics, and routed the wires through a tiny hole I cut in the rubber gasket between the glass and the back. Tiny amount of silicon to seal it back up.
8. Mount the vault camera to the rear header trim, double sided sticky tape, I removed all mounting hardware and front glass from the camera(get closer to the window, so the IR lights don’t wash out the video)
9. Tuck it all back together and post pics here.
Yes. Very interesting is seeing a install video with links etc. and finding out how you camera update goes. Thanks for the information.
 

moefren2000

Well-known member
Joined
Dec 8, 2023
Threads
5
Messages
53
Reaction score
31
Location
New Jersey
Vehicles
Model S
Country flag
I wonder if they can put a camera on the OEM light bar. Not sure how the camera view will be like since the camera will be more towards the front of the truck or an embedded camera on a crossbar.


OP
OP
Gaximus

Gaximus

Well-known member
Joined
Jun 22, 2024
Threads
23
Messages
1,460
Reaction score
2,284
Location
Mead, CO
Vehicles
CyberBeast, Model 3, Jeep Wrangler, Yamaha R6
Occupation
Software Developer
Country flag
I'm all for affiliate links, but can you share how much that mirror costs without requiring me to sign up for an account?
Sorry, I thought you could see the prices without signing up. It’s $212 like @Thoglom said. There are other places that sell it, but unfortunately not Amazon. Ive deal with crutchfield many times and trust them with returns Not sure about the other places.
 

eswimm

Well-known member
Joined
Jun 6, 2024
Threads
3
Messages
555
Reaction score
994
Location
Charlotte, NC
Vehicles
Model Y, Cybertruck
Country flag
I like the 120 degree camera option. I've done the Wolfbox Pro and now the Jomise mirrors (the Jomise is smaller and less intrusive than the Wolfbox), but both have 170 degree cameras and as you mention it's almost identical FOV as the backup window on the main screen and is just too small/distorted. I'd love other 90-120 degree FOV options that work with the Jomise.
 
OP
OP
Gaximus

Gaximus

Well-known member
Joined
Jun 22, 2024
Threads
23
Messages
1,460
Reaction score
2,284
Location
Mead, CO
Vehicles
CyberBeast, Model 3, Jeep Wrangler, Yamaha R6
Occupation
Software Developer
Country flag
I like the 120 degree camera option. I've done the Wolfbox Pro and now the Jomise mirrors (the Jomise is smaller and less intrusive than the Wolfbox), but both have 170 degree cameras and as you mention it's almost identical FOV as the backup window on the main screen and is just too small/distorted. I'd love other 90-120 degree FOV options that work with the Jomise.
I got my 120 degree camera in today. But still have to mount it and rerun the wires. I plugged it in at the unit, and it’s very promising.


OP
OP
Gaximus

Gaximus

Well-known member
Joined
Jun 22, 2024
Threads
23
Messages
1,460
Reaction score
2,284
Location
Mead, CO
Vehicles
CyberBeast, Model 3, Jeep Wrangler, Yamaha R6
Occupation
Software Developer
Country flag
As an update I did you the mirror at night and it is a bit too bright. And there doesn’t seem to be a way to dim it.
 

Cyberus

Well-known member
Joined
May 6, 2024
Threads
48
Messages
259
Reaction score
482
Location
California
Vehicles
Cybertruck
Country flag
I have replace my rear view mirror with a rear view mirror screen. It looks completely factory, even used the CT mirror mount to make it work.

IMG_2463.jpeg
IMG_2473.jpeg
IMG_2474.jpeg
IMG_2475.jpeg


The screen supports 2 inputs. One is on top of the truck and wired in through the tiny-gap between the glass and the trim. The other camera is mounted on the rear headliner and points into the vault.(so I can keep an eye on my dog when she is back there)

the current rear view camera I have sucks, and have a much better one on order, the view angle is just two much. It’s about the same as the factory camera, which is good for reversing, but not good for seeing cars behind you when driving.

This setup also uses 12v I found in the ceiling, and powers on when the car powers on.

Here are some better pics of the mirror, it’s not the best, and there is no way to adjust the brightness, so I’m not sure how great that will be at night.
IMG_2478.jpeg
IMG_2480.jpeg
IMG_2477.jpeg

This is the only thing I hate, but doesn’t look horrible.

I went through 3 mirrors before getting to this one. The others had slightly better image, and CarPlay built in. Which was assume, but they just rubberbanded to the existing mirror, which I would have fixed by just 3D printing a new mirror stem and mounting it to the screen. But the power and camera connection came out the top, making it look horrible. I wanted a factory look. Also this mirror supports two camera inputs, the others only supported one

Mirror:
https://www.crutchfield.com/I-rRAFc0001/rf/5ac54708-2806-4413-8283-b697c2e4b7f4/ use this link to sign up, and you get $20 rewards points.
after you create an account, buy the mirror here.

Vault camera:
https://a.co/d/cGqgwzf

Rear view camera:
https://a.co/d/7lFGqNM current one(not recommended, but works)
https://a.co/d/aUNTucG on order will update when I get it installed.

Extension cable for vault camera:
https://a.co/d/6U8Yt5S

Adapter for rear view camera:
https://a.co/d/eyGCxl3
You’ll also need 2.1mm barrel plugs to wire in.

Instructions (very vague, could make video if enough interest)
1. Remove all header trim from the interior of the truck, can leave driver side. (Tesla docs has instruction)
2. Find 12v power supply, I used the radio antenna module, it’s above the driver. I haven’t used radio in 15 years, so I left it unplugged, to avoid pulling too much amperage from that circuit. Note: It’s actually 15ish volts, but all hardware is for commercial applications, so it was rated at 12-24 volt
3. Remove factory mirror, will need to destroy it(unless you’re lucky, but consider it a loss, it was worthless anyway (although it was beautiful in its design)).
4. Open both mirrors and swap out the stem from the factory to the new one. Had to open it and remove the screen and electronics to make this work, take your time, it’s worth it.
5. Remove triangle cover on front window, and the PRDL panel and route the wires up into the main header trim.
6. Worst part: route the wires from the header to the back top of the truck. I went up through the 48 accessory hole, cut the grommet and siliconed the new wires in place, had to remove that whole top sail, and the panel above the door open button. Tesla docs again
7. I double sided the rear view camera to the top see pics, and routed the wires through a tiny hole I cut in the rubber gasket between the glass and the back. Tiny amount of silicon to seal it back up.
8. Mount the vault camera to the rear header trim, double sided sticky tape, I removed all mounting hardware and front glass from the camera(get closer to the window, so the IR lights don’t wash out the video)
9. Tuck it all back together and post pics here.
This is what friends are for!
 

scottf200

Well-known member
Joined
Jul 31, 2021
Threads
53
Messages
2,221
Reaction score
3,241
Location
Western NC
Vehicles
X; immed family 3 & Y
Country flag

MICyber

Well-known member
Joined
Jun 29, 2024
Threads
10
Messages
325
Reaction score
360
Location
Michigan
Vehicles
2024 Cybertruck AWD Foundation
Country flag
I have replace my rear view mirror with a rear view mirror screen. It looks completely factory, even used the CT mirror mount to make it work.

IMG_2463.jpeg
IMG_2473.jpeg
IMG_2474.jpeg
IMG_2475.jpeg


The screen supports 2 inputs. One is on top of the truck and wired in through the tiny-gap between the glass and the trim. The other camera is mounted on the rear headliner and points into the vault.(so I can keep an eye on my dog when she is back there)

the current rear view camera I have sucks, and have a much better one on order, the view angle is just two much. It’s about the same as the factory camera, which is good for reversing, but not good for seeing cars behind you when driving.

This setup also uses 12v I found in the ceiling, and powers on when the car powers on.

Here are some better pics of the mirror, it’s not the best, and there is no way to adjust the brightness, so I’m not sure how great that will be at night.
IMG_2478.jpeg
IMG_2480.jpeg
IMG_2477.jpeg

This is the only thing I hate, but doesn’t look horrible.

I went through 3 mirrors before getting to this one. The others had slightly better image, and CarPlay built in. Which was assume, but they just rubberbanded to the existing mirror, which I would have fixed by just 3D printing a new mirror stem and mounting it to the screen. But the power and camera connection came out the top, making it look horrible. I wanted a factory look. Also this mirror supports two camera inputs, the others only supported one

Mirror:
https://www.crutchfield.com/I-rRAFc0001/rf/5ac54708-2806-4413-8283-b697c2e4b7f4/ use this link to sign up, and you get $20 rewards points.
after you create an account, buy the mirror here.

Vault camera:
https://a.co/d/cGqgwzf

Rear view camera:
https://a.co/d/7lFGqNM current one(not recommended, but works)
https://a.co/d/aUNTucG on order will update when I get it installed.

Extension cable for vault camera:
https://a.co/d/6U8Yt5S

Adapter for rear view camera:
https://a.co/d/eyGCxl3
You’ll also need 2.1mm barrel plugs to wire in.

Instructions (very vague, could make video if enough interest)
1. Remove all header trim from the interior of the truck, can leave driver side. (Tesla docs has instruction)
2. Find 12v power supply, I used the radio antenna module, it’s above the driver. I haven’t used radio in 15 years, so I left it unplugged, to avoid pulling too much amperage from that circuit. Note: It’s actually 15ish volts, but all hardware is for commercial applications, so it was rated at 12-24 volt
3. Remove factory mirror, will need to destroy it(unless you’re lucky, but consider it a loss, it was worthless anyway (although it was beautiful in its design)).
4. Open both mirrors and swap out the stem from the factory to the new one. Had to open it and remove the screen and electronics to make this work, take your time, it’s worth it.
5. Remove triangle cover on front window, and the PRDL panel and route the wires up into the main header trim.
6. Worst part: route the wires from the header to the back top of the truck. I went up through the 48 accessory hole, cut the grommet and siliconed the new wires in place, had to remove that whole top sail, and the panel above the door open button. Tesla docs again
7. I double sided the rear view camera to the top see pics, and routed the wires through a tiny hole I cut in the rubber gasket between the glass and the back. Tiny amount of silicon to seal it back up.
8. Mount the vault camera to the rear header trim, double sided sticky tape, I removed all mounting hardware and front glass from the camera(get closer to the window, so the IR lights don’t wash out the video)
9. Tuck it all back together and post pics here.
There are no connections on the mirror for power or video or GPS. I just installed the G900 Pro from wolfbox and all those connections are on the top center. Your mirror is void of any connections. What gives?
 
OP
OP
Gaximus

Gaximus

Well-known member
Joined
Jun 22, 2024
Threads
23
Messages
1,460
Reaction score
2,284
Location
Mead, CO
Vehicles
CyberBeast, Model 3, Jeep Wrangler, Yamaha R6
Occupation
Software Developer
Country flag
There are no connections on the mirror for power or video or GPS. I just installed the G900 Pro from wolfbox and all those connections are on the top center. Your mirror is void of any connections. What gives?
That’s the reason I didn’t go with any of the over mirror solutions. The wires run through the mirror mount.
Sponsored


Top