TeslaKen
Well-known member
- First Name
- Ken
- Joined
- Apr 26, 2024
- Threads
- 109
- Messages
- 1,254
- Reaction score
- 1,716
- Location
- Overland Park
- Website
- www.halocybertruck.com
- Vehicles
- Cyberbeast, M3PD+, GT4, XK140OTS
- Occupation
- Currently Occupied
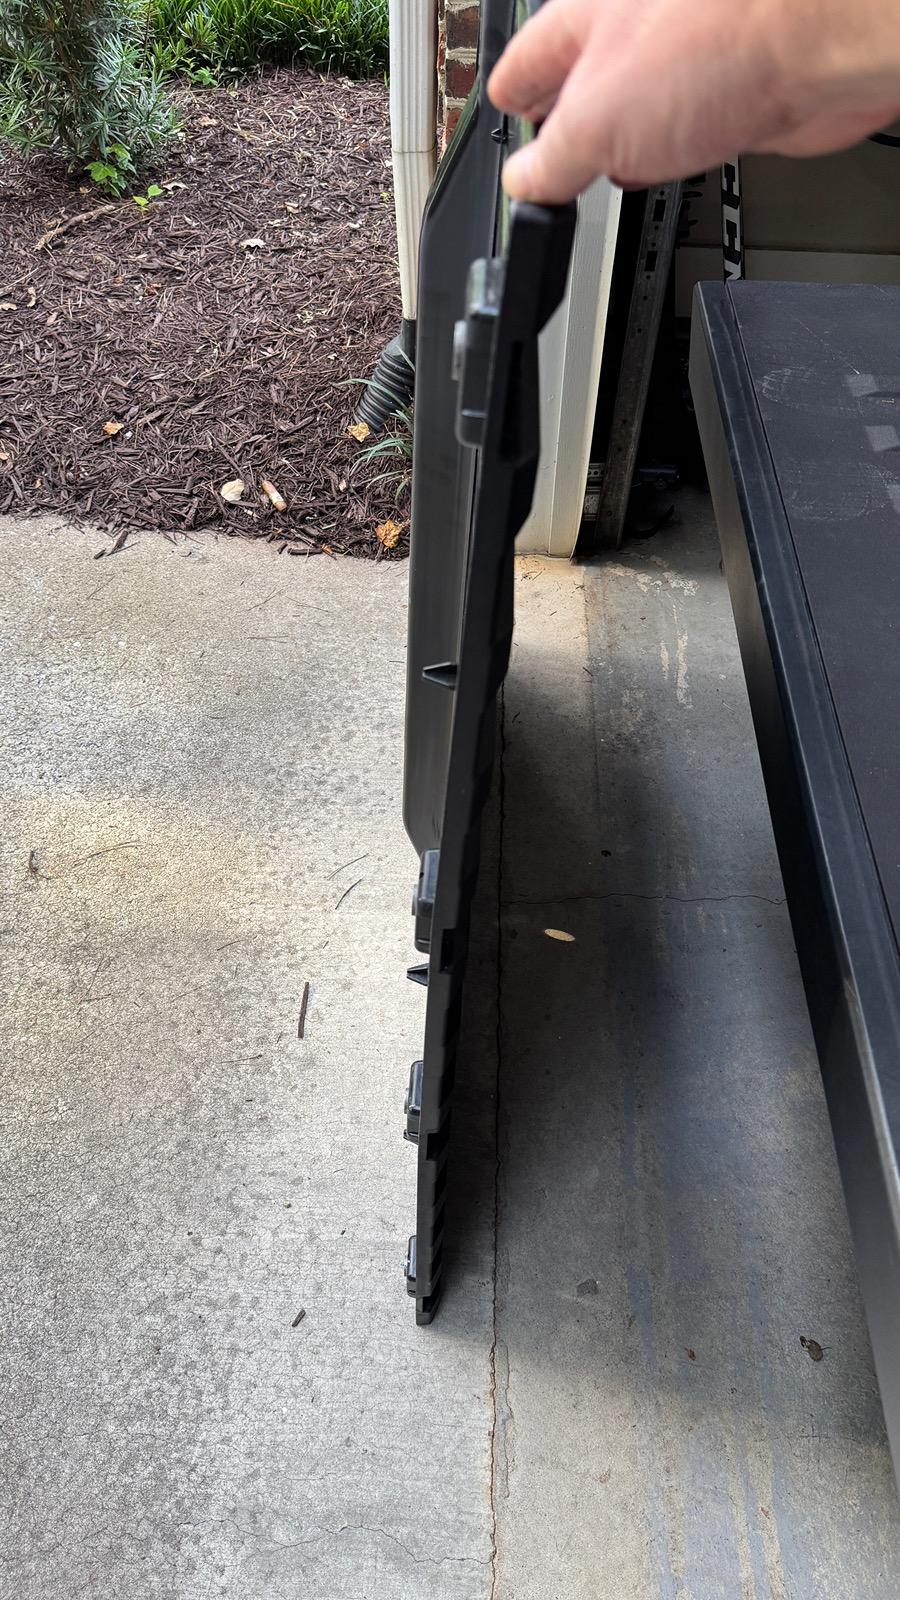
Ok my job is to try and help everyone out here ") I decided to dive into this today because by brand new vault divider just arrived from Tesla today. (Ordered last week so I assume it is a new one, new style, whatever). Arrived fine in the box and like others no instructions but how hard can it be right? I'd read about the problems here where it would fit in the back part of the bed but not in front of the lower cargo hatch. Well when I tried mine, I was getting much the same result. I could make it fit but geez it was really tight and didn't fit as easily as it did in the rear section. So let's see some pics in get into what I did.
I decided to dive into this today because by brand new vault divider just arrived from Tesla today. (Ordered last week so I assume it is a new one, new style, whatever). Arrived fine in the box and like others no instructions but how hard can it be right? I'd read about the problems here where it would fit in the back part of the bed but not in front of the lower cargo hatch. Well when I tried mine, I was getting much the same result. I could make it fit but geez it was really tight and didn't fit as easily as it did in the rear section. So let's see some pics in get into what I did.

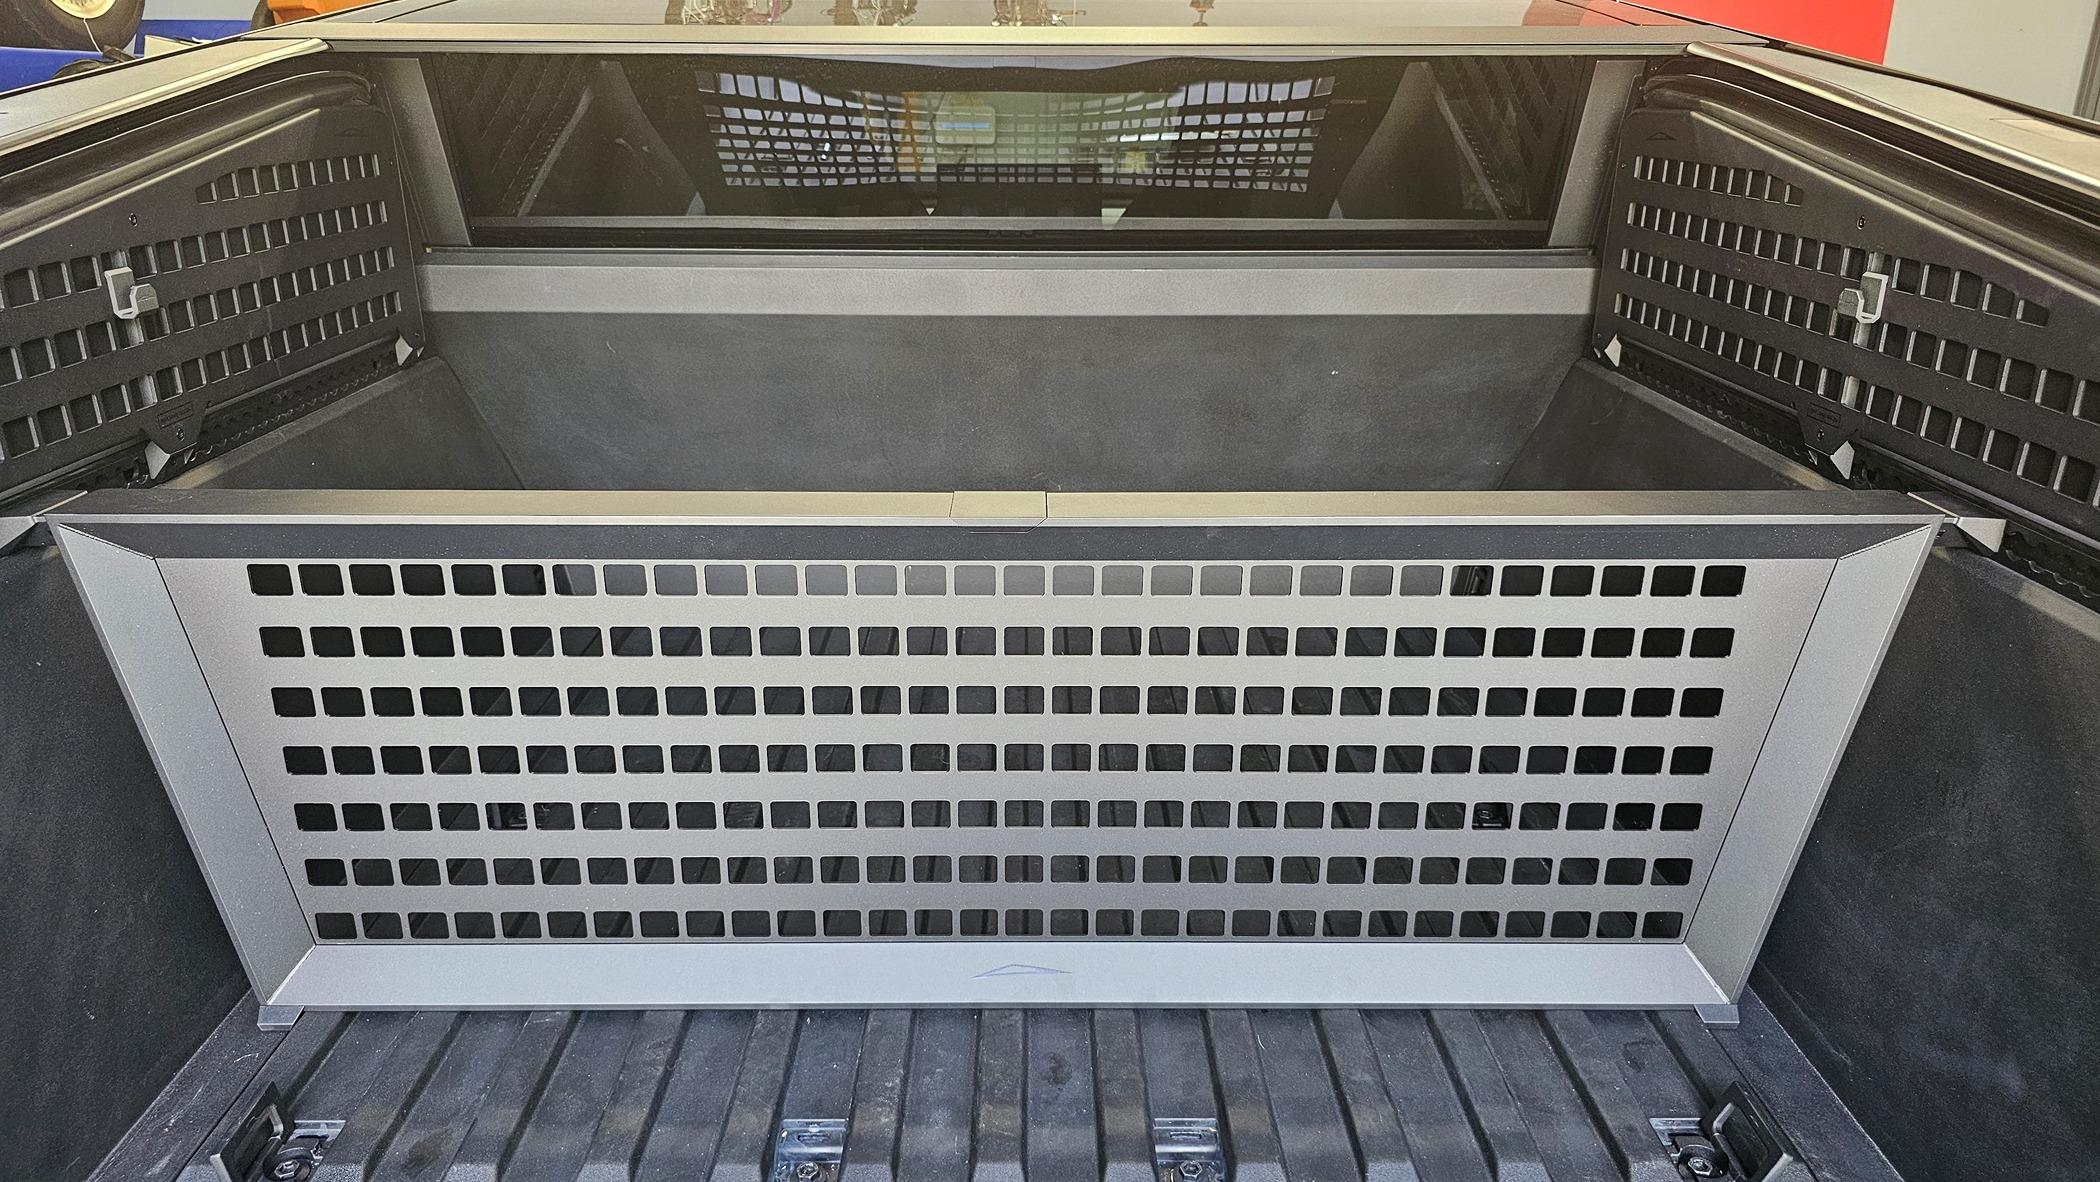
Here is the vault divider easily installed over the top of the hatch, no issues, went in like a charm. When I tried it forward of the divider, again, not so great. So let's move on and remove some bolts shall we. First off you are going to need a 10mm hex bit. I just happened to have one from doing brake work on another car where the caliper bolts used 10mm hex so I didn't need to make a run to the hardware store. You might.
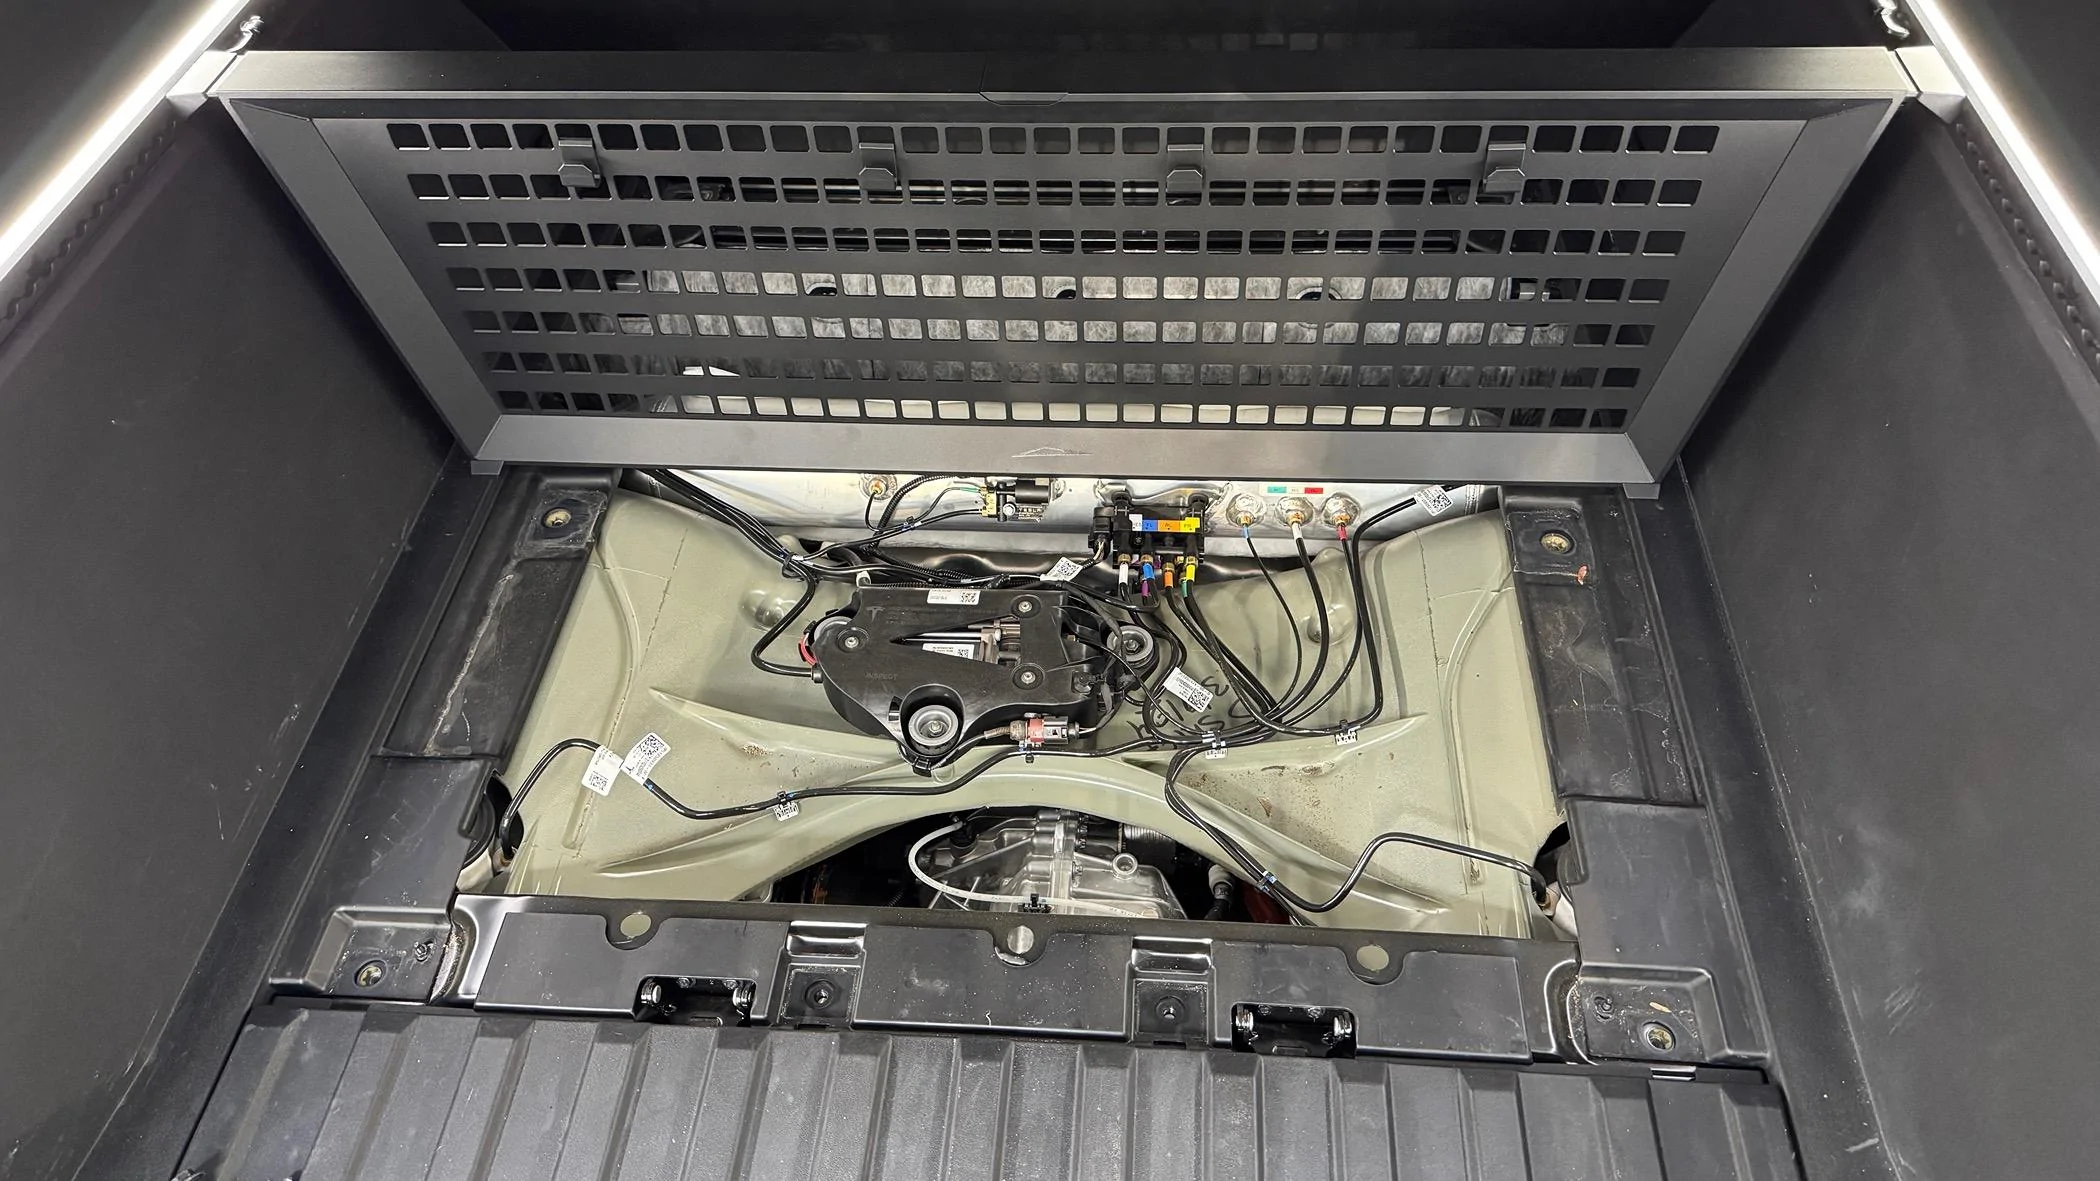
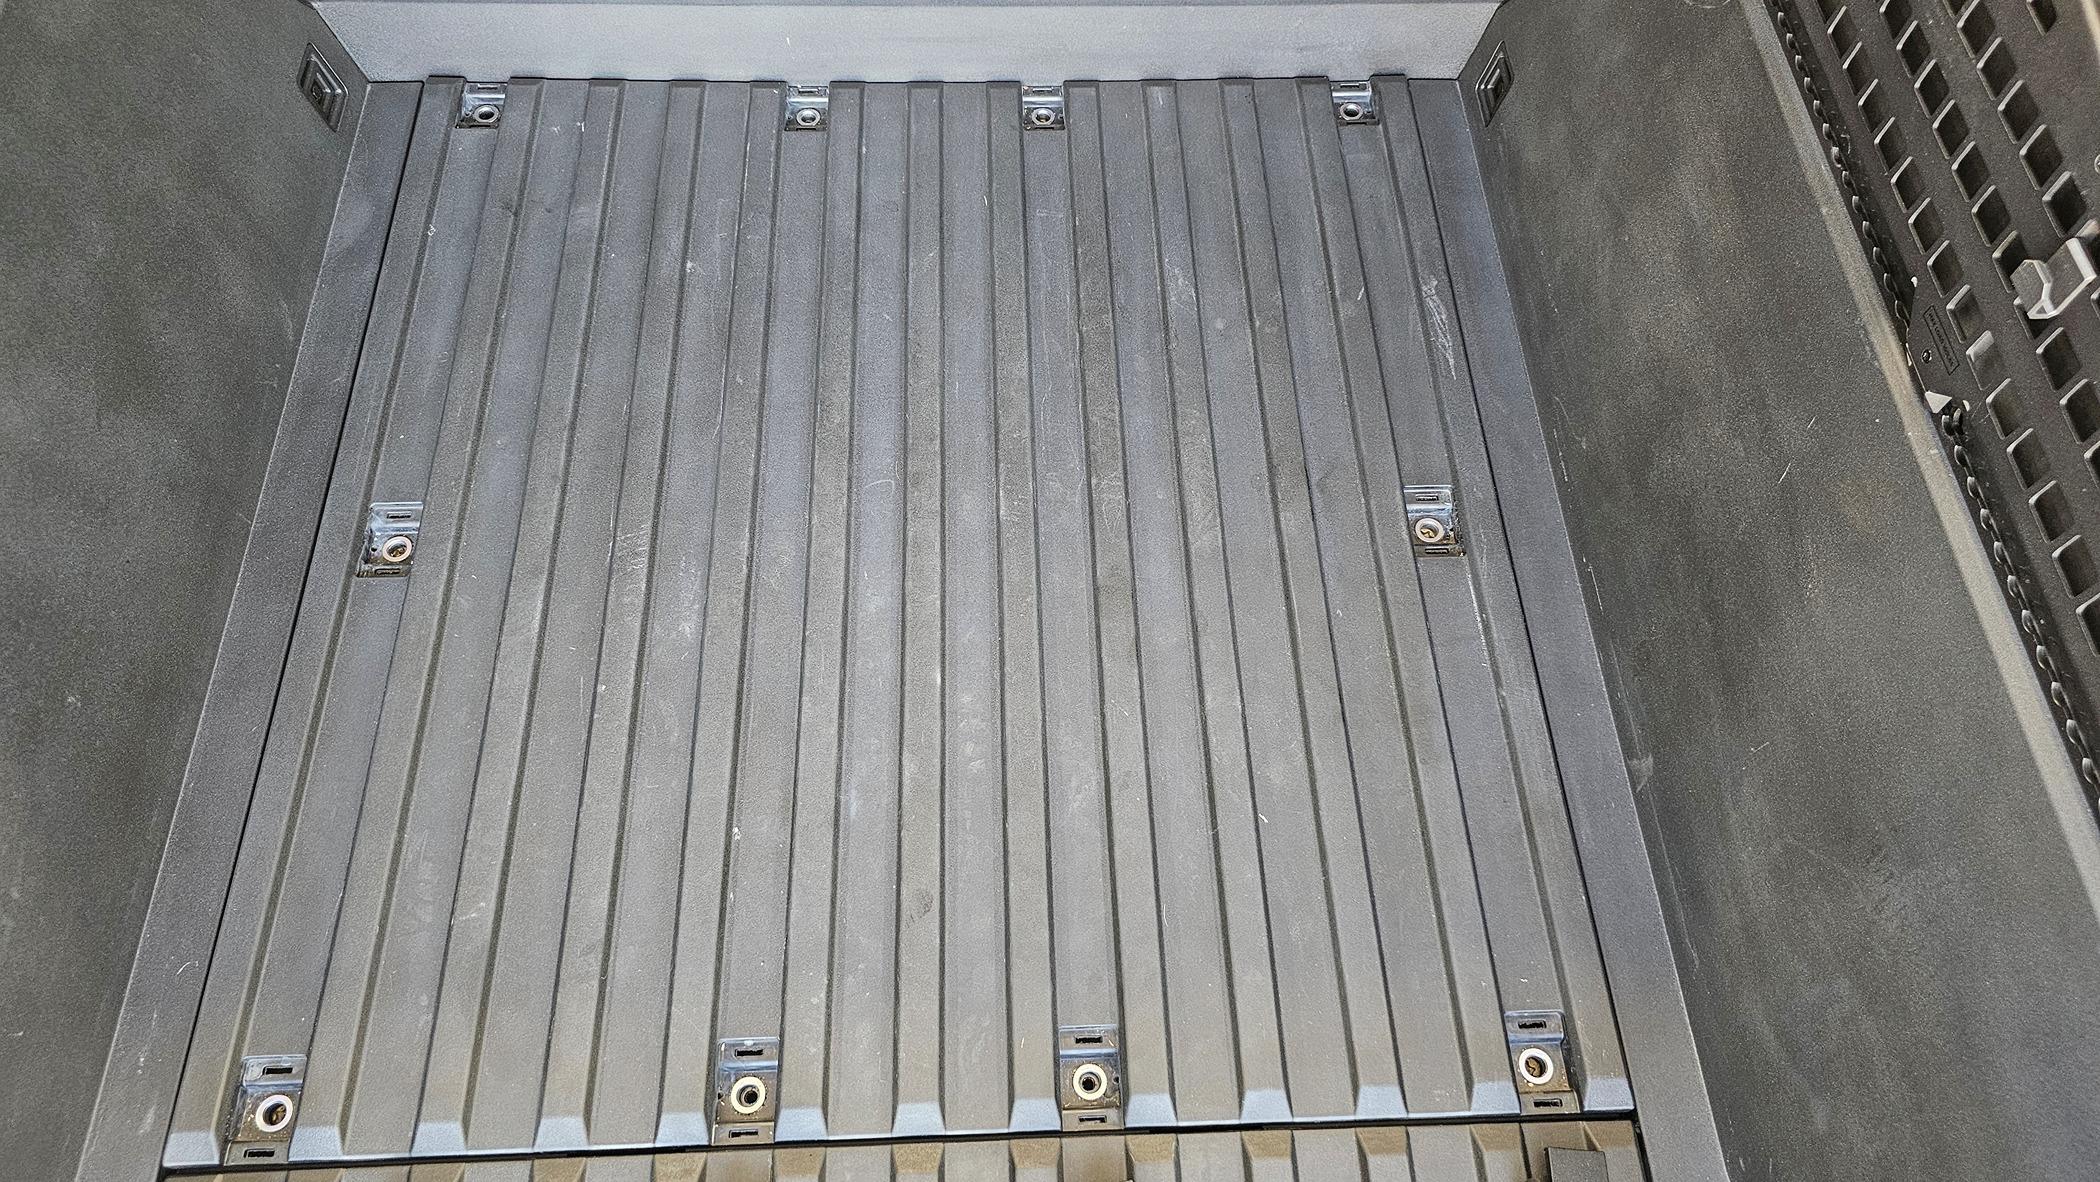
I proceeded to use the 10mm hex and my ratchet to remove the 10 bolts, 4 of which were through D-Rings and 6 just into the bed itself and covered by plastic covers. I used one of those plastic trim removal tools to pop those off and expose the bolts. If you look carefully in the above picture you will see metal rings in each of the holes, those rings are different depending upon where the hole is located, some sit flush with the bed, some protrude through it and need to fit into circles below. Let's remove this cover (easiest to lift at a corner) and see what is underneath shall we?

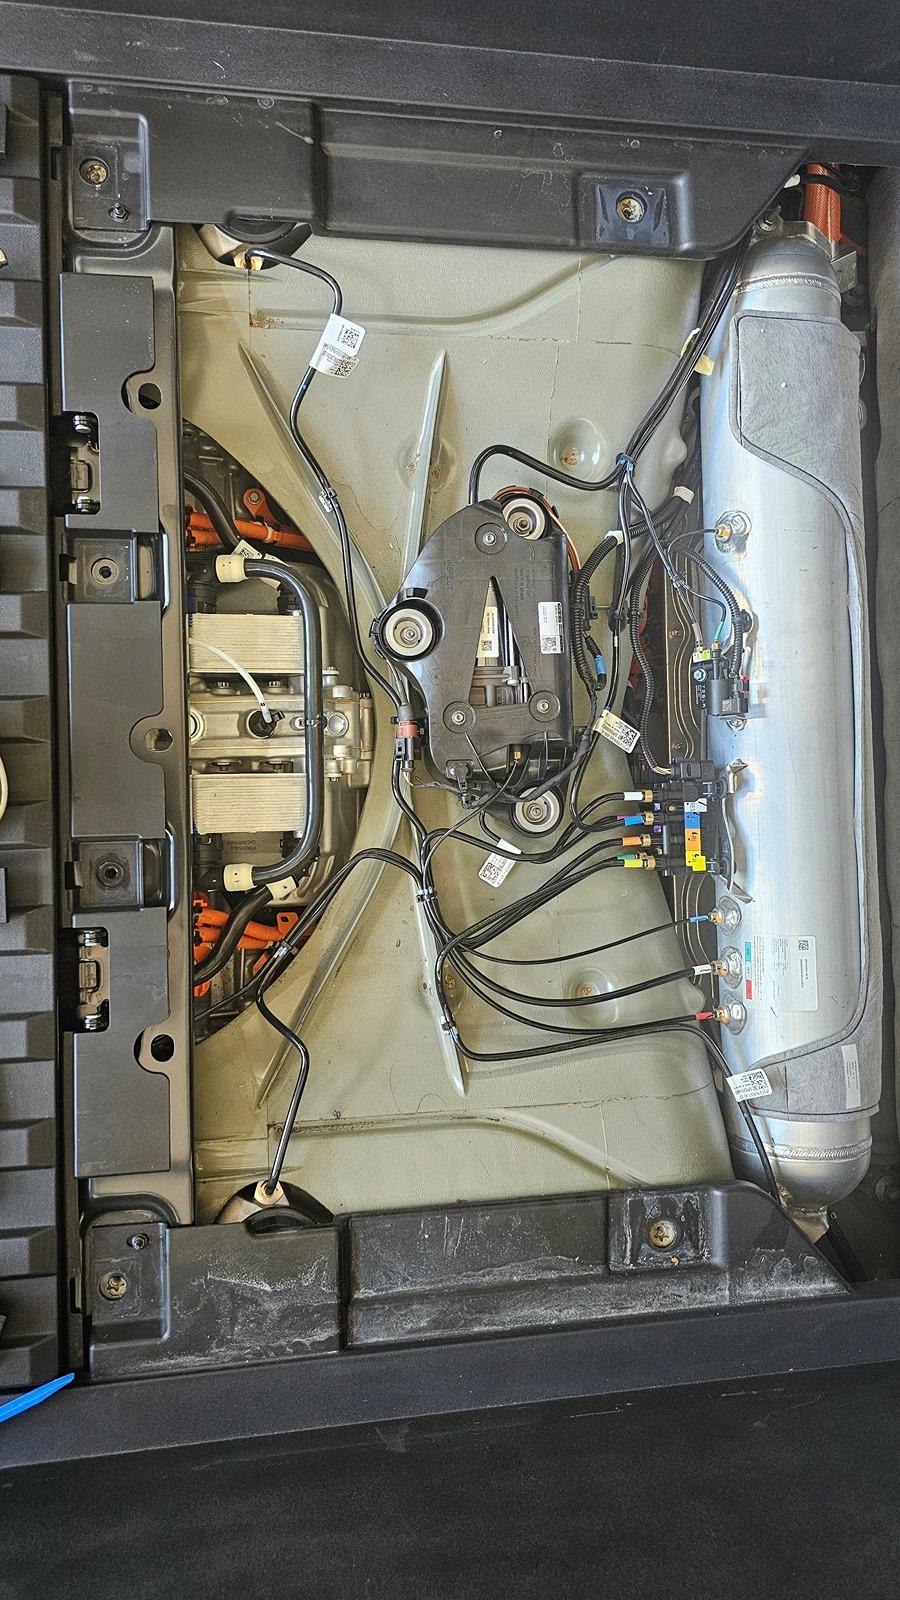
Well look at that, an air tank, a couple of beastly electric motors, wiring, tubing, casting, etc. etc. Looking at the holes underneath you will see some have multiple stage cut outs, larger circle with smaller circle towards the middle, some do not. What I was looking for was some sort of adjustment, anything down here that could be moved, removed, adjusted, etc. etc. to free up more space. Nope, nothing, nada, your bed should look like this and short of cutting metal you aren't going to magically free up space here. However, there is one item that I think may be causing some people an issue, so let's look at some close up photos to show you what I mean:
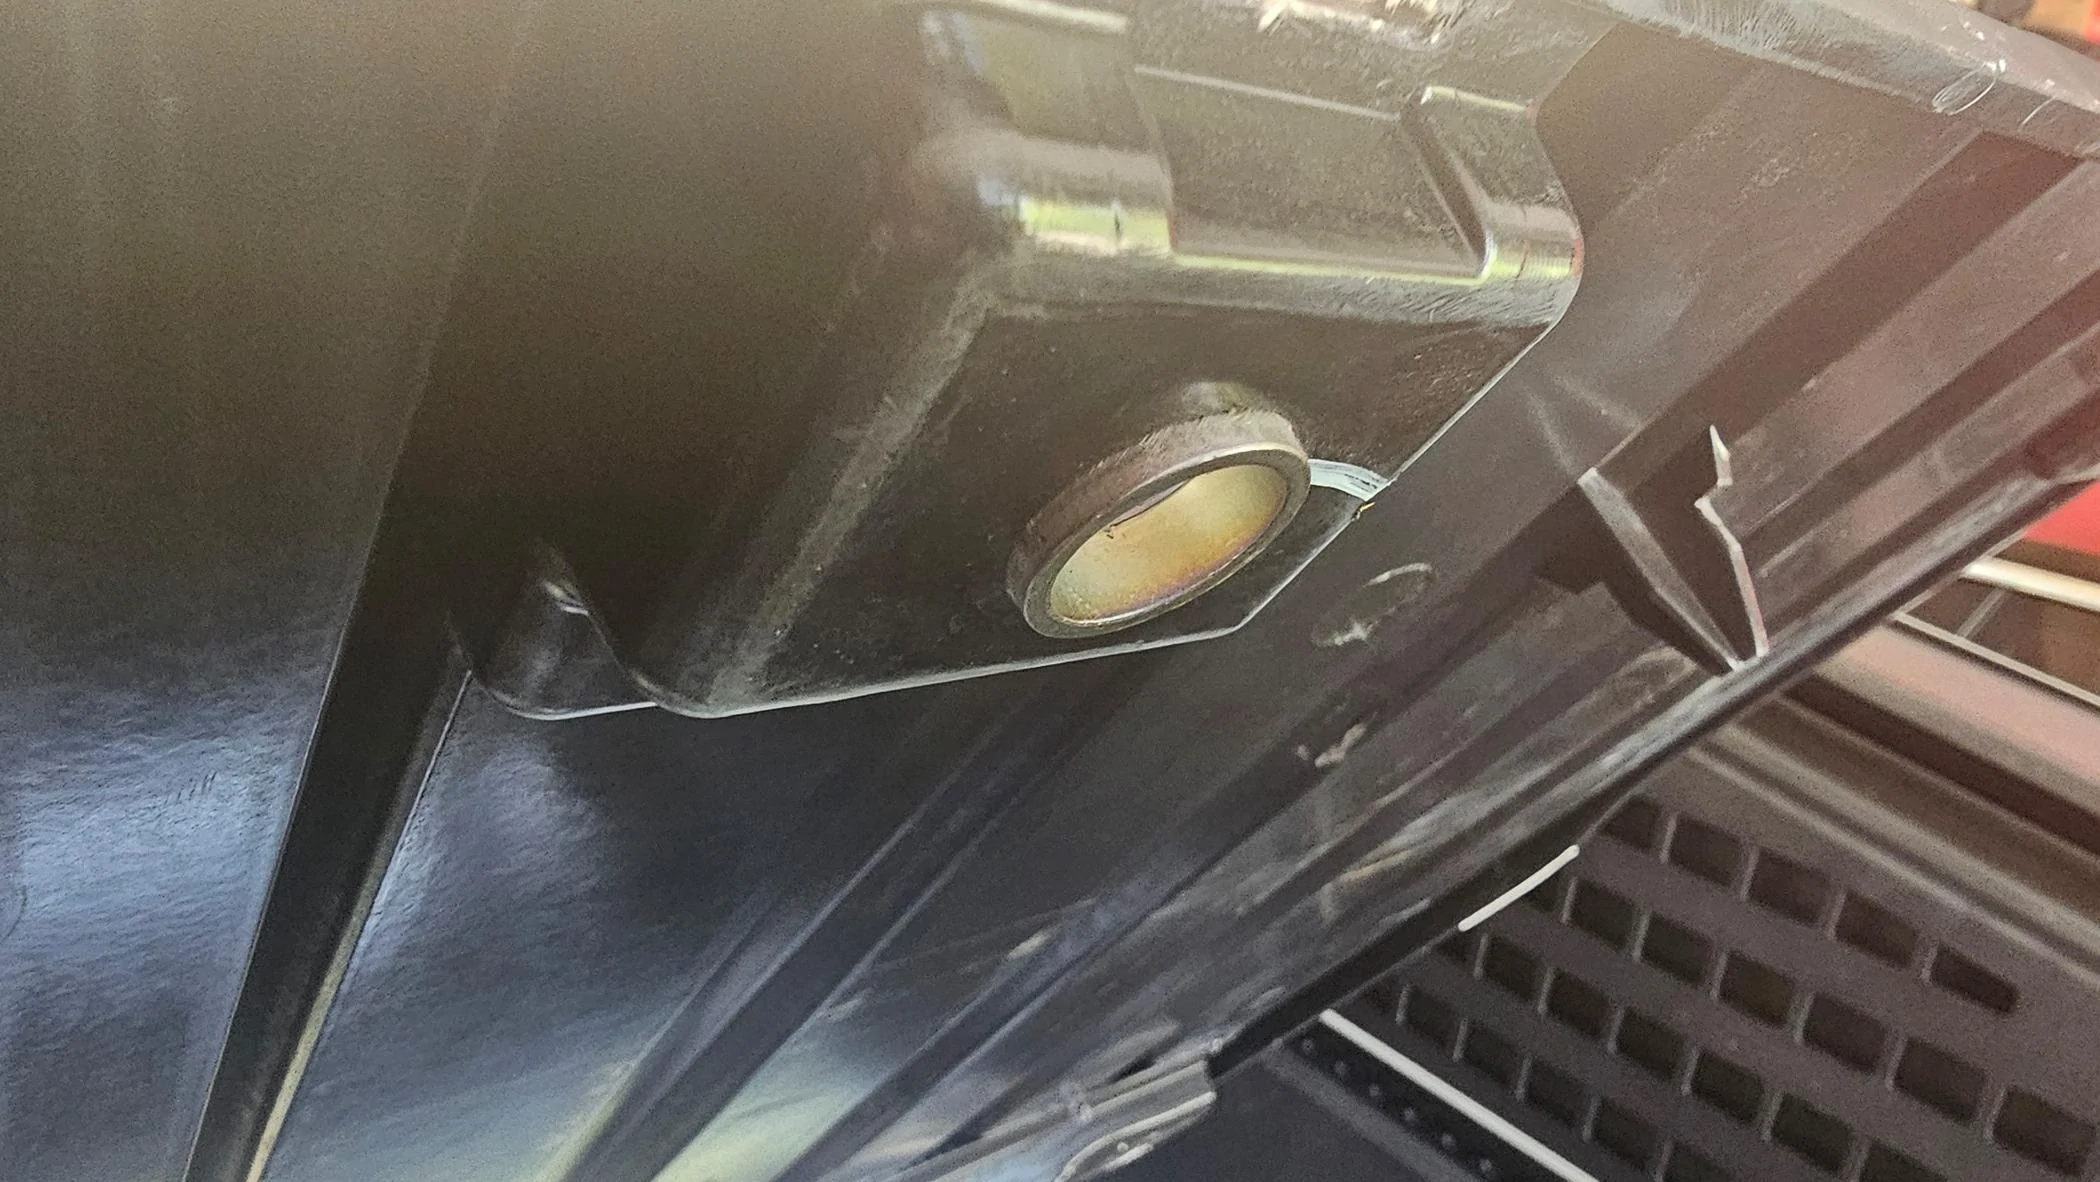
Here is one of those metal rings at one of the holes. Notice how the metal ring / collar protrudes through the bottom of the floor panel? As I mentioned, some positions are like this, and some are flush. You cannot push these upwards as they would then stick out of the top of the bed, but if they are supposed to stick out (which I believe they are) then they have to go somewhere right? Let's look at the next photo to see where they go:
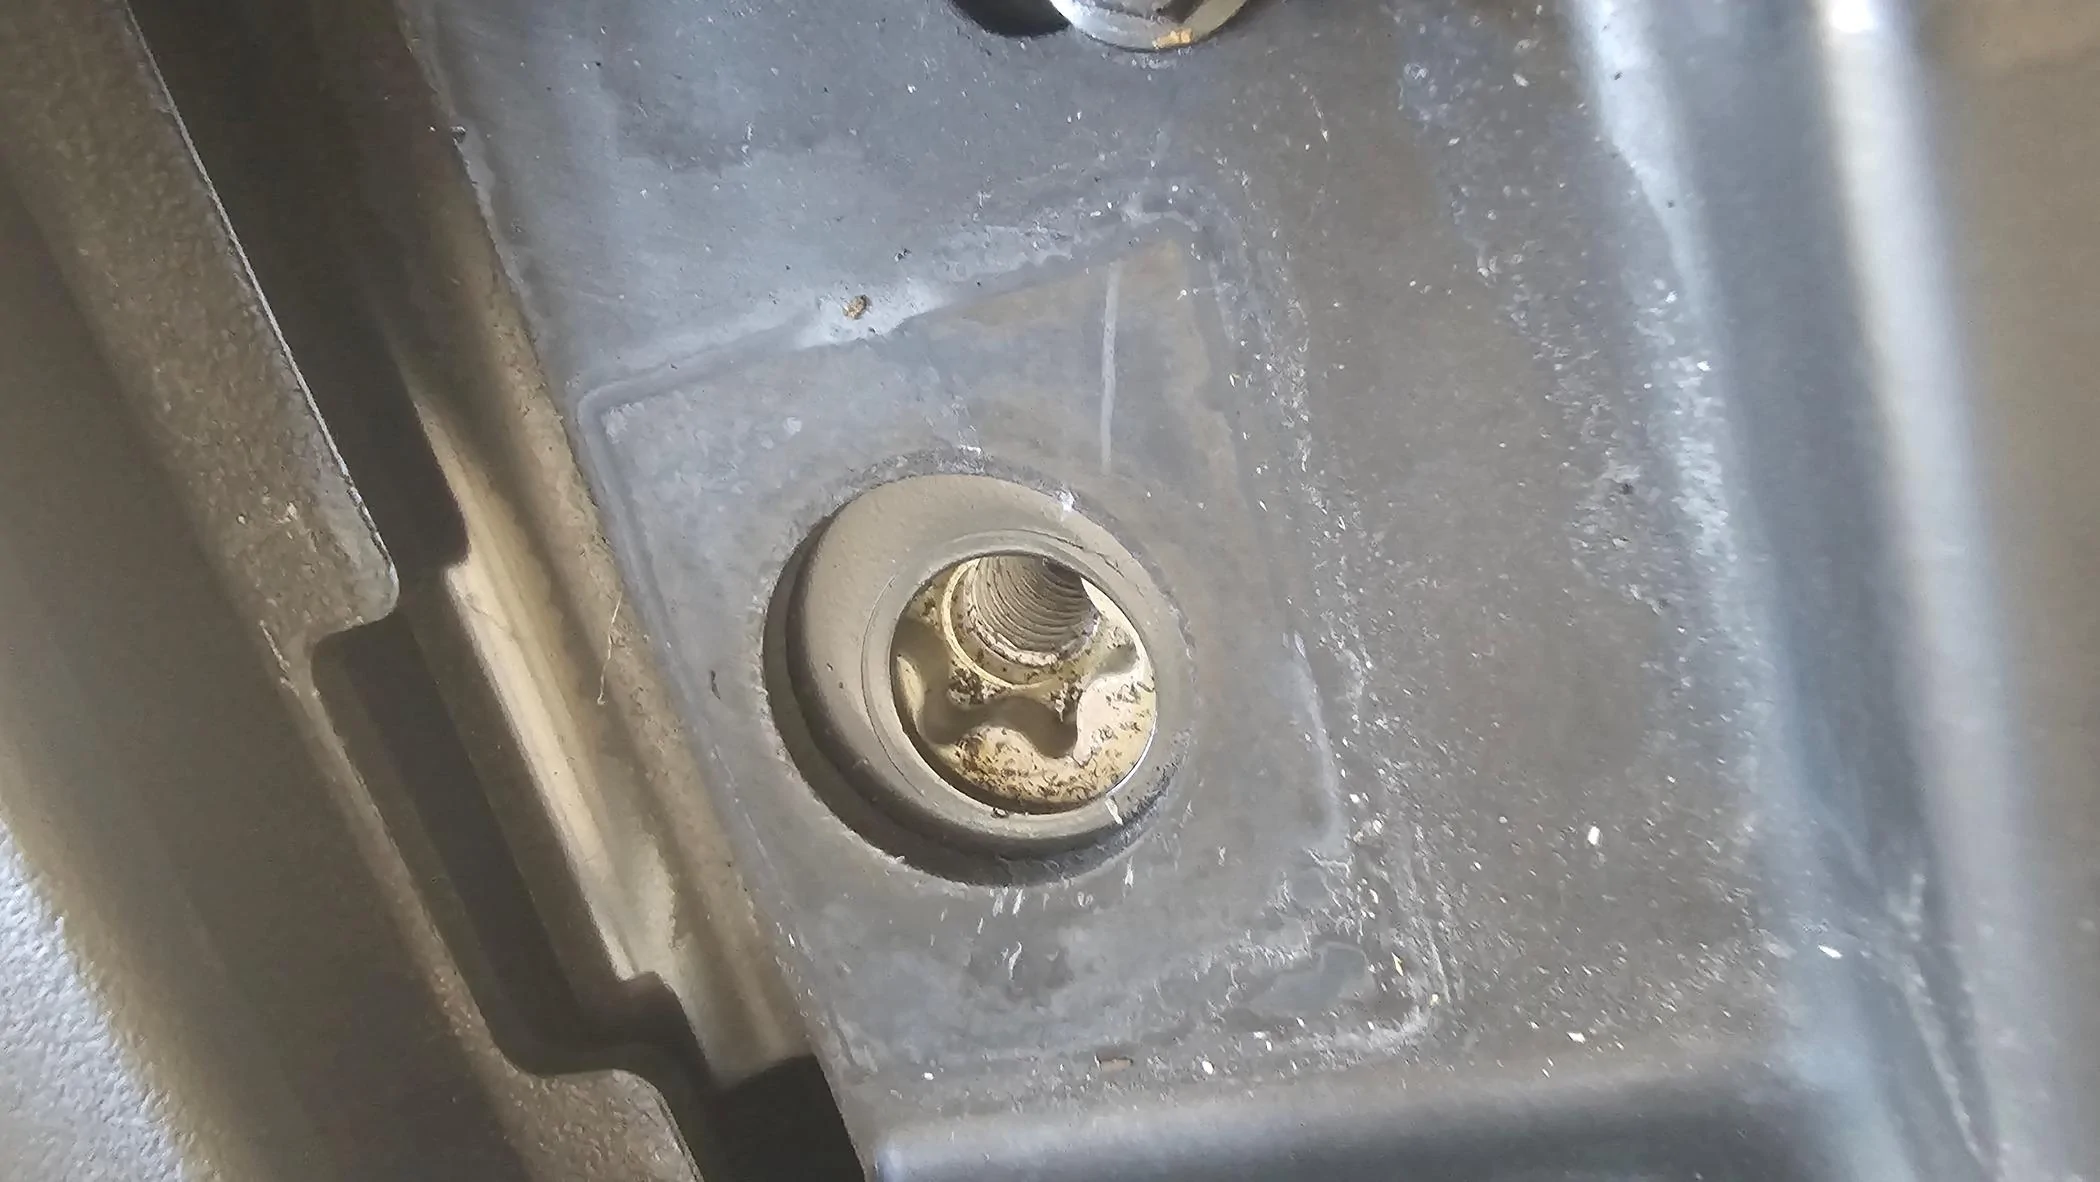
Well what do we have here? This is where the bolt goes, but look at the sub structure under the bed, there is a larger cutout hole with a smaller cutout hole somewhat off center. Guess where that ring/collar from the prior photo is supposed to go? At first I thought the center smaller hole, but it doesn't go all the way down in that hole because the diameter is larger. Is it supposed to go in the hole and those holes aren't cut large enough? I do not know. At a minimum the collar needs to go down in the larger hole and maybe in some installations the collars aren't even in the larger hole but resting on the lip of the larger hole, without examining a lot of installs it is hard to say. There may be as much as 1/8" of space available here if you could get the collar / ring to sit down inside that smaller hole somehow (likely widening the hole to accommodate) Oddly enough there doesn't seem to be much play here, not a lot of room for error or moving things around. I did my best to seat the rings that protruded and far down as I could, making sure all of them were at least inside the big holes before inserting the bolts and tightening down with my ratchet and hex bit.
Once I did this I then test fit the divider again behind the hatch and it fit better, not perfect, it still took a little bit of pressing down on the outside pieces at the side track but they popped into place pretty easily, at least better than they did before and good enough for me to be happy with the fit as compared to before I adjusted the bed.
I cannot guarantee this will work for you, but it did make a small difference for me, and at least enough difference for me to be able to put the divider in without forcing it or fear of breaking something. If anyone tries this procedure and somehow makes the holes wider or the rings fit deeper please share with everyone. I simply did the process or removal, reposition and re-install as I was short on time. But hey at least I snapped these pictures and shared! Enjoy!
I decided to dive into this today because by brand new vault divider just arrived from Tesla today. (Ordered last week so I assume it is a new one, new style, whatever). Arrived fine in the box and like others no instructions but how hard can it be right? I'd read about the problems here where it would fit in the back part of the bed but not in front of the lower cargo hatch. Well when I tried mine, I was getting much the same result. I could make it fit but geez it was really tight and didn't fit as easily as it did in the rear section. So let's see some pics in get into what I did.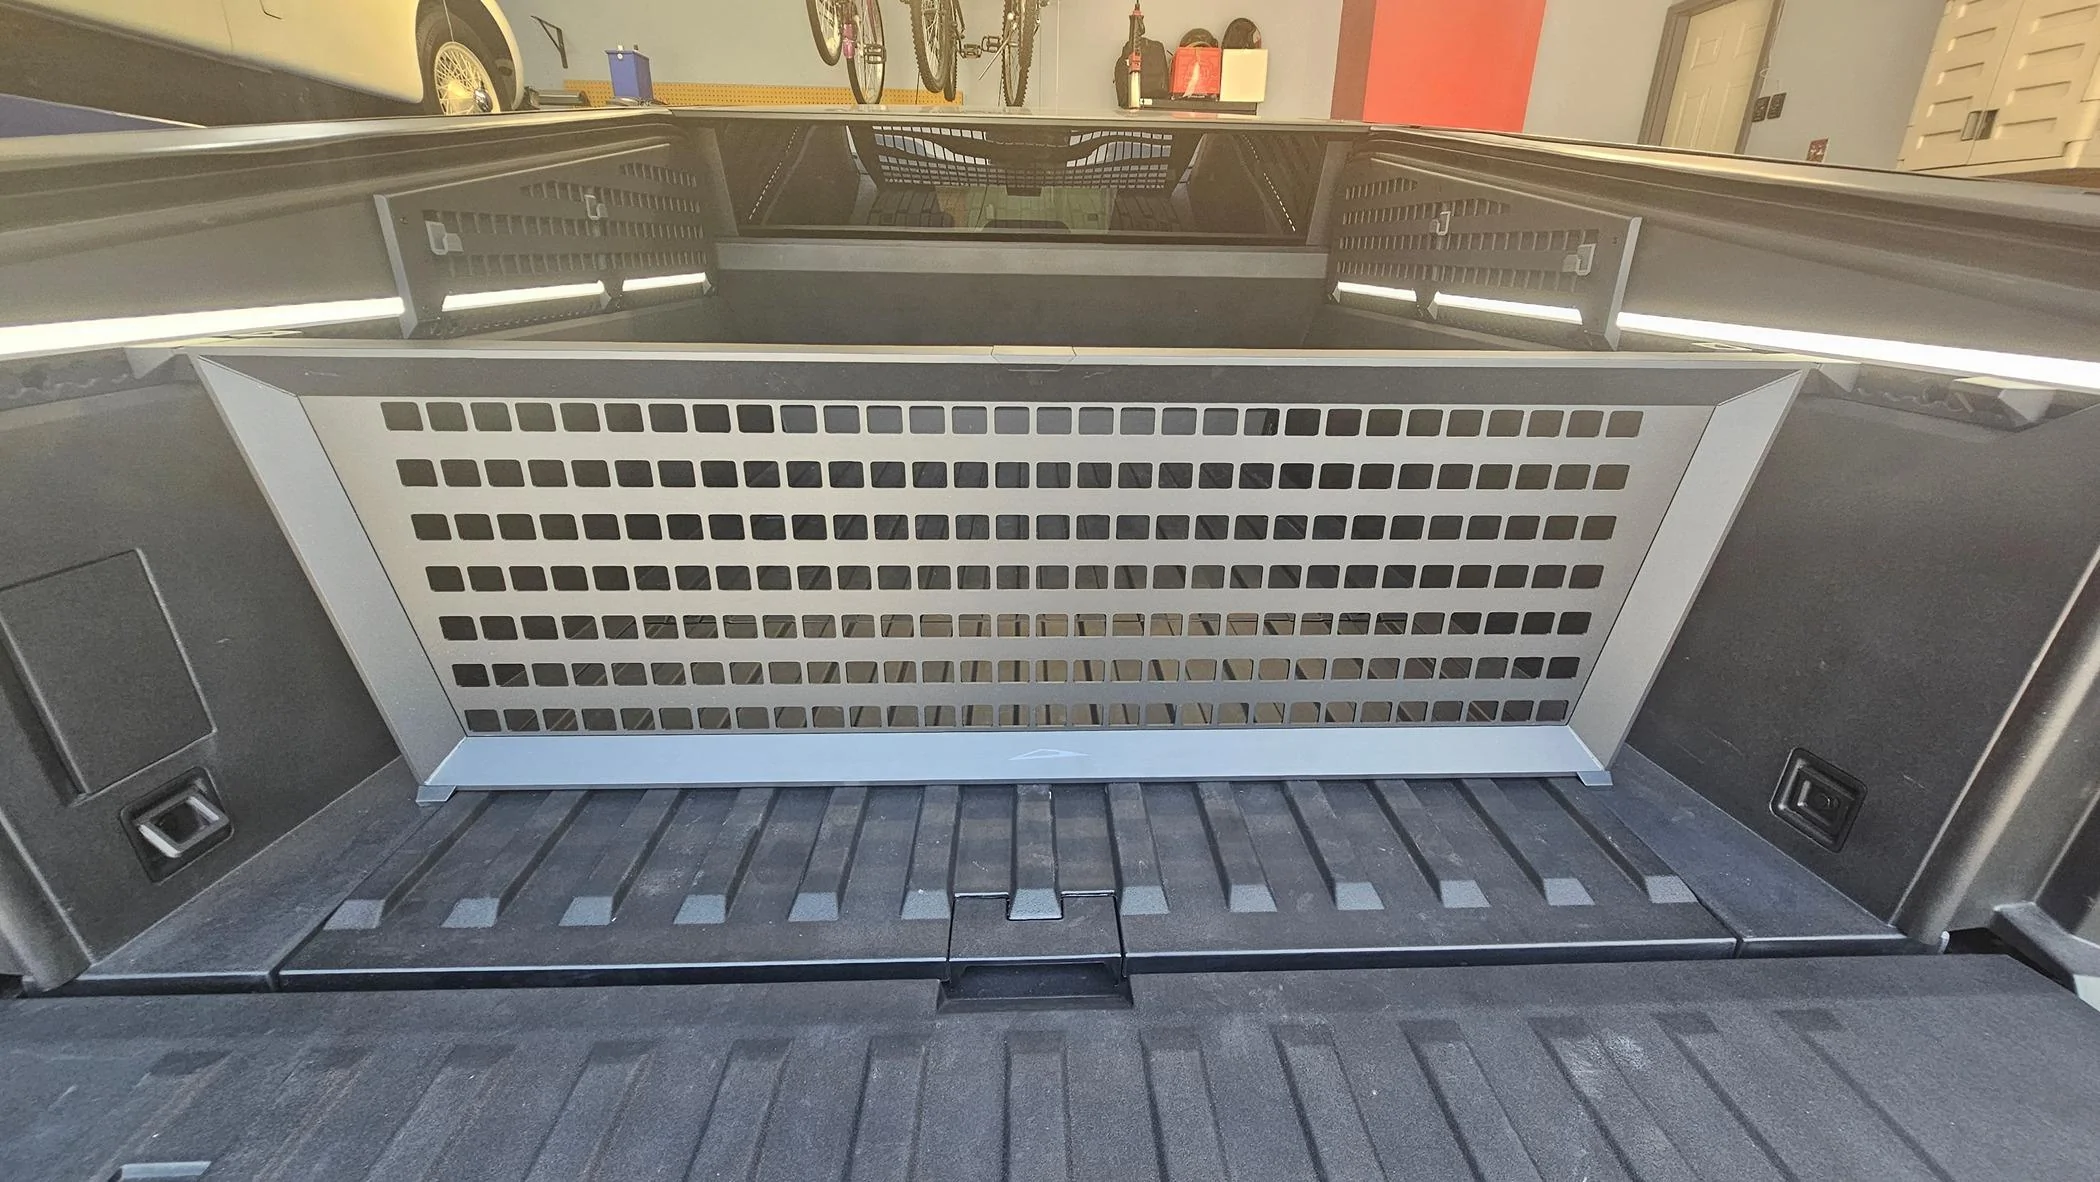
Here is the vault divider easily installed over the top of the hatch, no issues, went in like a charm. When I tried it forward of the divider, again, not so great. So let's move on and remove some bolts shall we. First off you are going to need a 10mm hex bit. I just happened to have one from doing brake work on another car where the caliper bolts used 10mm hex so I didn't need to make a run to the hardware store. You might.
I proceeded to use the 10mm hex and my ratchet to remove the 10 bolts, 4 of which were through D-Rings and 6 just into the bed itself and covered by plastic covers. I used one of those plastic trim removal tools to pop those off and expose the bolts. If you look carefully in the above picture you will see metal rings in each of the holes, those rings are different depending upon where the hole is located, some sit flush with the bed, some protrude through it and need to fit into circles below. Let's remove this cover (easiest to lift at a corner) and see what is underneath shall we?
Well look at that, an air tank, a couple of beastly electric motors, wiring, tubing, casting, etc. etc. Looking at the holes underneath you will see some have multiple stage cut outs, larger circle with smaller circle towards the middle, some do not. What I was looking for was some sort of adjustment, anything down here that could be moved, removed, adjusted, etc. etc. to free up more space. Nope, nothing, nada, your bed should look like this and short of cutting metal you aren't going to magically free up space here. However, there is one item that I think may be causing some people an issue, so let's look at some close up photos to show you what I mean:
Here is one of those metal rings at one of the holes. Notice how the metal ring / collar protrudes through the bottom of the floor panel? As I mentioned, some positions are like this, and some are flush. You cannot push these upwards as they would then stick out of the top of the bed, but if they are supposed to stick out (which I believe they are) then they have to go somewhere right? Let's look at the next photo to see where they go:
Well what do we have here? This is where the bolt goes, but look at the sub structure under the bed, there is a larger cutout hole with a smaller cutout hole somewhat off center. Guess where that ring/collar from the prior photo is supposed to go? At first I thought the center smaller hole, but it doesn't go all the way down in that hole because the diameter is larger. Is it supposed to go in the hole and those holes aren't cut large enough? I do not know. At a minimum the collar needs to go down in the larger hole and maybe in some installations the collars aren't even in the larger hole but resting on the lip of the larger hole, without examining a lot of installs it is hard to say. There may be as much as 1/8" of space available here if you could get the collar / ring to sit down inside that smaller hole somehow (likely widening the hole to accommodate) Oddly enough there doesn't seem to be much play here, not a lot of room for error or moving things around. I did my best to seat the rings that protruded and far down as I could, making sure all of them were at least inside the big holes before inserting the bolts and tightening down with my ratchet and hex bit.
Once I did this I then test fit the divider again behind the hatch and it fit better, not perfect, it still took a little bit of pressing down on the outside pieces at the side track but they popped into place pretty easily, at least better than they did before and good enough for me to be happy with the fit as compared to before I adjusted the bed.
I cannot guarantee this will work for you, but it did make a small difference for me, and at least enough difference for me to be able to put the divider in without forcing it or fear of breaking something. If anyone tries this procedure and somehow makes the holes wider or the rings fit deeper please share with everyone. I simply did the process or removal, reposition and re-install as I was short on time. But hey at least I snapped these pictures and shared! Enjoy!
Sponsored